


文章目录
1.将图片名写入文本文件
文件夹分为train和val,文件夹的名字为类别名


"""
读取文件夹下所有图片,存取在txt中
G:\deep_learning\deep_learning\data_set\flower_data

flower_data
   |
   |---------train--| A
   |                | B
  |
  |---------val--| A
                 | B

读取以后, 将文件名和类别id以及类别名 存储在txt文件中, 以'\t'分隔开
"""
import os


def mk_folder(path):
    if not os.path.exists(path):
        os.mkdir(path)


root_path = r"G:\deep_learning\deep_learning\data_set\flower_data"
train_root = os.path.join(root_path, "train")
val_root = os.path.join(root_path, "val")

class_list = os.listdir(train_root)
# 得到了class_dict: {'daisy': 0, 'dandelion': 1, 'roses': 2, 'sunflowers': 3, 'tulips': 4}
class_list.sort()
class_dict = {v: k for k, v in enumerate(class_list)}

# 创建txt文件目录
save_txt_root = r"data"
mk_folder(save_txt_root)
save_train_txt = os.path.join(save_txt_root, "train.txt")
save_val_txt = os.path.join(save_txt_root, "val.txt")

# 将训练集中,所有文件写入train_txt
f = open(save_train_txt, 'w')
for cls in os.listdir(train_root):
    # 对应文件夹下的标签
    idx = class_dict[cls]
    sub_folder = os.path.join(train_root, cls)
    for file in os.listdir(sub_folder):
        file_path = os.path.join(sub_folder, file)
        if file_path.endswith('jpg') or file_path.endswith('png'):
            f.write(file_path + '\t' + str(idx) + '\t' + cls + '\n')  # 写入文件
f.close()

# 将验证中,所有文件写入val_txt

f = open(save_val_txt, 'w')
for cls in os.listdir(val_root):
    # 对应文件夹下的标签
    idx = class_dict[cls]
    sub_folder = os.path.join(val_root, cls)
    for file in os.listdir(sub_folder):
        file_path = os.path.join(sub_folder, file)
        if file_path.endswith('jpg') or file_path.endswith('png'):
            f.write(file_path + '\t' + str(idx) + '\t' + cls + '\n')  # 写入文件
f.close()
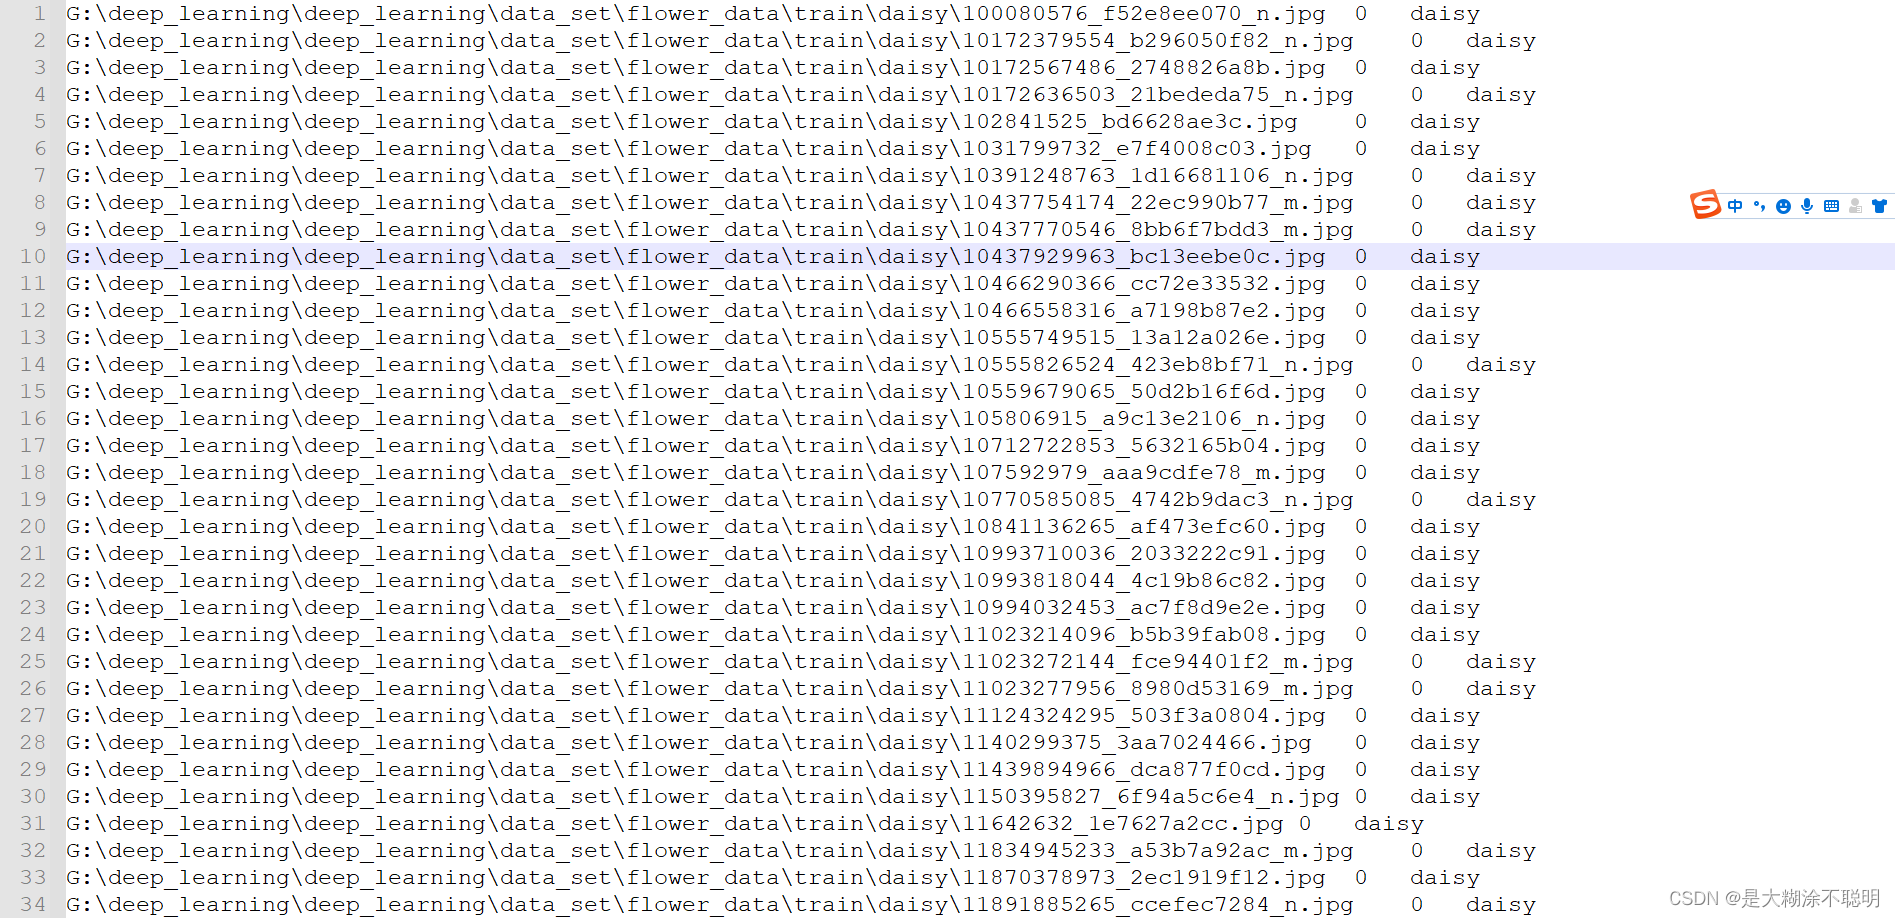
得到的txt文件如下
1.1 字典保存到json
# class_dict保存到json
json_str = json.dumps(class_dict, indent=4)
with open('class_indices.json', 'w') as json_file:
    json_file.write(json_str)

# 从json文件中获取class_dict
json_path = r"class_indices.json"
with open(json_path, "r") as f:
    class_indict = json.load(f)
print(class_indict)
2.读取文件自定义数据类
class VOCDataset(data.Dataset):
    def __init__(self, file_path, transform=None):
        super(VOCDataset, self).__init__()
        self.trans = transform
        with open(file_path, 'r') as f:
            self.lines = f.readlines()
        self.img_list = [line.split("\t")[0] for line in self.lines if len(line.strip())]
        # 先取出数字,再去掉结尾的换行符,再强转成int
        self.labels = [int(line.split("\t")[1]) for line in self.lines if len(line.strip())]
        # 去除类名中的重复值、按照字符串顺序排序
        # 得到对应的类别名, 由于在写入txt时,已经sort操作了
        self.classname = [line.split("\t")[-1].replace('\n', '') for line in self.lines if len(line.strip())]
        self.classname = list(set(self.classname))
        self.classname.sort()

    def __len__(self):
        return len(self.labels)

    def __getitem__(self, index):
        img_path = self.img_list[index]
        label = self.labels[index]
        # tranforms的输入要求PIL image或tensor, [...,h,w]格式
        img = Image.open(img_path).convert("RGB")
        # bgr --> rgb
        # img = cv2.imread(img_path)[:, :, ::-1]
        if self.trans is not None:
            img = self.trans(img)
        return img, label
3. 遍历Dataloader的方式
通过for循环方式,
debug下面的代码,可以看到图片shape
from torch.utils.data.dataloader import DataLoader


train_loader = DataLoader(train_set, batch_size=2, shuffle=True, num_workers=0)
for i, (image, label) in enumerate(train_loader):
    print(image.size)
    if i == 3:
        break
4. collate_fn的用法
Dataloader中有自带的collate_fn,其作用就是将Dataset中__getitem()__方法返回的img和label,按照batch,依次拼接成一个tensor
batch = 4
Dataset : img, label ---> (1, 4, 224, 224) (1,)

经过dataloader后, imgs, labels ---> (4, 4, 224, 224), (4,)

4.1 自定义collate_fn
在目标检测中,__getitem()__会返回多个对象,有时需要自己手动写collate_fn
下面代码来自yolov5-6.1
因为需要在label维度新增加一个索引。代表其在batch中的原始顺序
@staticmethod
    def collate_fn(batch):
        img, label, path, shapes = zip(*batch)  # transposed
        for i, lb in enumerate(label):
            lb[:, 0] = i  # add target image index for build_targets()
        return torch.stack(img, 0), torch.cat(label, 0), path, shapes
faster rcnn
@staticmethod
    def collate_fn(batch):
        return tuple(zip(*batch))


"""
  getitem 返回的是tensor图片,和一个带有字典的label
"""
   def __getitem__(self, index):
   		target = {}
        target["boxes"] = boxes
        target["labels"] = labels
        target["image_id"] = image_id
        target["area"] = area
        target["iscrowd"] = iscrowd

		return image, target
使用collate_fn之前的batch

拼接以后,得到一个data数据

data[0] 全是image
data[1] 是长度为8的字典

5. 损失函数如何给类别赋予权重
5.1 注意bug点
为了解决类别不均衡问题,因而给损失函数加权
注:
下面的float和to(device)都不可缺,否则会报错的,各种错误。
"""
缺少float(),会报错如下:
Expected object of scalar type Float but got scalar type Double for argument #3 'weight'
意思就是,参数权重:weight为Double,而不是Float
"""
class_weights = torch.from_numpy(class_weights).float()# float64 -->float32
"""
缺少 to(device), 会报错如下:
Expected object of backend CUDA but got backend CPU for argument #3 'weight'
因为在计算损失函数时,output和target都已经在cuda上了,而这个系数权重,在cpu中,肯定会出问题的。
"""
class_weights = class_weights.to(device)
criterion = nn.CrossEntropyLoss(weight=class_weights)
在其他地方下载的 一个工程,由于定义了交叉熵计算方式
因此,只能在其内部修改
下面的东西,很奇怪,linux系统上调试的,反正就是出bug
class CrossEntropy(nn.Module):
    def __init__(self, para_dict=None, class_weight=False):
        super(CrossEntropy, self).__init__()
        self.class_weight = class_weight

        device = para_dict['device']
        self.class_weight_loss = para_dict['class_weight_loss']
        if self.class_weight:
            # self.class_weight_loss.to(device)
            self.class_weight_loss = self.class_weight_loss.to(device)
        pass
        # pass
        # num_cls_list = [5000, 3237, 2096, 1357, 878, 568, 368, 238, 154, 100]
        # self.class_weight = get_class_weight_2(num_cls_list)
        # self.class_weight = torch.from_numpy(self.class_weight).float()
        # self.class_weight = self.class_weight.to(device)


    def forward(self, output, target):
        output = output
        if self.class_weight:
            loss = F.cross_entropy(output, target, self.class_weight_loss)
        else:
            loss = F.cross_entropy(output, target)
        return loss
5.1 crossentropyLoss详解
6. 类中定义函数要self
下面的一直报错,参数问题
直到发现是self的问题
class xxx:
 	def __init__(self):
 		...
 		self.class_weights_loss = self.get_class_weight_loss(img_num_list)
 	""" 一定要加一个self,否则会报错的"""
 	def get_class_weight_loss(self, tmp_cls_num):
        # 深拷贝,防止改变原始数据
        tmp_num = deepcopy(tmp_cls_num)
        tmp_num = np.array(tmp_num)
        # 防止0作为除数
        tmp_num[tmp_num == 0] = 1
        # 对每个类别数目,归一化处理
        tmp_num = tmp_num / tmp_num.sum()
        # 将归一化后类别数目的倒数,作为权重 (数目越大,权重越小)
        tmp_num = 1 / tmp_num
        tmp_num = tmp_num / tmp_num.sum()
        # 乘以总的nc,同等放大权重
        return tmp_num * len(tmp_cls_num)
7.pytorch中squeeze加不加下划线
如下所示, fake_out维度是(128, 1)
直接进行squeeze(), 维度仍然为(128, 1)
除非写 fake_out = fake_out.squeeze()
但是如果写下划线,如下代码所示,维度是会变成(128, )
fake_img = G(z)
fake_out = D(fake_img)

fake_out.squeeze_()
"""
classname为一个list 列表
['airplane', 'dog' ,'frog']
调用sort后,自动完成列表排序。返回对象为None。
反而不能去写赋值操作
"""
self.classname.sort()
但是写 fake_out.squeeze_()
dim=1的维度可以去掉,但是遇到了一个问题,计算criterion,loss反向传播时,无法梯度反传。
因此,修改标签维度,加一个dim=1的维度
"""
下面写 unsqueeze_(dim=1)也是可以的
"""
fake_label = fake_label.unsqueeze(dim=1)

z = Variable(torch.randn(num_img, z_dimension)).cuda()
fake_img = G(z)
fake_out = D(fake_img)

d_loss_fake = criterion(fake_out, fake_label)
fake_scores = fake_out  # closer to 0 means better

# bp and optimize
d_loss = d_loss_real + d_loss_fake
d_optimizer.zero_grad()
d_loss.backward()
d_optimizer.step()
7.1 label.to(device)
这个还是要注意了
这样写会有问题
还是会报错 “多个设备的”
应该像下面那样,写赋值操作,label=label.to(device)
z = torch.randn(num_img, z_dimension).to(device)
fake_label = torch.zeros(num_img).to(device)  # fake_img的标签为0
fake_label = fake_label.unsqueeze(dim=1)
8.pytorch中summary的用法
import torch
from torchsummary import summary
import torch.nn as nn

nz = 100   #  噪声向量的维度
ngf = 64
nc = 3
#                           输入、输出、k、s、p
# h_ = (h-1)*s + k - 2*p
# (1, 1) , k=4,s=1,p=0 ---> (1-1)*0+4-s*0 = 4
# (4, 4), k=4,s=2,p=1 ---> (4-1)*2 + 4-2*1 = 8
# (8, 8)---> 7*2 + 4-2 = 16
# 这种情况下, 就相当于普通的upsample

# 网络的输出维度, (b, 3, img_h, img_w)
# 就是得到一个图片呗, channel=3
# 和语义分割有点像,但是又不相同。语义分割的输出通道为为类别数
netG = nn.Sequential(nn.ConvTranspose2d(nz, ngf * 8, 4, 1, 0, bias=False), nn.BatchNorm2d(ngf * 8),
                     nn.LeakyReLU(0.2, inplace=True),
                     nn.ConvTranspose2d(ngf * 8, ngf * 4, 4, 2, 1, bias=False), nn.BatchNorm2d(ngf * 4),
                     nn.LeakyReLU(0.2, inplace=True),
                     nn.ConvTranspose2d(ngf * 4, ngf * 4, 4, 2, 1, bias=False), nn.BatchNorm2d(ngf * 4),
                     nn.LeakyReLU(0.2, inplace=True),
                     nn.ConvTranspose2d(ngf * 4, ngf * 2, 4, 2, 1, bias=False), nn.BatchNorm2d(ngf * 2),
                     nn.LeakyReLU(0.2, inplace=True),
                     nn.ConvTranspose2d(ngf * 2, ngf * 2, 4, 2, 1, bias=False), nn.BatchNorm2d(ngf * 2),
                     nn.LeakyReLU(0.2, inplace=True),
                     nn.ConvTranspose2d(ngf * 2, nc, 4, 2, 1, bias=False),
                     nn.Tanh()  # (N,nz, 128,128)
                     )


# 需要使用device来指定网络在GPU还是CPU运行
device = torch.device('cuda' if torch.cuda.is_available() else 'cpu')
netG.to(device)
# summary函数中,有一个"device"参数,默认为cuda的
# 因此,model需要先放在device上
# summary中,加不加参数,问题不大
# 传入的只能是"cuda"或者"cpu”,而不能是torch.device
summary(netG, input_size=(100, 1, 1), device=“cuda”)
显示结果如下:

8.1. gan网络,生成图片,保存jpg
- 注意一下,
with torch.no_grad()和model.eval() - 网络生成的数据范围为0~1,转换到0 ~ 255
加0.5的操作,是为了四舍五入,向上取整
with torch.no_grad():
    gnet.eval()
    for i in range(20):
        z = torch.randn(1, latent_size, 1, 1)
        z = z.to(device)
        fake_img = gnet(z)
        fake_image = fake_img.cpu()
        fake_image.squeeze_(dim=0)
        res = fake_image.mul(255)
        res = res.add(0.5)
        res = res.clamp(0, 255)
        res = res.permute(1, 2, 0)
        res = res.numpy()
        res = res.astype(np.uint8)
        # res = fake_image.mul(255).add_(0.5).clamp(0, 255).permute(1, 2, 0).numpy()
        # res = res.astype(np.uint8)
        file_path = os.path.join(save_folder, "g_", str(i)+".jpg")
        cv.imwrite(file_path, res)
        print(res.shape)
9. 常见的保存图片的方式
要注意opencv的bgr和rgb
9.1 Image.open
path = r"./001.jpg"     #图片路径
img = Image.open(path)  #打开图片
img.save("1.jpg")      #将图片保存为1.jpg
9.2 torchvision.utils.save_image
save_image(real_img,os.path.join(save_img,f"{epoch}_real.jpg"),nrow=10,padding=2,pad_value=255)
tensor:4D张量,形状为(B x C x H x W),分别表示样本数,通道数,图像高度,图像宽度
nrow:每行的图片数量,默认值为8
padding:相邻图像之间的间隔。默认值为2
normalize:如果为True,则把图像的像素值通过range指定的最大值和最小值归一化到0-1。默认为False
range:元组,用于指定最大值和最小值。默认使用图像像素的最大最小值。
sacle_each:如果为True,就单独对每张图像进行normalize;如果是False,统一对所有图像进行normalize。默认为Flase
pad_value:float,上述padding会使得图像之间留出空隙,默认为0

图片保存方式参考链接
9.3 rgb形式的矩阵保存为图片
用opencv,只能保存bgr形式,还需要转换一下通道
使用Image,会好一些
    for i in range(tmp_img.shape[0]):
        img = array_convert_img(tmp_img[i])
        img = Image.fromarray(img)

        save_path = os.path.join(save_folder, str(i)+'.jpg')
        img.save(save_path)
9.4 plt.imsave
会自动把矩阵的像素值缩放到colormap的范围内,也就是处理到0~255之间
*vmin* and *vmax* set the color scaling for the image by fixing the
        values that map to the colormap color limits
def convert_tensor_to_img(tmp_tensor, save_folder):
    # 将gan生成的(b,c,h,w)形式的数据,转换为图片
    arr = tmp_tensor.data.cpu().permute(0, 2, 3, 1)
    batch = int(arr.size(0))
    arr = arr.numpy()
    arr = arr * 0.5 + 0.5
    for i in range(batch):
        file_ = os.path.join(save_folder, str(i)+".png")
        # plt.imsave会自动转换数值
        plt.imsave(file_, arr[i])
增加一个给定的类别,结合noise生成新的img
noise = torch.randn((10, 100, 1, 1))
# 给定生成标签, 为3, 10个3 , 【3,3,3,...,3】
choice_class = torch.full([10], 3)
# 将标签one-hot处理, size : (10, 10)
choice_class = nn.functional.one_hot(choice_class, num_classes=10)
# (10, 10) ---> (10, 10, 1, 1)
choice_class = choice_class.reshape(choice_class.size(0), choice_class.size(1), 1, 1)
choice_class = choice_class.float()


data = torch.cat((noise, choice_class), dim=1).to(device)
res = netG(data)
9.5多张图片保存成grid形式
maplotlib形式保存
size_figure_grid = 10
fig, ax = plt.subplots(size_figure_grid, size_figure_grid, figsize=(5, 5))
for i, j in itertools.product(range(size_figure_grid), range(size_figure_grid)):
    ax[i, j].get_xaxis().set_visible(False)
    ax[i, j].get_yaxis().set_visible(False)
for i in range(10):
    ax[i, 0].set_ylabel(str(i), ha="center", weight="bold", size=12)
for k in range(10 * 10):
    i = k // 10
    j = k % 10

    # res原本是一个(100,3,32,32)形式的tensor
    # 归一化处理过的张量
    # 取出单独的图
    ax[i, j].imshow((res[k].cpu().data.numpy().transpose(1, 2, 0) + 1) / 2)

torchvision形式
# nrow指的是每行的图片个数
# normalize指的是在乘以255之前,是否需要将tensormin-max归一化到0~1
# 由于已经手动还原成0~1,所以无需normalize
torchvision.utils.save_image(res * 0.5 + 0.5,
                           fp='./csdn_cgan_cifar_result_depth32/generated_img/grid.png', nrow=10,
                            normalize=False)

10. 将多张图片拼接成gif动图
对应的文件夹下,原本存储多张图片,将其合成一个
# 测试一下,将多张图片合成一张图
# 测试fps的影响, fps就是正常的,显示帧率
# 帧率越高,肯定越快
import imageio
root = 'CIFAR10_cDCGAN_results/'
model = 'CIFAR10_cDCGAN_'
images = []
for e in range(100):
    # root = 'CIFAR10_cDCGAN_results/'
    # model是一个 字符串, 'CIFAR10_cDCGAN_'
    img_name = root + 'Fixed_results/' + model + str(e + 1) + '.png'
    images.append(imageio.imread(img_name))
imageio.mimsave(root + model + 'test_animation.gif', images, fps=5)


 2727
2727


 被折叠的 条评论
为什么被折叠?
被折叠的 条评论
为什么被折叠?
 到【灌水乐园】发言


