


此次文档主要是对学习SSM的一些心得,(之前是看黑马的SSM视频学的,感觉脑子里一团浆糊,学完了也没法手敲项目,主体框架还是注解,xml配置比较繁琐,这里做一个整理与总结)
软件IDEA,MySQL Workbench,postman
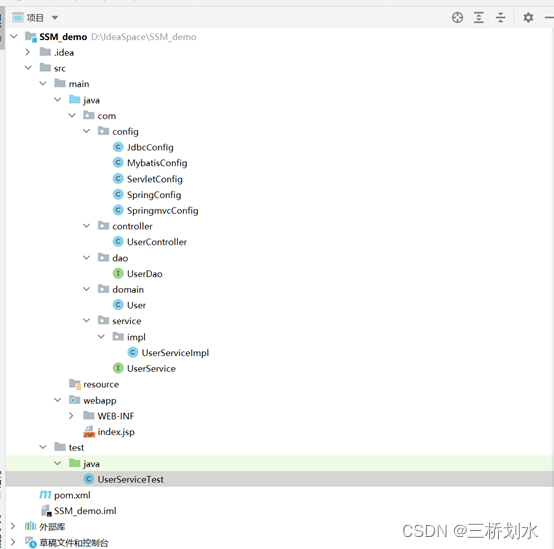
- IDEA创建模块

- 创建包——基本是固定结构
①先在项目结构中创建一些由模板项目生成不了的文件Java、resource、test

②在对应包下创建差不多的文件结构
==》config:配置文件
==》dao:Dao接口中的方法都大同小异,因为对数据库的基本操作类似:insert、delete、update,select。在Dao层完成相关方法的定义,有利于支持后期Service层的扩展。(与相应的mapper对应)
==》domain:通常就是用于放置这个系统中,与数据库中的表,一一对应起来的JavaBean的
==》service:service层的业务层具体要调用已经定义的dao层接口,封装service层业务逻辑有利于通用的业务逻辑的独立性和重复利用性。程序显得非常简洁。
==》controller:要调用service层的接口来控制业务流程。负责url映射(action)
- 导入pom.xml
 <dependencies>

  <dependency>

    <groupId>org.springframework</groupId>

    <artifactId>spring-webmvc</artifactId>

    <version>5.2.10.RELEASE</version>

  </dependency>


  <dependency>

    <groupId>org.springframework</groupId>

    <artifactId>spring-jdbc</artifactId>

    <version>5.2.10.RELEASE</version>

  </dependency>


  <dependency>

    <groupId>org.springframework</groupId>

    <artifactId>spring-test</artifactId>

    <version>5.2.10.RELEASE</version>

  </dependency>


  <dependency>

    <groupId>org.mybatis</groupId>

    <artifactId>mybatis</artifactId>

    <version>3.5.6</version>

  </dependency>


  <dependency>

    <groupId>org.mybatis</groupId>

    <artifactId>mybatis-spring</artifactId>

    <version>1.3.0</version>

  </dependency>


  <dependency>

    <groupId>mysql</groupId>

    <artifactId>mysql-connector-java</artifactId>

    <version>5.1.47</version>

  </dependency>


  <dependency>

    <groupId>com.alibaba</groupId>

    <artifactId>druid</artifactId>

    <version>1.1.16</version>

  </dependency>


  <dependency>

    <groupId>junit</groupId>

    <artifactId>junit</artifactId>

    <version>4.12</version>

    <scope>test</scope>

  </dependency>


  <dependency>

    <groupId>javax.servlet</groupId>

    <artifactId>javax.servlet-api</artifactId>

    <version>3.1.0</version>

    <scope>provided</scope>

  </dependency>


  <dependency>

    <groupId>com.fasterxml.jackson.core</groupId>

    <artifactId>jackson-databind</artifactId>

    <version>2.9.0</version>

  </dependency>

</dependencies>
<build>

  <plugins>

    <plugin>

      <groupId>org.apache.tomcat.maven</groupId>

      <artifactId>tomcat7-maven-plugin</artifactId>

      <version>2.1</version>

      <configuration>

        <port>8081</port>

        <path>/</path>

      </configuration>

    </plugin>

  </plugins>

</build>
- 做好数据层基础操作
- 建表
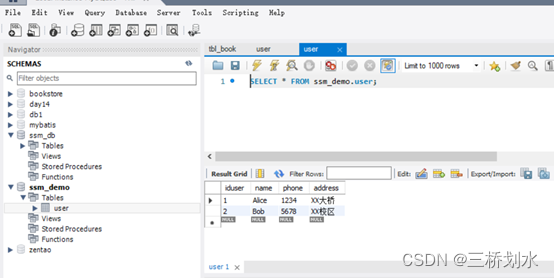
-
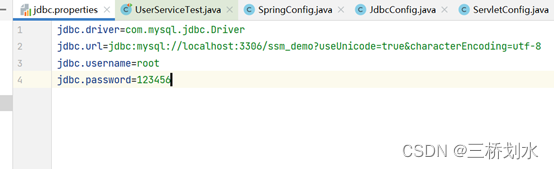
- 写好连接数据库的jdbc.properties
jdbc.driver=com.mysql.jdbc.Driver

jdbc.url=jdbc:mysql://localhost:3306/ssm_demo?useUnicode=true&characterEncoding=utf-8
jdbc.username=root
jdbc.password=123456
写好domain

- 写好配置文件
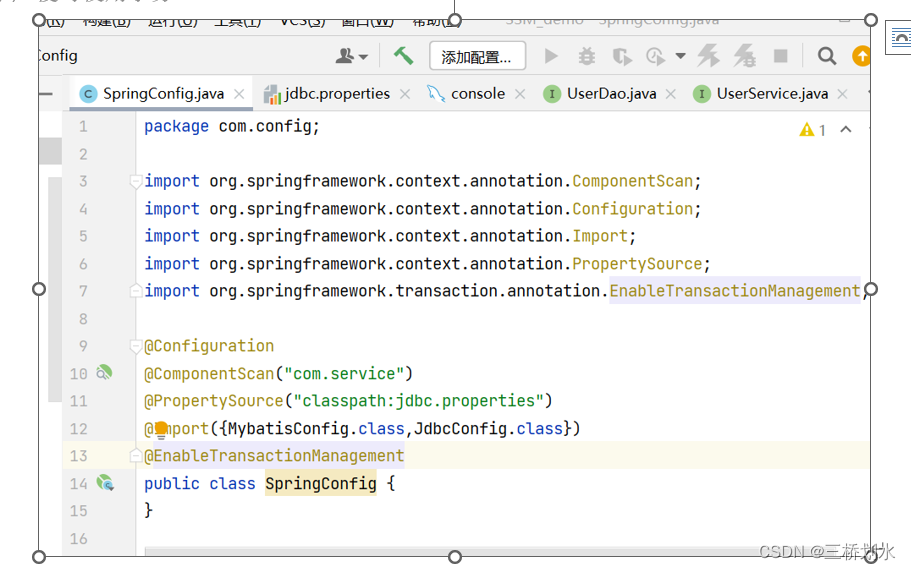
- 写好springconfig
@Configuration

//声明当前类为配置类;

@ComponentScan({"com.service"})

//用于对Component进行扫描;Spring扫描service

@PropertySource("classpath:jdbc.properties")

//加载数据源

@Import({JdbcConfig.class,MyBatisConfig.class})

//要导入到容器中的组件

@EnableTransactionManagement

//开启事务支持后,

// 然后在访问数据库的Service方法上添加注解 @Transactional

// 便可使用事务
-
- 写好Mybatisconfig和jdbcconfig
- Mybatisconfig配置类中:
// setTypeAliasesPackage该属性可以给包中的类注册别名,以后不用写包名了
public SqlSessionFactoryBean sqlSessionFactory(DataSource dataSource){

    SqlSessionFactoryBean factoryBean = new SqlSessionFactoryBean();

    factoryBean.setDataSource(dataSource);

    factoryBean.setTypeAliasesPackage("com. domain");

    return factoryBean;

}

//查找类路径下的映射器并自动将它们创建成MapperFactoryBean。

@Bean
public MapperScannerConfigurer mapperScannerConfigurer(){

    MapperScannerConfigurer msc = new MapperScannerConfigurer();

    msc.setBasePackage("com.dao");

    return msc;

}
-
jdbcconfig
public class JdbcConfig {

    @Value("${jdbc.driver}")

    private String driver;

    @Value("${jdbc.url}")

    private String url;

    @Value("${jdbc.username}")

    private String username;

    @Value("${jdbc.password}")

    private String password;


    @Bean

    public DataSource dataSource(){

        DruidDataSource dataSource = new DruidDataSource();

        dataSource.setDriverClassName(driver);

        dataSource.setUrl(url);

        dataSource.setUsername(username);

        dataSource.setPassword(password);

        return dataSource;

    }


    @Bean

    public PlatformTransactionManager transactionManager(DataSource dataSource){

        DataSourceTransactionManager ds = new DataSourceTransactionManager();

        ds.setDataSource(dataSource);

        return ds;

    }

}
-
- 写好springmvcconfig和servletconfig:
Springmvcconfig中:
  @Configuration

@ComponentScan("com.controller")

@EnableWebMvc

public class SpringmvcConfig {

}
Servletconfig中:
public class ServletConfig extends AbstractAnnotationConfigDispatcherServletInitializer {
protected Class<?>[] getRootConfigClasses() {
return new Class[]{SpringConfig.class};
}
protected Class<?>[] getServletConfigClasses() {
return new Class[]{SpringmvcConfig.class};
}
protected String[] getServletMappings() {
return new String[]{"/"};
}
}
配置文件写好了,基本上完成了一半
- 确定好需求
- 写好dao
@Insert("insert into user(name, phone, address) values (#{name},#{phone},#{address}) ")
public void save(User user);
@Update("update user set name=#{name},phone=#{phone},address=#{address}")
public void update(User user);
@Delete("delete from user where id=#{id}")
public void delete(Integer id);
@Select("select * from user where id = #{id}")
public User getById(Integer id);
@Select("select * from user")
public List<User> getAll();
-
- 写好service和serviceimpl
Service:
@Transactional
public interface UserService {
public boolean save(User user);
public boolean update(User user);
public boolean delete(Integer id);
public User getById(Integer id);
public List<User> getAll();
}
Serviceimpl:
@Service
public class UserServiceImpl implements UserService {
@Autowired
private UserDao userDao;
public boolean save(User user) {
userDao.save(user);
return true;
}
public boolean update(User user) {
userDao.update(user);
return true;
}
public boolean delete(Integer id) {
userDao.delete(id);
return true;
}
public User getById(Integer id) {
return userDao.getById(id);
}
public List<User> getAll() {
return userDao.getAll();
}
}
-
- 写好controller
@RestController
@RequestMapping("/users")
public class UserController {
@Autowired
private UserService userService;
@PostMapping
public boolean save(@RequestBody User user){
return userService.save(user);
}
@PutMapping
public boolean update(@RequestBody User user){
return userService.update(user);
}
@DeleteMapping("/{id}")
public boolean delete(@PathVariable Integer id){
return userService.delete(id);
}
@GetMapping("/{id}")
public User getById(@PathVariable Integer id){
return userService.getById(id);
}
@GetMapping
public List<User> getAll(){
return userService.getAll();
}
}
一整个结束,可以直接部署了

运行起来了,验证一下:

也可以自己写测试类

或者利用postman来测试

①保存(post)

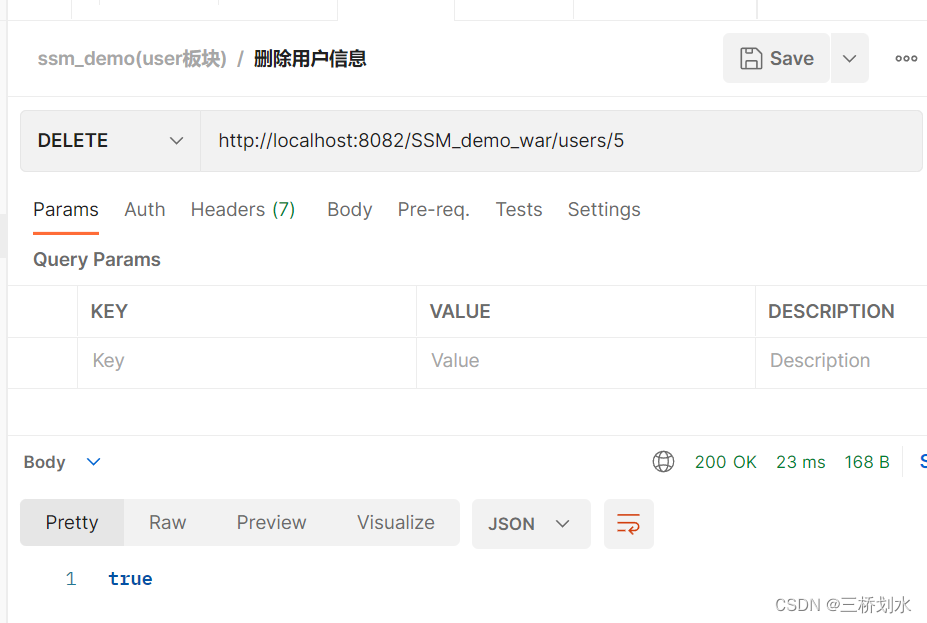
②删除(delete)
③修改(put)

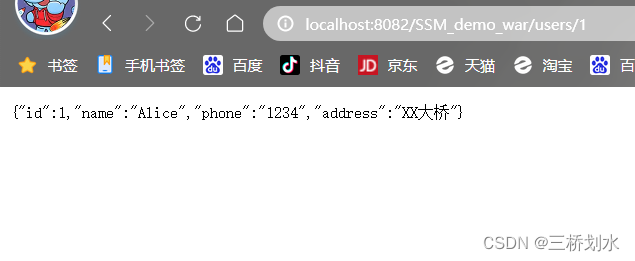
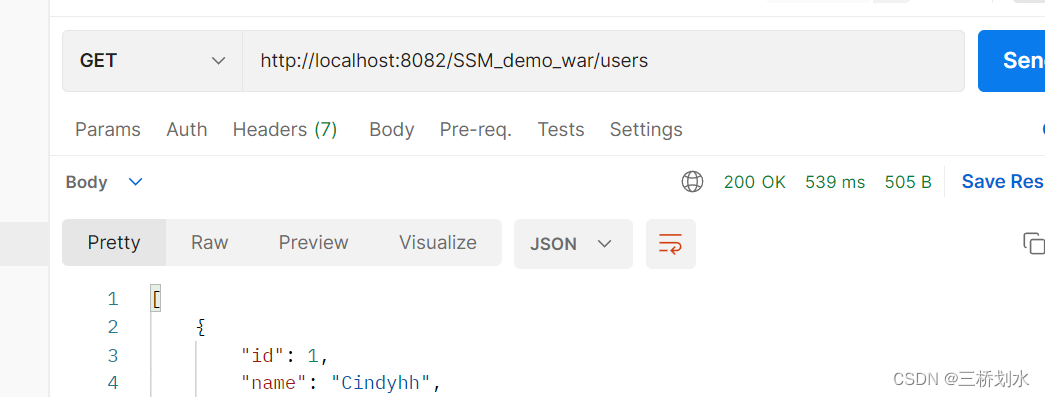
④查询(get)
至此,后端的代码基本结束。。。
但是如果想要前后端分离,互相合作,这样的代码还是太乱了,因为返回的数据格式各异,前端不好处理
这时,咱们需要在“表现层“和”前端数据层“做一个协议
又叫数据协议
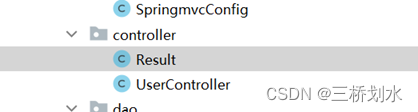
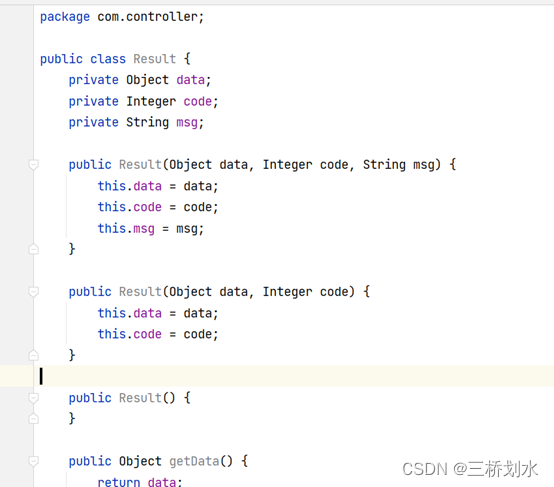
- 先在表现层建一个Result类
属性:
data:各类数据格式都可以
Code:显示数据类型以及成败
Msg:当错误时的一些的用户提示
构造方法可以因地适宜创造
- 表现层建一个code类,定义协议码值
码值都是自己定义的,约定俗成最后一位是1是成功,为0为失败


- 表现层改写UserController类

@RestController

@RequestMapping("/users")

public class UserController {

    @Autowired

    private UserService userService;


    @PostMapping

    public Result save(@RequestBody User user){

        boolean save = userService.save(user);

        return new Result((save ? SAVE_OK : SAVE_ERR),save);

    }

    @PutMapping

    public Result update(@RequestBody User user){

        boolean update = userService.update(user);

        return new Result((update ? UPDATE_OK : UPDATE_ERR),update);

    }

    @DeleteMapping("/{id}")

    public Result delete(@PathVariable Integer id){

        boolean delete = userService.delete(id);

        return new Result((delete ? DELETE_OK : DELETE_ERR),delete);

    }

    @GetMapping("/{id}")

    public Result getById(@PathVariable Integer id){

        User byId = userService.getById(id);

        Integer code = ((byId == null) ? GET_ERR : GET_OK);

        String msg = ((byId == null) ? "查询失败":"" );

        return new Result(code,byId,msg);

    }

    @GetMapping

    public Result getAll(){

        List<User> all = userService.getAll();

        Integer code = ((all == null) ? GET_ERR : GET_OK);

        String msg = ((all == null) ? "查询失败":"" );

        return new Result(code,all,msg);

    }

}
- Dao改写(影响行数)
-

将void返回值改为int
public interface UserDao {
@Insert("insert into user(name, phone, address) values (#{name},#{phone},#{address}) ")
public int save(User user);
@Update("update user set name=#{name},phone=#{phone},address=#{address} where ssm_demo.user.id=#{id}")
public int update(User user);
@Delete("delete from user where id=#{id}")
public int delete(Integer id);
@Select("select * from user where id = #{id}")
public User getById(Integer id);
@Select("select * from user")
public List<User> getAll();
} - Service改写(影响行数>0说明成功,否则失败)
-

public boolean save(User user) {
return userDao.save(user) > 0;
}
public boolean update(User user) {
return userDao.update(user) >0;
}
public boolean delete(Integer id) {
return userDao.delete(id) > 0;
}其他方法不变然后改造完成,测试方法同上:
用postman浅测一下
-

下面,咱们会遇到一个新的问题,那就是遇到程序异常,咋处理,
如果遇到异常,会导致返给前端数据混乱,结构不统一,咱们必须统一一下格式,方便前端处理(与前端交流)
一般程序各个地方都可能出现异常,一般全部往上,抛到表现层处理(Controller)
采用AOP思想:
所有的异常咱们一般归为三类:
①业务异常:业务异常直接反馈给用户,提醒用户规范操作
②系统异常:安抚信号,发消息给运维,记录日记
③其他异常:安抚信号,自己修改好,改不好将错误抛给上两类
- 创建单独的异常包:
-

两代码除了名字相差无几,加了一个异常标识CODE属性,
①BusinessException业务异常
package com.exception;
public class BusinessException extends RuntimeException {
private Integer code;
public Integer getCode() {
return code;
}
public void setCode(Integer code) {
this.code = code;
}
public BusinessException(Integer code, String message) {
super(message);
this.code = code;
}
public BusinessException(Integer code, String message, Throwable cause) {
super(message, cause);
this.code = code;
}
}②SystemException系统异常
package com.exception;
public class SystemException extends RuntimeException{
private Integer code;
public Integer getCode() {
return code;
}
public void setCode(Integer code) {
this.code = code;
}
public SystemException(Integer code,String message) {
super(message);
this.code = code;
}
public SystemException( Integer code, String message, Throwable cause) {
super(message, cause);
this.code = code;
}
} - 在CODE类下增加异常错误编码
-

// 异常错误码
public static final Integer SYSTEM_ERR = 50001;
public static final Integer SYSTEM_TIMEOUT_ERR = 50002;
public static final Integer SYSTEM_UNKNOWN_ERR = 59999;
public static final Integer BUSINESS_ERR = 60001; - 在表现性层增加ProjectExceptionAdvice
-
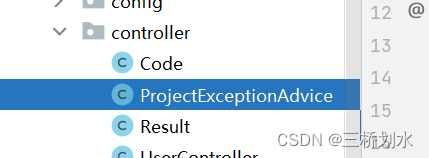
@RestControllerAdvice
//rest风格的,声明此类做异常处理,异常处理器
public class ProjectExceptionAdvice {
@ExceptionHandler(SystemException.class)
public Result doSystemException(SystemException se){
return new Result(se.getCode(),null, se.getMessage());
}
@ExceptionHandler(BusinessException.class)
public Result doBusinessException(BusinessException be){
return new Result(be.getCode(), null,be.getMessage());
}
@ExceptionHandler(Exception.class)
//拦截所有异常,未预期的异常
public Result doException(Exception e){
return new Result(Code.SYSTEM_UNKNOWN_ERR,null,"系统繁忙,请稍后重试!");
}
}除此之外,后端还要写一个过滤前端资源的配置类
- 在config目录下增加SpringMvcSupport
-
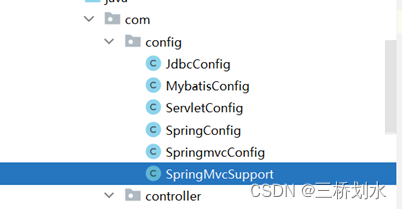
@Configuration
public class SpringMvcSupport extends WebMvcConfigurationSupport {
@Override
protected void addResourceHandlers(ResourceHandlerRegistry registry) {
registry.addResourceHandler("/pages/**").addResourceLocations("/page/");
registry.addResourceHandler("/css/**").addResourceLocations("/css/");
registry.addResourceHandler("/js/**").addResourceLocations("/js/");
registry.addResourceHandler("/plugins/**").addResourceLocations("/plugins/");
}
}
- 在SpringMvcConfig中加上包扫描

至此,异常处理告一段落;
后端代码至此写完,前端代码看黑马程序员P66-P70


 2万+
2万+


 被折叠的 条评论
为什么被折叠?
被折叠的 条评论
为什么被折叠?
 到【灌水乐园】发言


