


| 工具及依赖 | 版本 |
|---|---|
| JDK | 1.8 |
| SpringBoot | 2.3.7.RELEASE |
| Spring Cloud Netflix | Hoxton.SR12 |
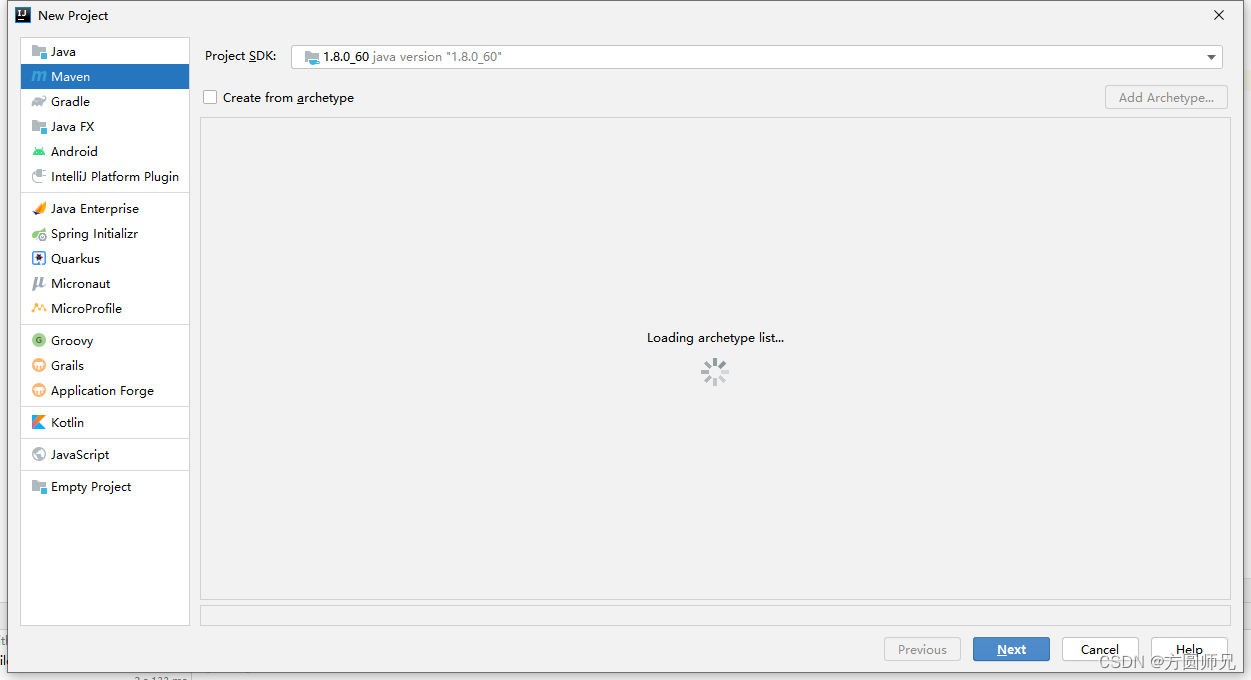
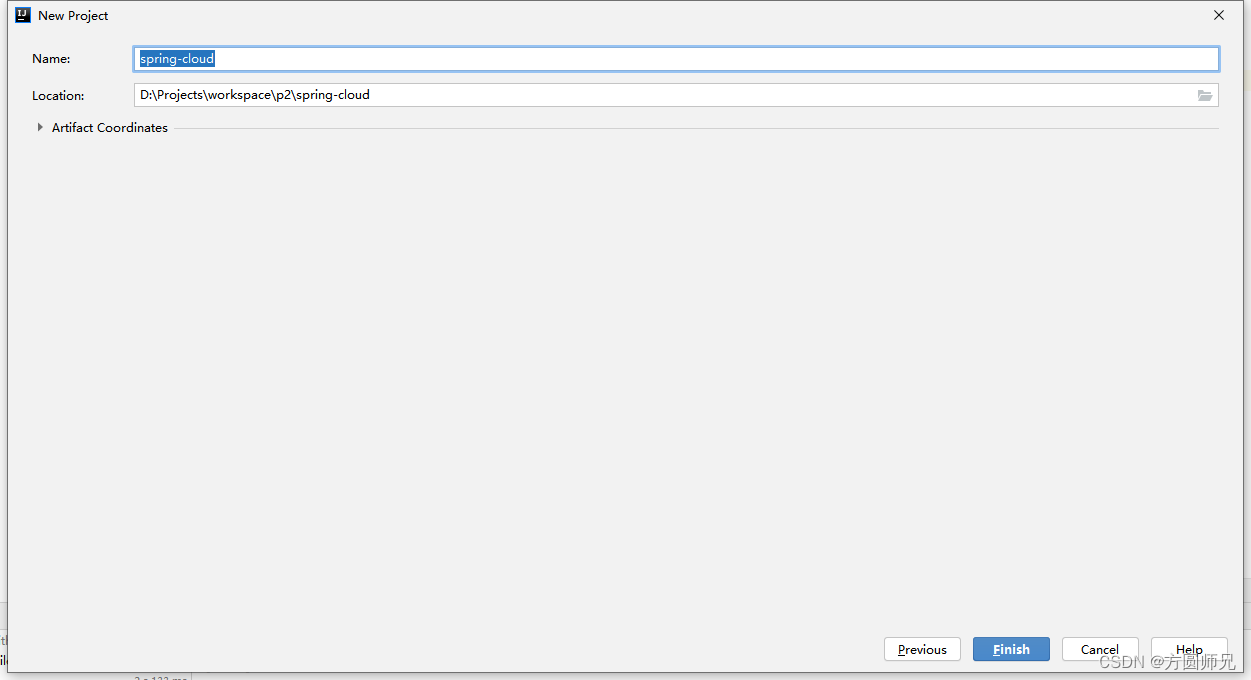
1.创建父项目
1.1 开始创建一个普通的maven工程
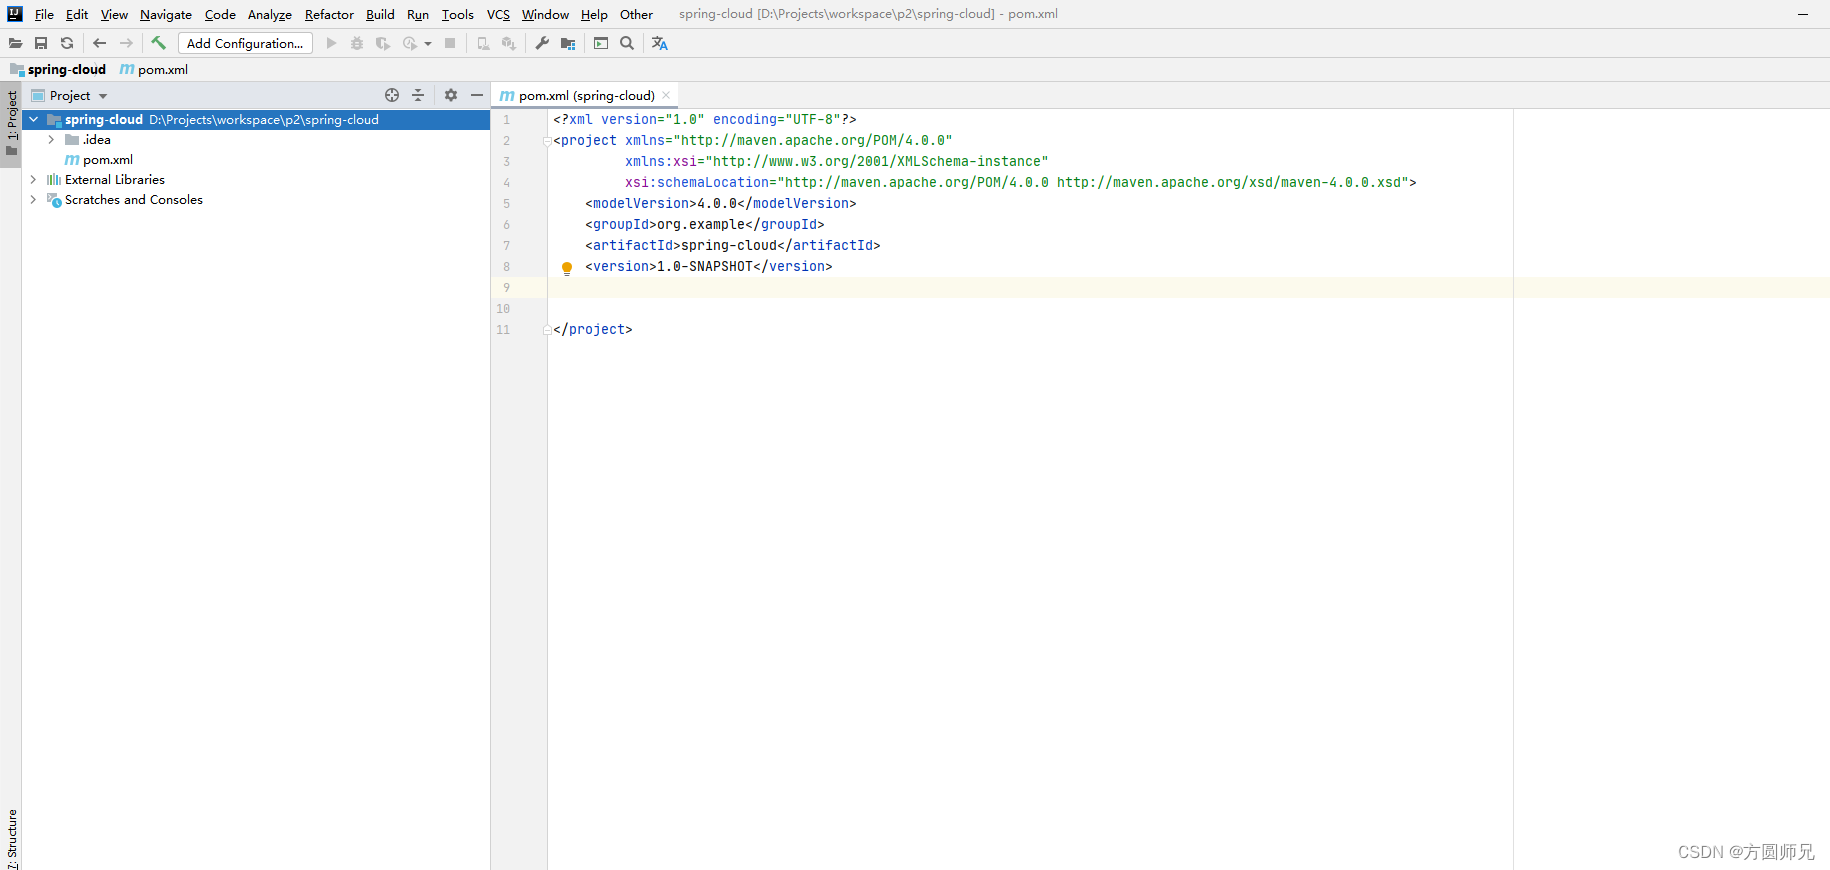
1.2 修改 父工程的pom.xml文件
这里主要是做一些版本管理以及模块管理
<?xml version="1.0" encoding="UTF-8"?>
<project xmlns="http://maven.apache.org/POM/4.0.0"
         xmlns:xsi="http://www.w3.org/2001/XMLSchema-instance"
         xsi:schemaLocation="http://maven.apache.org/POM/4.0.0 http://maven.apache.org/xsd/maven-4.0.0.xsd">
    <modelVersion>4.0.0</modelVersion>
    <groupId>org.example</groupId>
    <artifactId>spring-cloud</artifactId>
    <version>1.0-SNAPSHOT</version>
    <packaging>pom</packaging>
    <modules>
    </modules>
    <properties>
        <java.version>1.8</java.version>
        <mybatis.plus.version>3.4.2</mybatis.plus.version>
        <mysql.connect.java.version>8.0.27</mysql.connect.java.version>
        <druid.version>1.2.8</druid.version>
        <spring-boot-dependencies.version>2.3.7.RELEASE</spring-boot-dependencies.version>
        <spring-cloud-dependencies.version>Hoxton.SR12</spring-cloud-dependencies.version>
    </properties>
</project>
2.创建eureka注册中心
2.1 创建一个maven项目,同1.1步骤一样,这里忽略
2.2 eureka的pom.xml引入依赖
<?xml version="1.0" encoding="UTF-8"?>
<project xmlns="http://maven.apache.org/POM/4.0.0"
         xmlns:xsi="http://www.w3.org/2001/XMLSchema-instance"
         xsi:schemaLocation="http://maven.apache.org/POM/4.0.0 http://maven.apache.org/xsd/maven-4.0.0.xsd">
    <parent>
        <artifactId>spring-cloud</artifactId>
        <groupId>org.example</groupId>
        <version>1.0-SNAPSHOT</version>
    </parent>
    <modelVersion>4.0.0</modelVersion>
    <artifactId>eureka-server</artifactId>
    <packaging>jar</packaging>
    <properties>
        <java.version>1.8</java.version>
    </properties>
    <dependencyManagement>
        <dependencies>
            <dependency>
                <groupId>org.springframework.cloud</groupId>
                <artifactId>spring-cloud-dependencies</artifactId>
                <version>${spring-cloud-dependencies.version}</version>
                <type>pom</type>
                <scope>import</scope>
            </dependency>
            <!--springboot依赖-->
            <dependency>
                <groupId>org.springframework.boot</groupId>
                <artifactId>spring-boot-dependencies</artifactId>
                <version>${spring-boot-dependencies.version}</version>
                <type>pom</type>
                <scope>import</scope>
            </dependency>
        </dependencies>
    </dependencyManagement>
    <dependencies>
        <dependency>
            <groupId>org.springframework.cloud</groupId>
            <artifactId>spring-cloud-starter-netflix-eureka-server</artifactId>
            <version>2.2.9.RELEASE</version>
        </dependency>
        <dependency>
            <groupId>org.springframework.boot</groupId>
            <artifactId>spring-boot-starter-web</artifactId>
            <version>2.3.7.RELEASE</version>
        </dependency>
    </dependencies>
    <build>
        <finalName>eureka</finalName>
        <plugins>
            <plugin>
                <groupId>org.springframework.boot</groupId>
                <artifactId>spring-boot-maven-plugin</artifactId>
                <executions>
                    <execution>
                        <goals>
                            <goal>repackage</goal>
                        </goals>
                    </execution>
                </executions>
                <configuration>
                    <includeSystemScope>true</includeSystemScope>
                </configuration>
            </plugin>
            <plugin>
                <groupId>org.apache.maven.plugins</groupId>
                <artifactId>maven-surefire-plugin</artifactId>
                <configuration>
                    <skipTests>true</skipTests>
                </configuration>
            </plugin>
        </plugins>
    </build>
</project>
2.3 创建application.yml文件
server:
  port: 8001
spring:
  application:
    name: eureka
eureka:
  client:
    fetch-registry: true
    register-with-eureka: false
    service-url:
      defaultZone: ${EUREKA_URL:http://127.0.0.1:${server.port:8001}/eureka/}
2.4 创建主启动类
import org.springframework.boot.SpringApplication;
import org.springframework.boot.autoconfigure.SpringBootApplication;
import org.springframework.cloud.netflix.eureka.server.EnableEurekaServer;

@SpringBootApplication
@EnableEurekaServer//标识eureka服务端
public class EurekaApplication {
    public static void main(String[] args) {
        SpringApplication.run(EurekaApplication.class,args);
    }
}
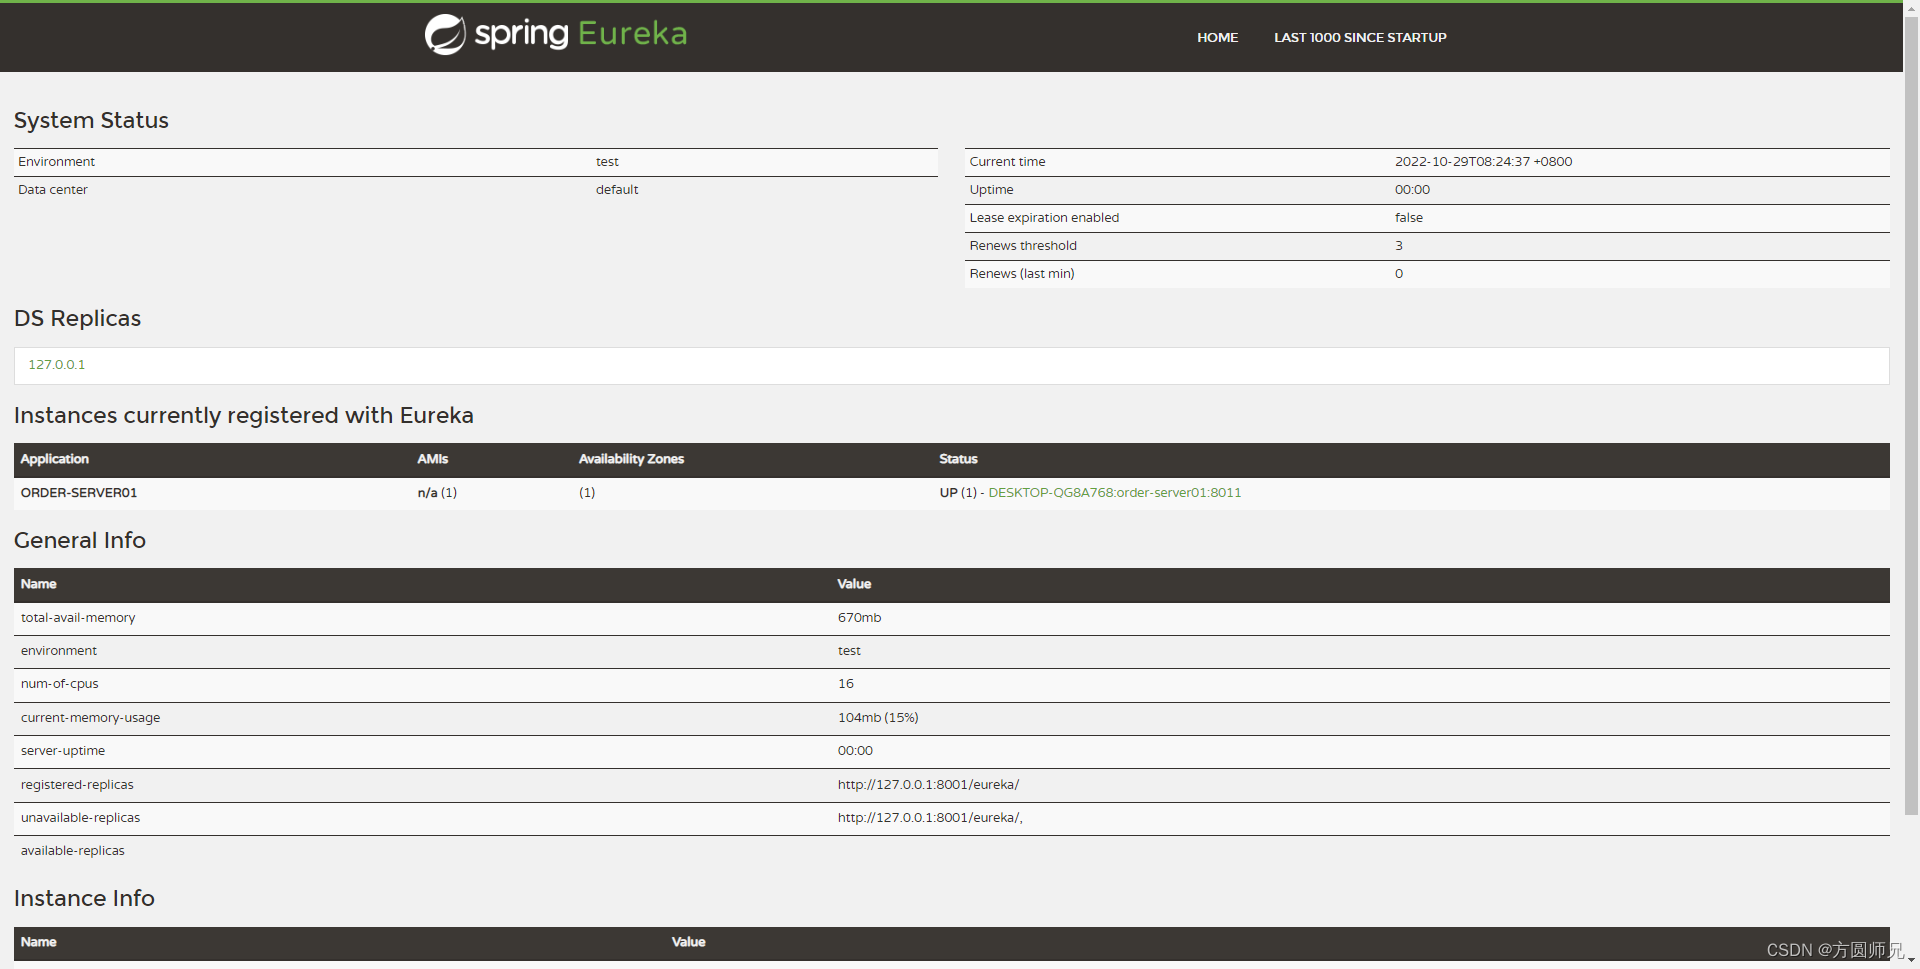
2.5 启动项目 ,浏览器输入ip+端口,例如 127.0.0.1:8001
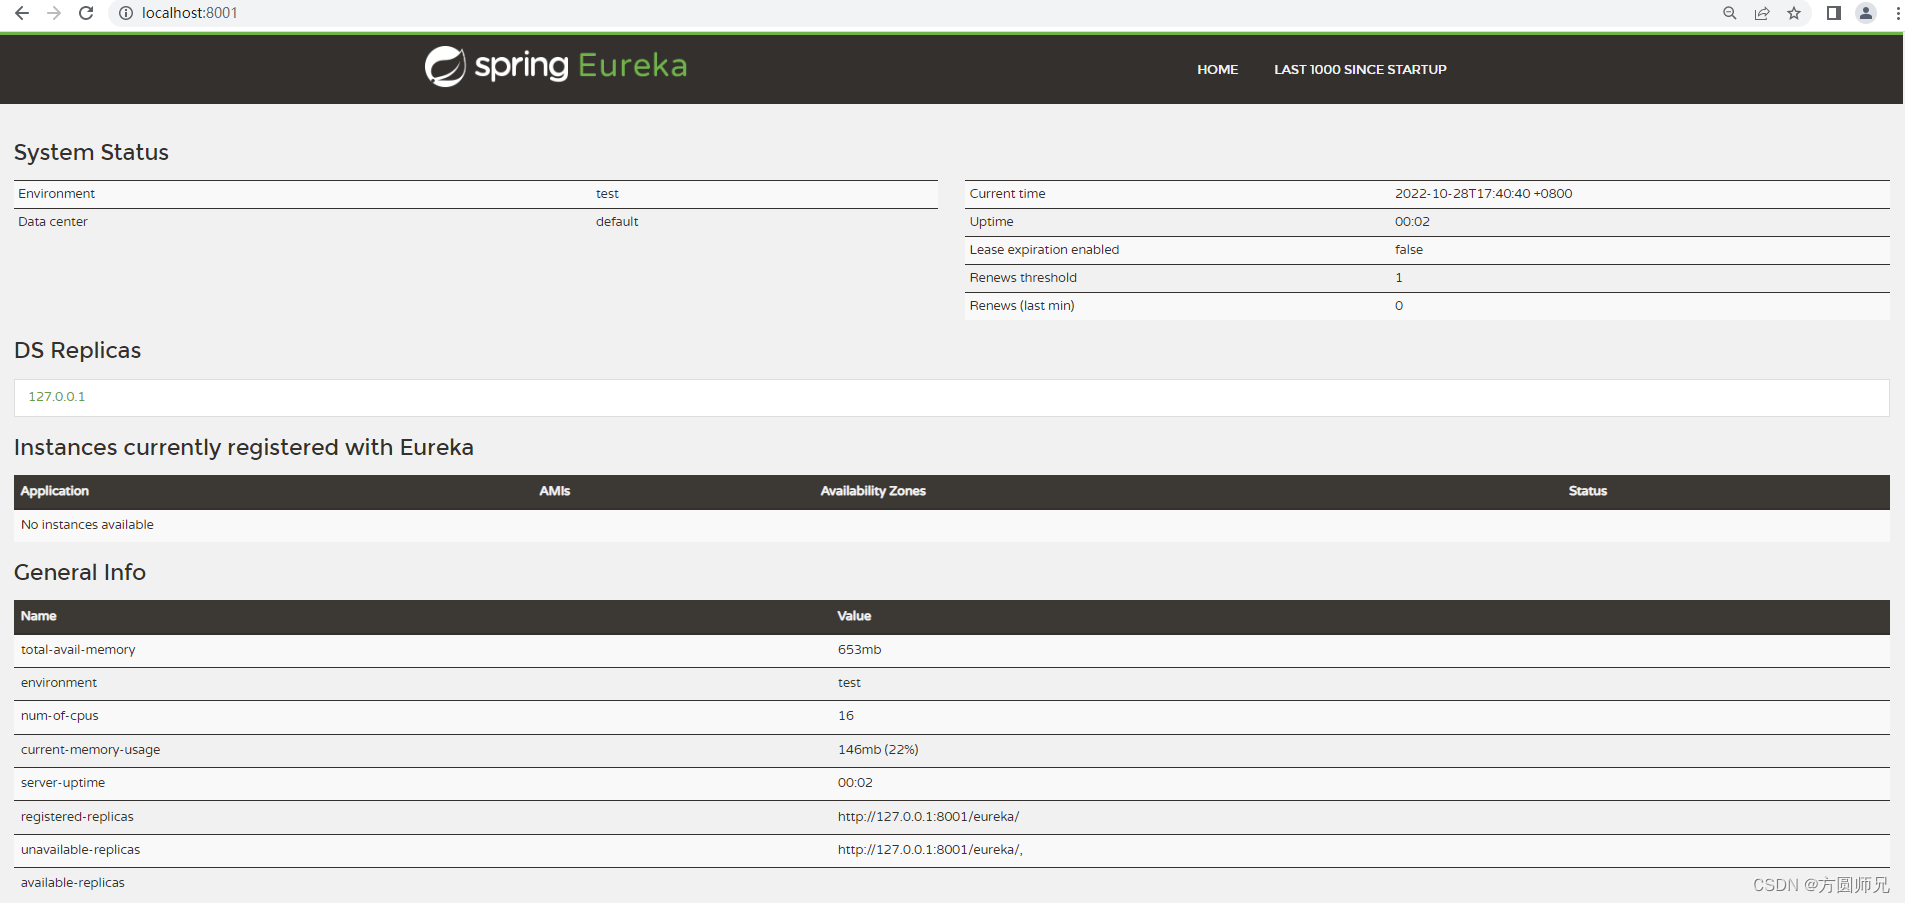
3.创建 order-server 的微服务注册到eureka
3.1 创建一个maven项目,同1.1步骤一样,这里忽略
3.2 order-server 的pom.xml引入依赖
<?xml version="1.0" encoding="UTF-8"?>
<project xmlns="http://maven.apache.org/POM/4.0.0"
         xmlns:xsi="http://www.w3.org/2001/XMLSchema-instance"
         xsi:schemaLocation="http://maven.apache.org/POM/4.0.0 http://maven.apache.org/xsd/maven-4.0.0.xsd">
    <parent>
        <artifactId>spring-cloud</artifactId>
        <groupId>org.example</groupId>
        <version>1.0-SNAPSHOT</version>
    </parent>
    <modelVersion>4.0.0</modelVersion>

    <artifactId>order-server</artifactId>
    <dependencyManagement>
        <dependencies>
            <dependency>
                <groupId>org.springframework.cloud</groupId>
                <artifactId>spring-cloud-dependencies</artifactId>
                <version>${spring-cloud-dependencies.version}</version>
                <type>pom</type>
                <scope>import</scope>
            </dependency>
            <!--springboot依赖-->
            <dependency>
                <groupId>org.springframework.boot</groupId>
                <artifactId>spring-boot-dependencies</artifactId>
                <version>${spring-boot-dependencies.version}</version>
                <type>pom</type>
                <scope>import</scope>
            </dependency>
        </dependencies>
    </dependencyManagement>

    <dependencies>
        <dependency>
            <groupId>org.springframework.boot</groupId>
            <artifactId>spring-boot-starter-web</artifactId>
        </dependency>
        <dependency>
            <groupId>org.springframework.cloud</groupId>
            <artifactId>spring-cloud-starter-netflix-eureka-client</artifactId>
        </dependency>
        <dependency>
            <groupId>org.projectlombok</groupId>
            <artifactId>lombok</artifactId>
        </dependency>

        <!--数据库orm系列-->
        <dependency>
            <groupId>com.baomidou</groupId>
            <artifactId>mybatis-plus-boot-starter</artifactId>
            <version>${mybatis.plus.version}</version>
        </dependency>
        <dependency>
            <groupId>mysql</groupId>
            <artifactId>mysql-connector-java</artifactId>
            <version>${mysql.connect.java.version}</version>
        </dependency>
        <dependency>
            <groupId>org.springframework.boot</groupId>
            <artifactId>spring-boot-starter-jdbc</artifactId>
        </dependency>
        <dependency>
            <groupId>com.alibaba</groupId>
            <artifactId>druid-spring-boot-starter</artifactId>
            <version>${druid.version}</version>
        </dependency>

        <dependency>
            <groupId>io.springfox</groupId>
            <artifactId>springfox-swagger2</artifactId>
            <version>2.9.2</version>
        </dependency>
        <dependency>
            <groupId>io.springfox</groupId>
            <artifactId>springfox-swagger-ui</artifactId>
            <version>2.9.2</version>
        </dependency>


    </dependencies>
    <build>
        <finalName>order</finalName>
        <plugins>
            <plugin>
                <groupId>org.springframework.boot</groupId>
                <artifactId>spring-boot-maven-plugin</artifactId>
                <executions>
                    <execution>
                        <goals>
                            <goal>repackage</goal>
                        </goals>
                    </execution>
                </executions>
                <configuration>
                    <includeSystemScope>true</includeSystemScope>
                </configuration>
            </plugin>
            <plugin>
                <groupId>org.apache.maven.plugins</groupId>
                <artifactId>maven-surefire-plugin</artifactId>
                <configuration>
                    <skipTests>true</skipTests>
                </configuration>
            </plugin>
        </plugins>
    </build>
</project>
3.3 创建application.yml文件
server:
  port: 8011
spring:
  application:
    name: order-server01
  datasource:
    url: ${DB_URL:jdbc:mysql://192.168.34.7:3306/order?useSSL=false&characterEncoding=UTF8}
    username: ${DB_NAME:root}
    password: ${DB_PWD:root}
    driver-class-name: com.mysql.cj.jdbc.Driver
    type: com.alibaba.druid.pool.DruidDataSource
    druid:
      # 下面为连接池的补充设置,应用到上面所有数据源中
      # 初始化大小,最小,最大
      initial-size: 15
      min-idle: 15
      max-active: 50
      # 配置获取连接等待超时的时间
      max-wait: 60000
      # 配置间隔多久才进行一次检测,检测需要关闭的空闲连接,单位是毫秒
      time-between-eviction-runs-millis: 60000
      # 配置一个连接在池中最小生存的时间,单位是毫秒
      min-evictable-idle-time-millis: 300000

eureka:
  client:
    service-url:
      defaultZone: ${EUREKA_URL:http://127.0.0.1:8001/eureka/}
##mybatis plus 设置
mybatis-plus:
  #  **  代表多级  *代表一级
  mapper-locations: classpath*:com/**/xml/*Mapper.xml
  global-config:
    # 关闭MP3.0自带的banner
    banner: false
    db-config:
      #主键类型  0:"数据库ID自增",1:"该类型为未设置主键类型", 2:"用户输入ID",3:"全局唯一ID (数字类型唯一ID)", 4:"全局唯一ID UUID",5:"字符串全局唯一ID (idWorker 的字符串表示)";
      id-type: AUTO
      # 默认数据库表下划线命名
      table-underline: true
  configuration:
    #这个配置会将执行的sql打印出来,在开发或测试的时候可以用,正式环境需要注释,可以在log日志里打印出来
    log-impl: org.apache.ibatis.logging.stdout.StdOutImpl
3.4 创建主启动类 并启动项目查看eureka的dashboard
@SpringBootApplication
@EnableEurekaClient
@EnableSwagger2
public class OrderApplication {
    public static void main(String[] args) {
        SpringApplication.run(OrderApplication.class,args);
    }
}
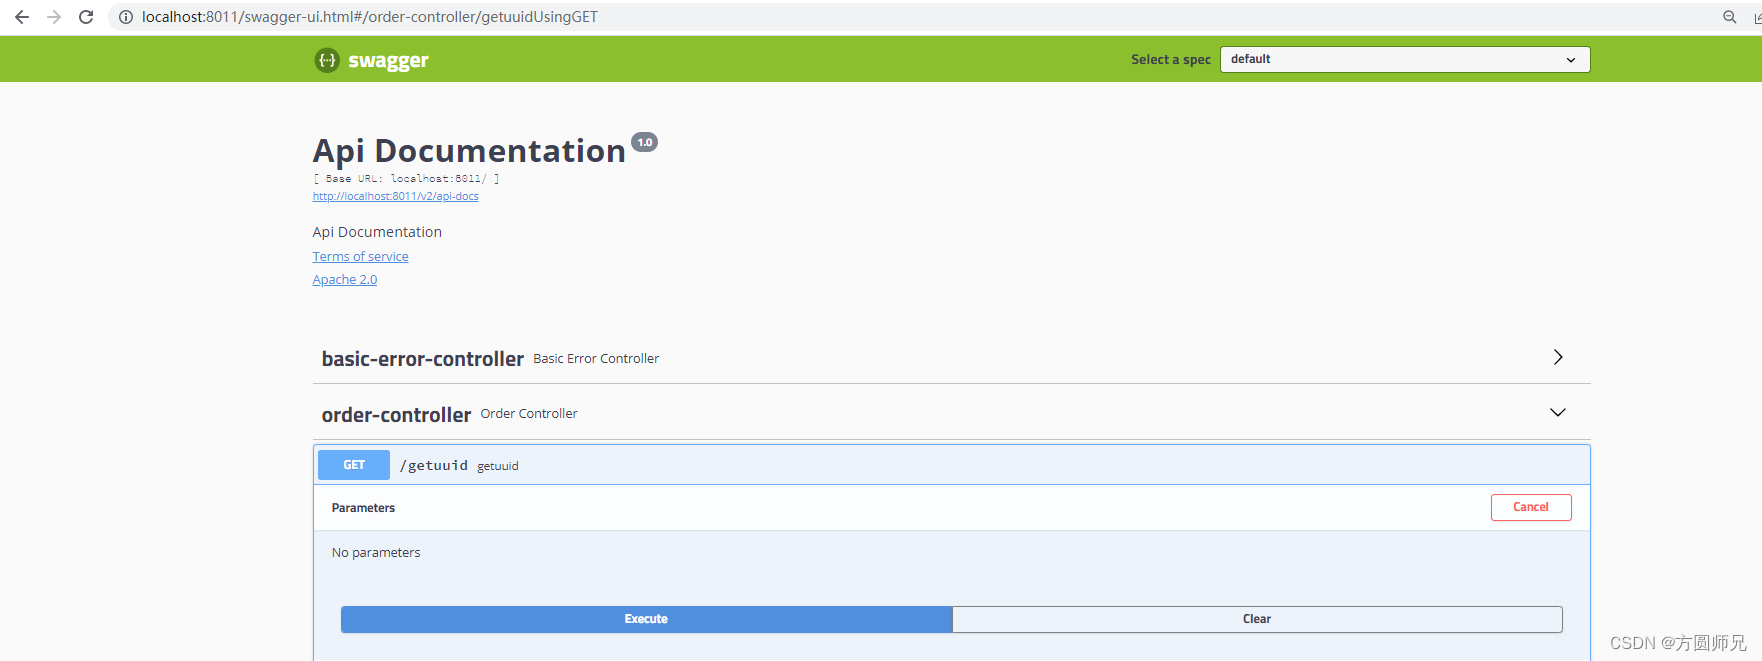
3.5 在order-server这个服务中心创建一个简单的http请求,用于后边服务进行feign调用
@RestController
public class OrderController {
    @GetMapping("/getuuid")
    public String getuuid(){
        return UUID.randomUUID().toString();
    }
}
4. 创建新的 monitor-server 微服务用feign调用上边的订单服务
4.1 创建一个maven项目,同1.1步骤一样,这里忽略
4.2 monitor-server的pom.xml引入依赖
<?xml version="1.0" encoding="UTF-8"?>
<project xmlns="http://maven.apache.org/POM/4.0.0"
         xmlns:xsi="http://www.w3.org/2001/XMLSchema-instance"
         xsi:schemaLocation="http://maven.apache.org/POM/4.0.0 http://maven.apache.org/xsd/maven-4.0.0.xsd">
    <parent>
        <artifactId>spring-cloud</artifactId>
        <groupId>org.example</groupId>
        <version>1.0-SNAPSHOT</version>
    </parent>
    <modelVersion>4.0.0</modelVersion>

    <artifactId>monitor-server</artifactId>
    <dependencyManagement>
        <dependencies>
            <dependency>
                <groupId>org.springframework.cloud</groupId>
                <artifactId>spring-cloud-dependencies</artifactId>
                <version>${spring-cloud-dependencies.version}</version>
                <type>pom</type>
                <scope>import</scope>
            </dependency>
            <!--springboot依赖-->
            <dependency>
                <groupId>org.springframework.boot</groupId>
                <artifactId>spring-boot-dependencies</artifactId>
                <version>${spring-boot-dependencies.version}</version>
                <type>pom</type>
                <scope>import</scope>
            </dependency>
        </dependencies>
    </dependencyManagement>
    <dependencies>
        <dependency>
            <groupId>org.springframework.boot</groupId>
            <artifactId>spring-boot-starter-web</artifactId>
        </dependency>
        <dependency>
            <groupId>org.springframework.cloud</groupId>
            <artifactId>spring-cloud-starter-netflix-eureka-client</artifactId>
        </dependency>
        <dependency>
            <groupId>org.springframework.cloud</groupId>
            <artifactId>spring-cloud-starter-openfeign</artifactId>
        </dependency>
        <dependency>
            <groupId>org.springframework.cloud</groupId>
            <artifactId>spring-cloud-starter-netflix-hystrix</artifactId>
        </dependency>
        <dependency>
            <groupId>org.projectlombok</groupId>
            <artifactId>lombok</artifactId>
        </dependency>
    </dependencies>
    <build>
        <finalName>monitor</finalName>
        <plugins>
            <plugin>
                <groupId>org.springframework.boot</groupId>
                <artifactId>spring-boot-maven-plugin</artifactId>
                <executions>
                    <execution>
                        <goals>
                            <goal>repackage</goal>
                        </goals>
                    </execution>
                </executions>
            </plugin>
        </plugins>
    </build>
</project>
4.3 创建application.yml文件
server:
  port: 8021
spring:
  application:
    name: monitor-server01
eureka:
  client:
    service-url:
      defaultZone: ${EUREKA_URL:http://127.0.0.1:8001/eureka/}
feign:
  circuitbreaker: ##开启服务熔断
    enabled: true
  hystrix:
    enabled: true
  httpclient:
    connection-timeout: 5000
  client:
    default:
      connectTimeout: 5000
      readTimeout: 5000
4.4 创建feign调用类
@FeignClient(value = "ORDER-SERVER01",fallback = OrderFeignHystrix.class)
public interface OrderFeignServer {
    @GetMapping("/getuuid")
    String getuuid();
}
4.5 创建Hystrix熔断器
@Component
public class OrderFeignHystrix implements OrderFeignServer {
    public String getuuid() {
        return "微服务调用失败";
    }
}
4.6 创建Controller控制器
@RestController
public class OrderController {
    @Autowired
    private OrderFeignServer orderFeignServer;
    @GetMapping("/getuuid")
    public String getuuid(){
        return orderFeignServer.getuuid();
    }
}
4.7 创建主启动类 并启动,使用 feign 调用 order-server 服务
@SpringBootApplication
@EnableEurekaClient
@EnableFeignClients
@EnableHystrix
public class MonitorApplication {
    public static void main(String[] args) {
        SpringApplication.run(MonitorApplication.class,args);
    }
}

5. 使用 zuul 创建网关服务 zuul-server
5.1 创建一个maven项目,同1.1步骤一样,这里忽略
5.2 zuul-server 的pom.xml引入依赖
<?xml version="1.0" encoding="UTF-8"?>
<project xmlns="http://maven.apache.org/POM/4.0.0"
         xmlns:xsi="http://www.w3.org/2001/XMLSchema-instance"
         xsi:schemaLocation="http://maven.apache.org/POM/4.0.0 http://maven.apache.org/xsd/maven-4.0.0.xsd">
    <parent>
        <artifactId>spring-cloud</artifactId>
        <groupId>org.example</groupId>
        <version>1.0-SNAPSHOT</version>
    </parent>
    <modelVersion>4.0.0</modelVersion>

    <artifactId>zuul-server</artifactId>
    <dependencyManagement>
        <dependencies>
            <dependency>
                <groupId>org.springframework.cloud</groupId>
                <artifactId>spring-cloud-dependencies</artifactId>
                <version>${spring-cloud-dependencies.version}</version>
                <type>pom</type>
                <scope>import</scope>
            </dependency>
            <dependency>
                <groupId>org.springframework.boot</groupId>
                <artifactId>spring-boot-dependencies</artifactId>
                <version>${spring-boot-dependencies.version}</version>
                <type>pom</type>
                <scope>import</scope>
            </dependency>
        </dependencies>
    </dependencyManagement>
    <dependencies>
        <dependency>
            <groupId>org.springframework.boot</groupId>
            <artifactId>spring-boot-starter-web</artifactId>
        </dependency>
        <dependency>
            <groupId>org.springframework.cloud</groupId>
            <artifactId>spring-cloud-starter-netflix-zuul</artifactId>
        </dependency>
        <dependency>
            <groupId>org.springframework.cloud</groupId>
            <artifactId>spring-cloud-starter-netflix-eureka-client</artifactId>
        </dependency>
        <dependency>
            <groupId>io.springfox</groupId>
            <artifactId>springfox-swagger2</artifactId>
            <version>2.9.2</version>
        </dependency>
        <dependency>
            <groupId>io.springfox</groupId>
            <artifactId>springfox-swagger-ui</artifactId>
            <version>2.9.2</version>
        </dependency>
    </dependencies>

    <build>
        <finalName>zuul</finalName>
        <plugins>
            <plugin>
                <groupId>org.springframework.boot</groupId>
                <artifactId>spring-boot-maven-plugin</artifactId>
                <executions>
                    <execution>
                        <goals>
                            <goal>repackage</goal>
                        </goals>
                    </execution>
                </executions>
                <configuration>
                    <includeSystemScope>true</includeSystemScope>
                </configuration>
            </plugin>
            <plugin>
                <groupId>org.apache.maven.plugins</groupId>
                <artifactId>maven-surefire-plugin</artifactId>
                <configuration>
                    <skipTests>true</skipTests>
                </configuration>
            </plugin>
        </plugins>
    </build>
</project>
5.3 创建application.yml文件
server:
  port: 9001
spring:
  application:
    name: zuul-server
eureka:
  client:
    service-url:
      defaultZone: ${EUREKA_URL:http://127.0.0.1:8001/eureka/}
zuul:
  prefix: /api   ##给所有通过网关访问的接口前边增加路由
  ignored-services: "*"  ##忽略所有直接通过网关+微服务名称访问
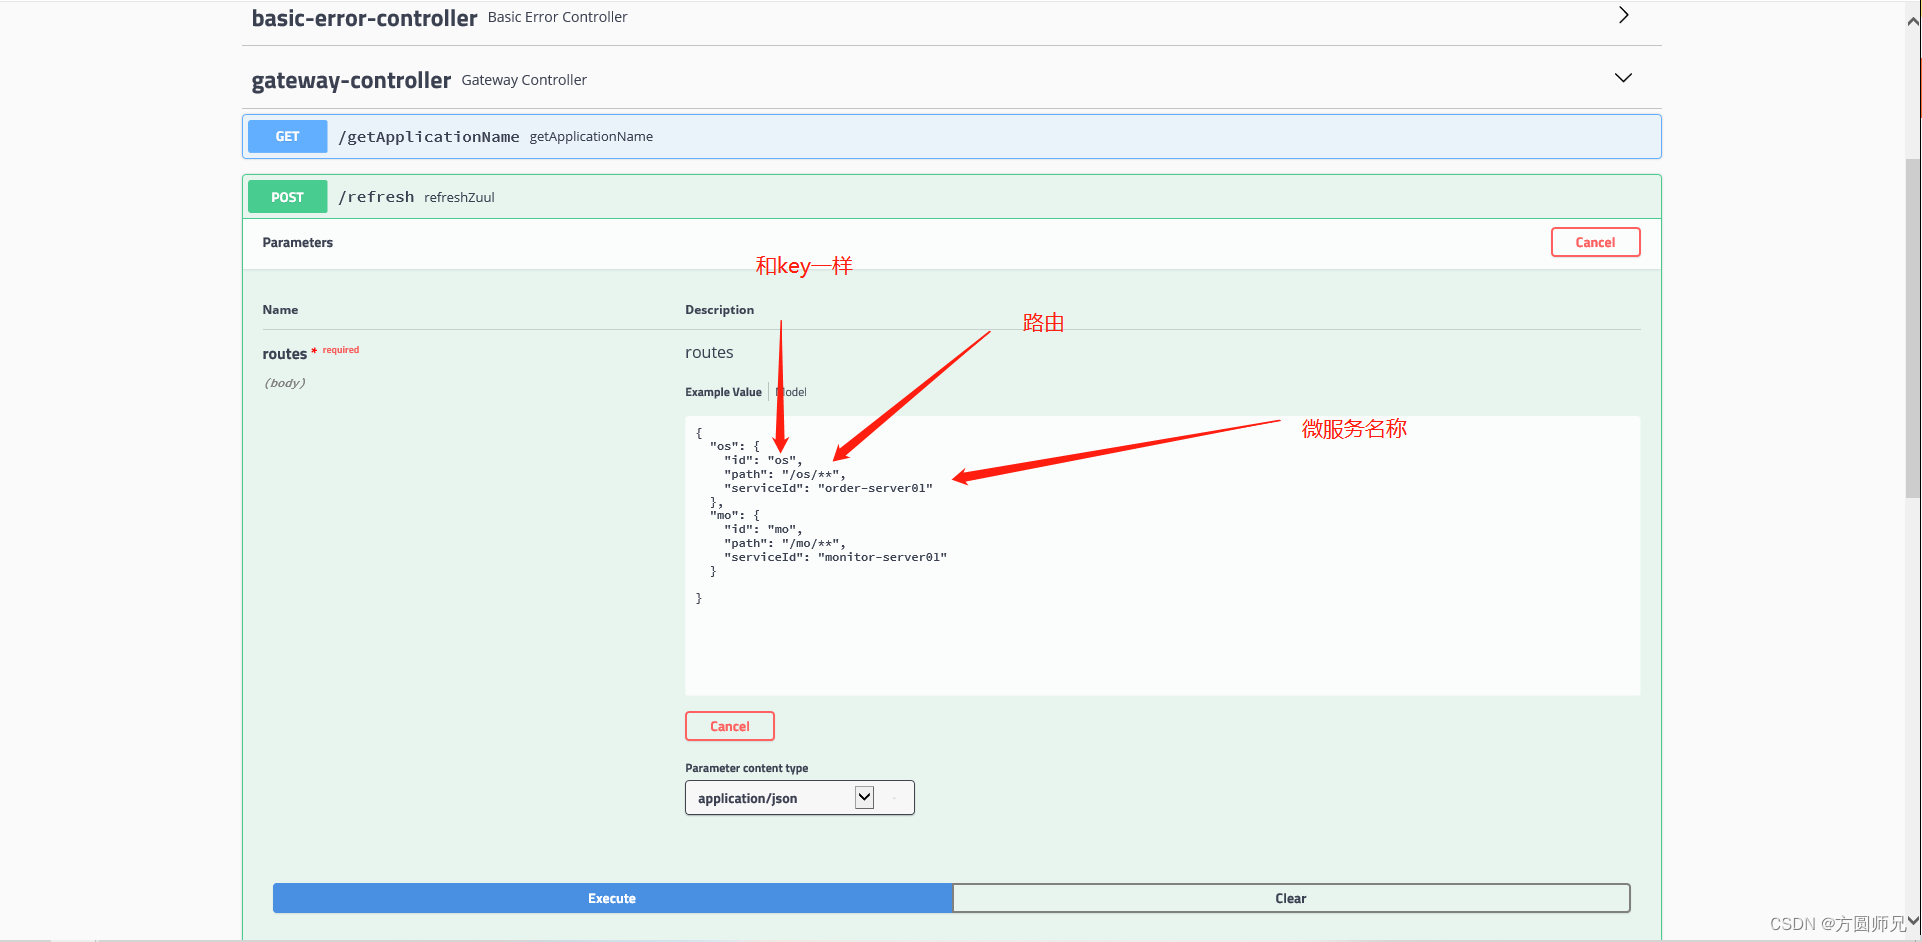
5.4 创建刷新网关接口
@RestController
public class GatewayController {
    @Autowired
    private DiscoveryClient discoveryClient;
    @Autowired
    private ZuulProperties zuulProperties;
    @GetMapping("/getApplicationName")
    public List<String> getApplicationName(){
        return discoveryClient.getServices();
    }

    @PostMapping("/refresh")
    public void refreshZuul(@RequestBody Map<String, ZuulProperties.ZuulRoute> routes){
        zuulProperties.setRoutes(routes);
    }
}
5.5 创建主启动类
@SpringBootApplication
@EnableZuulProxy
@EnableDiscoveryClient
@EnableSwagger2
public class ZuulApplication {
    public static void main(String[] args) {
        SpringApplication.run(ZuulApplication.class,args);
    }
}
5.6 刷新网关,使用网关调用微服务接口


 1806
1806


 被折叠的 条评论
为什么被折叠?
被折叠的 条评论
为什么被折叠?
 到【灌水乐园】发言


