


mqtt是一种类似于mq的通讯技术
1、mqtt服务端搭建
创建docker网络
docker network create --driver bridge --subnet 172.18.0.0/24 --gateway 172.18.0.1 emqx-net
创建容器
docker run -d \
    --name emqx1 \
    -e "EMQX_NODE_NAME=emqx@172.18.0.2" \
    --network emqx-net \
        --ip 172.18.0.2 \
    --network-alias 172.18.0.2 \
    -p 1883:1883 \
    -p 8083:8083 \
    -p 8084:8084 \
    -p 8883:8883 \
    -p 18083:18083 \
    emqx/emqx:5.4.1


docker run -d \
 --name emqx2 \
     --ip 172.18.0.3 \
 -e "EMQX_NODE_NAME=emqx@172.18.0.3" \
 --network emqx-net \
 --network-alias 172.18.0.3 \
 emqx/emqx:5.4.1


docker run -d \
 --name emqx3 \
     --ip 172.18.0.4 \
 -e "EMQX_NODE_NAME=emqx@172.18.0.4" \
 --network emqx-net \
 --network-alias 172.18.0.4 \
 emqx/emqx:5.4.1
服务节点注册
docker exec -it emqx2 \
emqx ctl cluster join emqx@172.18.0.2


docker exec -it emqx3 \
emqx ctl cluster join emqx@172.18.0.2
2、创建springboot项目,并增加mqtt依赖
依赖引入
<dependency>
    <groupId>com.hivemq</groupId>
    <artifactId>hivemq-mqtt-client</artifactId>
    <version>1.3.0</version>
</dependency>
<dependency>
    <groupId>com.alibaba</groupId>
    <artifactId>fastjson</artifactId>
    <version>1.2.83</version>
</dependency>
创建连接器
@Configuration
public class VideoConfig implements MqttClientDisconnectedListener, MqttClientConnectedListener {
    static Logger logger = LoggerFactory.getLogger(VideoConfig.class);

    @Value("${mqtt.server.url:192.168.31.47}")
    private String serverUrl;//mqtt地址
    @Value("${mqtt.server.port:1883}")
    private Integer serverPort;//mqtt地址
    @Value("${mqtt.server.username}")
    private String serverUserName;//mqtt账号(测试默认没有)
    @Value("${mqtt.server.password}")
    private String serverPassWord;//mqtt密码(测试默认没有)

    @Autowired
    private DefautMqttConsumerListener defautMqttConsumerListener;

    @Bean
    public Mqtt3AsyncClient mqtt3AsyncClient(){
        String clientId = String.format("%d%s", TimeUtil.getCurrentInMillis(), RandomUtil.getRandomStr(10));
        Mqtt3ClientBuilder mqttClientBuilder = Mqtt3Client.builder();
        Mqtt3AsyncClient mqttClient = mqttClientBuilder
                .identifier(clientId)
                .serverHost(serverUrl)
                .serverPort(serverPort)
                .addConnectedListener(this)
                .addDisconnectedListener(this)
                .build().toAsync();
        mqttClient.connect();
        mqttClient.connectWith()
                .keepAlive(60)
                .willPublish()
                .topic("/")
                .applyWillPublish()
                .simpleAuth()
                .username(serverUserName)
                .password(serverPassWord.getBytes())
                .applySimpleAuth()
                .send()
                .whenCompleteAsync((connAck, throwable) -> {
                    Mqtt3ConnAckReturnCode returnCode = connAck.getReturnCode();
                    logger.info("mqtt connect result: {}", returnCode);
                    if (throwable != null) {
                        logger.error("connectWith error , throwable :"+throwable);
                    }
                });
        return mqttClient;
    }

	/**
	*连接成功回调后 监听mqtt消息
	**/
    @Override
    public void onConnected(MqttClientConnectedContext mqttClientConnectedContext) {
        String subscribedTopic ="+/reply";//+表示匹配一个信息
        mqtt3AsyncClient().subscribeWith()
        .topicFilter(subscribedTopic)
        .callback(defautMqttConsumerListener)
        .send()
        .whenComplete((subAck, throwable) -> {
            if (throwable != null) {
                logger.error("Handle failure to subscribe", throwable);
            } else {
                logger.info("successful subscription: " + subscribedTopic);
            }
        });
    }

	/**
	*连接关闭回调重新创建连接
	**/
    @Override
    public void onDisconnected(MqttClientDisconnectedContext mqttClientDisconnectedContext) {
        final Mqtt3ClientDisconnectedContext context = (Mqtt3ClientDisconnectedContext) mqttClientDisconnectedContext;
            try {
                context.getReconnector()
                        .connectWith()
                        .simpleAuth()
                        .username(serverUserName)
                        .password(serverPassWord.getBytes())
                        .applySimpleAuth()
                        .applyConnect()
                        .reconnect(true)
                        .delay(new Random().nextInt(100), TimeUnit.MILLISECONDS);
            } catch (Exception e) {
                logger.error("reconnect:" + e.getMessage(), e);
            }
    }
}
监听器
@Component
public class DefautMqttConsumerListener implements Consumer<Mqtt3Publish> {
    private static final Logger logger = LoggerFactory.getLogger(DefautMqttConsumerListener.class);


    @Override
    public void accept(Mqtt3Publish mqttPublish) {
          String topic = mqttPublish.getTopic().toString();
          byte[] msg = mqttPublish.getPayloadAsBytes();
          String msgJson = new String(msg);
          logger.info("mqtt listener topic :{} ,msg:{}" ,topic, msgJson);

    }

}
消息发送
public void sendMqttMsg(String topic, MqttQos qos, String msg){
		mqtt3AsyncClient.publishWith()
				.topic(topic)
				.payload(msg.getBytes())
				.qos(Optional.ofNullable(qos).orElse(MqttQos.AT_LEAST_ONCE))
				.retain(false)
				.send()
				.whenComplete((result, throwable) -> {
					logger.info("sendMqttMsg to video, topic : {} , body : {}",topic,body);
					if (throwable != null) {
						logger.error("transfer failed , throwable :{}",throwable);
					}
				});
	}
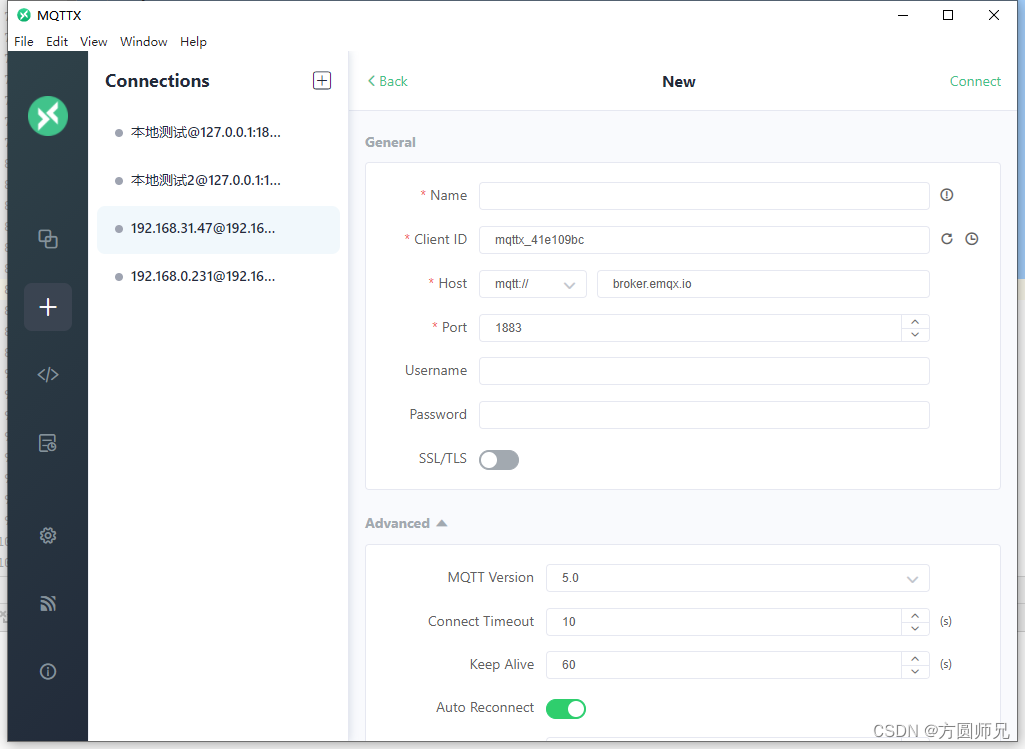
3、MQTT工具
下载地址:https://mqttx.app/zh/downloads

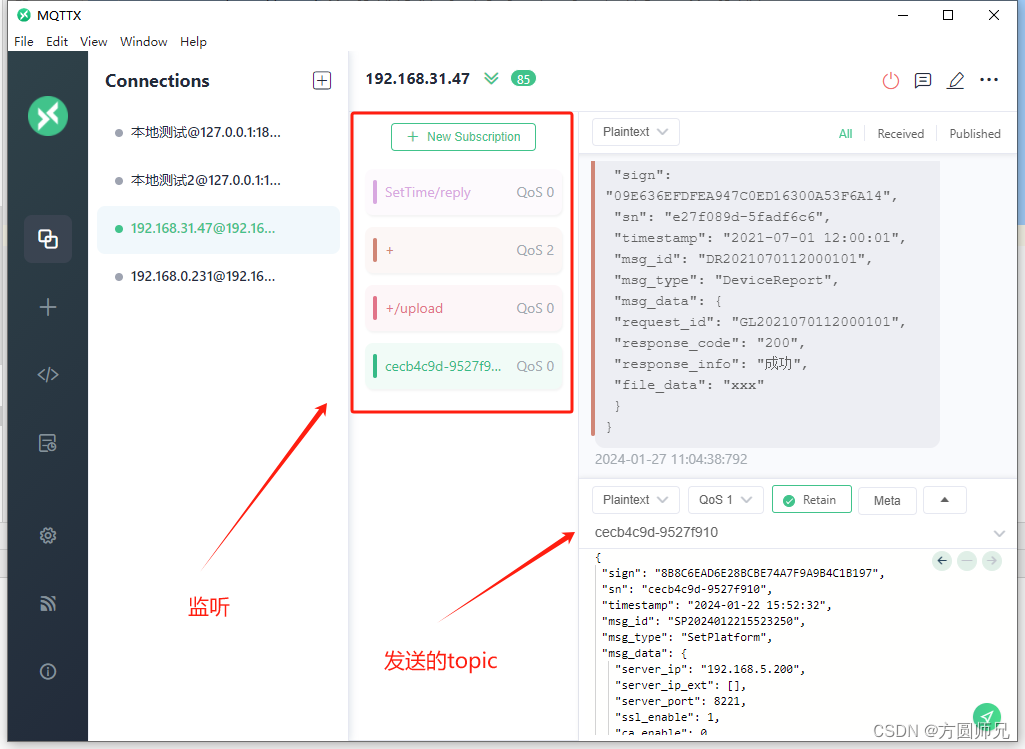
QOS
分为3级,0表示发一次,意味着消息可能会丢失;1表示至少发一次,意味着消息可能会收到多次;2表示保证一次,但是越高性能越低,可以根据自己业务进行选择
topic
类似于rocketmq的topic,也类似于rabbitmq的routingKey,mqtt的topic同样也是消息收发的引导,监听时 + 号,表示匹配 任意 / 号中间的任何数据,# 号表示多个数据 包含了 / 号后边多个


 2398
2398


 被折叠的 条评论
为什么被折叠?
被折叠的 条评论
为什么被折叠?
 到【灌水乐园】发言


