


目录
一、基本配置
-
桌面上右键Click 选择Git Bash打开命令终端
-
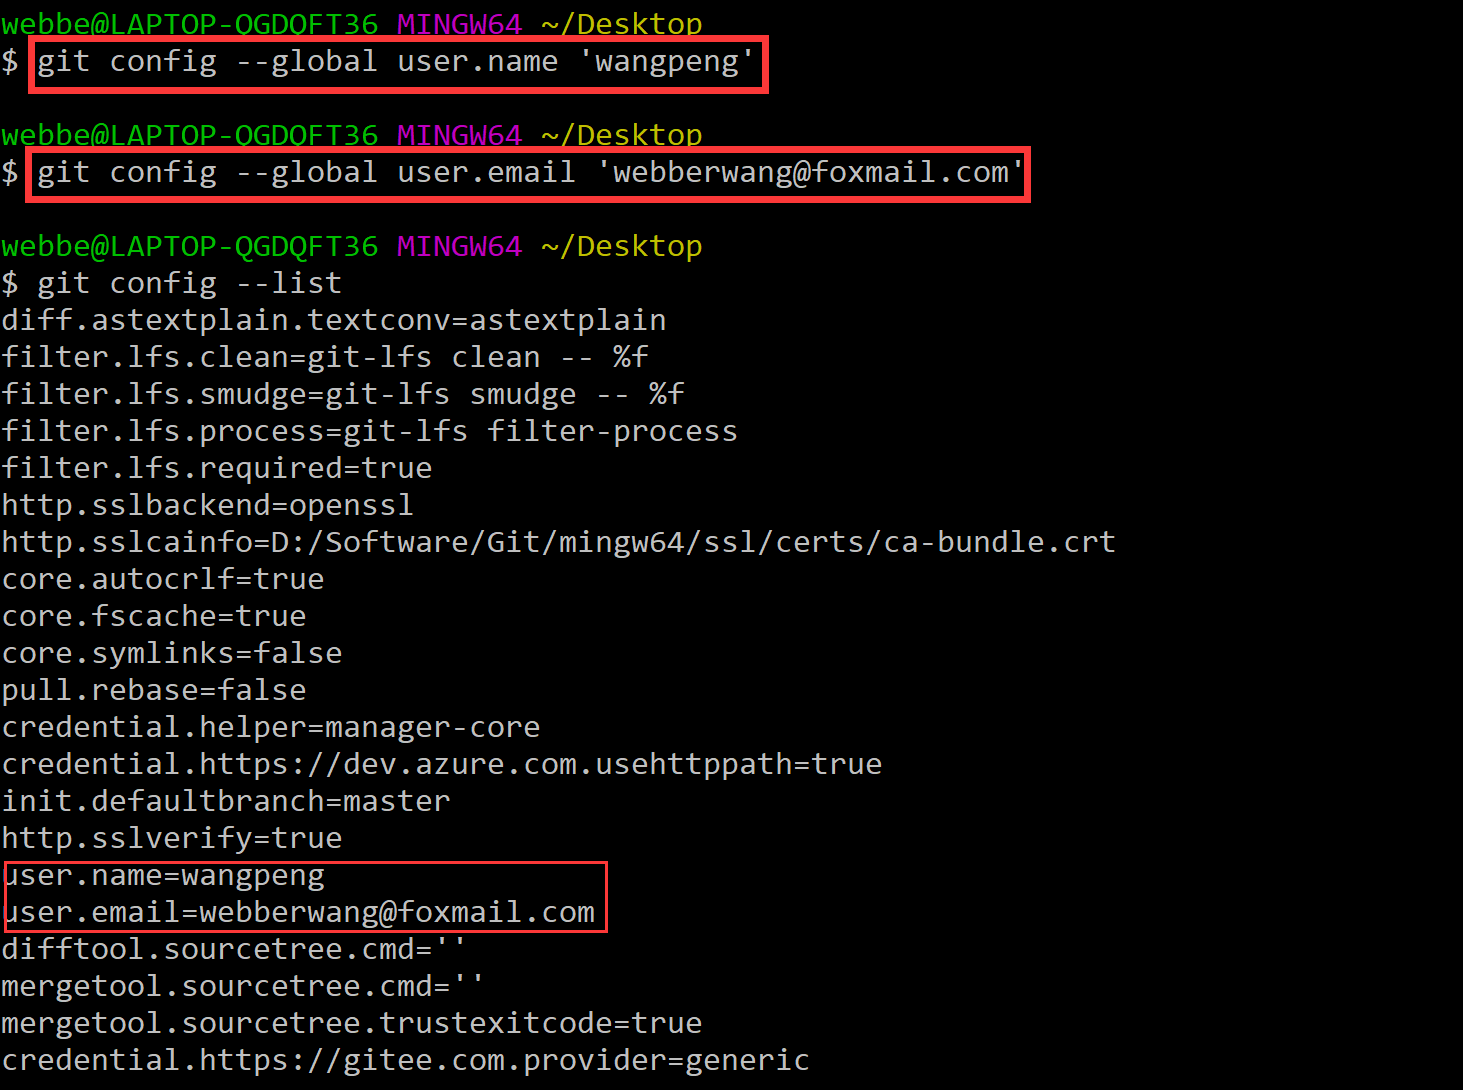
设置用户信息名称和邮箱(设置用户信息,以便知道谁对 github上的项目文件进行了commit 操作)
  git config --global user.name 'wangpeng'
  git config --global user.email 'webberwang@foxmail.com'
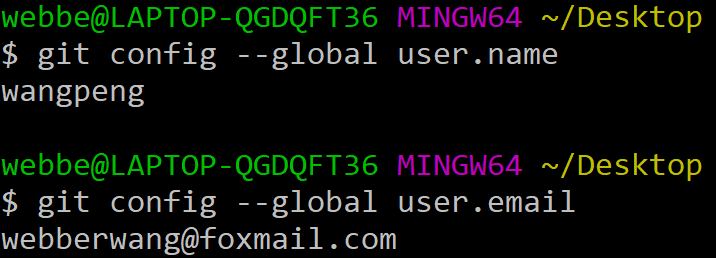
- 查看配置的所有信息
git config --list
- 查看刚刚配置的用户信息
git config --global user.name
git config --global user.email
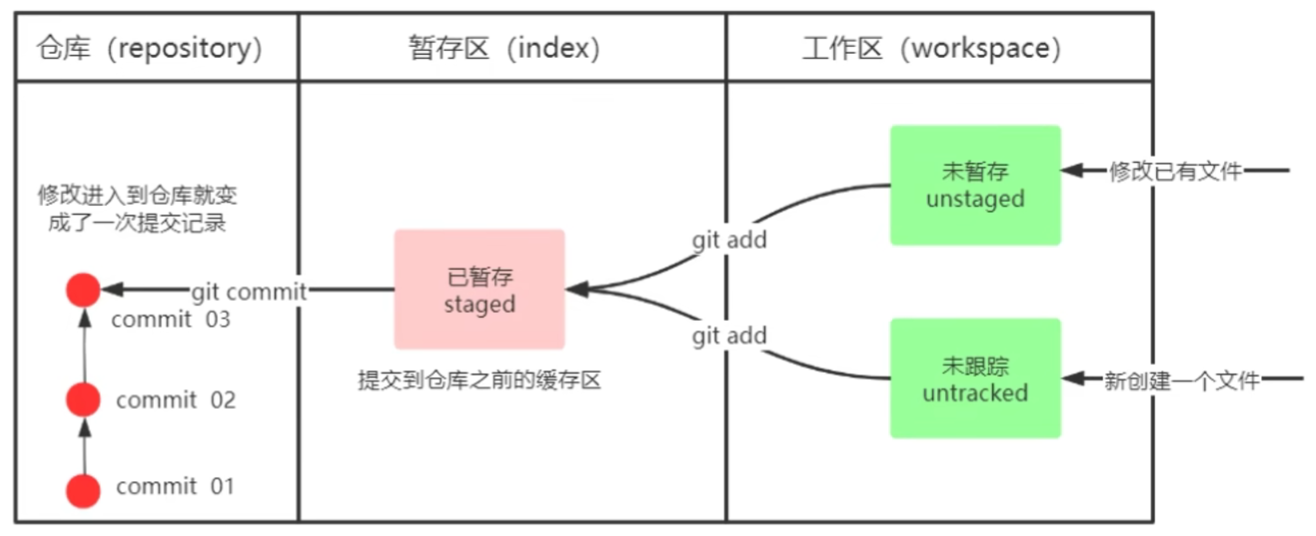
二、git完整流程
三、创建本地仓库
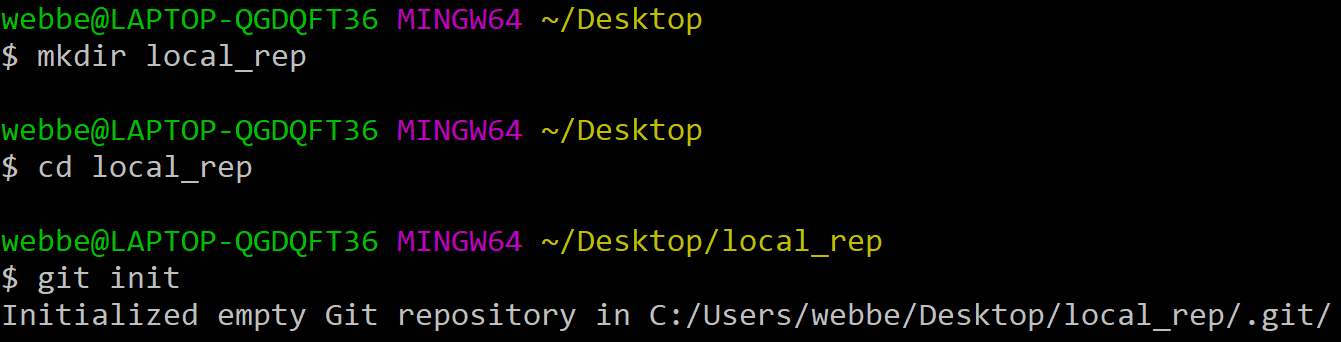
- 创建空目录local_rep,使用指令
mkdir local_rep - 切换目录到local_rep,
cd local_rep - 执行命令
git init来初始化本地仓库 - 此时进入master仓库,执行
ls -al命令可以看到.git文件

四、基础操作指令
4.1 git的add、commit 以及log的使用
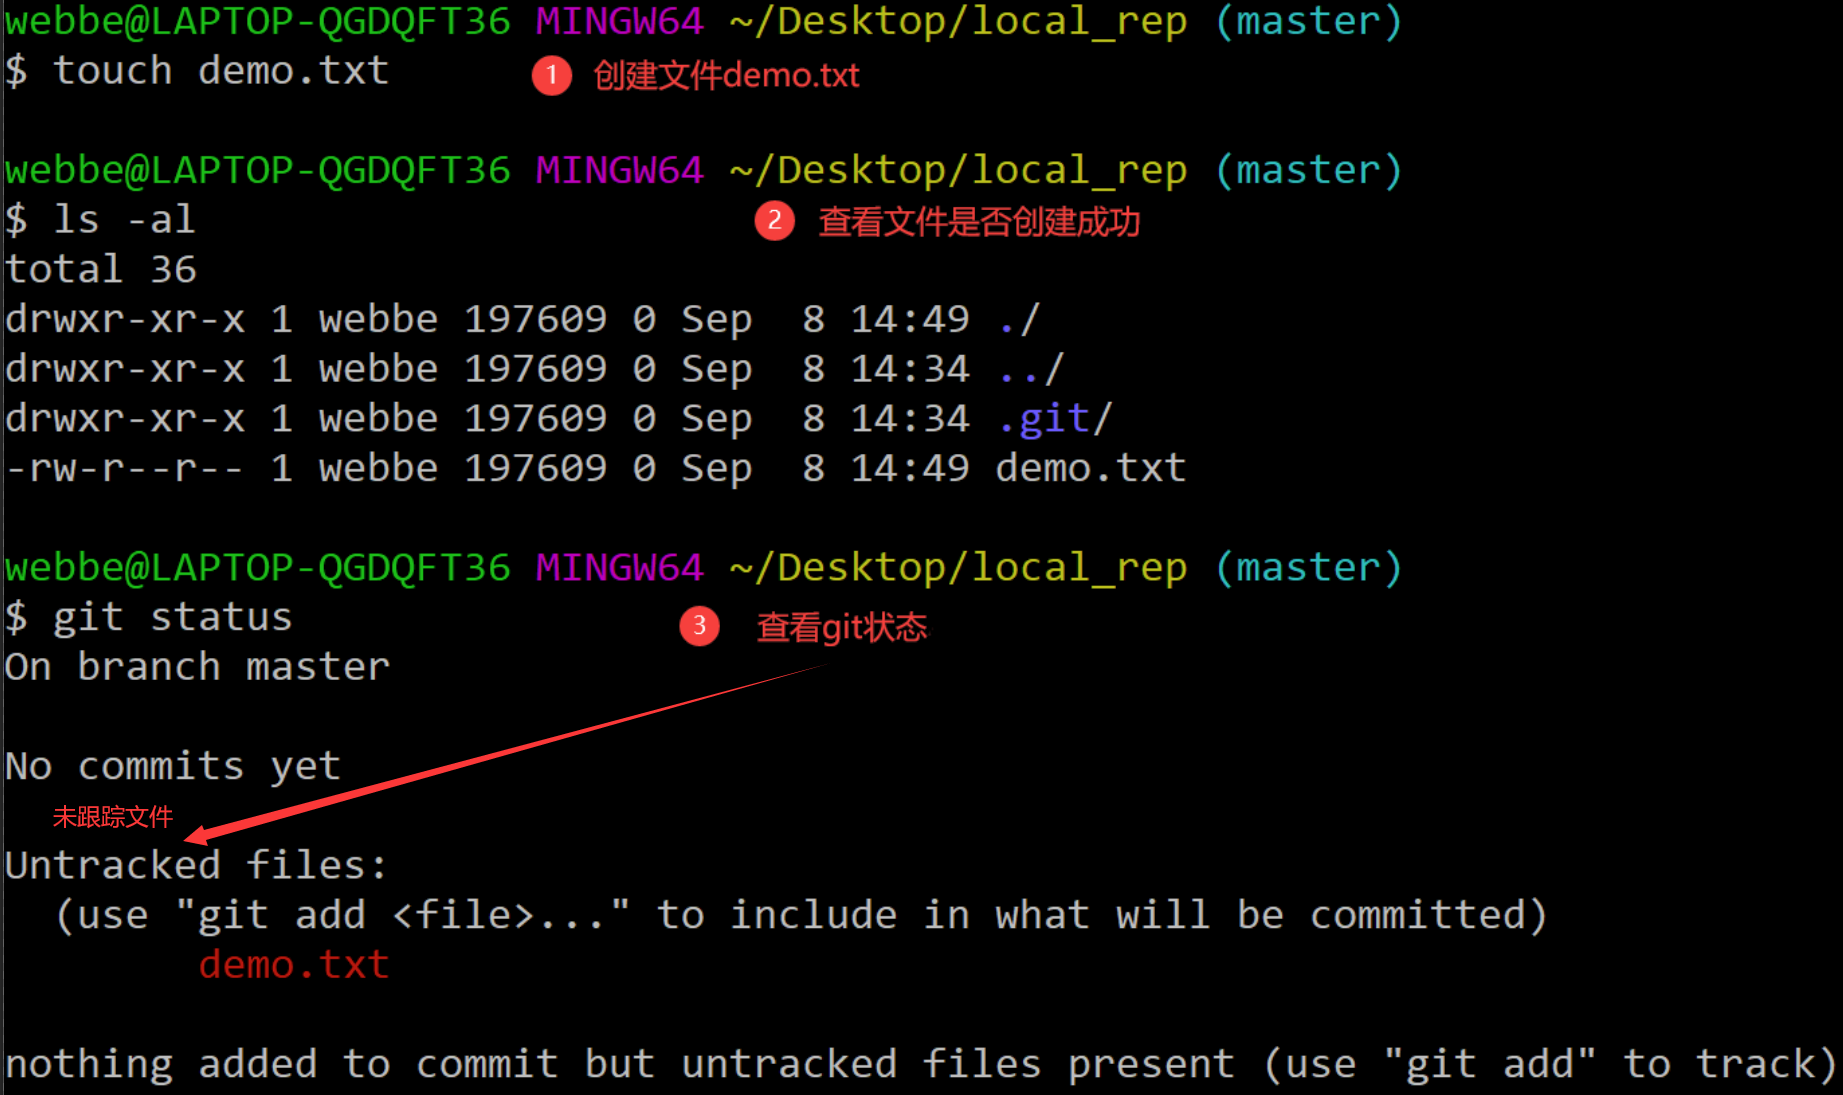
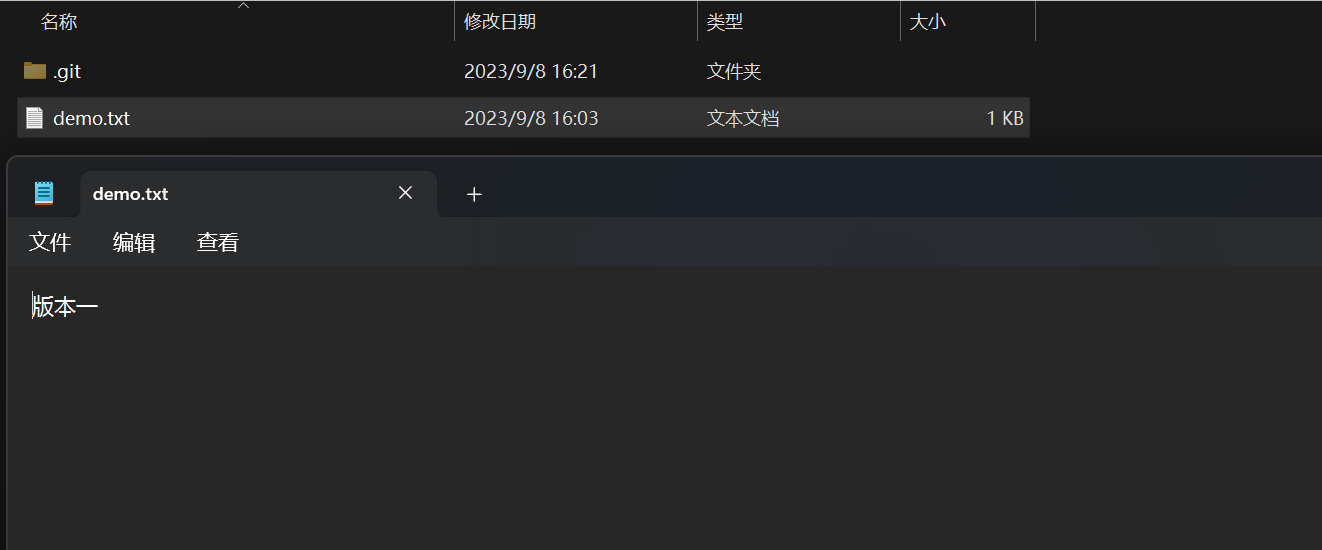
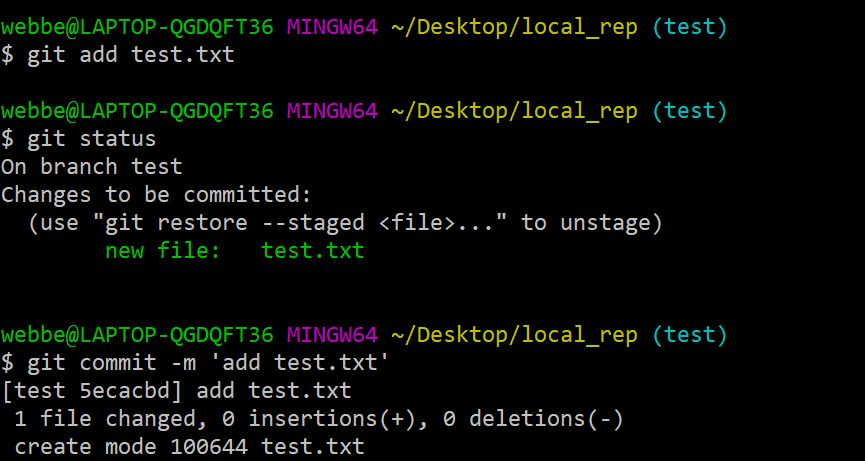
- 新建文件demo.txt 查看git状态 其为未跟踪文件(untracked file)
- 使用
git add demo.txt将文件添加到暂存区

- 使用
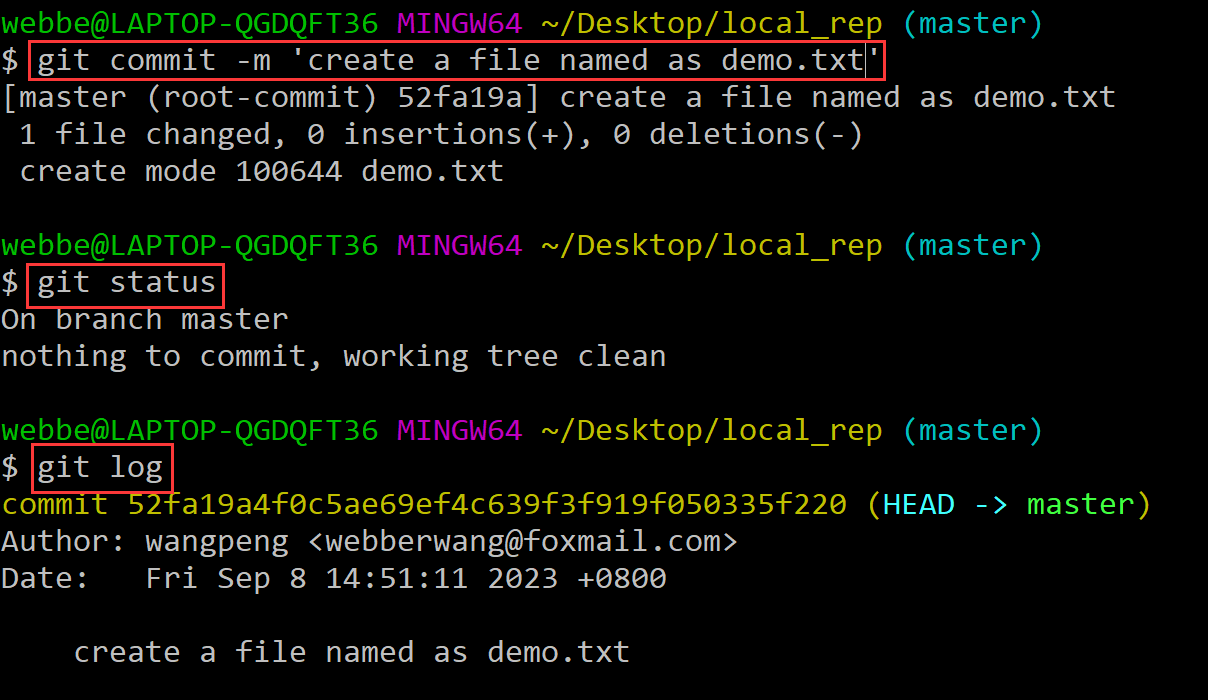
git commit -m 'create a file named as demo.txt'将文件提交到本地仓库
- 使用
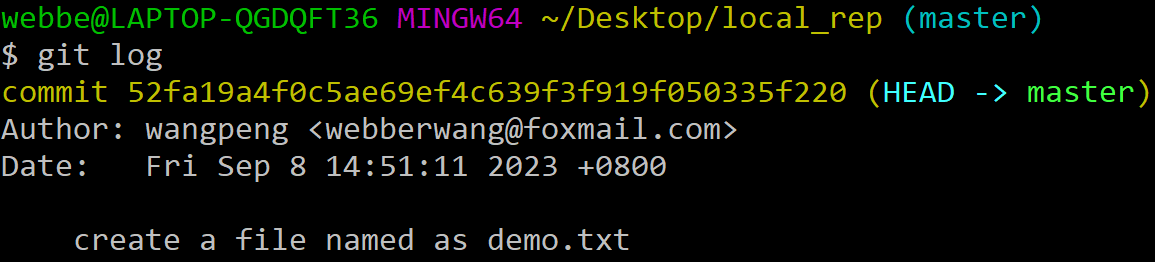
git log输出提交日志
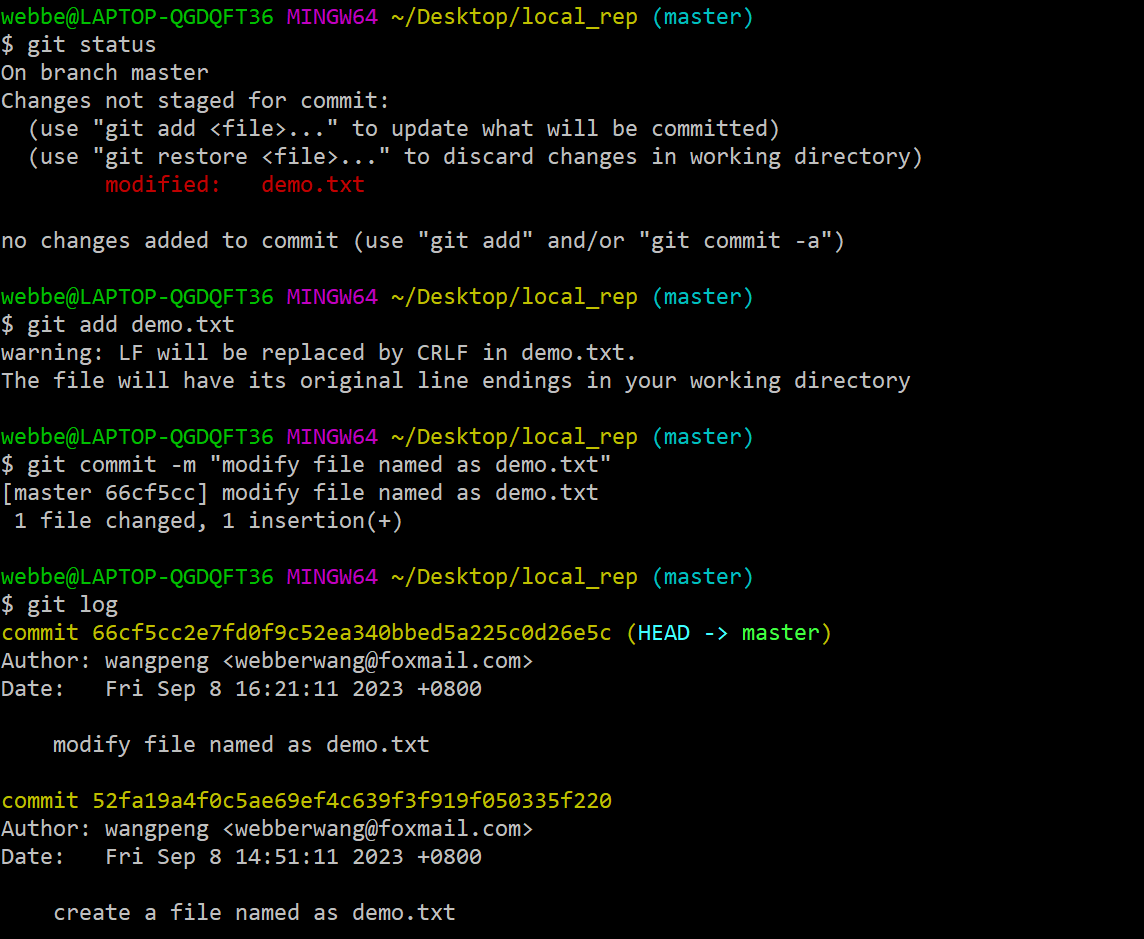
- 修改文件demo.txt 指令为
echo "版本一" > demo.txt

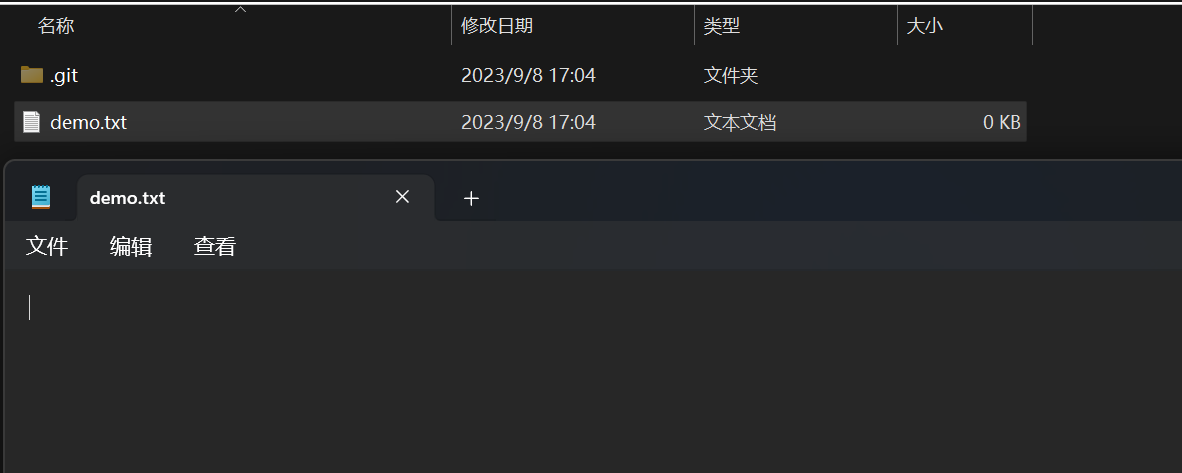
- 继续查看git status 发现目前文件处于 not staged 状态 重新执行 add 以及 commit 操作提交到本地仓库 执行 git log 查看有两条提交日志
-
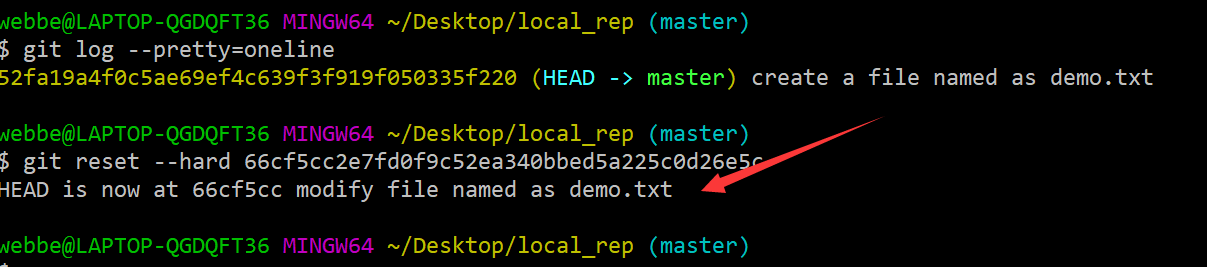
git log 的选项描述
git log --pretty=oneline将提交信息表示为一行

git log --pretty=oneline --abbrev-commit使得commitid更简短

- 当前修改版本回退到创建版本,指令为
git reset --hard commit_id

- 再从创建版本恢复到修改版本
我们可以通过给长命令取别名的方式来简化输入命令难度。
- 在~目录下创建 .bashrc文件

- 通过vim打开 ./bashrc 文件 输入
alias gitlog='git log --pretty=oneline --abbrev-commit --all --graph'

- 执行
source ~/.bashrc命令
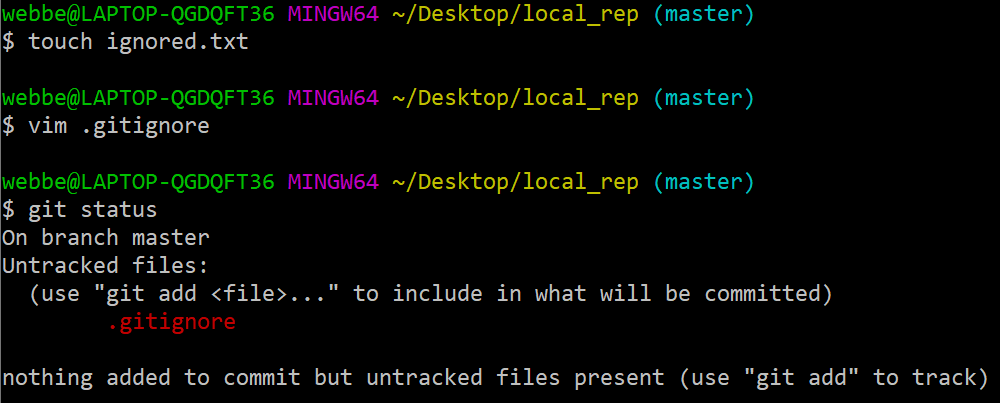
4.4 忽略文件 .gitignore
- 创建文件.gitignore 指令为
touch .gitignore

五、分支
5.1 创建分支
命令:git branch dev
5.2 切换到dev分支
命令:git checkout dev

命令:git checkout -b test

5.4 合并分支(merge)
- 在 test 分支上提交 test.txt 文件

- add、commit 文件
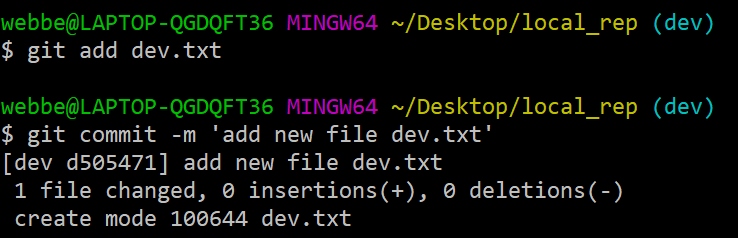
- 在dev分支上进行相同的操作。

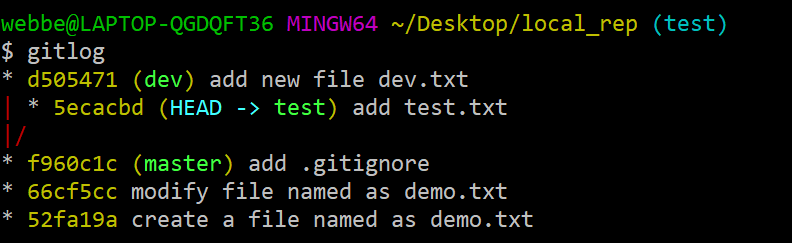
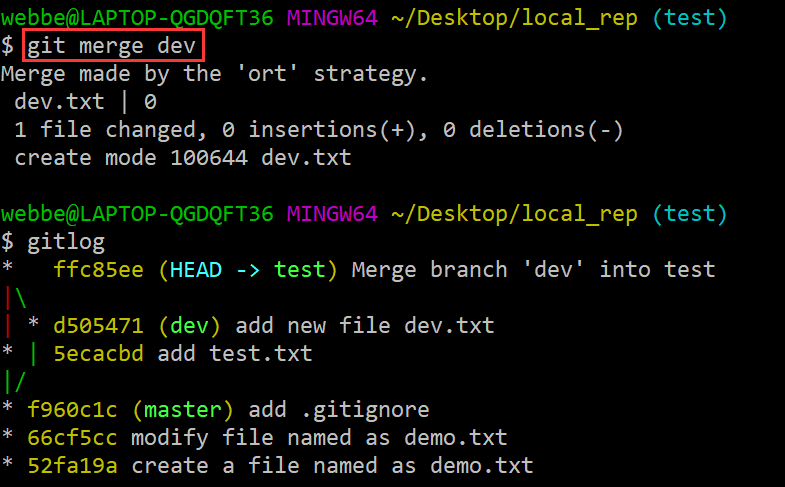
- gitlog一下
- 在test分支上执行 merge操作
git merge dev
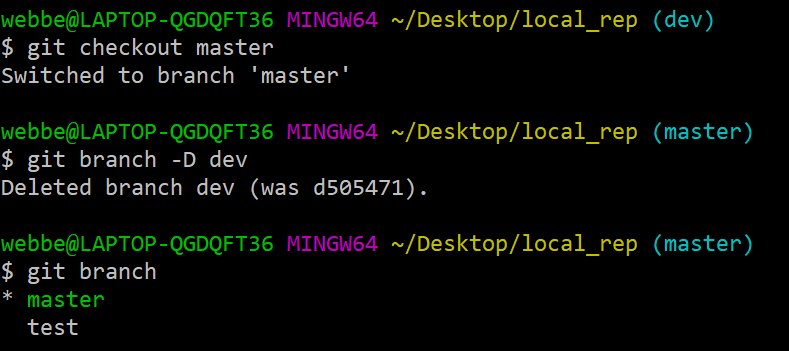
- 删除分支
git branch -D 分支名称
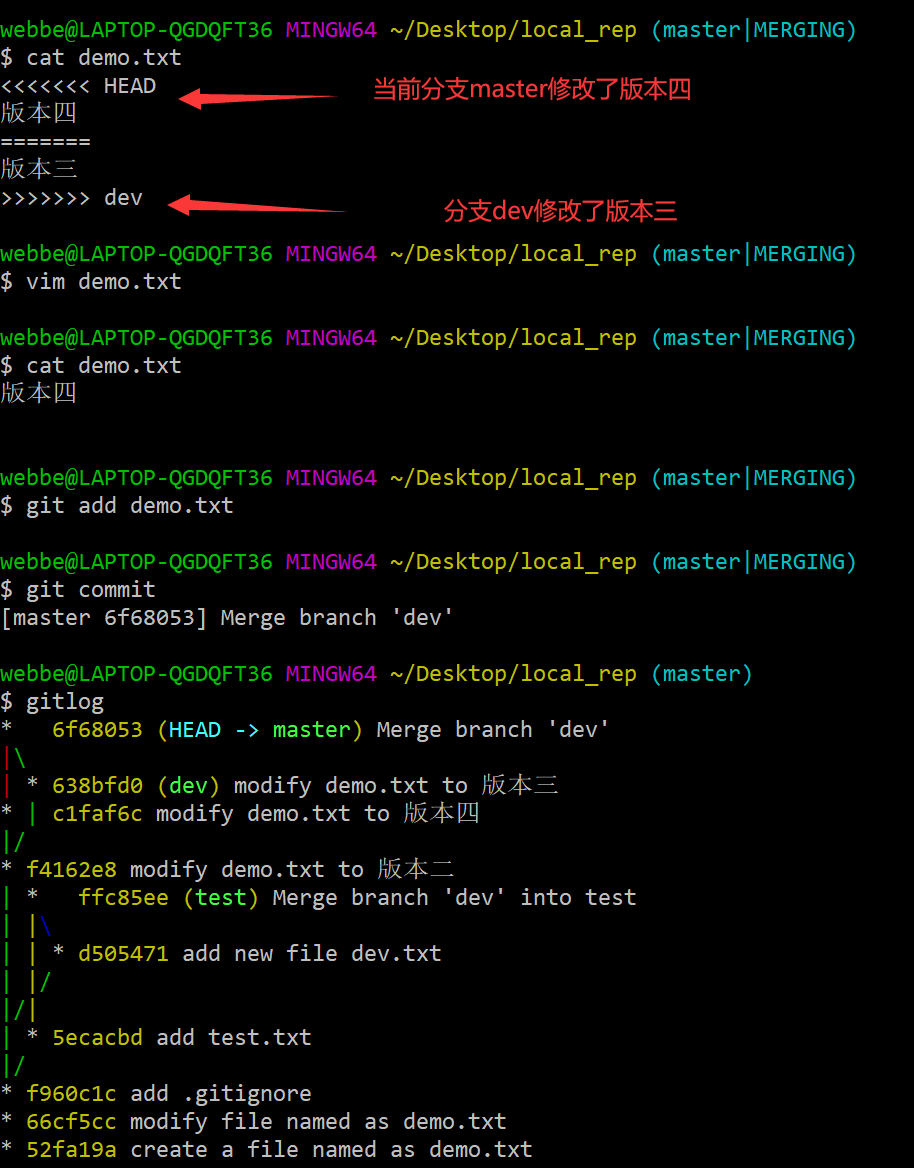
5.5 解决冲突
当两个分支上对文件的修改可能会存在冲突,例如同时修改了同一个文件的同一行,这时就需要手动解决冲突。解决冲突步骤如下:
- 处理文件中冲突的地方
- 将解决完冲突的文件加入到暂存区(add)
- 提交到仓库(commit)
六、本地仓库 > 远程仓库
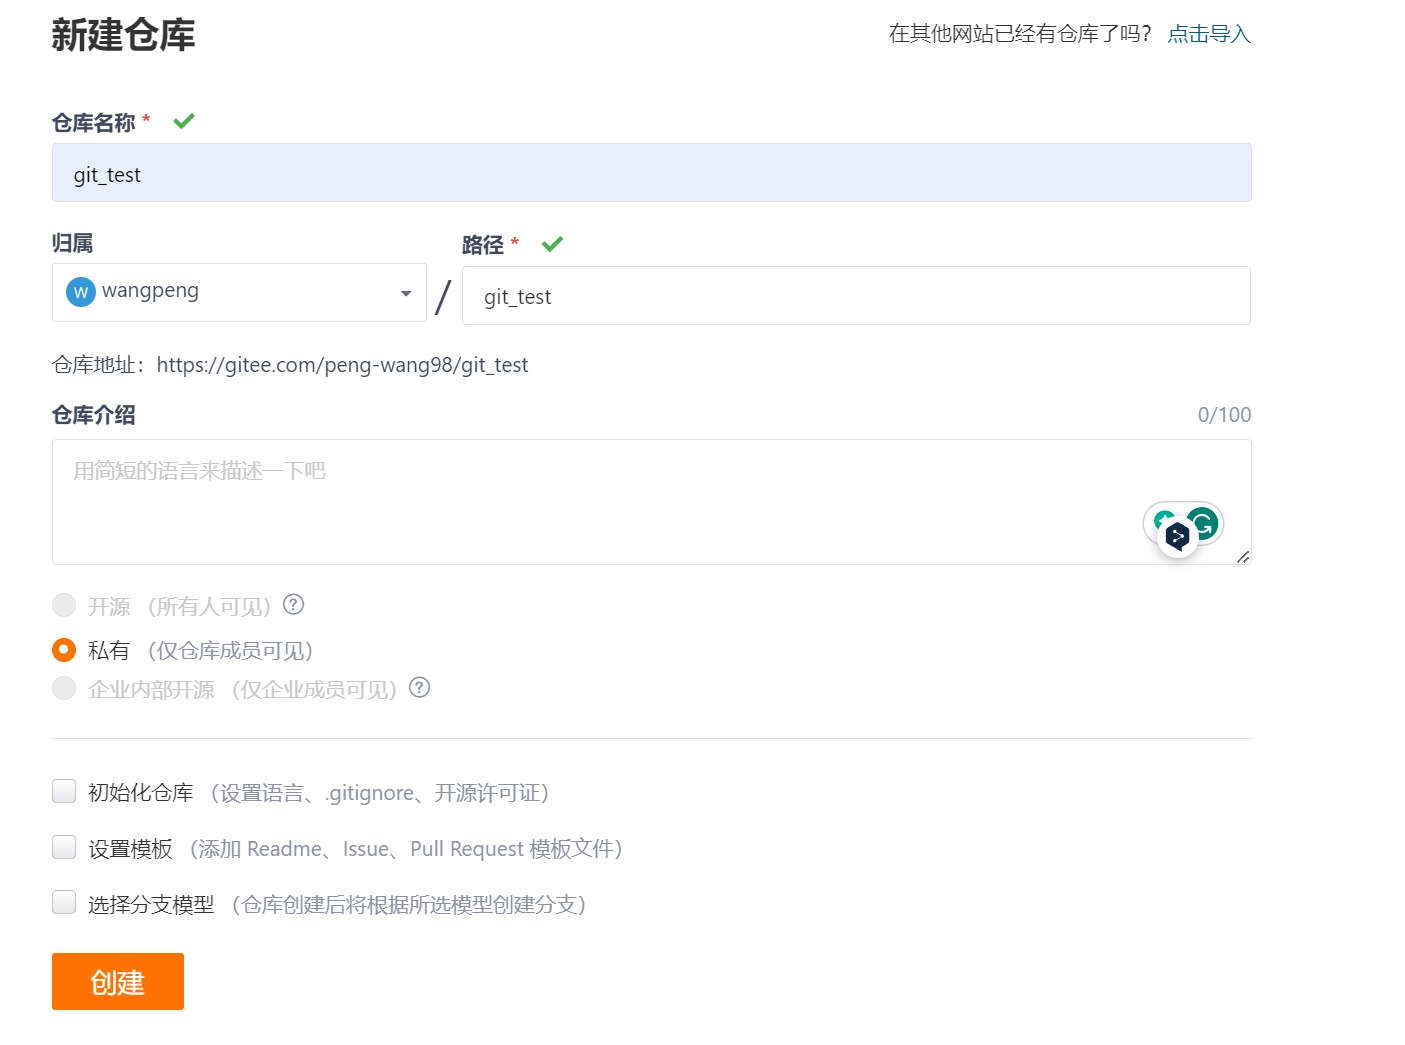
6.1 gitee上新建远程仓库
6.2 配置SSH公钥
- 输入
ssh-keygen -t ed25519 -C "Gitee SSH Key"来生成SSH公钥-t为SSH 密钥类型(算法采用ed25519 )-C为注释

-
Gitee添加生成好的公钥
- 输入
cat gitee_ssh.pub查看内容
- 输入

- 复制该内容粘贴至gitee中
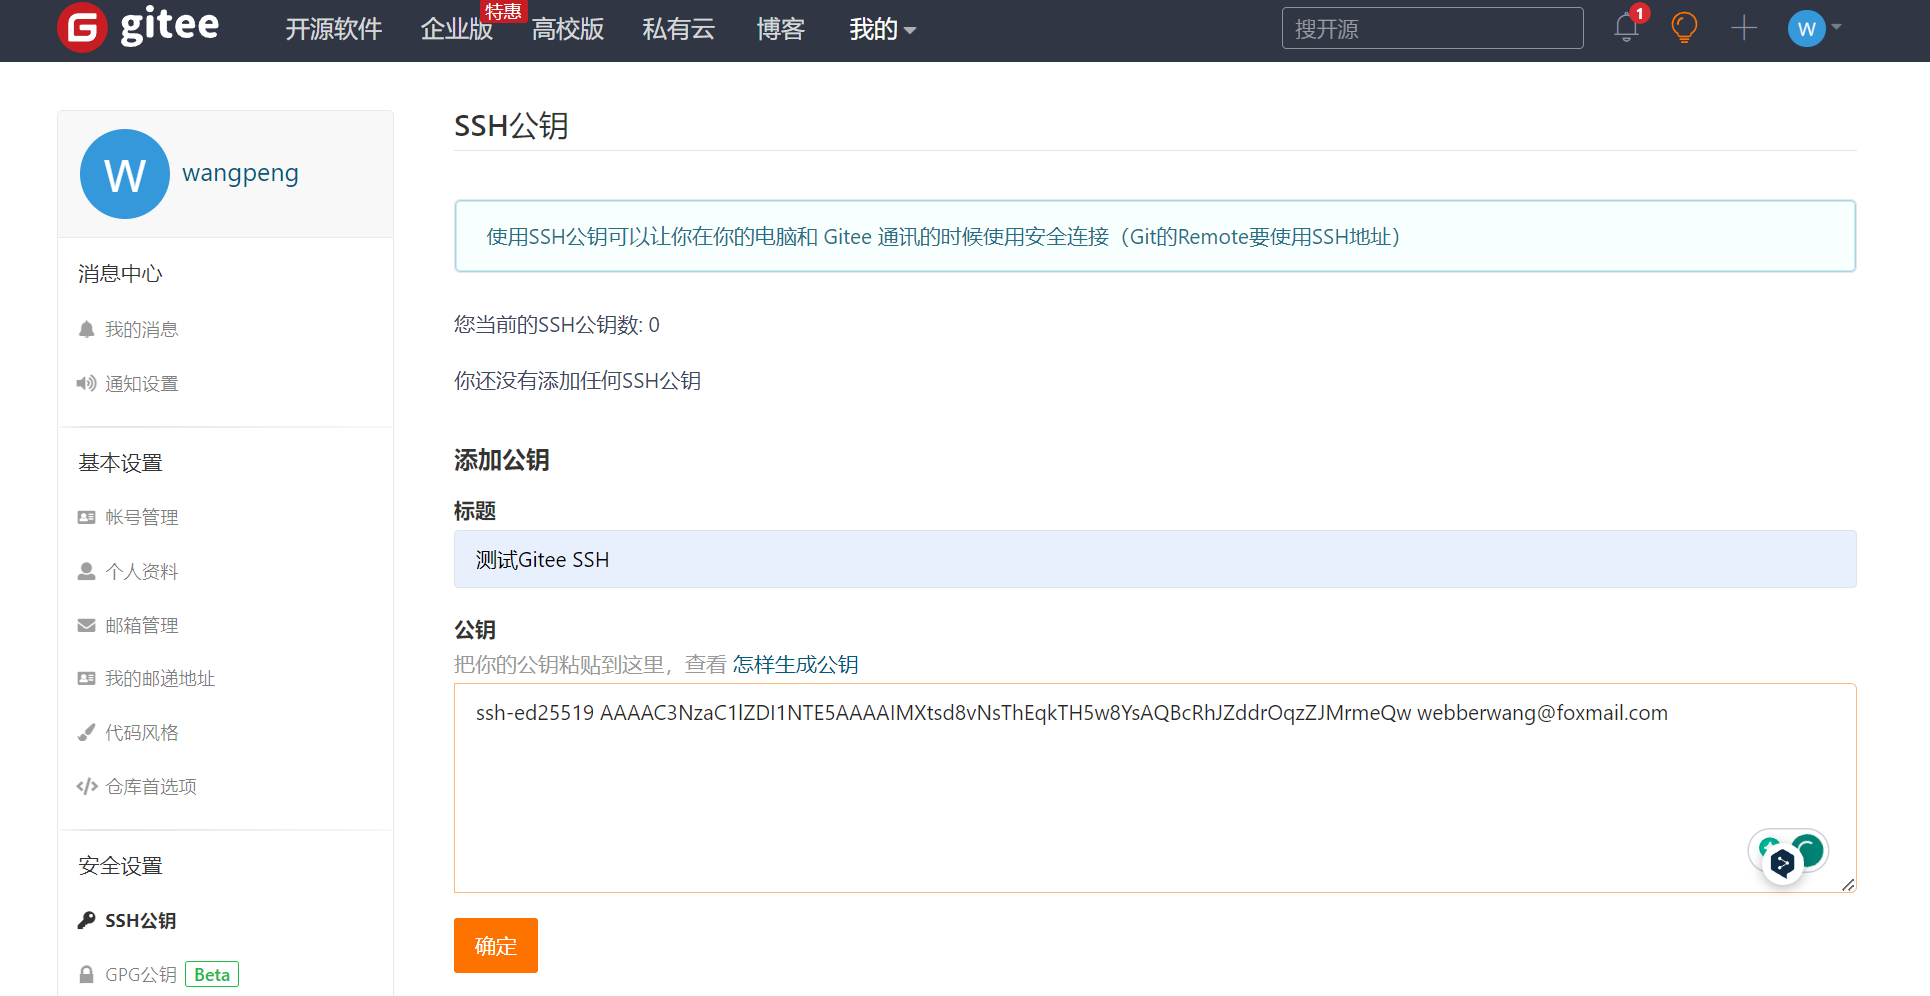
- 验证是否配置成功 输入
ssh -T git@gitee.com

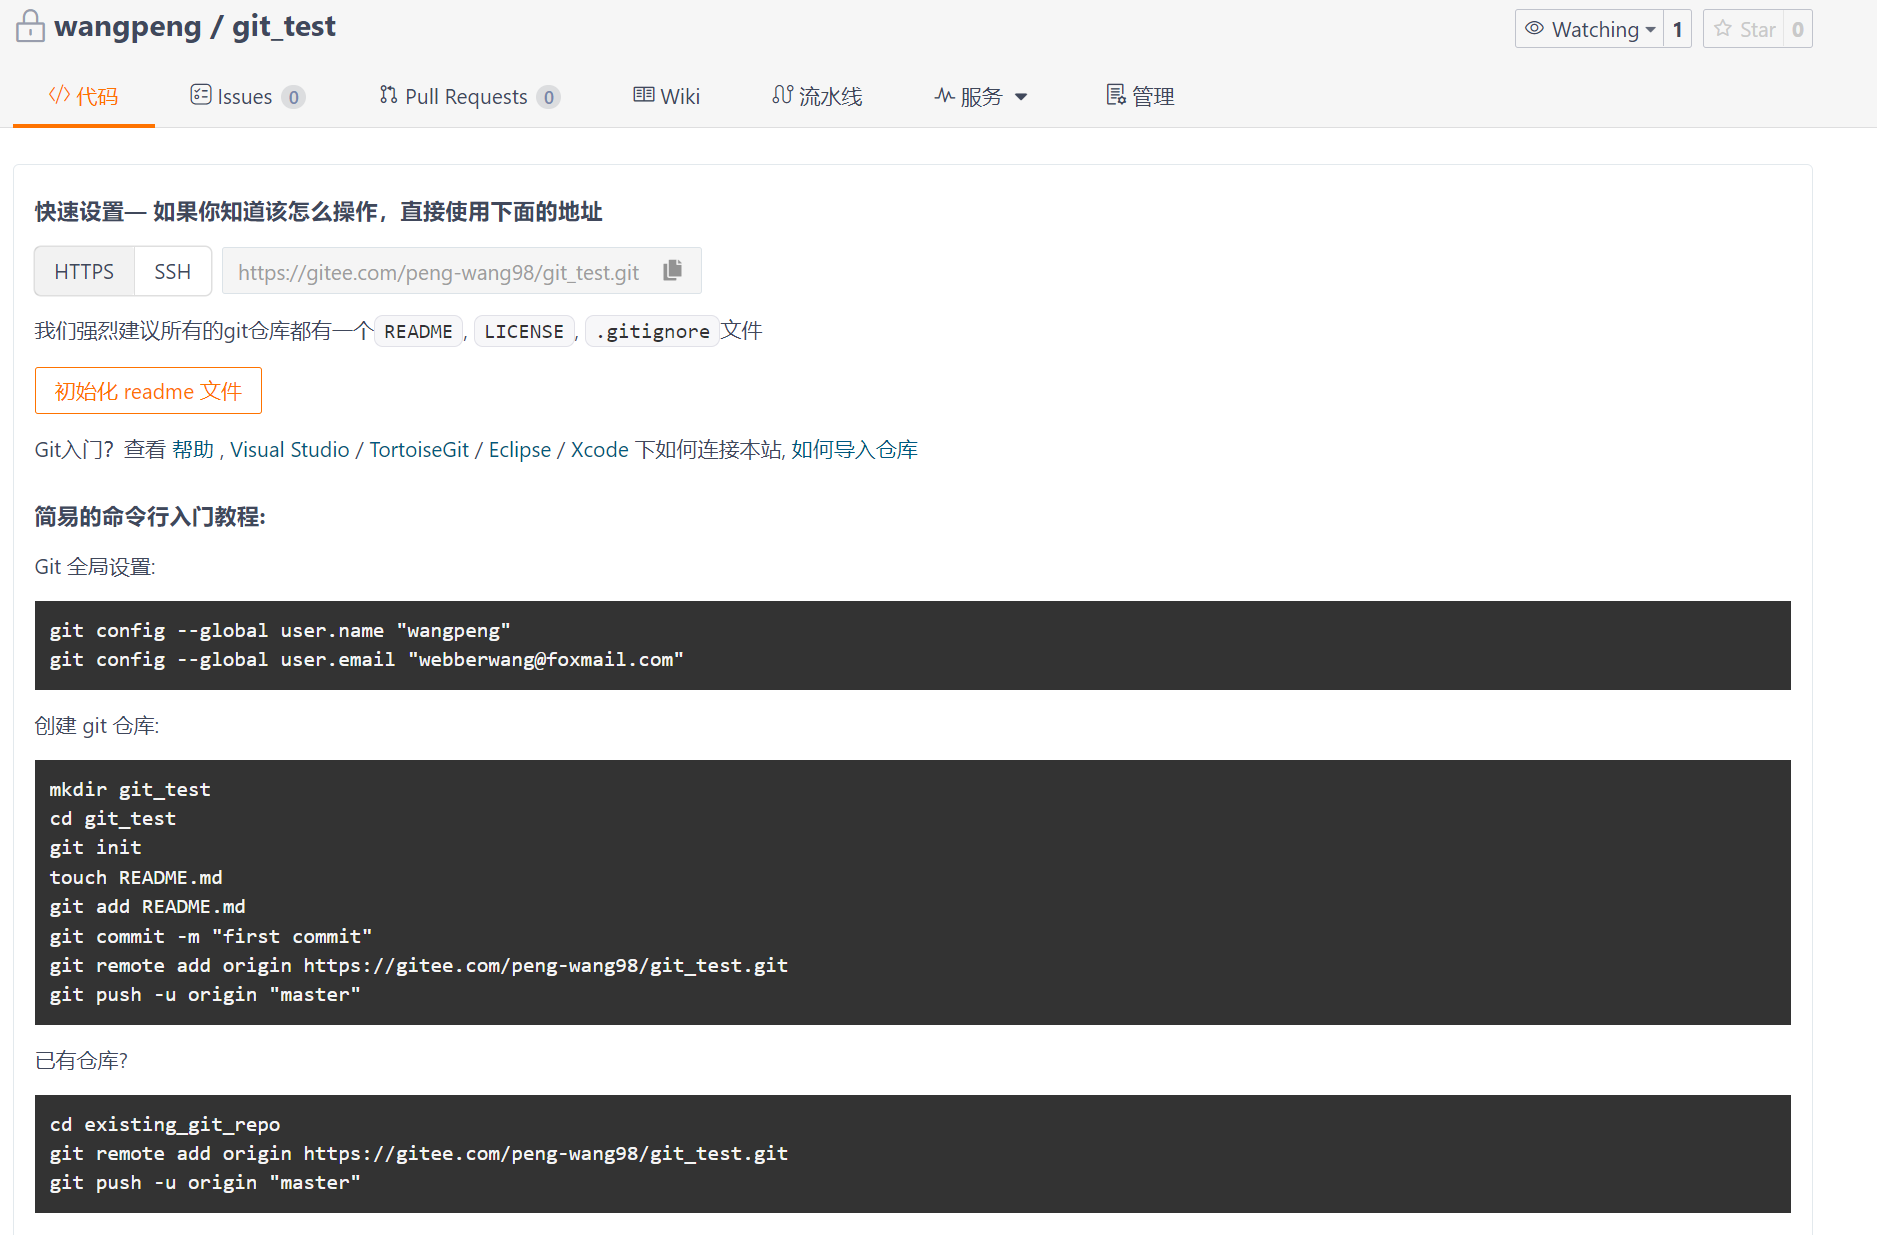
6.3 本地仓库与远程仓库建立连接
指令:
git remote add <远程名称> <仓库路径>远程名称默认为origin
- git remote add origin https://gitee.com/peng-wang98/git_test.git

6.4 查看远程仓库
指令:
git remote

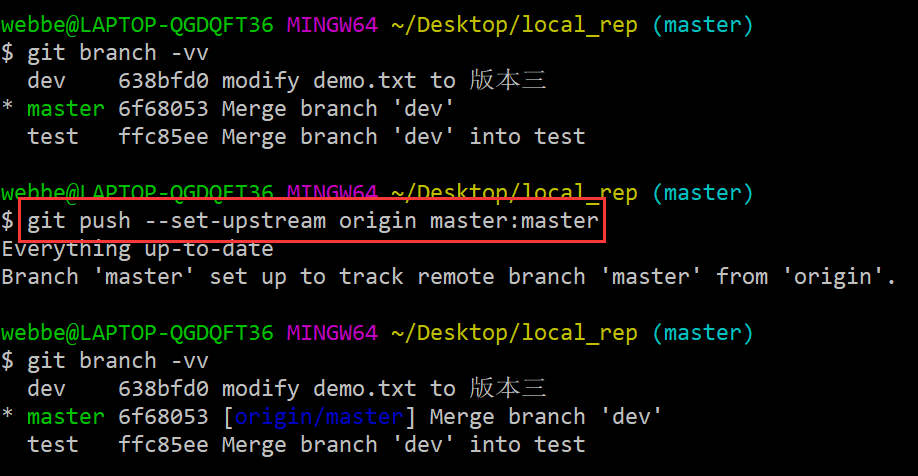
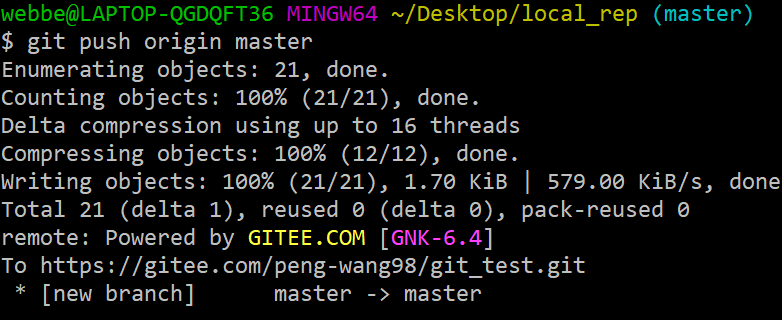
6.5 推送到远程仓库
指令:git push [-f] [--set-upstream] [远端名称] [本地分支名] [:远端分支名]
- 如果远程分支名和本地分支名名称相同(都为master),则可以只写本地分支名 命令为
git push origin master -f表示强制覆盖--set-upstream建立分支联系,如果当前分支已经和远端分支建立了联系,则可以忽略分支名和远端名。直接 git push
七、远程仓库>本地仓库
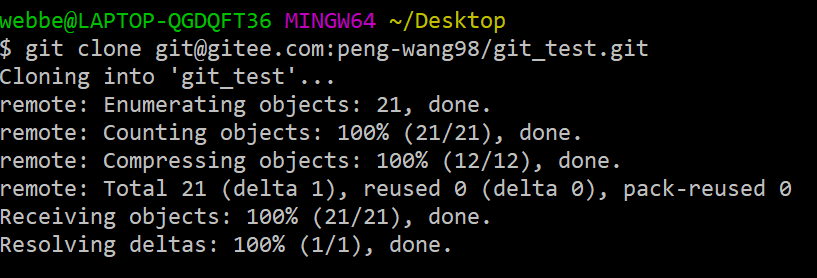
7.1 克隆仓库
我们可以将远程仓库clone到本地。指令:
git clone <仓库路径> <本地目录[可省略]>
7.2 抓取和拉取
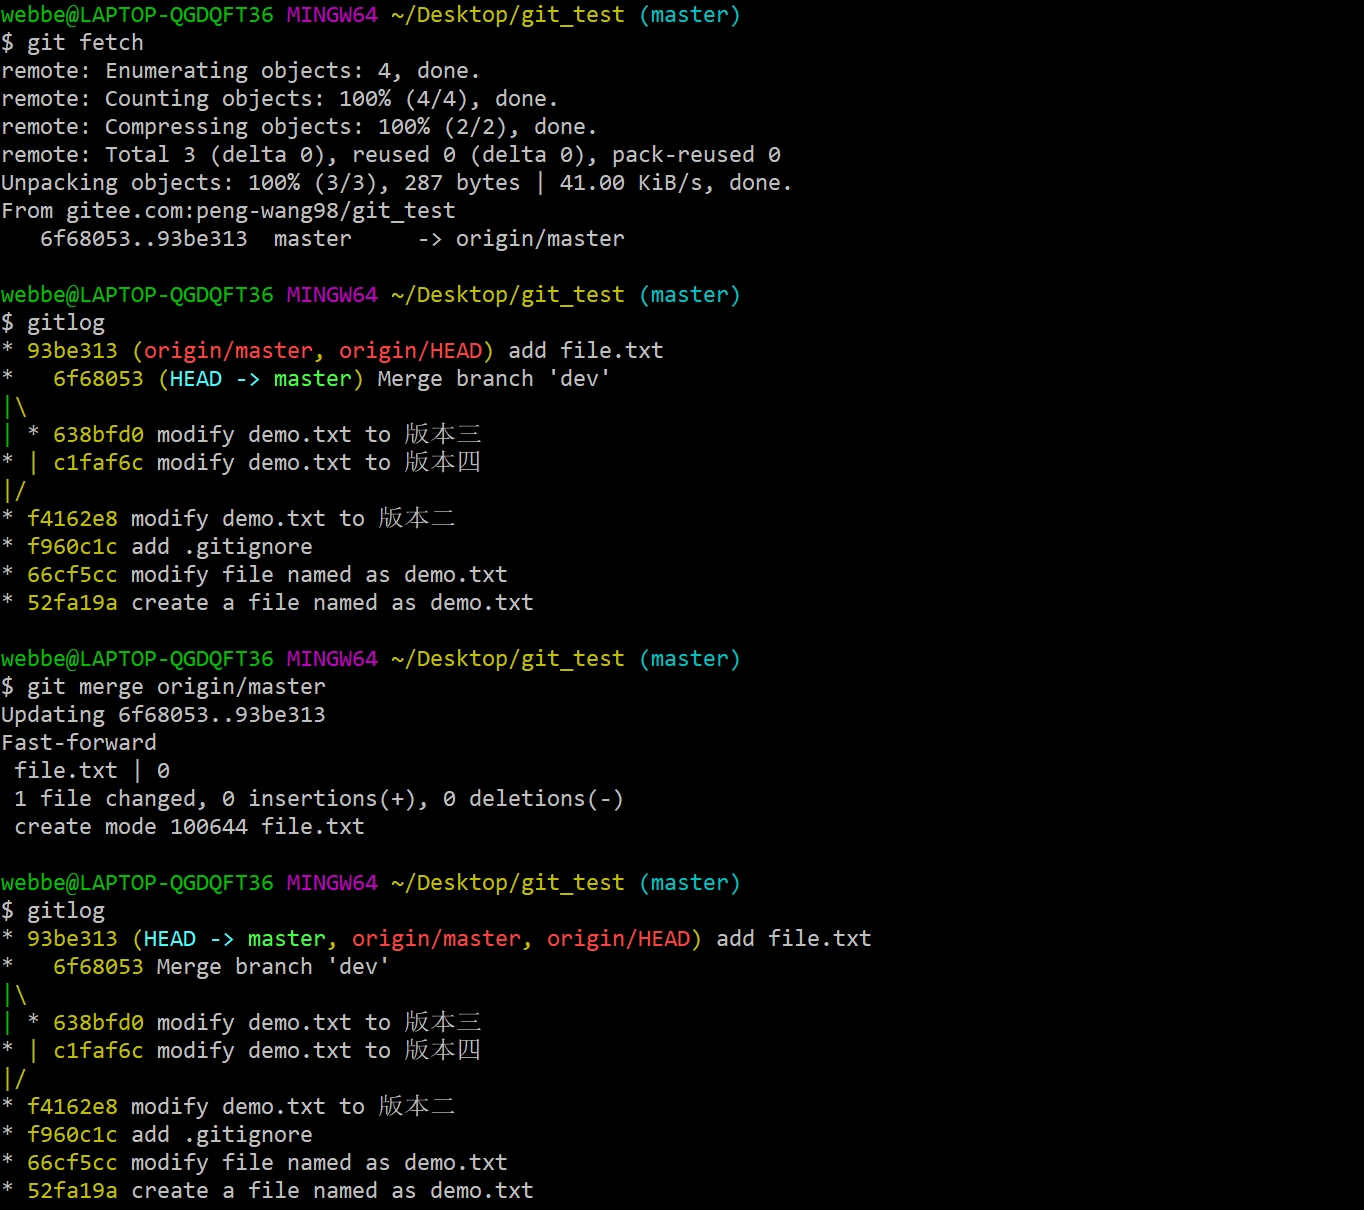
- 抓取命令
git fetch [remote name] [branch name]不会合并
- 拉取命令
git pull [remote name] [branch name]自动合并


 1万+
1万+


 被折叠的 条评论
为什么被折叠?
被折叠的 条评论
为什么被折叠?
 到【灌水乐园】发言


