


1、安装wsl
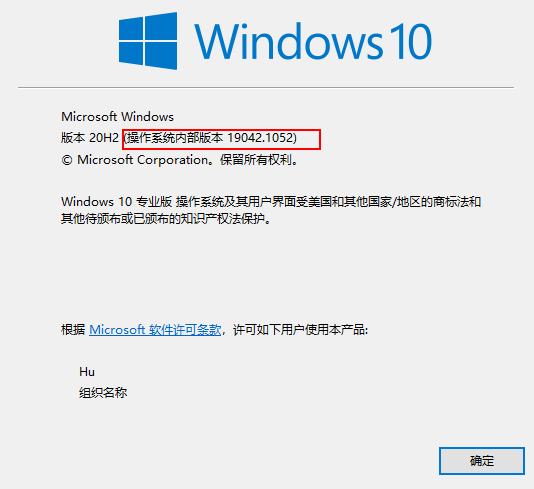
需要windows版本大于
搜索启用或关闭windows功能
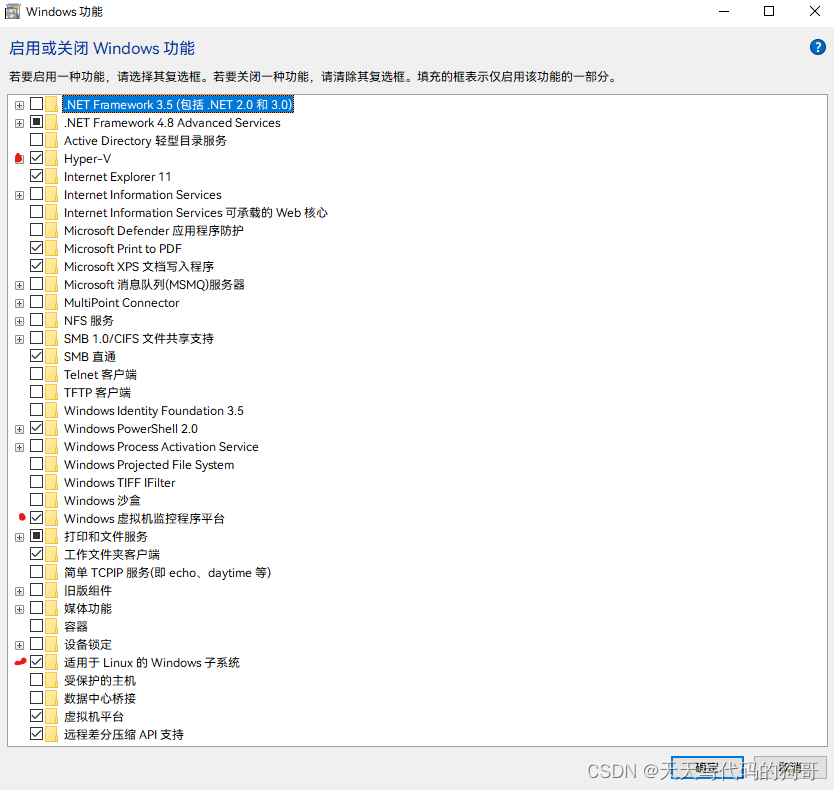
把图片中红点标注的功能勾选,注意勾选hyper-v就不能使用虚拟机类软件,如vm,安卓模拟器一类,点击确定,重启电脑。
打开任务管理器
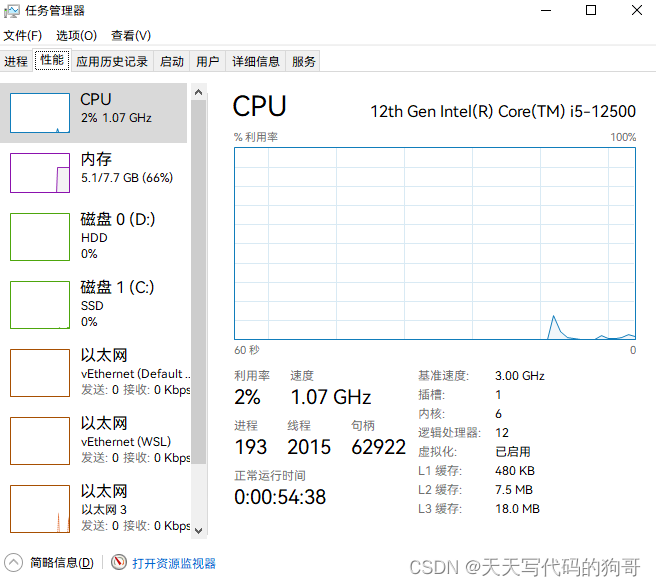
确保虚拟化已经启用,部分设备可能需要去bios设置,自行查阅下相关资料
下载64位wsl2内核升级包 https%3A//wslstorestorage.blob.core.windows.net/wslblob/wsl_update_x64.msi
安装后,设置默认wsl版本
wsl --set-default-version 2安装linux系统
方法一:可以从微软商店搜索安装,有概率会失败
方法二: 翻到页面最下方,下载你需要的版本 旧版 WSL 的手动安装步骤 | Microsoft Learn在旧版 Windows 上手动(而不是使用 wsl 安装命令)安装 WSL 的分步说明。![]() https://docs.microsoft.com/zh-cn/windows/wsl/install-manual给下载到的文件添加一个.zip后缀,用解压缩软件解压到你想安装的地方
https://docs.microsoft.com/zh-cn/windows/wsl/install-manual给下载到的文件添加一个.zip后缀,用解压缩软件解压到你想安装的地方
点击里面的ubnutu.exe文件,等待一会就会安装成功
去cmd中输入 wsl -l -v 查看安装的子系统版本
2、安装完成后的设置:
安装完成后会设置自己的用户名,密码(注意不是root账户)
设置root密码
sudo passwd切换root用户测试
su root每次切换root用户很麻烦,可以用powershell执行下面这条命令,默认root用户登录,其中参数自己替换下
C:\Users\用户名\AppData\Local\Microsoft\WindowsApps\ubuntu版本.exe config --default-user root开启ssh服务
首先确保是root用户
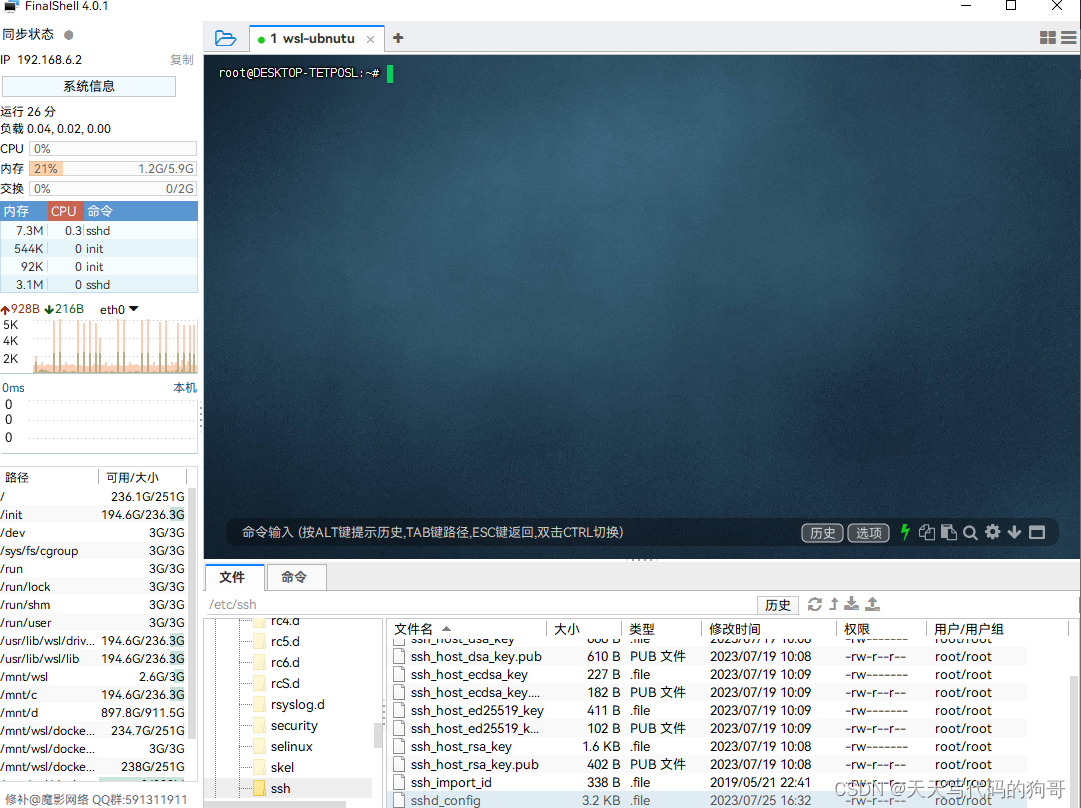
vi /etc/ssh/sshd_config
进入之后,修改如下配置,可以直接复制我的,(我修改的项加了注释)
#	$OpenBSD: sshd_config,v 1.101 2017/03/14 07:19:07 djm Exp $

# This is the sshd server system-wide configuration file.  See
# sshd_config(5) for more information.

# This sshd was compiled with PATH=/usr/bin:/bin:/usr/sbin:/sbin

# The strategy used for options in the default sshd_config shipped with
# OpenSSH is to specify options with their default value where
# possible, but leave them commented.  Uncommented options override the
# default value.

Port 22   #22端口,ssh服务默认端口
#AddressFamily any
ListenAddress 0.0.0.0  #所有ip都可以联通
#ListenAddress ::

#HostKey /etc/ssh/ssh_host_rsa_key
#HostKey /etc/ssh/ssh_host_ecdsa_key
#HostKey /etc/ssh/ssh_host_ed25519_key

# Ciphers and keying
#RekeyLimit default none

# Logging
#SyslogFacility AUTH
#LogLevel INFO

# Authentication:

#LoginGraceTime 2m
#PermitRootLogin prohibit-password
#StrictModes yes
#MaxAuthTries 6
#MaxSessions 10
PermitRootLogin yes  #把上面那行相同的注释掉,新加一行,允许root账户登录

#PubkeyAuthentication yes

# Expect .ssh/authorized_keys2 to be disregarded by default in future.
#AuthorizedKeysFile	.ssh/authorized_keys .ssh/authorized_keys2

#AuthorizedPrincipalsFile none

#AuthorizedKeysCommand none
#AuthorizedKeysCommandUser nobody

# For this to work you will also need host keys in /etc/ssh/ssh_known_hosts
#HostbasedAuthentication no
# Change to yes if you don't trust ~/.ssh/known_hosts for
# HostbasedAuthentication
#IgnoreUserKnownHosts no
# Don't read the user's ~/.rhosts and ~/.shosts files
#IgnoreRhosts yes

# To disable tunneled clear text passwords, change to no here!
PasswordAuthentication yes #允许使用密码登录
#PermitEmptyPasswords no

# Change to yes to enable challenge-response passwords (beware issues with
# some PAM modules and threads)
ChallengeResponseAuthentication no

# Kerberos options
#KerberosAuthentication no
#KerberosOrLocalPasswd yes
#KerberosTicketCleanup yes
#KerberosGetAFSToken no

# GSSAPI options
#GSSAPIAuthentication no
#GSSAPICleanupCredentials yes
#GSSAPIStrictAcceptorCheck yes
#GSSAPIKeyExchange no

# Set this to 'yes' to enable PAM authentication, account processing,
# and session processing. If this is enabled, PAM authentication will
# be allowed through the ChallengeResponseAuthentication and
# PasswordAuthentication.  Depending on your PAM configuration,
# PAM authentication via ChallengeResponseAuthentication may bypass
# the setting of "PermitRootLogin without-password".
# If you just want the PAM account and session checks to run without
# PAM authentication, then enable this but set PasswordAuthentication
# and ChallengeResponseAuthentication to 'no'.
UsePAM yes

#AllowAgentForwarding yes
#AllowTcpForwarding yes
#GatewayPorts no
X11Forwarding yes
#X11DisplayOffset 10
#X11UseLocalhost yes
#PermitTTY yes
PrintMotd no
#PrintLastLog yes
#TCPKeepAlive yes
#UseLogin no
#PermitUserEnvironment no
#Compression delayed
#ClientAliveInterval 0
#ClientAliveCountMax 3
#UseDNS no
#PidFile /var/run/sshd.pid
#MaxStartups 10:30:100
#PermitTunnel no
#ChrootDirectory none
#VersionAddendum none

# no default banner path
#Banner none

# Allow client to pass locale environment variables
AcceptEnv LANG LC_*

# override default of no subsystems
Subsystem	sftp	/usr/lib/openssh/sftp-server

# Example of overriding settings on a per-user basis
#Match User anoncvs
#	X11Forwarding no
#	AllowTcpForwarding no
#	PermitTTY no
#	ForceCommand cvs server
重启ssh项目
sudo service ssh restart使用ssh工具测试链接
成功
3、windows下docker-desktop的安装
官网下载docker-desktop的安装包,一定要确保第一步开启的windows功能都开启了
Download Docker Desktop | Docker
正常软件安装流程
进入软件,点击小齿轮进入设置
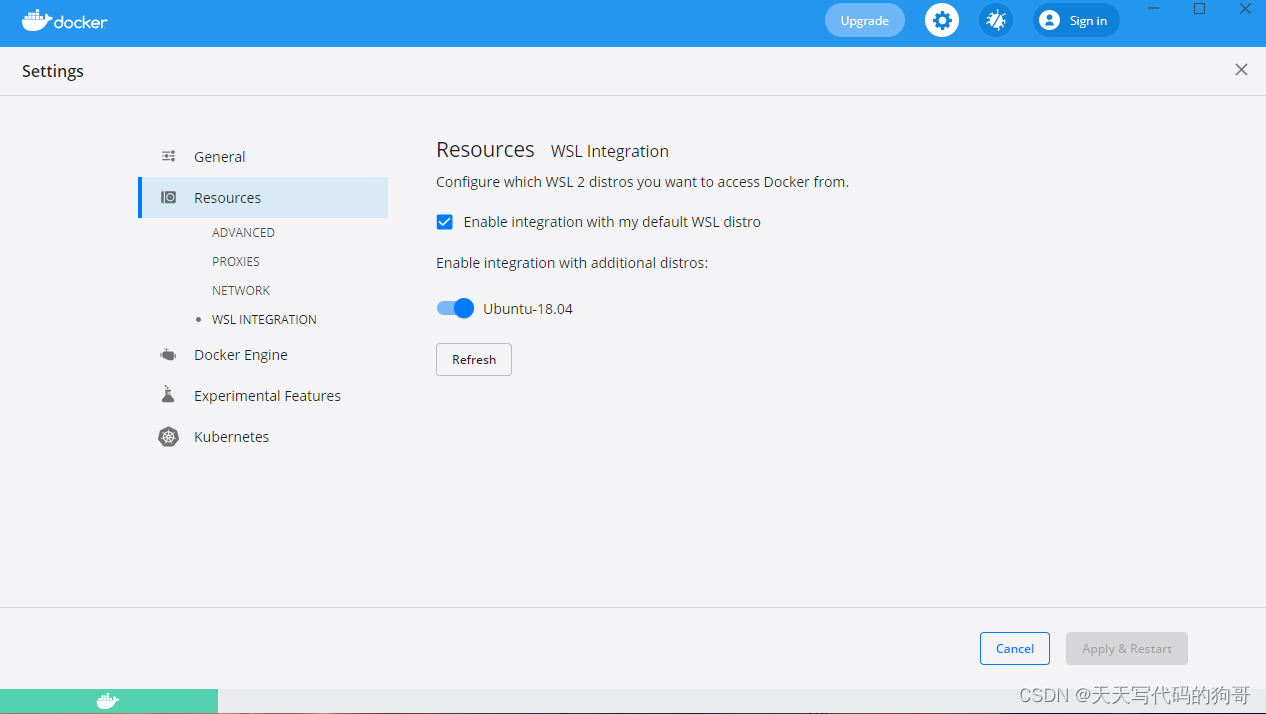
勾选你安装的ubnutu
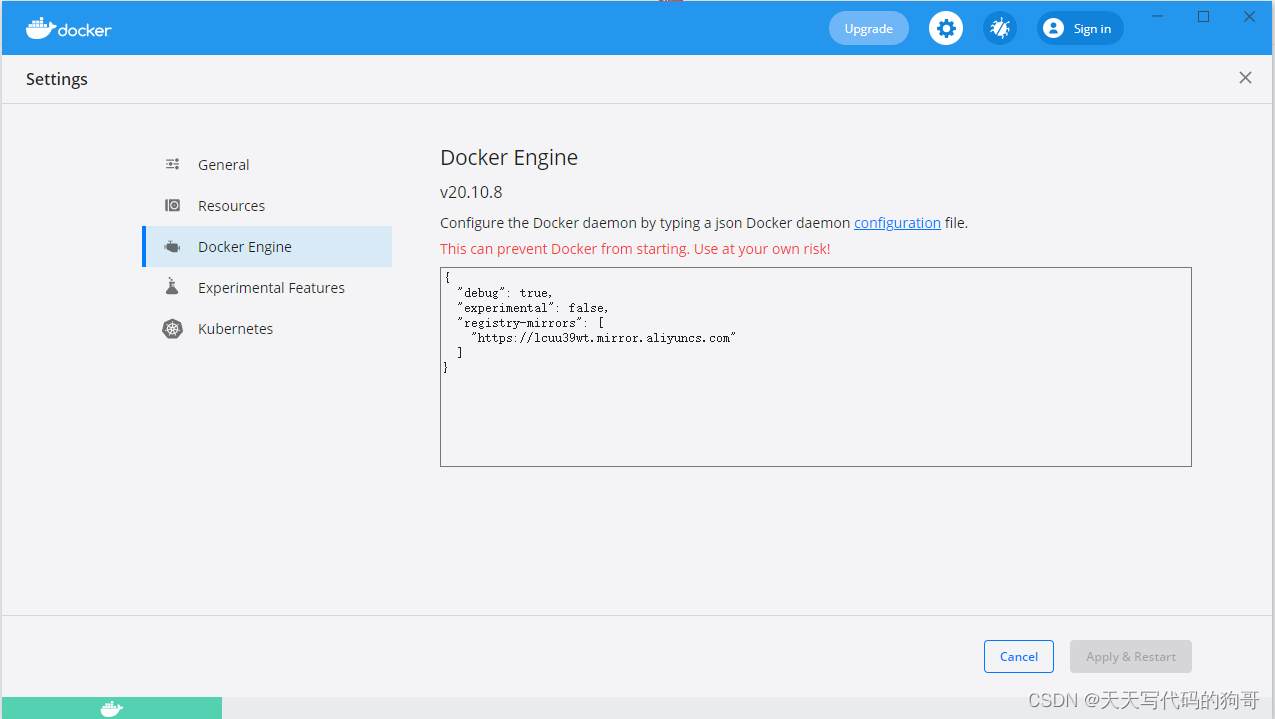
更改镜像仓库地址,我使用的阿里云,网上也有好多,比如中科大等
{
  "debug": true,
  "experimental": false,
  "registry-mirrors": [
    "https://lcuu39wt.mirror.aliyuncs.com"
  ]
}
resource中可以更改docker镜像位置,推荐更改,不然c盘会占用很高
设置完之后,打开终端,输入docker ps
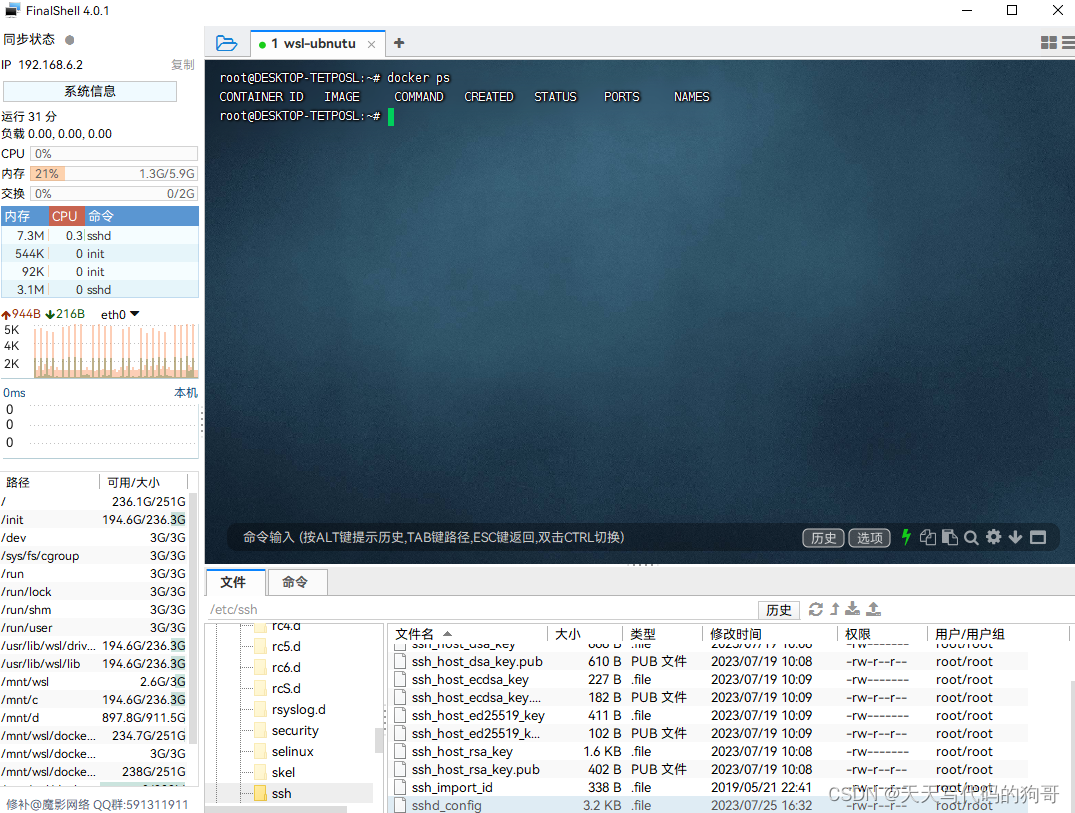
就会发现docker和你的linux子系统已经连接起来了
4、配置wsl2新特性,一定要开,否则会出现内存泄漏,爆内存的情况
C:\Users\电脑用户名文件夹下新建一个.wslconfig文件
# Settings apply across all Linux distros running on WSL 2
[wsl2]
autoProxy=false  # 是否强制 WSL2/WSLg 子系统使用 Windows 代理设置(请根据实际需要启用)
dnsTunneling=true           # WSL2/WSLg DNS 代理隧道,以便由 Windows 代理转发 DNS 请求(请根据实际需要启用)
firewall=true               # WSL2/WSLg 子系统的 Windows 防火墙集成,以便 Hyper-V 或者 WPF 能过滤子系统流量(请根据实际需要启用)
guiApplications=true        # 启用 WSLg GUI 图形化程序支持
ipv6=true                   # 启用 IPv6 网络支持
localhostForwarding=true    # 启用 localhost 网络转发支持
memory=12GB                 # 限制 WSL2/WSLg 子系统的最大内存占用
nestedVirtualization=true   # 启用 WSL2/WSLg 子系统嵌套虚拟化功能支持
networkingMode=mirrored     # 启用镜像网络特性支持
#pageReporting=true          # 启用 WSL2/WSLg 子系统页面文件通报,以便 Windows 回收已分配但未使用的内存
processors=4                # 设置 WSL2/WSLg 子系统的逻辑 CPU 核心数为 8(最大肯定没法超过硬件的物理逻辑核心数)
#vmIdleTimeout=-1            # WSL2 VM 实例空闲超时关闭时间,-1 为永不关闭,根据参数说明,目前似乎仅适用于 Win11+


[experimental]
autoMemoryReclaim=gradual       # 启用空闲内存自动缓慢回收,其它选项:dropcache / disabled(立即/禁用)
hostAddressLoopback=true        # 启用 WSL2/WSLg 子系统和 Windows 宿主之间的本地回环互通支持
sparseVhd=true                  # 启用 WSL2/WSLg 子系统虚拟硬盘空间自动回收
useWindowsDnsCache=false        # 和 dnsTunneling 配合使用,决定是否使用 Windows DNS 缓存池
重启wsl2或重启电脑生效
5、存在的问题及解决思路
ssh服务不会自动开启
解决思路:
重启ssh服务的命令,根据需要修改参数哦,可以写个cmd脚本放在windows自启动文件夹中,开机自己运行就不用每次输入了
C:\Users\用户名\AppData\Local\Microsoft\WindowsApps\ubuntu2004.exe run "sudo service ssh restart"


 658
658


 被折叠的 条评论
为什么被折叠?
被折叠的 条评论
为什么被折叠?
 到【灌水乐园】发言


