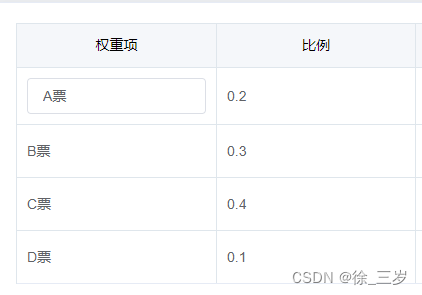
el-table点击单元格可编辑

需求:表格的每一个单元格点击都可编辑
在这里插入图片描述

<template>
  <div>
    <el-table
      @cell-click="cellClick"
      :row-class-name="tableRowClassName"
      :cell-class-name="tableCellClassName"
      :data="tableData"
      style="width: 500px"
      border
    >
      <el-table-column prop="weightName" label="权重项">
        <template slot-scope="{ row, column }">
          <el-input
            v-if="row.index == rowIndex && column.index == columnIndex"
            v-model="row.weightName"
            @blur="inputBlur"
          ></el-input>
          <span v-else>{{ row.weightName }}</span>
        </template>
      </el-table-column>
      <el-table-column prop="weightPer" label="比例">
        <template slot-scope="{ row, column }">
          <el-input
            v-if="row.index == rowIndex && column.index == columnIndex"
            v-model.number="row.weightPer"
            type="number"
            @blur="inputBlur(row)"
          ></el-input>
          <span v-else>{{ row.weightPer }}</span>
        </template>
      </el-table-column>
    </el-table>
  </div>
</template>

<script>
export default{
	data() {
	    return {
	      tableData: [],
	      rowIndex: -1, //行索引
	      columnIndex: -1, //列索引
	    };
	  },
	 methods:{
	 	tableRowClassName({ row, rowIndex }) {
	      // 把每一行的索引放到row里
	      row.index = rowIndex;
	    },
	    tableCellClassName({ column, columnIndex }) {
	      // 把每一列的索引放到column里
	      column.index = columnIndex;
	    },
	    cellClick(row, column) {
	      this.rowIndex = row.index;
	      this.columnIndex = column.index;
	    },
	    // 失去焦点
	    inputBlur() {
	      this.rowIndex = -1;
	      this.columnIndex = -1;
	    },
	  }
}
</script>
  • 4
    点赞
  • 28
    收藏
    觉得还不错? 一键收藏
  • 2
    评论
el-table是一个基于element-ui的表组件。编辑单元的操作需要使用到el-table的slot和scoped-slot属性。 首先,在el-table中定义一个slot,用来渲染需要编辑单元。例如,可以在表的第二列中添加一个可编辑单元: ```html <el-table-column label="姓名"> <template slot-scope="scope"> <span>{{ scope.row.name }}</span> </template> </el-table-column> <el-table-column label="年龄"> <template slot-scope="scope"> <span class="editable-cell">{{ scope.row.age }}</span> </template> </el-table-column> ``` 在第二列中,我们使用了一个class为editable-cell的span元素来渲染需要编辑单元。 接下来,我们需要定义一个scoped-slot,用来渲染编辑单元时的弹出框。例如,我们可以使用el-dialog组件来实现弹出框的效果: ```html <el-table-column label="年龄"> <template slot-scope="scope"> <span class="editable-cell" @click="editCell(scope.row, 'age')">{{ scope.row.age }}</span> <el-dialog :visible.sync="dialogVisible"> <el-input v-model="editValue"></el-input> <div slot="footer"> <el-button @click="dialogVisible = false">取消</el-button> <el-button type="primary" @click="saveEdit()">保存</el-button> </div> </el-dialog> </template> </el-table-column> ``` 在这里,我们为editable-cell元素添加了一个@click事件,当单元被点时,会触发editCell方法。该方法会设置dialogVisible为true,显示el-dialog组件。el-dialog中包含一个el-input用来输入编辑后的值,以及一个保存和取消按钮。 在methods中定义editCell、saveEdit方法: ```js methods: { editCell(row, prop) { this.editRow = row this.editProp = prop this.editValue = row[prop] this.dialogVisible = true }, saveEdit() { this.dialogVisible = false this.editRow[this.editProp] = this.editValue } } ``` 在editCell方法中,我们记录当前需要编辑的行和属性,以及设置编辑框的值和可见性。在saveEdit方法中,我们将编辑后的值保存到数据源中,并将编辑框隐藏。 最后,为了让用户知道哪些单元可以编辑,我们可以使用CSS样式来为编辑单元添加一个边框或者背景色: ```css .editable-cell { cursor: pointer; border: 1px dashed #ccc; padding: 2px 6px; display: inline-block; } ```

“相关推荐”对你有帮助么?

  • 非常没帮助
  • 没帮助
  • 一般
  • 有帮助
  • 非常有帮助
提交
评论 2
添加红包

请填写红包祝福语或标题

红包个数最小为10个

红包金额最低5元

当前余额3.43前往充值 >
需支付:10.00
成就一亿技术人!
领取后你会自动成为博主和红包主的粉丝 规则
hope_wisdom
发出的红包
实付
使用余额支付
点击重新获取
扫码支付
钱包余额 0

抵扣说明:

1.余额是钱包充值的虚拟货币,按照1:1的比例进行支付金额的抵扣。
2.余额无法直接购买下载,可以购买VIP、付费专栏及课程。

余额充值