


OpenStack-cinder 组件部署
继Dashboard部署完成后,继续部署cinder组件
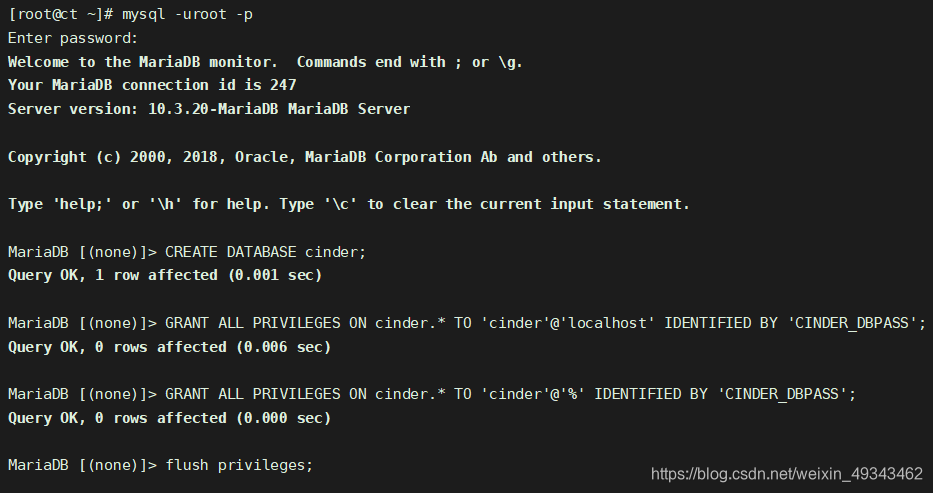
创建数据库实例和角色
[root@ct ~]# mysql -uroot -p
Enter password:
Welcome to the MariaDB monitor.  Commands end with ; or \g.
Your MariaDB connection id is 247
Server version: 10.3.20-MariaDB MariaDB Server

Copyright (c) 2000, 2018, Oracle, MariaDB Corporation Ab and others.

Type 'help;' or '\h' for help. Type '\c' to clear the current input statement.

MariaDB [(none)]> CREATE DATABASE cinder;
Query OK, 1 row affected (0.001 sec)

MariaDB [(none)]> GRANT ALL PRIVILEGES ON cinder.* TO 'cinder'@'localhost' IDENTIFIED BY 'CINDER_DBPASS';
Query OK, 0 rows affected (0.006 sec)

MariaDB [(none)]> GRANT ALL PRIVILEGES ON cinder.* TO 'cinder'@'%' IDENTIFIED BY 'CINDER_DBPASS';
Query OK, 0 rows affected (0.000 sec)

MariaDB [(none)]> flush privileges;
Query OK, 0 rows affected (0.004 sec)

MariaDB [(none)]> exit
Bye
创建用户、修改配置文件
1. 创建cinder用户,密码设置为CINDER_PASS
[root@ct ~]# openstack user create --domain default --password CINDER_PASS cinder
+---------------------+----------------------------------+
| Field               | Value                            |
+---------------------+----------------------------------+
| domain_id           | default                          |
| enabled             | True                             |
| id                  | 9ed2fe5930fd4bff96163acdaff555ae |
| name                | cinder                           |
| options             | {}                               |
| password_expires_at | None                             |
+---------------------+----------------------------------+
2. 把cinder用户添加到service服务中,并授予admin权限
[root@ct ~]# openstack role add --project service --user cinder admin
3. cinder有v2和v3两个并存版本的API,所以需要创建两个版本的service实例
[root@ct ~]# openstack service create --name cinderv2 --description "OpenStack Block Storage" volumev2
+-------------+----------------------------------+
| Field       | Value                            |
+-------------+----------------------------------+
| description | OpenStack Block Storage          |
| enabled     | True                             |
| id          | 86fc46058bc14d60b9777e593d293662 |
| name        | cinderv2                         |
| type        | volumev2                         |
+-------------+----------------------------------+
[root@ct ~]# openstack service create --name cinderv3 --description "OpenStack Block Storage" volumev3
+-------------+----------------------------------+
| Field       | Value                            |
+-------------+----------------------------------+
| description | OpenStack Block Storage          |
| enabled     | True                             |
| id          | 83e6439a228045dc8896ffdbfd8975a7 |
| name        | cinderv3                         |
| type        | volumev3                         |
+-------------+----------------------------------+
4. 给v2和v3版本的api创建endpoint
[root@ct ~]# openstack endpoint create --region RegionOne volumev2 public http://ct:8776/v2/%\(project_id\)s
+--------------+----------------------------------+
| Field        | Value                            |
+--------------+----------------------------------+
| enabled      | True                             |
| id           | 0ec81284bd524e48aa43392f898a4fd2 |
| interface    | public                           |
| region       | RegionOne                        |
| region_id    | RegionOne                        |
| service_id   | 86fc46058bc14d60b9777e593d293662 |
| service_name | cinderv2                         |
| service_type | volumev2                         |
| url          | http://ct:8776/v2/%(project_id)s |
+--------------+----------------------------------+
[root@ct ~]#  openstack endpoint create --region RegionOne volumev2 internal http://ct:8776/v2/%\(project_id\)s
+--------------+----------------------------------+
| Field        | Value                            |
+--------------+----------------------------------+
| enabled      | True                             |
| id           | de006d8ec4f7411ca603b3ff36f23e35 |
| interface    | internal                         |
| region       | RegionOne                        |
| region_id    | RegionOne                        |
| service_id   | 86fc46058bc14d60b9777e593d293662 |
| service_name | cinderv2                         |
| service_type | volumev2                         |
| url          | http://ct:8776/v2/%(project_id)s |
+--------------+----------------------------------+
[root@ct ~]#  openstack endpoint create --region RegionOne volumev2 admin http://ct:8776/v2/%\(project_id\)s
+--------------+----------------------------------+
| Field        | Value                            |
+--------------+----------------------------------+
| enabled      | True                             |
| id           | dcdc92299cdb402e9f99ca938bb21218 |
| interface    | admin                            |
| region       | RegionOne                        |
| region_id    | RegionOne                        |
| service_id   | 86fc46058bc14d60b9777e593d293662 |
| service_name | cinderv2                         |
| service_type | volumev2                         |
| url          | http://ct:8776/v2/%(project_id)s |
+--------------+----------------------------------+
[root@ct ~]#  openstack endpoint create --region RegionOne volumev3 public http://ct:8776/v3/%\(project_id\)s
+--------------+----------------------------------+
| Field        | Value                            |
+--------------+----------------------------------+
| enabled      | True                             |
| id           | c5000ebf4818462ea492388b26a52da2 |
| interface    | public                           |
| region       | RegionOne                        |
| region_id    | RegionOne                        |
| service_id   | 83e6439a228045dc8896ffdbfd8975a7 |
| service_name | cinderv3                         |
| service_type | volumev3                         |
| url          | http://ct:8776/v3/%(project_id)s |
+--------------+----------------------------------+
[root@ct ~]#  openstack endpoint create --region RegionOne volumev3 internal http://ct:8776/v3/%\(project_id\)s
+--------------+----------------------------------+
| Field        | Value                            |
+--------------+----------------------------------+
| enabled      | True                             |
| id           | 9cafd83a6a3e4a6b98bf93da8b83569c |
| interface    | internal                         |
| region       | RegionOne                        |
| region_id    | RegionOne                        |
| service_id   | 83e6439a228045dc8896ffdbfd8975a7 |
| service_name | cinderv3                         |
| service_type | volumev3                         |
| url          | http://ct:8776/v3/%(project_id)s |
+--------------+----------------------------------+
[root@ct ~]#  openstack endpoint create --region RegionOne volumev3 admin http://ct:8776/v3/%\(project_id\)s
+--------------+----------------------------------+
| Field        | Value                            |
+--------------+----------------------------------+
| enabled      | True                             |
| id           | 627bed52185c43339f27098b05ff7967 |
| interface    | admin                            |
| region       | RegionOne                        |
| region_id    | RegionOne                        |
| service_id   | 83e6439a228045dc8896ffdbfd8975a7 |
| service_name | cinderv3                         |
| service_type | volumev3                         |
| url          | http://ct:8776/v3/%(project_id)s |
+--------------+----------------------------------+
5. yum 安装cinder 服务
[root@ct ~]# yum -y install openstack-cinder
6. 修改cinder 配置文件
- 修改配置文件
[root@ct ~]# cp /etc/cinder/cinder.conf{,.bak}
[root@ct ~]# grep -Ev '#|^$' /etc/cinder/cinder.conf.bak>/etc/cinder/cinder.conf
[root@ct ~]# openstack-config --set /etc/cinder/cinder.conf database connection mysql+pymysql://cinder:CINDER_DBPASS@ct/cinder
[root@ct ~]# openstack-config --set /etc/cinder/cinder.conf DEFAULT transport_url rabbit://openstack:RABBIT_PASS@ct
[root@ct ~]# openstack-config --set /etc/cinder/cinder.conf DEFAULT auth_strategy keystone
[root@ct ~]# openstack-config --set /etc/cinder/cinder.conf keystone_authtoken www_authenticate_uri http://ct:5000
[root@ct ~]# openstack-config --set /etc/cinder/cinder.conf keystone_authtoken auth_url http://ct:5000
[root@ct ~]# openstack-config --set /etc/cinder/cinder.conf keystone_authtoken memcached_servers ct:11211
[root@ct ~]# openstack-config --set /etc/cinder/cinder.conf keystone_authtoken auth_type password
[root@ct ~]# openstack-config --set /etc/cinder/cinder.conf keystone_authtoken project_domain_name default
[root@ct ~]# openstack-config --set /etc/cinder/cinder.conf keystone_authtoken user_domain_name default
[root@ct ~]# openstack-config --set /etc/cinder/cinder.conf keystone_authtoken project_name service
[root@ct ~]# openstack-config --set /etc/cinder/cinder.conf keystone_authtoken username cinder
[root@ct ~]# openstack-config --set /etc/cinder/cinder.conf keystone_authtoken password CINDER_PASS
[root@ct ~]# openstack-config --set /etc/cinder/cinder.conf DEFAULT my_ip 192.168.100.10
[root@ct ~]# openstack-config --set /etc/cinder/cinder.conf oslo_concurrency lock_path /var/lib/cinder/tmp
- 查看配置文件
[root@ct ~]# cat /etc/cinder/cinder.conf
[DEFAULT]
transport_url = rabbit://openstack:RABBIT_PASS@ct			//配置rabbitmq连接
auth_strategy = keystone						//认证方式
my_ip = 192.168.100.11						//内网IP

[backend]
[backend_defaults]
[barbican]
[brcd_fabric_example]
[cisco_fabric_example]
[coordination]
[cors]

[database]							//对接数据库
connection = mysql+pymysql://cinder:CINDER_DBPASS@ct/cinder

[fc-zone-manager]
[healthcheck]
[key_manager]

[keystone_authtoken]						//配置keystone认证信息
www_authenticate_uri = http://ct:5000					//keystone地址
auth_url = http://ct:5000
memcached_servers = ct:11211
auth_type = password
project_domain_name = default
user_domain_name = default
project_name = service
username = cinder							//指定通过cinder账号到keystone做认证(用户名、密码)
password = CINDER_PASS

[nova]

[oslo_concurrency]
lock_path = /var/lib/cinder/tmp					//配置锁路径

[oslo_messaging_amqp]
[oslo_messaging_kafka]
[oslo_messaging_notifications]
[oslo_messaging_rabbit]
[oslo_middleware]
[oslo_policy]
[oslo_reports]
[oslo_versionedobjects]
[privsep]
[profiler]
[sample_castellan_source]
[sample_remote_file_source]
[service_user]
[ssl]
[vault]
7. 同步cinder数据库(填充块存储数据库)
[root@ct ~]# su -s /bin/sh -c "cinder-manage db sync" cinder
Deprecated: Option "logdir" from group "DEFAULT" is deprecated. Use option "log-dir" from group "DEFAULT".
8. 修改 Nova 配置文件,并重启服务
[root@ct ~]# openstack-config --set /etc/nova/nova.conf cinder os_region_name RegionOne
[root@ct ~]# systemctl restart openstack-nova-api.service
9. 配置Cinder服务
[root@ct ~]# systemctl enable openstack-cinder-api.service openstack-cinder-scheduler.service
Created symlink from /etc/systemd/system/multi-user.target.wants/openstack-cinder-api.service to /usr/lib/systemd/system/openstack-cinder-api.service.
Created symlink from /etc/systemd/system/multi-user.target.wants/openstack-cinder-scheduler.service to /usr/lib/systemd/system/openstack-cinder-scheduler.service.
[root@ct ~]# systemctl start openstack-cinder-api.service openstack-cinder-scheduler.service
10. 配置控制节点验证
[root@ct ~]# cinder service-list
+------------------+------+------+---------+-------+----------------------------+---------+-----------------+---------------+
| Binary           | Host | Zone | Status  | State | Updated_at                 | Cluster | Disabled Reason | Backend State |
+------------------+------+------+---------+-------+----------------------------+---------+-----------------+---------------+
| cinder-scheduler | ct   | nova | enabled | up    | 2021-02-19T06:08:04.000000 | -       | -               |               |
+------------------+------+------+---------+-------+----------------------------+---------+-----------------+---------------+
在计算节点c2配置Cinder(存储节点)
1. 安装cinder及依赖文件,并设置开机自启
[root@c2 ~]# yum -y install openstack-cinder targetcli python-keystone
[root@c2 ~]# yum -y install lvm2 device-mapper-persistent-data
[root@c2 ~]# systemctl enable lvm2-lvmetad.service
[root@c2 ~]# systemctl start lvm2-lvmetad.service
2. 创建lvm物理卷和卷组
注:如若没有sdc则创建一个硬盘并重启
[root@c2 ~]# pvcreate /dev/sdc
  Physical volume "/dev/sdc" successfully created.
[root@c2 ~]# vgcreate cinder-volumes /dev/sdc
  Volume group "cinder-volumes" successfully created
3. 修改lvm配置文件(指定使用sdc磁盘)
[root@c2 ~]# vim /etc/lvm/lvm.conf
141         filter = [ "a/sdc/","r/.*/" ]      //取消前面#注释符并修改
- a表示允许,r表示拒绝
- 只允许lvm服务访问sdc中的数据,不允许lvm服务访问其他磁盘,这也间接实现了openstack创建的虚拟机只能访问sdb中的数据,不能访问其他磁盘
- 设置只允许实例访问sdc逻辑卷中的数据;如果不配置的话,本机的其他服务也有可能会访问sdc逻辑卷中的数据
4. 重启lvm服务
[root@c2 ~]# systemctl restart lvm2-lvmetad.service
5. 配置cinder模块
- 修改cinder.conf配置
[root@c2 ~]# cp /etc/cinder/cinder.conf{,.bak}
[root@c2 ~]# grep -Ev '#|^$' /etc/cinder/cinder.conf.bak>/etc/cinder/cinder.conf
[root@c2 ~]#
[root@c2 ~]# openstack-config --set /etc/cinder/cinder.conf  database  connection mysql+pymysql://cinder:CINDER_DBPASS@ct/cinder
[root@c2 ~]# openstack-config --set /etc/cinder/cinder.conf  DEFAULT transport_url rabbit://openstack:RABBIT_PASS@ct
[root@c2 ~]# openstack-config --set /etc/cinder/cinder.conf  DEFAULT auth_strategy keystone
[root@c2 ~]# openstack-config --set /etc/cinder/cinder.conf  DEFAULT my_ip 192.168.100.12    //c2内网ip
[root@c2 ~]# openstack-config --set /etc/cinder/cinder.conf  DEFAULT enabled_backends lvm
[root@c2 ~]# openstack-config --set /etc/cinder/cinder.conf  DEFAULT glance_api_servers http://ct:9292
[root@c2 ~]# openstack-config --set /etc/cinder/cinder.conf  keystone_authtoken www_authenticate_uri http://ct:5000
[root@c2 ~]# openstack-config --set /etc/cinder/cinder.conf  keystone_authtoken auth_url http://ct:5000
[root@c2 ~]# openstack-config --set /etc/cinder/cinder.conf  keystone_authtoken memcached_servers ct:11211
[root@c2 ~]# openstack-config --set /etc/cinder/cinder.conf  keystone_authtoken auth_type password
[root@c2 ~]# openstack-config --set /etc/cinder/cinder.conf  keystone_authtoken project_domain_name default
[root@c2 ~]# openstack-config --set /etc/cinder/cinder.conf  keystone_authtoken user_domain_name default
[root@c2 ~]# openstack-config --set /etc/cinder/cinder.conf  keystone_authtoken project_name service
[root@c2 ~]# openstack-config --set /etc/cinder/cinder.conf  keystone_authtoken username cinder
[root@c2 ~]# openstack-config --set /etc/cinder/cinder.conf  keystone_authtoken password CINDER_PASS
[root@c2 ~]# openstack-config --set /etc/cinder/cinder.conf  lvm volume_driver cinder.volume.drivers.lvm.LVMVolumeDriver
[root@c2 ~]# openstack-config --set /etc/cinder/cinder.conf  lvm volume_group cinder-volumes
[root@c2 ~]# openstack-config --set /etc/cinder/cinder.conf  lvm target_protocol iscsi
[root@c2 ~]# openstack-config --set /etc/cinder/cinder.conf  lvm target_helper lioadm
[root@c2 ~]# openstack-config --set /etc/cinder/cinder.conf  oslo_concurrency lock_path /var/lib/cinder/tmp
- 查看修改内容
[root@c2 ~]# cat /etc/cinder/cinder.conf
[DEFAULT]
transport_url = rabbit://openstack:RABBIT_PASS@ct
auth_strategy = keystone
my_ip = 192.168.100.12
enabled_backends = lvm
glance_api_servers = http://ct:9292
[backend]
[backend_defaults]
[barbican]
[brcd_fabric_example]
[cisco_fabric_example]
[coordination]
[cors]
[database]
connection = mysql+pymysql://cinder:CINDER_DBPASS@ct/cinder
[fc-zone-manager]
[healthcheck]
[key_manager]
[keystone_authtoken]
www_authenticate_uri = http://ct:5000
auth_url = http://ct:5000
memcached_servers = ct:11211
auth_type = password
project_domain_name = default
user_domain_name = default
project_name = service
username = cinder
password = CINDER_PASS
[nova]
[oslo_concurrency]         //配置锁路径
lock_path = /var/lib/cinder/tmp
[oslo_messaging_amqp]
[oslo_messaging_kafka]
[oslo_messaging_notifications]
[oslo_messaging_rabbit]
[oslo_middleware]
[oslo_policy]
[oslo_reports]
[oslo_versionedobjects]
[privsep]
[profiler]
[sample_castellan_source]
[sample_remote_file_source]
[service_user]
[ssl]
[vault]


[lvm]							//为LVM后端配置LVM驱动程序
volume_driver = cinder.volume.drivers.lvm.LVMVolumeDriver	//指定LVM驱动程序;即通过指定的驱动创建LVM
volume_group = cinder-volumes				//指定卷组(vg)
target_protocol = iscsi					//pv使用的是iscsi协议,可以提供块存储服务
target_helper = lioadm					//iscsi管理工具

#volume_backend_name=Openstack-lvm   			//选择:当后端有多个不同类型的存储时,可以在openstack中调用指定的存储;
给当前存储指定个名称,用于后期区分多个不同的存储
6. 开启cinder卷服务,并设置开机自启
[root@c2 ~]# systemctl enable openstack-cinder-volume.service target.service
Created symlink from /etc/systemd/system/multi-user.target.wants/openstack-cinder-volume.service to /usr/lib/systemd/system/openstack-cinder-volume.service.
Created symlink from /etc/systemd/system/multi-user.target.wants/target.service to /usr/lib/systemd/system/target.service.
[root@c2 ~]# systemctl start openstack-cinder-volume.service target.service
验证,ct上查看卷列表
[root@ct ~]# openstack volume service list
+------------------+--------+------+---------+-------+----------------------------+
| Binary           | Host   | Zone | Status  | State | Updated At                 |
+------------------+--------+------+---------+-------+----------------------------+
| cinder-scheduler | ct     | nova | enabled | up    | 2021-02-19T06:36:04.000000 |
| cinder-volume    | c2@lvm | nova | enabled | up    | 2021-02-19T06:36:04.000000 |
+------------------+--------+------+---------+-------+----------------------------+
至此,cinder组件部署完成,openstack全部部署成功
总结
Cinder配置思路:
- 创建管理、对接的用户、密码、服务和endpoint
修改配置文件:
- 主要内容为 向keystone对接认证授权、组件之间通讯模块、配置所在的域等
- 配置计算节点中虚拟机所用的卷


 1万+
1万+


 被折叠的 条评论
为什么被折叠?
被折叠的 条评论
为什么被折叠?
 到【灌水乐园】发言


