


一 概述
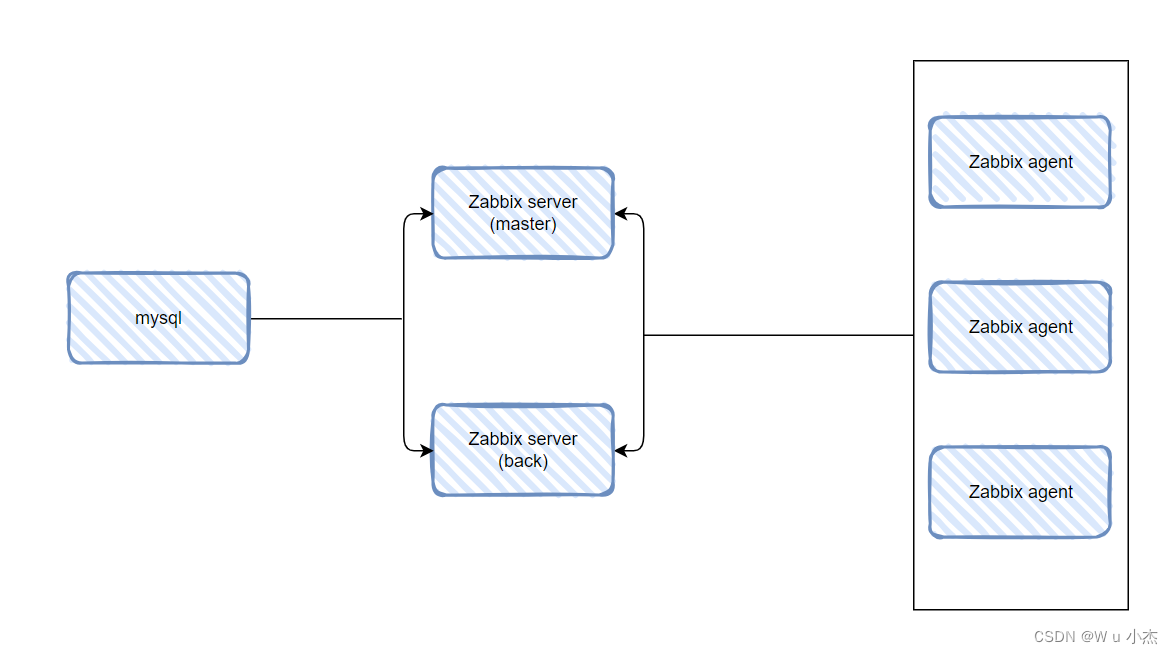
高可用性 (HA) 通常用于几乎不会停机的关键基础设施。因此,对于任何可能失败的服务,必须有一个故障转移选项,以便在当前服务发生故障时接管。 Zabbix提供了一个原生的高可用性解决方案,该解决方案易于设置,不需要任何以前的HA专业知识。原生Zabbix HA可能有助于为Zabbix server的软件/硬件故障提供额外的保护,或者减少因维护而导致的停机时间。 在Zabbix高可用性模式下,多个Zabbix server作为集群中的节点运行。当集群中的一台Zabbix server处于活动状态时,其他服务器处于待机状态,随时准备在必要时接管。
在同一个Zabbix HA集群中,只有一个实例或节点处于active(活动)状态,standby(备用)节点不进行数据收集、处理或其他任务,并且不监听端口,并保持一个最少的数据库连接
HA节点分为以下几种状态: Active(活动) Standby(备用) Unavailable(不可用) Stopped(停止)
二 部署zabbix高可用
1 环境说明
| 主机名 | IP地址 | 操作系统 | 角色 | 备注 |
|---|---|---|---|---|
| zabbix-serve01 | 11.0.1.136 | Linux For Euler 21.10 LTS | zabbix server节点(nginx php zabbix) | 2C2G100G |
| zabbix-serve02 | 11.0.1.137 | Linux For Euler 21.10 LTS | zabbix server节点(nginx php zabbix) | 2C2G100G |
| zabbix-db | 11.0.1.131 | Linux For Euler 21.10 LTS | mysql数据库 | 2C2G100G |
环境版本要求:
mysql数据库版本大于等于8.0.30 sqlite数据库版本3.3.5-3.34.X Nginx版本大于等于1.20 PHP版本7.4.0 - 8.2.X gd库版本大于等于2.0.28 libXML库版本大于等于2.6.15 zabbix版本大于6(官方规定6版本以上才支持HA高可用性)
所需软件包:
mysql下载地址
https://downloads.mysql.com/archives/community/
nginx下载地址
https://nginx.org/en/download.html
zabbix下载地址
https://cdn.zabbix.com/zabbix/sources/stable/6.4/
所需包查看
# ll -tr
总用量 1.2G
-rw-r--r-- 1 root root 186M  5月  6  2020 jdk-8u211-linux-x64.tar.gz
-rw-r--r-- 1 root root 1.1M  4月 14 11:52 nginx-1.24.0.tar.gz
-rw-r--r-- 1 root root 959M  4月 14 11:52 mysql-8.0.34-1.el8.x86_64.rpm-bundle.tar
-rw-r--r-- 1 root root  42M  4月 14 11:54 zabbix-6.4.4.tar.gz
2 部署
2.1 环境初始化
(所有节点执行)
1 修改主机名(根据实际情况修改)
# hostnamectl --static set-hostname XXX
2 关闭防火墙
# systemctl stop firewalld && systemctl disable firewalld
3 关闭selinux
# sed -i 's/^SELINUX=.*/SELINUX=disabled/' /etc/sysconfig/selinux  //永久设置
# setenforce 0 && getenforce                                       // 临时设置
4 时钟同步(如果有时钟同步服务器,那么要设置时钟同步服务器的地址)
# sed -i '/^#.*pool.ntp.org.*iburst/s/^# //' /etc/chrony.conf
# systemctl restart chronyd && systemctl enable chronyd
# timedate                                         // 检查是否同步
# chronyc sources                                  //检查时钟同步源
# date                                                   //检查下主机是否是北京标准时间(CST)
## sed -i '/.*pool.ntp.org.*.iburst/a\server x.x.x.x iburst' /tmp/aa.conf  // x.x.x.x 替换为时钟同步服务器的地址
2.2 Nginx服务部署
两台zabbix server 服务器安装即可
[root@zabbix-serve01 ~]# yum -y install gcc gcc-c++  pcre pcre-devel openssl openssl-devel zlib zlib-devel gd gd-devel
[root@zabbix-serve01 ~]# cd /home/weihu/
[root@zabbix-serve01 weihu]# tar -xf nginx-1.24.0.tar.gz
[root@zabbix-serve01 weihu]# cd nginx-1.24.0
[root@zabbix-serve01 nginx-1.24.0]# ./configure --prefix=/usr/local/nginx \
--with-pcre \
--with-http_ssl_module \
--with-http_v2_module \
--with-http_realip_module \
--with-http_addition_module \
--with-http_sub_module \
--with-http_dav_module \
--with-http_flv_module \
--with-http_mp4_module \
--with-http_gunzip_module \
--with-http_gzip_static_module \
--with-http_random_index_module \
--with-http_secure_link_module \
--with-http_stub_status_module \
--with-http_auth_request_module \
--with-http_image_filter_module \
--with-http_slice_module \
--with-mail \
--with-threads \
--with-file-aio \
--with-stream \
--with-mail_ssl_module \
--with-stream_ssl_module
[root@zabbix-serve01 nginx-1.24.0]# make && make install
[root@zabbix-serve01 nginx-1.24.0]# ls /usr/local/nginx/
conf  html  logs  sbin
2.3 MySQL部署
mysql数据库服务器安装
2.3.1 卸载服务器自带的mysql
[root@zabbix-db ~]# rpm -qa|grep mysql
2.3.2 安装mysql8.0.34
[root@zabbix-db ~]# cd /home/weihu/
[root@zabbix-db weihu]# ls
mysql-8.0.34-1.el8.x86_64.rpm-bundle.tar
[root@zabbix-db weihu]# tar -xf mysql-8.0.34-1.el8.x86_64.rpm-bundle.tar
[root@zabbix-db weihu]# ls -l mysql-community-*
-rw-r--r-- 1 7155 31415 16722316 6月 25 2023 mysql-community-client-8.0.34-1.el8.x86_64.rpm
-rw-r--r-- 1 7155 31415 35457224 6月 25 2023 mysql-community-client-debuginfo-8.0.34-1.el8.x86_64.rpm
-rw-r--r-- 1 7155 31415 3717776 6月 25 2023 mysql-community-client-plugins-8.0.34-1.el8.x86_64.rpm
-rw-r--r-- 1 7155 31415 3902276 6月 25 2023 mysql-community-client-plugins-debuginfo-8.0.34-1.el8.x86_64.rpm
-rw-r--r-- 1 7155 31415 684348 6月 25 2023 mysql-community-common-8.0.34-1.el8.x86_64.rpm
-rw-r--r-- 1 7155 31415 3702840 6月 25 2023 mysql-community-debuginfo-8.0.34-1.el8.x86_64.rpm
-rw-r--r-- 1 7155 31415 25179084 6月 25 2023 mysql-community-debugsource-8.0.34-1.el8.x86_64.rpm
-rw-r--r-- 1 7155 31415 2304272 6月 25 2023 mysql-community-devel-8.0.34-1.el8.x86_64.rpm
-rw-r--r-- 1 7155 31415 2347232 6月 25 2023 mysql-community-icu-data-files-8.0.34-1.el8.x86_64.rpm
-rw-r--r-- 1 7155 31415 1564496 6月 25 2023 mysql-community-libs-8.0.34-1.el8.x86_64.rpm
-rw-r--r-- 1 7155 31415 2928168 6月 25 2023 mysql-community-libs-debuginfo-8.0.34-1.el8.x86_64.rpm
-rw-r--r-- 1 7155 31415 67548616 6月 25 2023 mysql-community-server-8.0.34-1.el8.x86_64.rpm
-rw-r--r-- 1 7155 31415 25932512 6月 25 2023 mysql-community-server-debug-8.0.34-1.el8.x86_64.rpm
-rw-r--r-- 1 7155 31415 161259232 6月 25 2023 mysql-community-server-debug-debuginfo-8.0.34-1.el8.x86_64.rpm
-rw-r--r-- 1 7155 31415 247037468 6月 25 2023 mysql-community-server-debuginfo-8.0.34-1.el8.x86_64.rpm
-rw-r--r-- 1 7155 31415 378373704 6月 25 2023 mysql-community-test-8.0.34-1.el8.x86_64.rpm
-rw-r--r-- 1 7155 31415 26824452 6月 25 2023 mysql-community-test-debuginfo-8.0.34-1.el8.x86_64.rpm
[root@zabbix-db weihu]# rpm -ivh mysql-community-server-8.0.34-1.el8.x86_64.rpm mysql-community-client-8.0.34-1.el8.x86_64.rpm mysql-community-common-8.0
.34-1.el8.x86_64.rpm mysql-community-icu-data-files-8.0.34-1.el8.x86_64.rpm mysql-community-client-plugins-8.0.34-1.el8.x86_64.rpm mysql-community-libs-8
.0.34-1.el8.x86_64.rpm
警告:mysql-community-server-8.0.34-1.el8.x86_64.rpm: 头V4 RSA/SHA256 Signature, 密钥 ID 3a79bd29: NOKEY
Verifying... ################################# [100%]
准备中... ################################# [100%]
正在升级/安装...
1:mysql-community-client-plugins-8.################################# [ 17%]
2:mysql-community-common-8.0.34-1.e################################# [ 33%]
3:mysql-community-libs-8.0.34-1.el8################################# [ 50%]
4:mysql-community-client-8.0.34-1.e################################# [ 67%]
5:mysql-community-icu-data-files-8.################################# [ 83%]
6:mysql-community-server-8.0.34-1.e################################# [100%]
[root@zabbix-db weihu]#
[root@zabbix-db weihu]# mkdir -p /var/lib/mysql/{log_bin,data,socket}
[root@zabbix-db weihu]# chown -R mysql:mysql /var/lib/mysql
2.3.3 修改my.cnf配置文件
[root@zabbix-db weihu]# cat /etc/my.cnf [client] default-character-set = UTF8MB4 socket=/var/lib/mysql/socket/mysql.sock [mysqld] #server_id = 11 #auto-increment-increment = 2 #auto-increment-offset = 1 log_bin = /var/lib/mysql/log_bin/mysql_bin max_connections = 2000 open_files_limit = 30000 table_open_cache = 20000 explicit_defaults_for_timestamp = true transaction-isolation = READ-COMMITTED max_allowed_packet = 128M innodb_buffer_pool_size = 1G innodb_log_file_size = 1G innodb_file_per_table = 1 innodb_log_buffer_size=4M innodb_thread_concurrency=64 innodb_flush_log_at_trx_commit=0 innodb_flush_method=O_DIRECT lower_case_table_names = 1 default-storage-engine = INNODB default_authentication_plugin = mysql_native_password join_buffer_size = 512M sort_buffer_size = 20M read_rnd_buffer_size = 20M log_timestamps = system collation-server = UTF8MB4_BIN character-set-server = UTF8MB4 #validate_password_policy = 0 #validate_password_number_count = 0 #validate_password_length = 4 #validate_password_special_char_count = 0 default_password_lifetime = 0 innodb_read_io_threads = 16 innodb_write_io_threads = 16 datadir=/var/lib/mysql/data/ socket=/var/lib/mysql/socket/mysql.sock skip-host-cache skip-name-resolve skip-symbolic-links #sql_mode='STRICT_TRANS_TABLES,NO_ENGINE_SUBSTITUTION' log-error=/var/log/mysqld.log pid-file=/var/run/mysqld/mysqld.pid slow_query_log = 1 slow_query_log_file = /var/log/mysql-slow.log long_query_time = 3 log_queries_not_using_indexes = 1 [root@zabbix-db weihu]#
2.3.4 启动数据库并修改密码
[root@zabbix-db weihu]# systemctl start mysqld [root@zabbix-db weihu]# systemctl enable mysqld [root@zabbix-db weihu]# cat /var/log/mysqld.log |grep password 2024-05-16T17:17:18.472421+08:00 6 [Note] [MY-010454] [Server] A temporary password is generated for root@localhost: qr=hhYIa.8>R 2024-05-16T17:17:18.564601+08:00 6 [Warning] [MY-013360] [Server] Plugin mysql_native_password reported: ''mysql_native_password' is deprecated and will be removed in a future release. Please use caching_sha2_password instead' [root@zabbix-db weihu]# mysql -uroot -p Enter password: Welcome to the MySQL monitor. Commands end with ; or \g. Your MySQL connection id is 8 Server version: 8.0.34 Copyright (c) 2000, 2023, Oracle and/or its affiliates. Oracle is a registered trademark of Oracle Corporation and/or its affiliates. Other names may be trademarks of their respective owners. Type 'help;' or '\h' for help. Type '\c' to clear the current input statement. mysql> alter user 'root'@'localhost' identified by 'Ajie@123456'; Query OK, 0 rows affected (0.00 sec) mysql>
2.3.5 创建zabbix数据库,创建zabbix用户并设置访问权限
mysql> create database zabbix character set utf8mb4 collate utf8mb4_bin; Query OK, 1 row affected (0.01 sec) mysql> create user 'zabbix'@'11.0.1.%' identified by 'Ajie@123456'; Query OK, 0 rows affected (0.00 sec) mysql> grant all privileges on zabbix.* to 'zabbix'@'11.0.1.%'; Query OK, 0 rows affected (0.00 sec) mysql> SET GLOBAL log_bin_trust_function_creators = 1; Query OK, 0 rows affected, 1 warning (0.00 sec) mysql>
2.3.6 导入zabbix数据,必须按顺序导入
# 先将sql文件发送至数据库服务器上 [root@zabbix-serve02 weihu]# cd zabbix-6.4.4/database/mysql/ [root@zabbix-serve02 mysql]# ls data.sql double.sql history_pk_prepare.sql images.sql Makefile.am Makefile.in schema.sql [root@zabbix-serve02 mysql]# scp schema.sql images.sql data.sql root@11.0.1.131:/home/weihu/ root@11.0.1.131's password: schema.sql 100% 184KB 89.5MB/s 00:00 images.sql 100% 1932KB 217.4MB/s 00:00 data.sql 100% 35MB 207.5MB/s 00:00 [root@zabbix-db weihu]# ls *.sql data.sql images.sql schema.sql [root@zabbix-db weihu]# mysql -h11.0.1.131 -uzabbix -p zabbix < schema.sql Enter password: [root@zabbix-db weihu]# mysql -h11.0.1.131 -uzabbix -p zabbix < images.sql Enter password: [root@zabbix-db weihu]# mysql -h11.0.1.131 -uzabbix -p zabbix < data.sql Enter password: [root@zabbix-db weihu]# [root@zabbix-db weihu]# mysql -uroot -p Enter password: Welcome to the MySQL monitor. Commands end with ; or \g. Your MySQL connection id is 28 Server version: 8.0.34 MySQL Community Server - GPL Copyright (c) 2000, 2023, Oracle and/or its affiliates. Oracle is a registered trademark of Oracle Corporation and/or its affiliates. Other names may be trademarks of their respective owners. Type 'help;' or '\h' for help. Type '\c' to clear the current input statement. mysql> SET GLOBAL log_bin_trust_function_creators = 0; Query OK, 0 rows affected, 1 warning (0.00 sec) mysql> flush privileges; Query OK, 0 rows affected (0.00 sec) mysql> quit Bye [root@zabbix-db weihu]#
2.4 PHP部署
两台zabbix server 服务器安装即可
[root@zabbix-serve01 ~]# yum install php-fpm php php-bcmath php-mbstring php-ldap php-mysqlnd php-xml php-pdo php-gd [root@zabbix-serve01 ~]# vim /etc/php.ini expose_php = Off max_execution_time = 300 max_input_time = 300 memory_limit = 128M post_max_size = 16M upload_max_filesize = 2M date.timezone = Asia/Shanghai [root@zabbix-serve01 ~]# cd /etc/php-fpm.d [root@zabbix-serve01 php-fpm.d]# ls www.conf [root@zabbix-serve01 php-fpm.d]# egrep -v '^$|^;|^\s+' /etc/php-fpm.d/www.conf [www] user = nobody group = nobody listen = 127.0.0.1:9000 listen.acl_users = apache,nginx listen.allowed_clients = 127.0.0.1 pm = dynamic pm.max_children = 50 pm.start_servers = 20 pm.min_spare_servers = 20 pm.max_spare_servers = 35 pm.max_requests = 500 slowlog = /var/log/php-fpm/www-slow.log request_slowlog_timeout = 10 php_admin_value[error_log] = /var/log/php-fpm/www-error.log php_admin_flag[log_errors] = on php_value[session.save_handler] = files php_value[session.save_path] = /var/lib/php/session php_value[soap.wsdl_cache_dir] = /var/lib/php/wsdlcache [root@zabbix-serve01 php-fpm.d]# #启动php服务 [root@zabbix-serve01 php-fpm.d]# systemctl start php-fpm [root@zabbix-serve01 php-fpm.d]# systemctl enable php-fpm #查看端口是否启动 [root@zabbix-serve01 php-fpm.d]# netstat -tnlp|grep 9000 tcp 0 0 127.0.0.1:9000 0.0.0.0:* LISTEN 1896/php-fpm: maste
注释:
expose_php = Off #隐藏PHP版本 max_execution_time = 300 #监控执行时间 max_input_time = 300 #接收数据等待时间 memory_limit = 128M #每个脚本占用内存 post_max_size = 16M #POST数据大小 upload_max_filesize = 2M #下载文件大小 date.timezone = Asia/Shanghai #将时区设为上海时区
2.5 php和nginx关联
两台zabbix server 服务器操作即可
[root@zabbix-serve01 conf]# vim /usr/local/nginx/conf/nginx.conf
[root@zabbix-serve01 conf]# egrep -v '^\s+#.*|^$|^#' /usr/local/nginx/conf/nginx.conf
user nobody;
worker_processes auto;
worker_cpu_affinity auto;
worker_rlimit_nofile 30000;
events {
worker_connections 10240;
}
http {
include mime.types;
default_type application/octet-stream;
sendfile on;
keepalive_timeout 65;
server_tokens off;
server {
listen 80;
server_name localhost;
location / {
root html;
index index.html index.htm index.php; # 注意1
}
error_page 500 502 503 504 /50x.html;
location = /50x.html {
root html;
}
location ~ \.php$ {
root html;
fastcgi_pass 127.0.0.1:9000;
fastcgi_index index.php;
fastcgi_param SCRIPT_FILENAME $document_root$fastcgi_script_name; # 注意2
include fastcgi_params;
}
}
}
[root@zabbix-serve01 sbin]# /usr/local/nginx/sbin/nginx -t
nginx: the configuration file /usr/local/nginx/conf/nginx.conf syntax is ok
nginx: configuration file /usr/local/nginx/conf/nginx.conf test is successful
[root@zabbix-serve01 sbin]# /usr/local/nginx/sbin/nginx
[root@zabbix-serve01 sbin]# netstat -tnlp|grep 80
tcp 0 0 0.0.0.0:80 0.0.0.0:* LISTEN 2066/nginx: master
重点关注:
注意1 :index.php需要加上 否则访问http://IP/zabbix 会报错404
注意2 :nginx配置文件 fastcgi_param SCRIPT_FILENAME /scripts$fastcgi_script_name; 这一行需要改成fastcgi_param SCRIPT_FILENAME $document_root$fastcgi_script_name; 否则界面访问php文件会报File not Found的错误,nginx后台日志也会报Primary script unknown" while reading response header from upstream的报错,$document_root 代表当前请求在root指令中指定的值,更改后重启Nginx服务即可恢复正常访问。
2.6 测试nginx是否能正常打开php页面
[root@zabbix-serve01 ~]# cd /usr/local/nginx/html/
[root@zabbix-serve01 html]# cat index.php
<?php
phpinfo();
?>
2.7 zabbix server 部署
两台zabbix server 服务器操作即可
2.7.1 安装必要依赖
如果要zabbix需要监控JAVA应用程序的性能需要事先在服务端安装java编译环境然后启用—enable-java 参数
#我这里是直接勇tar包装得,可以直接勇rpm包装 [root@zabbix-serve01 weihu]# tar -xf jdk-8u211-linux-x64.tar.gz [root@zabbix-serve01 weihu]# cd jdk1.8.0_211/ [root@zabbix-serve01 jdk1.8.0_211]# pwd /home/weihu/jdk1.8.0_211 #设置java环境变量 [root@zabbix-serve01 weihu]# vim /etc/profile # java环境变量 JAVA_HOME=/home/weihu/jdk1.8.0_211 CLASSPATH=$JAVA_HOME/lib/ PATH=$PATH:$JAVA_HOME/bin export PATH JAVA_HOME CLASSPATH [root@zabbix-serve01 weihu]# source /etc/profile [root@zabbix-serve01 weihu]# java -version java version "1.8.0_211" Java(TM) SE Runtime Environment (build 1.8.0_211-b12) Java HotSpot(TM) 64-Bit Server VM (build 25.211-b12, mixed mode)
安装mysql devel开发包
[root@zabbix-serve01 weihu]# tar -xf mysql-8.0.34-1.el8.x86_64.rpm-bundle.tar
[root@zabbix-serve01 weihu]# rpm -ivh mysql-community-devel-8.0.34-1.el8.x86_64.rpm mysql-community-libs-8.0.34-1.el8.x86_64.rpm mysql-community-common-8.0.34-1.el8.x86_64.rpm mysql-community-client-8.0.34-1.el8.x86_64.rpm mysql-community-client-plugins-8.0.34-1.el8.x86_64.rpm
安装必要的软件依赖包
[root@zabbix-serve01 weihu]# yum install libevent-devel libevent libssh2-devel libssh2 OpenIPMI OpenIPMI-devel libxml2 libxml2-devel net-snmp net-snmp-devel openldap openldap-devel curl curl-devel
2.7.2 编译安装zabbix server
[root@zabbix-serve01 weihu]# tar -xf zabbix-6.4.4.tar.gz [root@zabbix-serve01 weihu]# cd zabbix-6.4.4 [root@zabbix-serve01 zabbix-6.4.4]# ./configure --prefix=/usr/local/zabbix-6.4.4 --enable-server --with-mysql --with-net-snmp --with-libcurl --with-libxml2 --with-openssl --enable-java --enable-ipv6 --with-openipmi --with-ssh2 --with-ldap [root@zabbix-serve01 zabbix-6.4.4]# make install [root@zabbix-serve01 ~]# egrep -v '^$|^#' /usr/local/zabbix-6.4.4/etc/zabbix_server.conf ListenPort=10051 LogFile=/tmp/zabbix_server.log DBHost=11.0.1.131 DBName=zabbix DBUser=zabbix DBPassword=Ajie@123456 ListenIP=0.0.0.0 Timeout=4 LogSlowQueries=3000 User=zabbix StatsAllowedIP=127.0.0.1 [root@zabbix-serve01 etc]# useradd -M zabbix -s /sbin/nologin [root@zabbix-serve01 zabbix-6.4.4]# /usr/local/zabbix-6.4.4/sbin/zabbix_server
2.7.3 拷贝zabbix web文件到html目录下并改名
[root@zabbix-serve01 ~]# mv /home/weihu/zabbix-6.4.4/ui/ /usr/local/nginx/html/
[root@zabbix-serve01 ~]# cd /usr/local/nginx/html/
[root@zabbix-serve01 html]# ls
50x.html  index.html  index.php  ui
[root@zabbix-serve01 html]# mv ui/ zabbix
[root@zabbix-serve01 html]# ls
50x.html  index.html  index.php  zabbix
[root@zabbix-serve01 html]# chown -R nobody:nobody zabbix/     //权限注意改
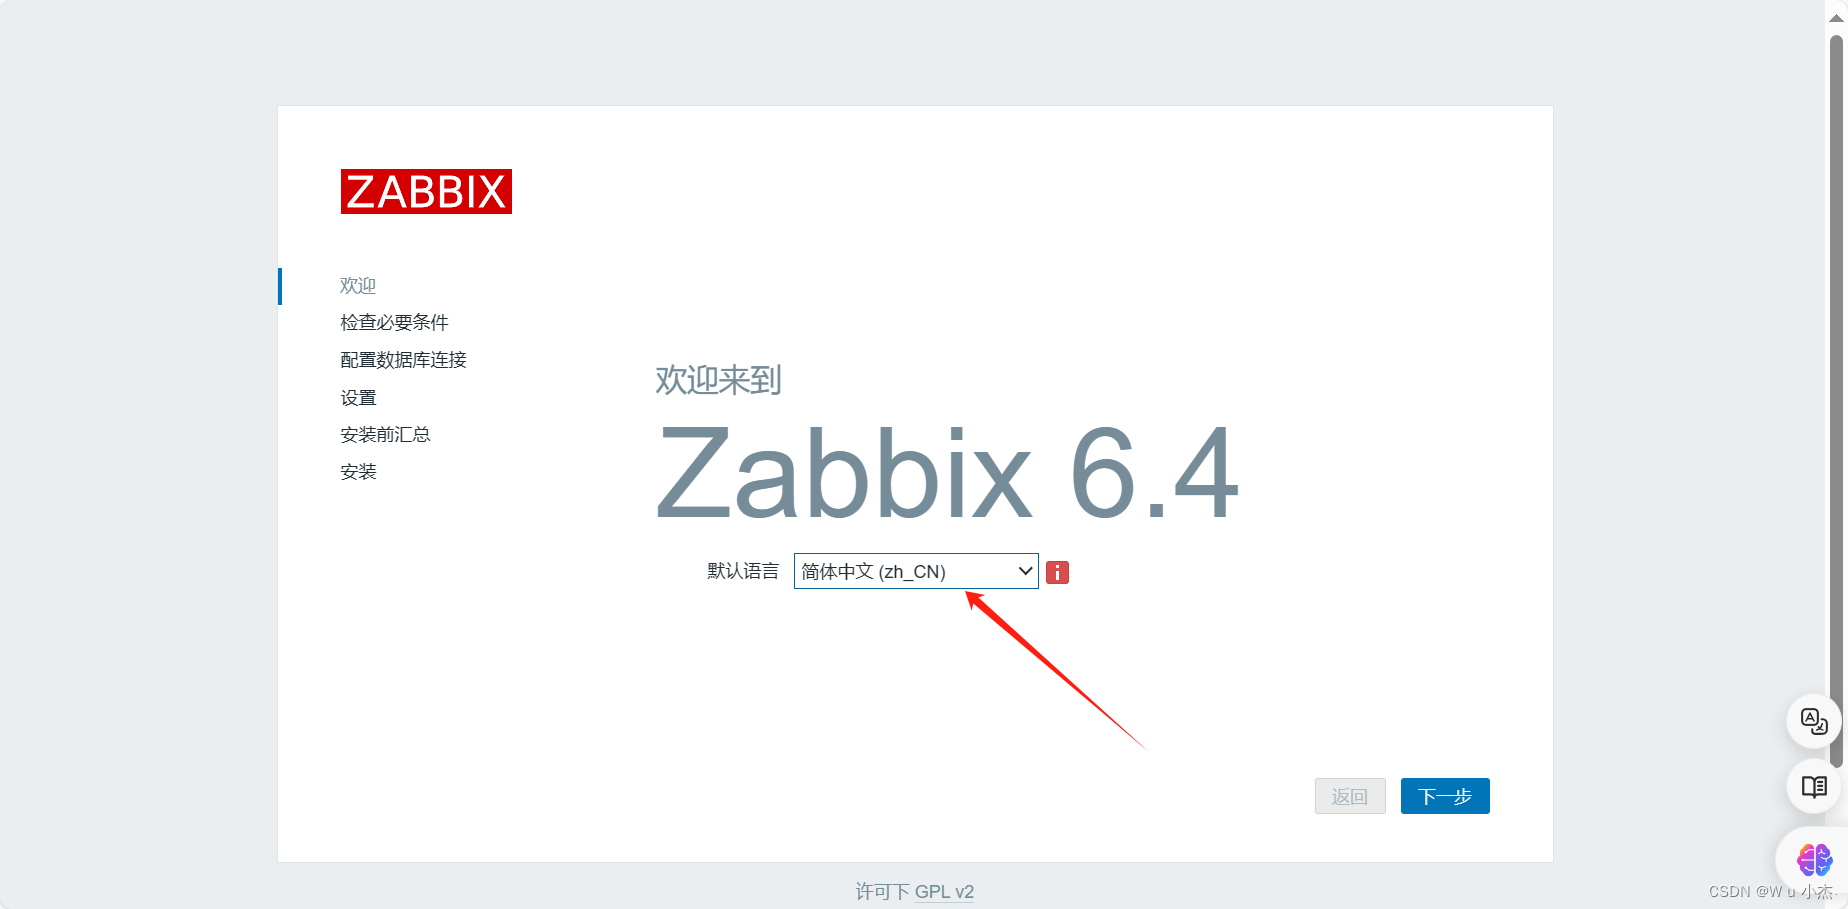
2.8 浏览器访问zabbix server
1 选择语言
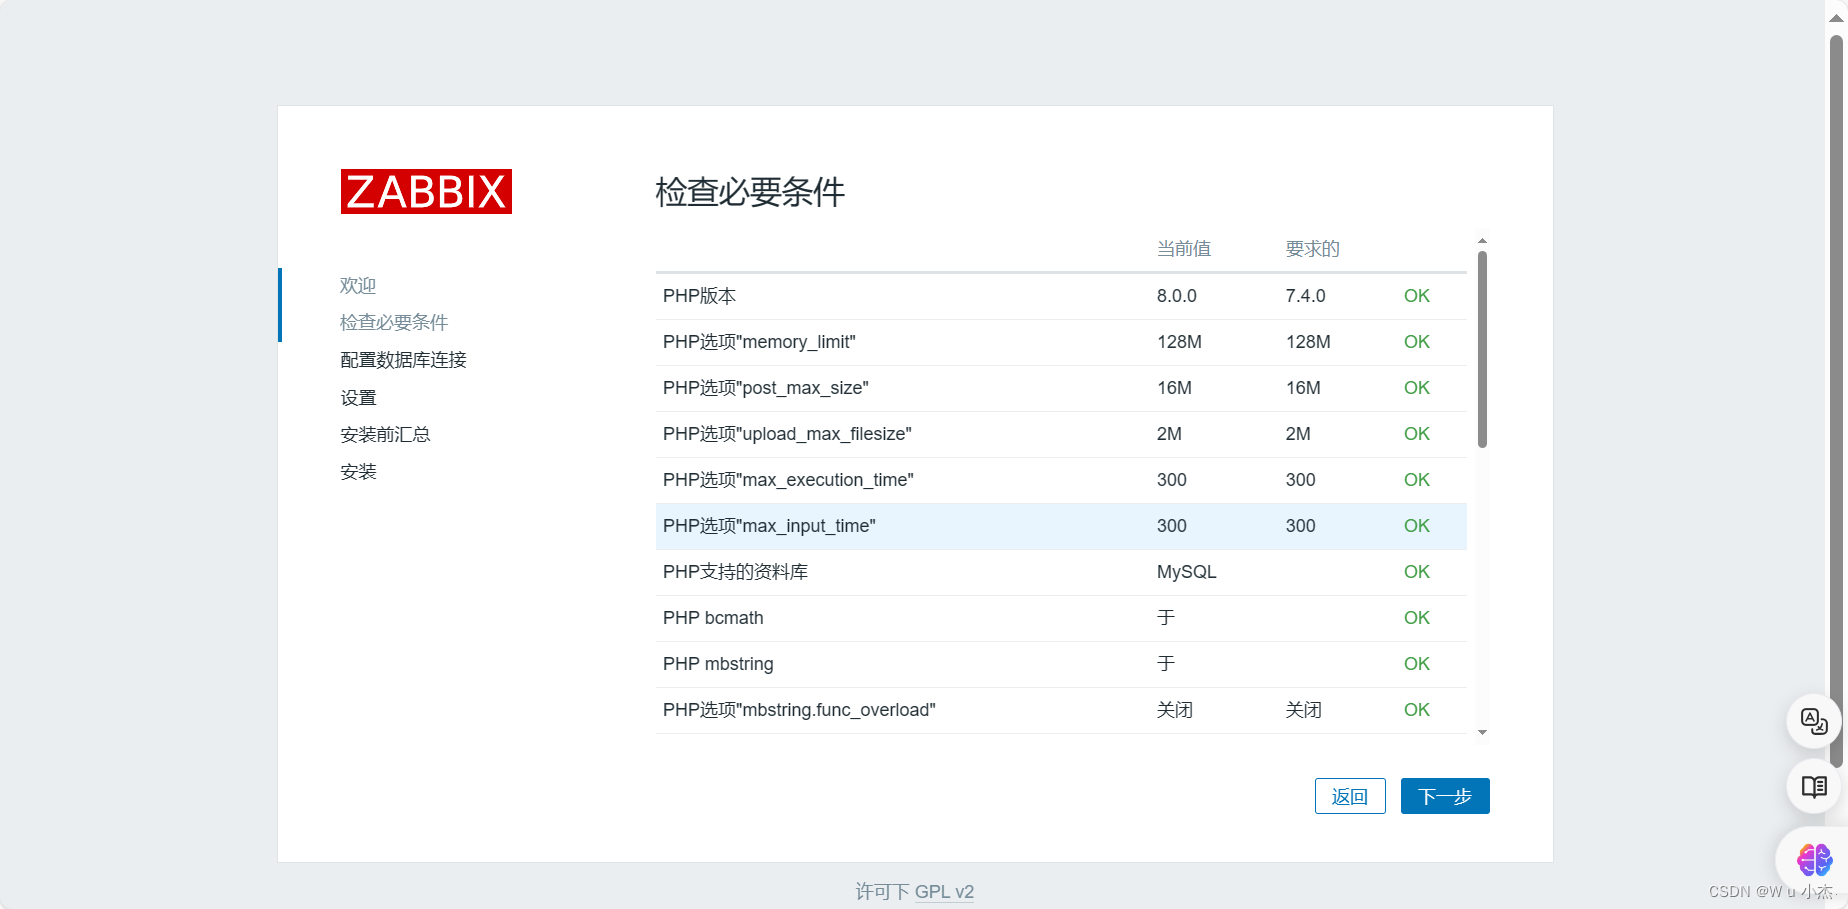
2 保证都是OK的状态
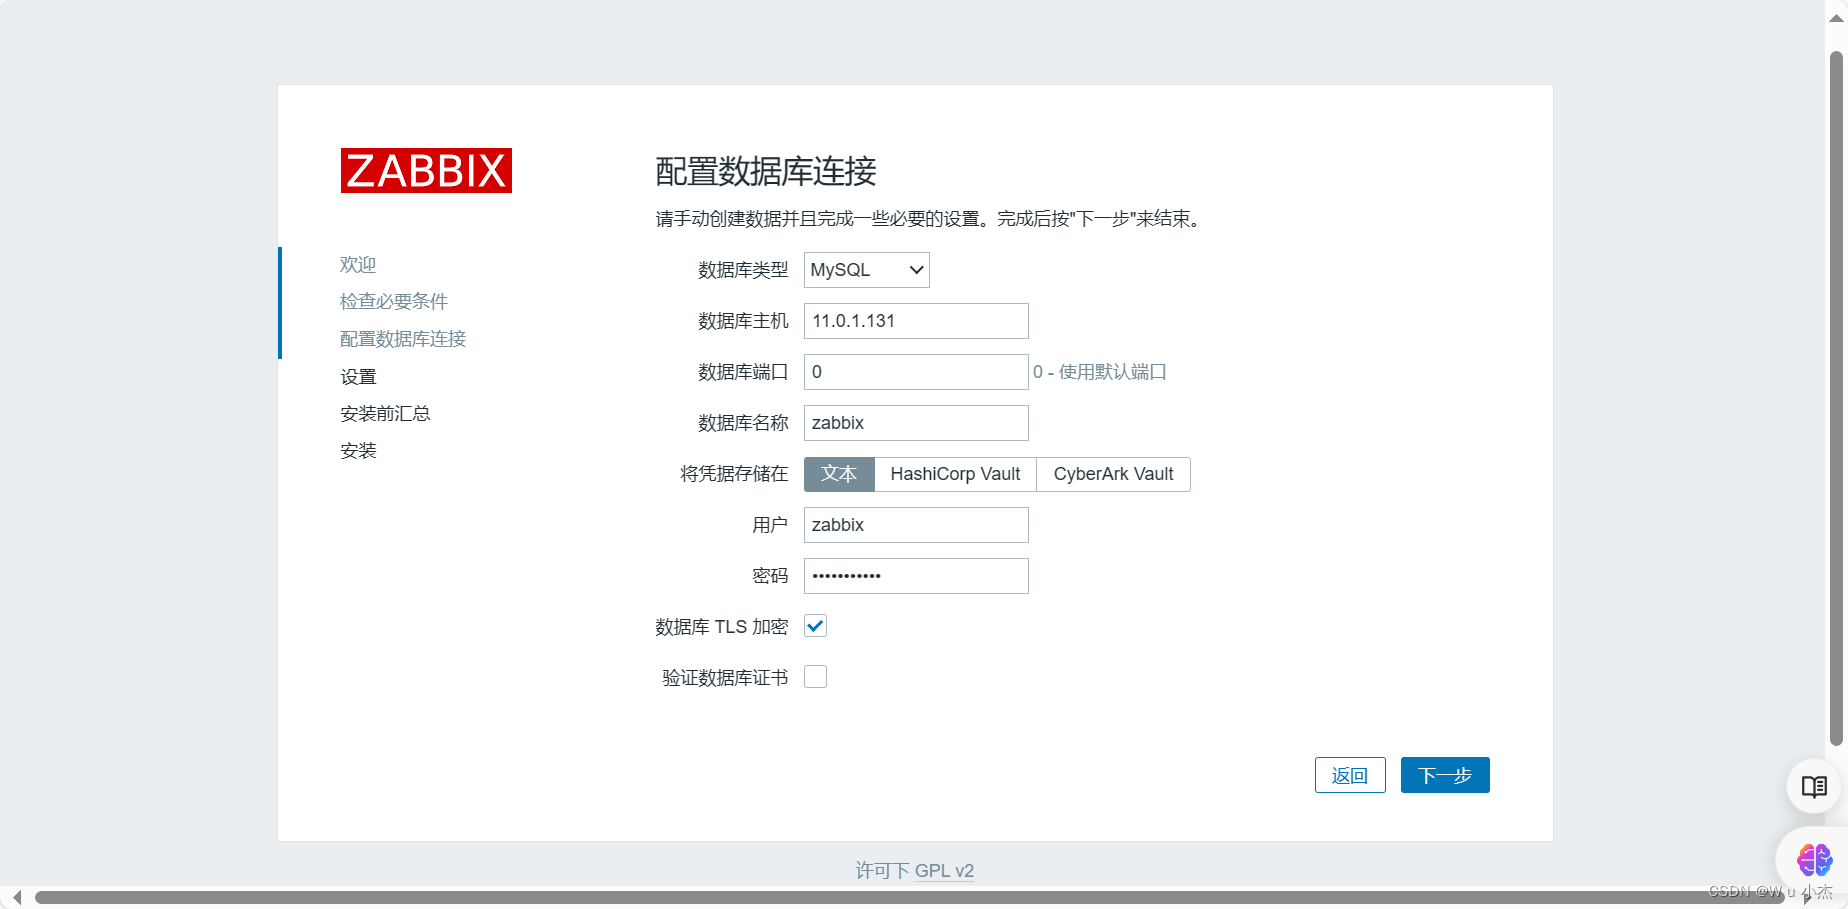
3 填写数据库信息(默认端口是3306 页面配置就是0)
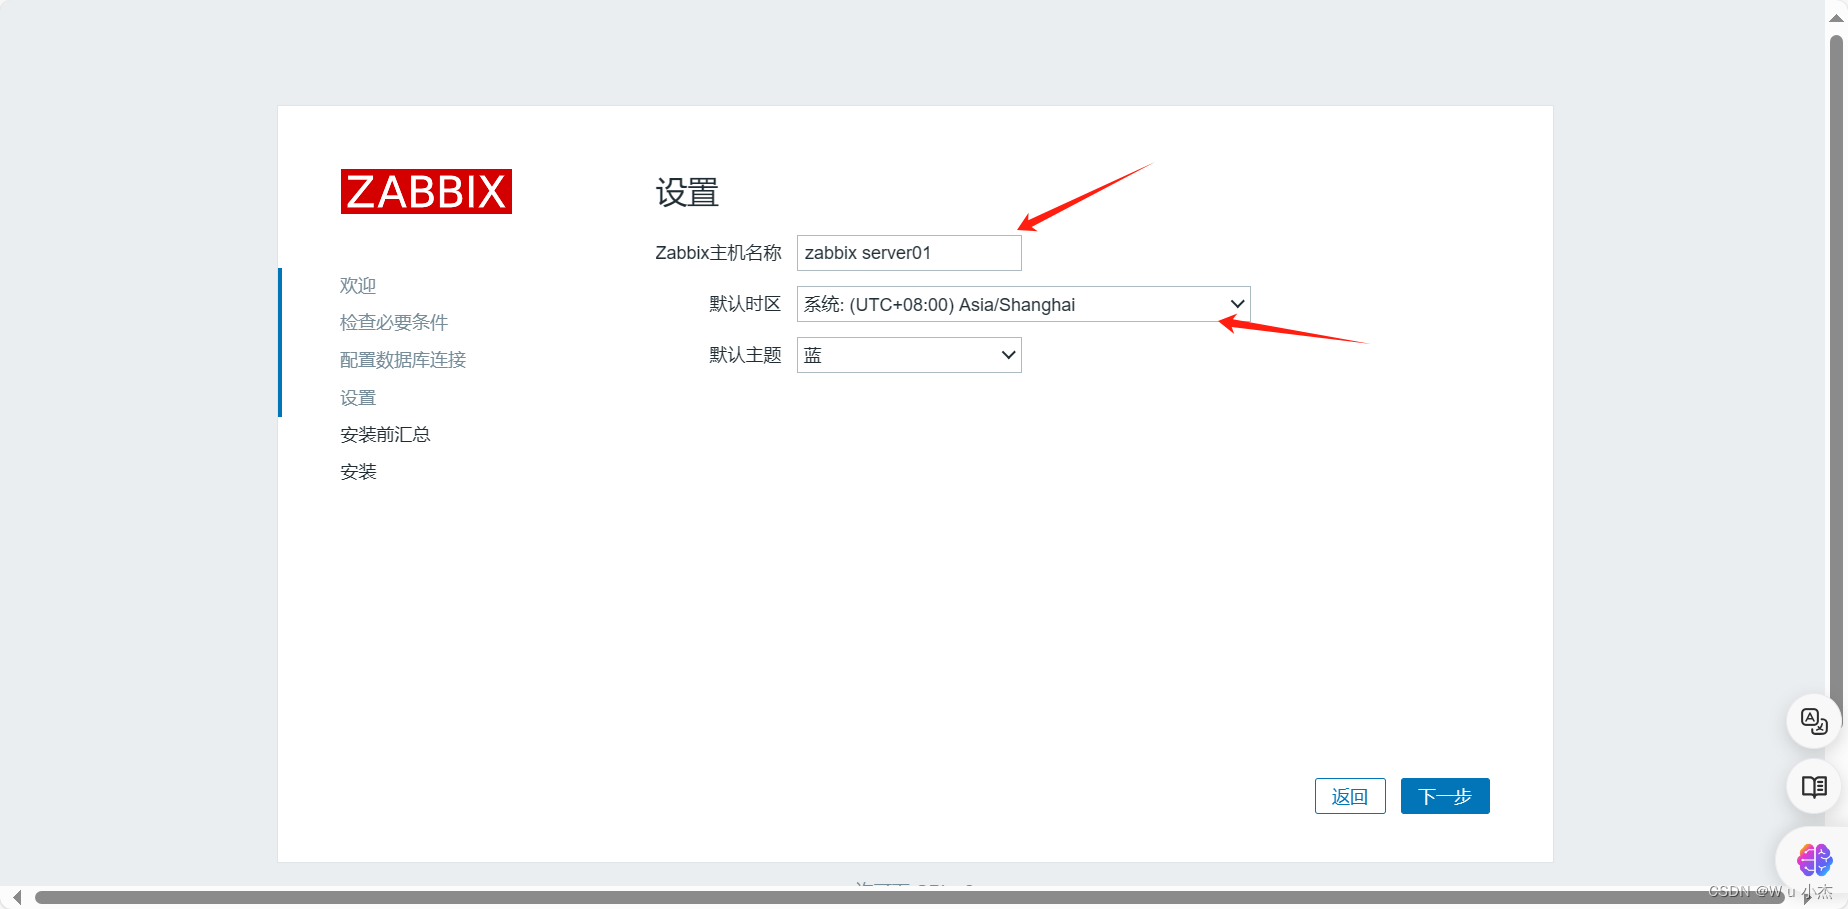
4 设置主机名称和时区(注意:这里设置的zabbix主机名称只是web页面显示的名称,为空也可以的)
5 检查
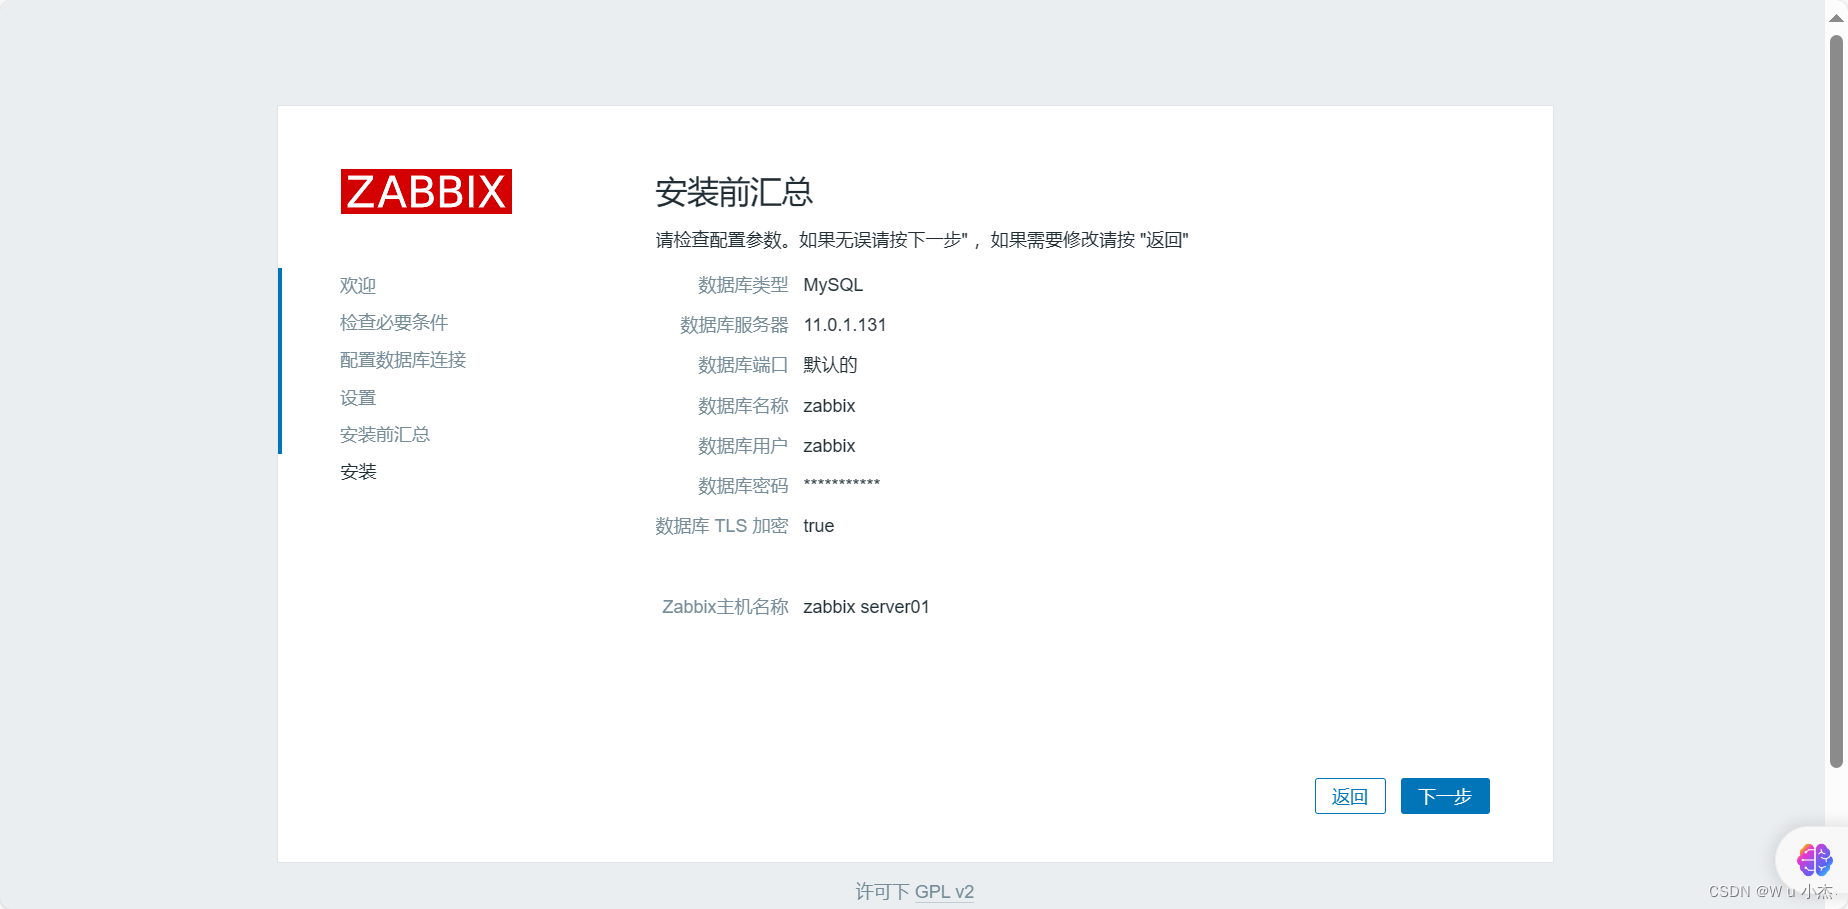
6 完成

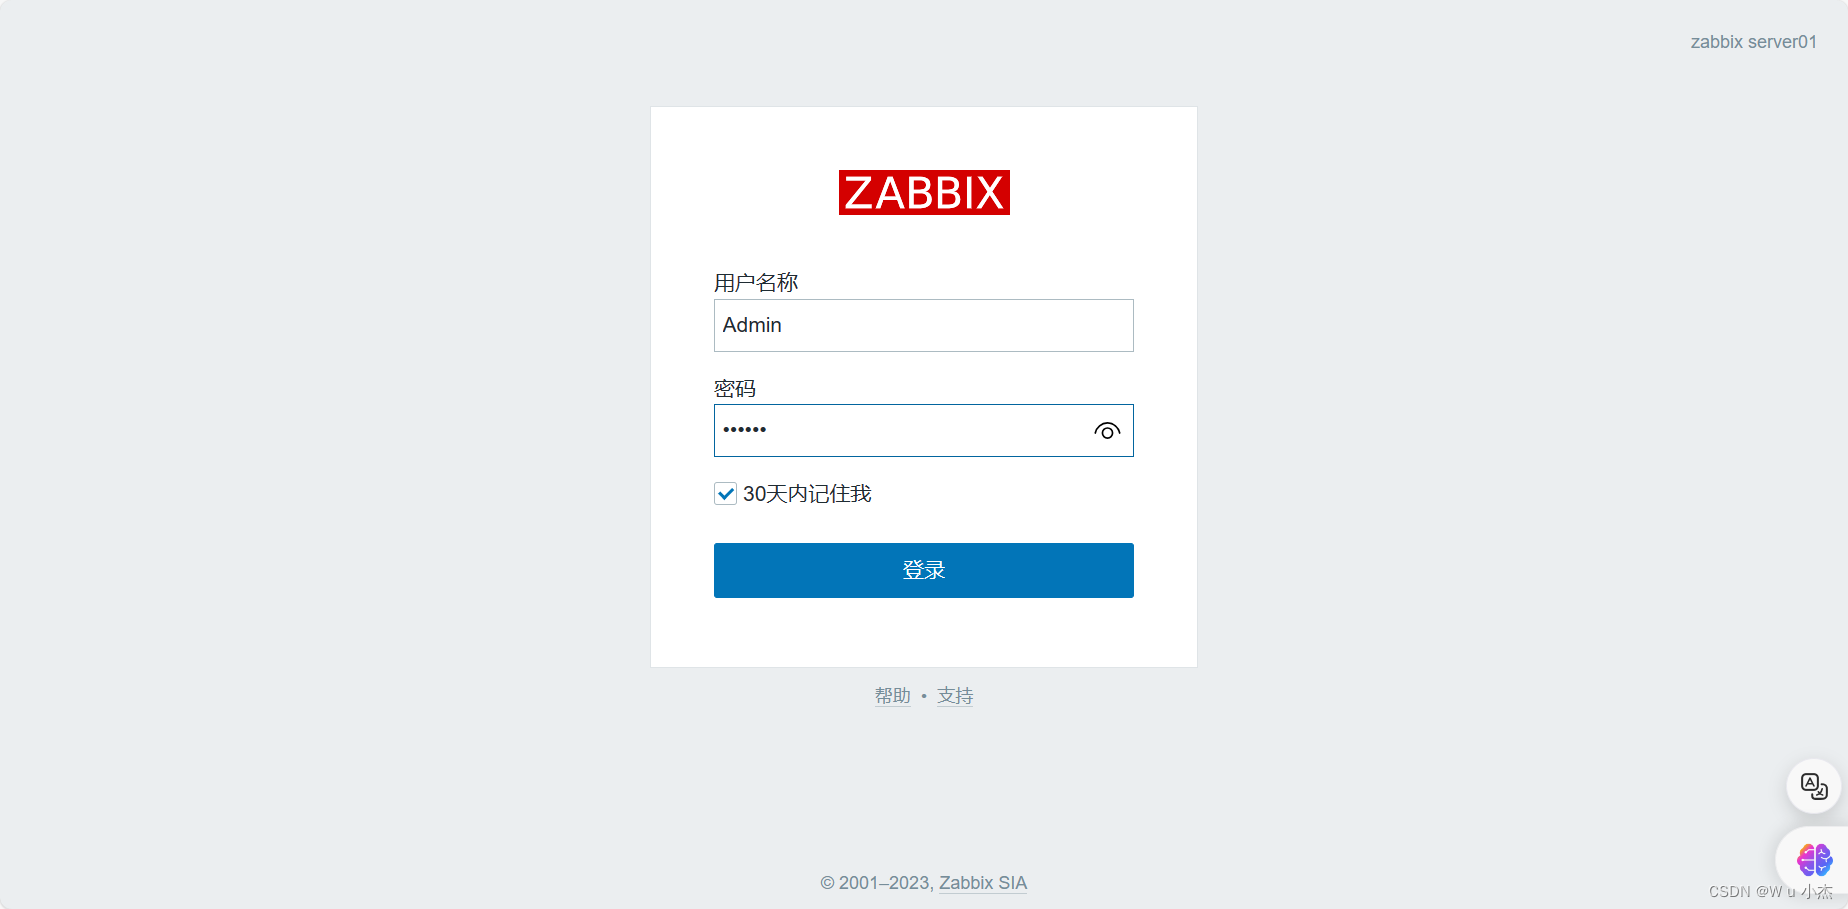
7 登录zabbix(默认账号密码:Admin/zabbix)
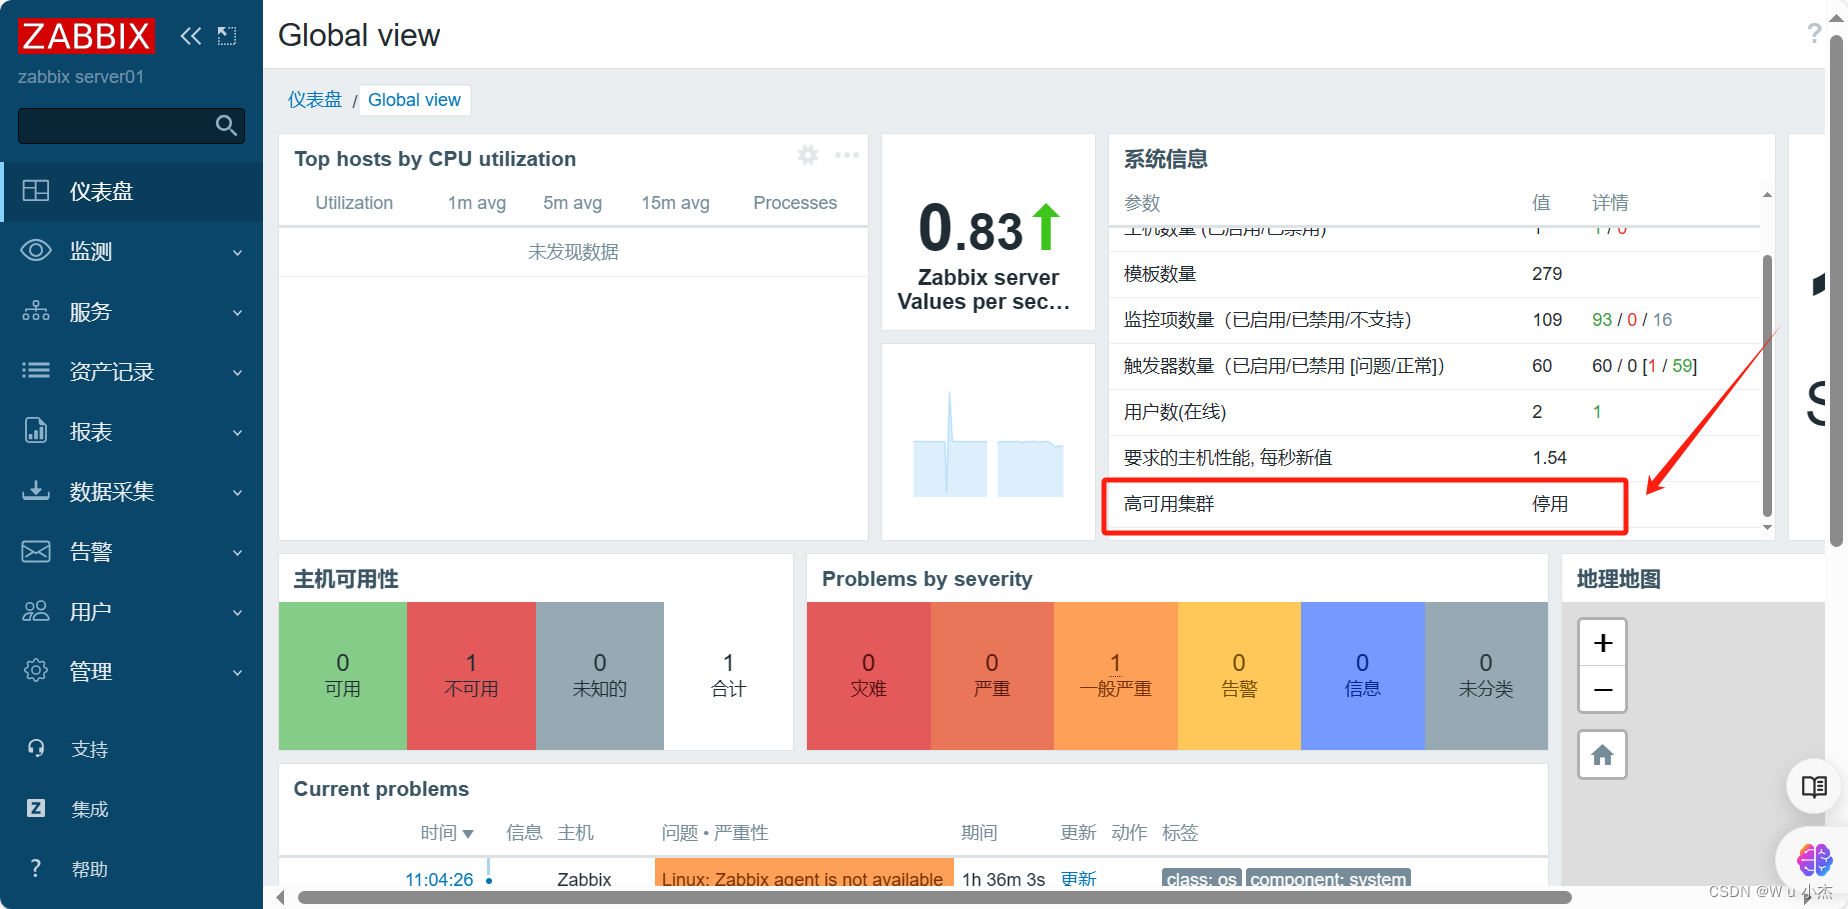
8 进入界面能看出来高可用集群是停用状态,因为还没配置
2.9 设置开机自动启动(也可以编写启动脚本下面有)
[root@zabbix-serve01 ~]# cat /etc/rc.local #nginx /usr/local/nginx/sbin/nginx # zabbix /usr/local/zabbix-6.4.4/sbin/zabbix_server -c /usr/local/zabbix-6.4.4/etc/zabbix_server.conf //添加以上内容 [root@zabbix-serve01 ~]# chmod +x /etc/rc.local
至此 zabbix单机版已经部署完成,zabbix-serve02 按照以上步骤再部署一个zabbix单机版
2.3章节数据库不需要再部署,zabbix集群需要共用一个数据库,两台zabbix server都指向11.0.1.131这台数据库即可
2.10 在zabbix-server02上面部署zabbis server,步骤按着zabbix-server01 来操作
2.11 配置HA
注意:在没有完成集群配置前,不要同时启动多个Zabbix Server
zabbix-server01(主节点):
[root@zabbix-serve01 ~]# egrep -v '^$|^#' /usr/local/zabbix-6.4.4/etc/zabbix_server.conf ListenPort=10051 LogFile=/tmp/zabbix_server.log DBHost=11.0.1.131 DBName=zabbix DBUser=zabbix DBPassword=Ajie@123456 ListenIP=0.0.0.0 Timeout=4 LogSlowQueries=3000 User=zabbix StatsAllowedIP=127.0.0.1 ##HA高可用重要的配置 # HANodeName设置为当前节点主机名或者IP地址,需保证同一集群中唯一 HANodeName=zabbix-server01 # NodeAddress设置为主节点IP:10051 NodeAddress=11.0.1.136:10051
zabbix-server02(备节点):
[root@zabbix-serve02 ~]# egrep -v '^$|^#' /usr/local/zabbix-6.4.4/etc/zabbix_server.conf
ListenPort=10051
LogFile=/tmp/zabbix_server.log
DBHost=11.0.1.131
DBName=zabbix
DBUser=zabbix
DBPassword=Ajie@123456
ListenIP=0.0.0.0
Timeout=4
LogSlowQueries=3000
User=zabbix
StatsAllowedIP=127.0.0.1
HANodeName=zabbix-serve02
NodeAddress=11.0.1.137:10051
启动zabbix server 服务(两台都要启动)
### 可以编写启动脚本文件 # cat /usr/lib/systemd/system/zabbix-server.service [Unit] Description=Zabbix Server After=syslog.target After=network.target [Service] Environment="CONFFILE=/usr/local/zabbix-6.4.4/etc/zabbix_server.conf" EnvironmentFile=-/etc/sysconfig/zabbix-server Type=forking Restart=on-failure PIDFile=/tmp/zabbix_server.pid KillMode=control-group ExecStart=/usr/local/zabbix-6.4.4/sbin/zabbix_server -c $CONFFILE ExecStop=/bin/kill -SIGTERM $MAINPID RestartSec=10s TimeoutSec=0 [Install] WantedBy=multi-user.target [root@zabbix-serve02 ~]# systemctl daemon-reload [root@zabbix-serve02 ~]# systemctl enable --now zabbix-server.service
查看状态
# 主节点查看 [root@zabbix-serve01 sbin]# /usr/local/zabbix-6.4.4/sbin/zabbix_server -R ha_status Failover delay: 60 seconds Cluster status: # ID Name Address Status Last Access 1. clwaa27300001152d3vatqb3z zabbix-serve01 11.0.1.136:10051 active 2s 2. clwaa4t1x0001492e0ph0qvdg zabbix-serve02 11.0.1.136:10051 standby 1s [root@zabbix-serve01 sbin]# #备节点查看 [root@zabbix-serve02 sbin]# /usr/local/zabbix-6.4.4/sbin/zabbix_server -R ha_status Runtime commands can be executed only in active mode # 备节点程序状态 [root@zabbix-serve02 sbin]# ps -ef |grep zabbix zabbix 1461 1 0 14:50 ? 00:00:00 /usr/local/zabbix-6.4.4/sbin/zabbix_server zabbix 1462 1461 0 14:50 ? 00:00:00 /usr/local/zabbix-6.4.4/sbin/zabbix_server: ha manager root 1468 1355 0 14:53 pts/0 00:00:00 grep --color=auto zabbix #备节点的zabbix server虽然在运行,但是端口不在监听状态 [root@zabbix-serve02 sbin]# ss -ntl |grep 10050 [root@zabbix-serve02 sbin]#
也可以访问主节点的web页面查看
三 zabbix agent2安装
下载地址
https://repo.zabbix.com/zabbix/6.4/rhel/8/x86_64/zabbix-agent2-6.4.0-release1.el8.x86_64.rpm
安装
[root@zabbix-serve01 weihu]# rpm -ivh zabbix-agent2-6.4.0-release1.el8.x86_64.rpm
警告:zabbix-agent2-6.4.0-release1.el8.x86_64.rpm: 头V4 RSA/SHA512 Signature, 密钥 ID a14fe591: NOKEY
Verifying...                          ################################# [100%]
准备中...                          ################################# [100%]
正在升级/安装...
   1:zabbix-agent2-6.4.0-release1.el8 ################################# [100%]
/usr/lib/tmpfiles.d/net-snmp.conf:1: Line references path below legacy directory /var/run/, updating /var/run/net-snmp → /run/net-snmp; please update the tmpfiles.d/ drop-in file accordingly.
[root@zabbix-serve01 weihu]# ls /etc/zabbix/
zabbix_agent2.conf  zabbix_agent2.d
修改配置文件(主动模式)
# 根据自己实际情况去修改 sed -i '/^Server=/s/^/#/' /etc/zabbix/zabbix_agent2.conf sed -i '/^#Server.*/a\Server=11.0.1.136,11.0.1.137' /etc/zabbix/zabbix_agent2.conf sed -i '/^ServerActive=.*/s/ServerActive=127.0.0.1/ServerActive=11.0.1.136,11.0.1.137/' /etc/zabbix/zabbix_agent2.conf sed -i '/^Hostname=/s/^/# /' /etc/zabbix/zabbix_agent2.conf sed -i '/^# .*HostnameItem=system.hostname.*/s/^# //' /etc/zabbix/zabbix_agent2.conf [root@zabbix-db zabbix]# egrep -v '^#|^$' /etc/zabbix/zabbix_agent2.conf PidFile=/run/zabbix/zabbix_agent2.pid LogFile=/var/log/zabbix/zabbix_agent2.log LogFileSize=0 Server=11.0.1.136,11.0.1.137 ServerActive=11.0.1.136,11.0.1.137 HostnameItem=system.hostname Include=/etc/zabbix/zabbix_agent2.d/*.conf PluginSocket=/run/zabbix/agent.plugin.sock ControlSocket=/run/zabbix/agent.sock Include=./zabbix_agent2.d/plugins.d/*.conf [root@zabbix-db zabbix]#
启动agent2服务
[root@zabbix-db zabbix]# systemctl restart zabbix-agent2
[root@zabbix-db zabbix]# systemctl enable zabbix-agent2
[root@zabbix-db zabbix]# ss -ntl |grep 10050
LISTEN  0        128                    *:10050                *:*
四 扩展
4.1 解决乱码问题
当前有些图形显示有乱码,是由于web界面显示为中文但是系统没有相关字体,因此需要准备相关字体文件才能正常显示,例如下图所示
解决办法:
1 本地操作 :按win + R打开命令行 输入fonts


2 zabbix server操作
# 找到原有的字体 可以用find命令查找
[root@zabbix-serve01 ~]# ll /usr/local/nginx/html/zabbix/assets/fonts
总用量 740K
-rw-r--r-- 1 nobody nobody 739K  6月 27  2023 DejaVuSans.ttf
# 选择一个本地的字体上传到/usr/local/nginx/html/zabbix/assets/fonts目录下
[root@zabbix-serve01 ~]# ll /usr/local/nginx/html/zabbix/assets/fonts
总用量 9.6M
-rw-r--r-- 1 root   root   8.8M  4月  2  2021 SIMLI.TTF
-rw-r--r-- 1 nobody nobody 739K  6月 27  2023 DejaVuSans.ttf
# 然后将系统自带的字体 DejaVuSans.ttf 改名备份一下
[root@zabbix-serve01 fonts]# mv DejaVuSans.ttf DejaVuSans.ttf.bak
# 再讲上传的字体 SIMLI.TTF 改为 DejaVuSans.ttf 这个名字
[root@zabbix-serve01 fonts]# mv SIMLI.TTF DejaVuSans.ttf
3 刷新浏览器即可
4.2 验证高可用性
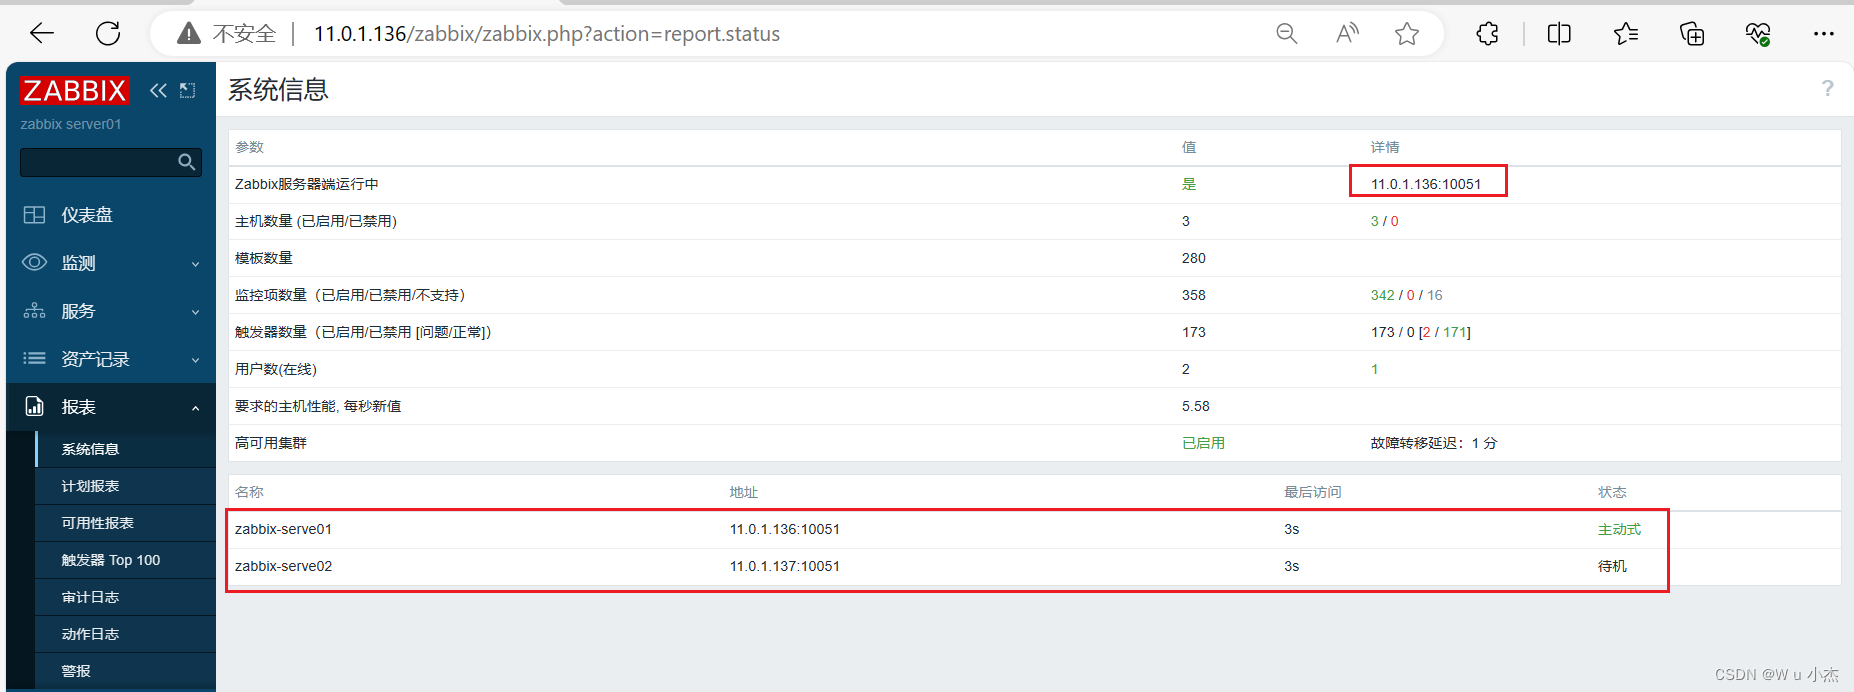
1 查看HA状态
目前zabbix server的10051端口运行在 zabbix-serve01(11.0.1.136) 上运行
[root@zabbix-serve01 ~]# /usr/local/zabbix-6.4.4/sbin/zabbix_server -R ha_status
Failover delay: 60 seconds
Cluster status:
   #  ID                        Name                      Address                        Status      Last Access
   1. clwaa27300001152d3vatqb3z zabbix-serve01            11.0.1.136:10051               active      1s
   2. clwaa4t1x0001492e0ph0qvdg zabbix-serve02            11.0.1.137:10051               standby     0s
2 故障模拟
停止主节点服务,也就是停止 zabbix-server01 主机上的zabbix server服务
[root@zabbix-serve01 ~]# systemctl stop zabbix-server.service
[root@zabbix-serve01 ~]#
[root@zabbix-serve01 ~]# /usr/local/zabbix-6.4.4/sbin/zabbix_server -R ha_status
zabbix_server [2673]: Cannot perform runtime control command: Cannot connect to service "rtc": [111] Connection refused.
[root@zabbix-serve01 ~]#
[root@zabbix-serve01 ~]# ss -ntl |grep 10051
[root@zabbix-serve01 ~]#
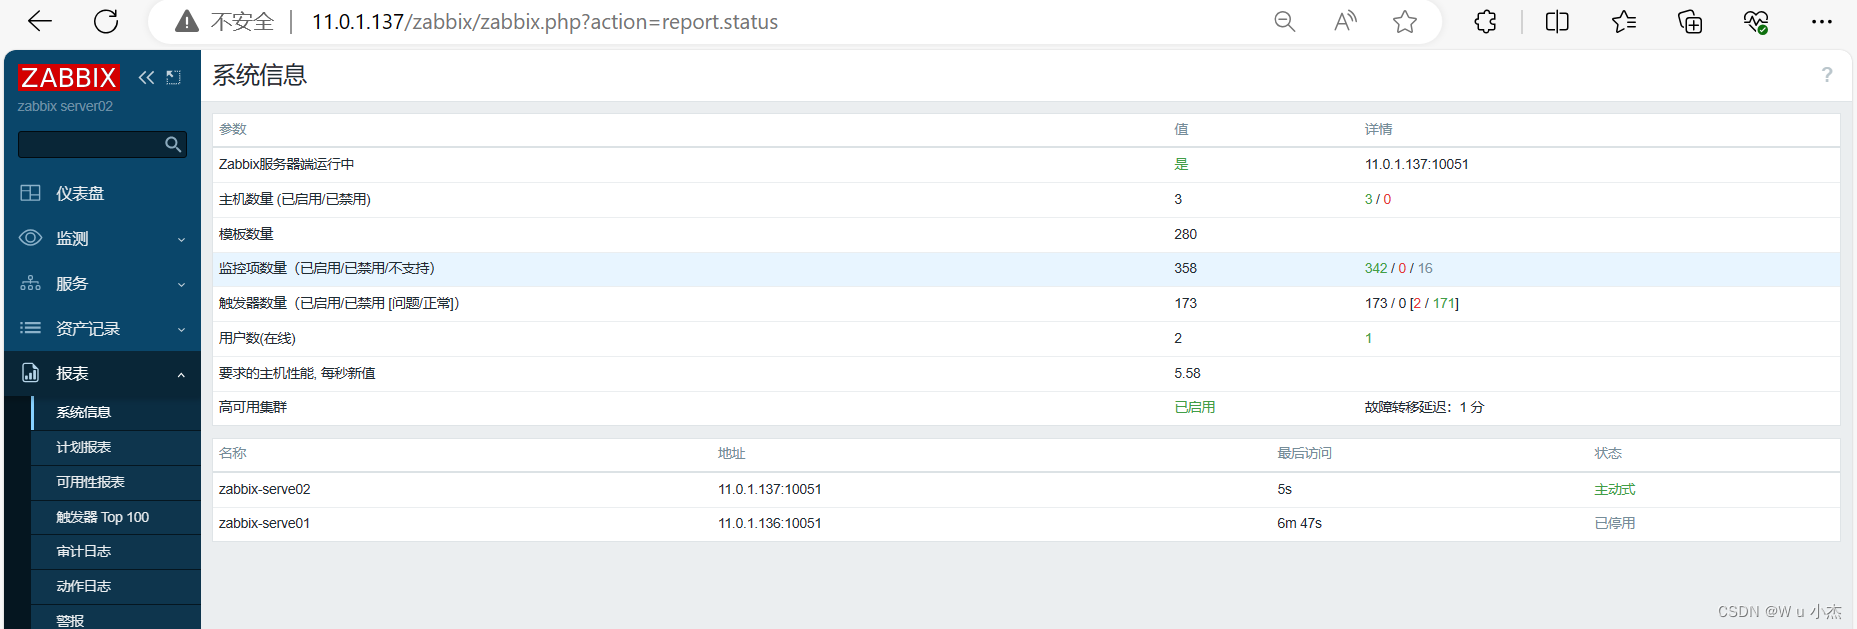
3 去备节点查看,也就是去 zabbix-server02 主机上查看zabbix server服务端口是否存在
[root@zabbix-serve02 ~]# ss -ntl |grep 10051
LISTEN  0        128              0.0.0.0:10051          0.0.0.0:*
[root@zabbix-serve02 ~]# /usr/local/zabbix-6.4.4/sbin/zabbix_server -R ha_status
Failover delay: 60 seconds
Cluster status:
   #  ID                        Name                      Address                        Status      Last Access
   1. clwaa27300001152d3vatqb3z zabbix-serve01            11.0.1.136:10051               stopped     3m 4s
   2. clwaa4t1x0001492e0ph0qvdg zabbix-serve02            11.0.1.137:10051               active      2s
[root@zabbix-serve02 ~]#
可以发现备用节点自动打开10051端口
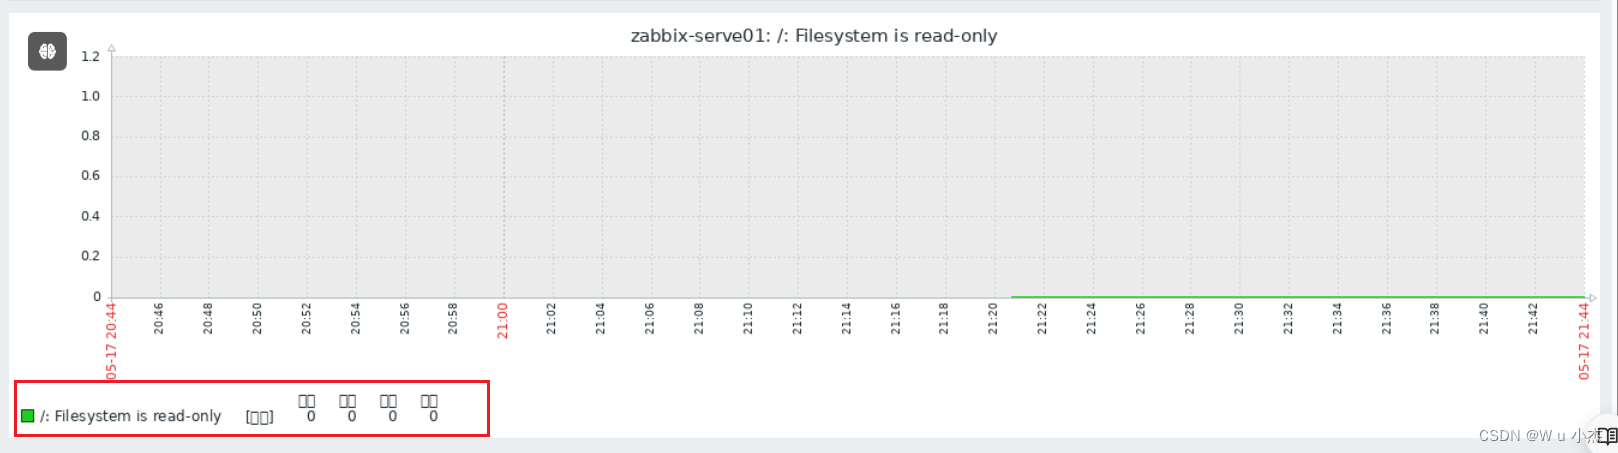
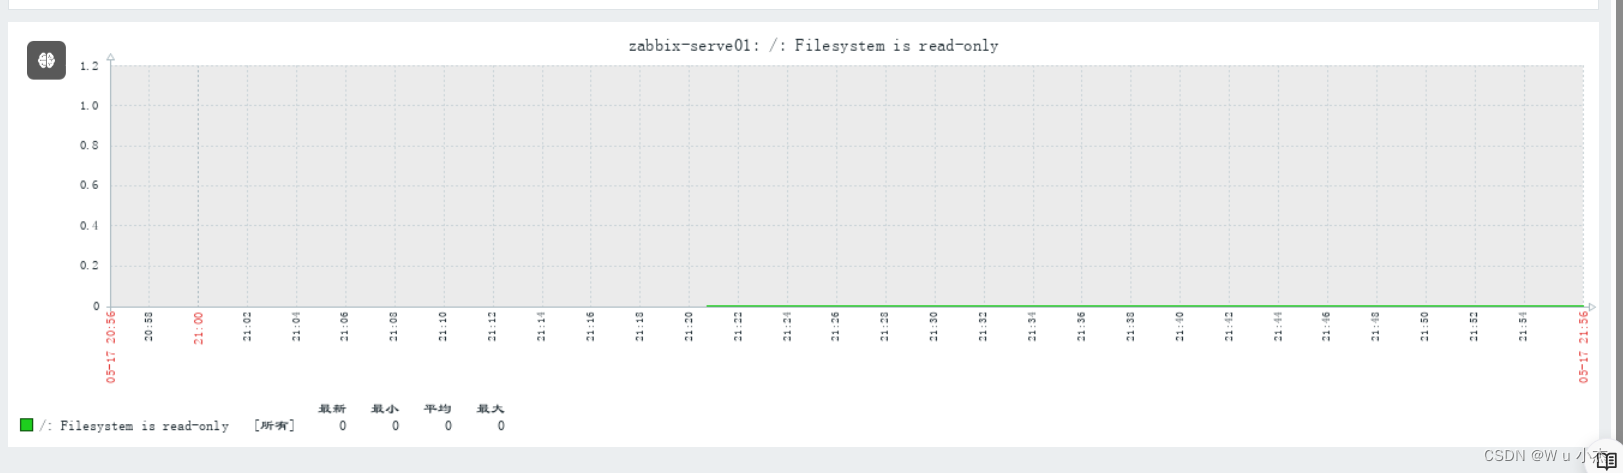
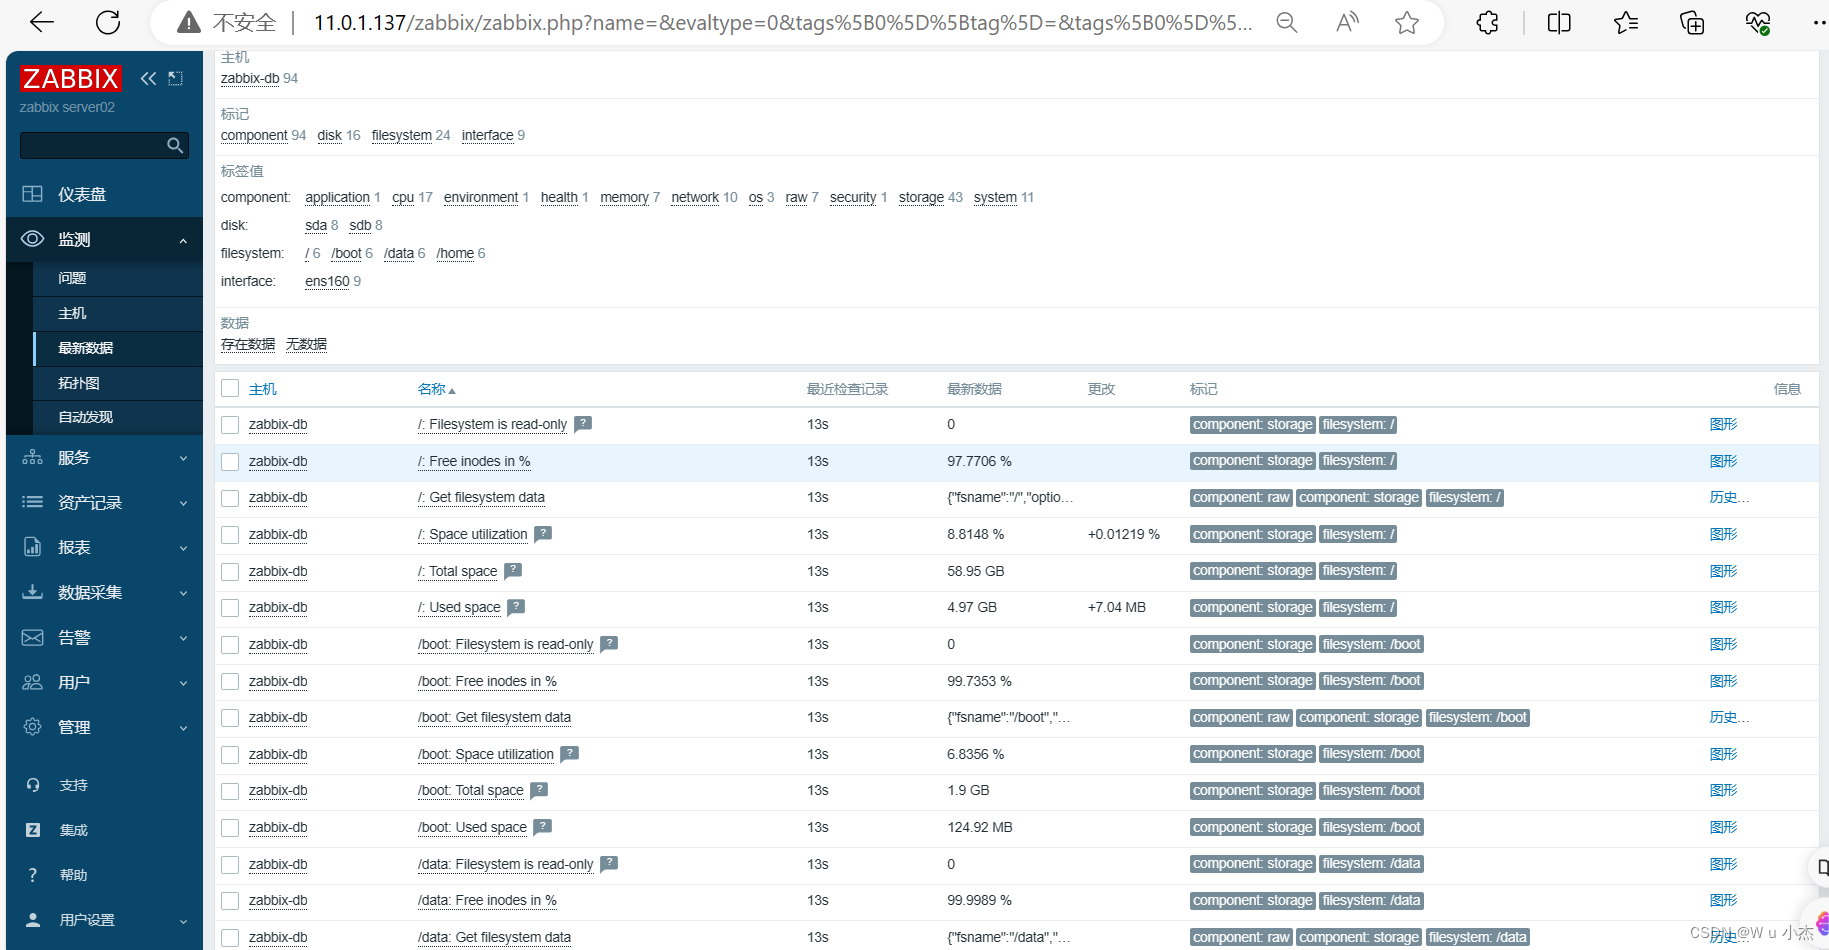
4 登录备用节点的web页面可以看到数据也是最新采集的
5 恢复故障节点的zabbix server服务
[root@zabbix-serve01 ~]# systemctl start zabbix-server.service [root@zabbix-serve01 ~]# systemctl status zabbix-server.service ● zabbix-server.service - Zabbix Server Loaded: loaded (/usr/lib/systemd/system/zabbix-server.service; enabled; vendor preset: disabled) Active: active (running) since Fri 2024-05-17 22:13:49 CST; 5s ago Process: 3034 ExecStart=/usr/local/zabbix-6.4.4/sbin/zabbix_server -c $CONFFILE (code=exited, status=0/SUCCESS) Main PID: 3036 (zabbix_server) Tasks: 2 Memory: 3.4M CGroup: /system.slice/zabbix-server.service ├─3036 /usr/local/zabbix-6.4.4/sbin/zabbix_server -c /usr/local/zabbix-6.4.4/etc/zabbix_server.conf └─3037 /usr/local/zabbix-6.4.4/sbin/zabbix_server: ha manager 5月 17 22:13:48 zabbix-serve01 systemd[1]: Starting Zabbix Server... 5月 17 22:13:49 zabbix-serve01 systemd[1]: Started Zabbix Server. [root@zabbix-serve01 ~]# [root@zabbix-serve01 ~]# /usr/local/zabbix-6.4.4/sbin/zabbix_server -R ha_status Runtime commands can be executed only in active mode
可以发现 原故障节点恢复时,也就是zabbix-server01,会自动成为备用节点,可以理解为是非抢占模式
可以在现在的主节点上查看你HA的状态
[root@zabbix-serve02 ~]# /usr/local/zabbix-6.4.4/sbin/zabbix_server -R ha_status
Failover delay: 60 seconds
Cluster status:
   #  ID                        Name                      Address                        Status      Last Access
   1. clwaa27300001152d3vatqb3z zabbix-serve01            11.0.1.136:10051               standby     1s
   2. clwaa4t1x0001492e0ph0qvdg zabbix-serve02            11.0.1.137:10051               active      3s
[root@zabbix-serve02 ~]#


 1897
1897

 被折叠的 条评论
为什么被折叠?
被折叠的 条评论
为什么被折叠?
 到【灌水乐园】发言


