


 本文通过具体示例展示了Java中多线程的创建与启动方式,包括通过继承Thread类及实现Runnable接口两种方法,并演示了如何设置线程名称及简单的线程调度。
奉天承运,博主诏曰:
多线程

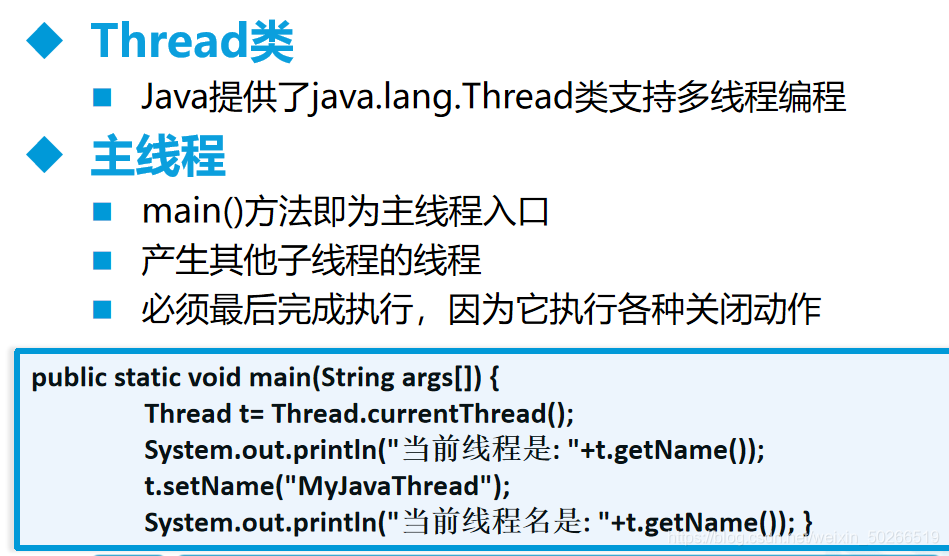
主线程
线程的创建和启动

代码演示
public class TestThread extends Thread{
    public void run(){//线程工作的主体,重写run方法实现
        Thread t=Thread.currentThread();
        for (int i = 0; i < 10; i++) {
            System.out.println(t.getName()+":第"+(i+1)+"次执行");
        }
    }

    public static void main(String[] args) {
        TestThread t1=new TestThread();
//        TestThread t2=new TestThread();
        Thread th1=new Thread(t1,"线程1");
        Thread th2=new Thread(t1,"线程2");
//        t1.setName("线程1");
//        t2.setName("线程2");
//        t1.run();
//        t2.run();
        th1.start();
        th2.start();//使用start方法才是真正意义上的java多线程
    }
}
public class TestRunable implements Runnable{
    @Override
    public void run() {
        Thread t=Thread.currentThread();
        for (int i = 0; i < 10; i++) {
            System.out.println(t.getName()+":第"+(i+1)+"次执行");
//            try {
//                Thread.sleep(1000);
//            } catch (InterruptedException e) {
//                e.printStackTrace();
//            }
        }
    }

    public static void main(String[] args) {
        TestRunable tr=new TestRunable();
        Thread t1=new Thread(tr,"接口线程一");
        Thread t2=new Thread(tr,"接口线程二");
//        t1.setPriority(1);//优先级
//        t2.setPriority(10);
        t1.start();
        t2.start();
        for (int i = 1; i <=10 ; i++) {
            System.out.println(Thread.currentThread().getName()+"运行第"+i+"次");
            if(i%3==0){
                Thread.yield();//线程礼让并没什么用
//                try {
//                    t1.join(10);//如果join的线程join前一直是阻塞状态
//                    //则等待参数里的毫秒数,超时则不继续等待,被join的线程继续运行
//                } catch (InterruptedException e) {
//                    e.printStackTrace();
//                }
            }
        }
    }
}
钦此。


 10万+
10万+

 被折叠的 条评论
为什么被折叠?
被折叠的 条评论
为什么被折叠?
 到【灌水乐园】发言


