


SpringMVC笔记1
1.SpringMVC简介
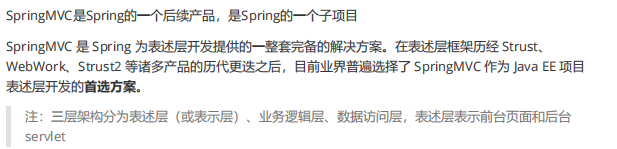
1.1 MVC简介

1.2 SpringMVC
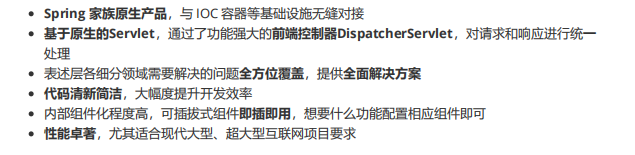
1.3 SpringMVC的特点
2. 使用SpringMVC完成HelloWorld
2.1 开发环境
IDE:IDEA
构建工具:Maven
服务器:tomcat
2.2 创建maven工程

依赖代码
<?xml version="1.0" encoding="UTF-8"?>
<project xmlns="http://maven.apache.org/POM/4.0.0"
         xmlns:xsi="http://www.w3.org/2001/XMLSchema-instance"
         xsi:schemaLocation="http://maven.apache.org/POM/4.0.0 http://maven.apache.org/xsd/maven-4.0.0.xsd">
    <modelVersion>4.0.0</modelVersion>

    <groupId>com.atguigu.mvc</groupId>
    <artifactId>springMVC-demo01</artifactId>
    <version>1.0-SNAPSHOT</version>
    <!--设置打包方式为war包-->
    <packaging>war</packaging>
    <!--引入依赖-->
    <dependencies>
        <dependency>
            <!--springMVC-->
            <groupId>org.springframework</groupId>
            <artifactId>spring-webmvc</artifactId>
            <version>5.3.1</version>
        </dependency>

        <!--日志-->
        <dependency>
            <groupId>ch.qos.logback</groupId>
            <artifactId>logback-classic</artifactId>
            <version>1.2.3</version>
        </dependency>

        <!--ServletAPI-->
        <dependency>
            <groupId>javax.servlet</groupId>
            <artifactId>javax.servlet-api</artifactId> <version>3.1.0</version>
            <scope>provided</scope>
        </dependency>

        <!--Spring5和Thymeleaf整合包-->
        <dependency>
            <groupId>org.thymeleaf</groupId>
            <artifactId>thymeleaf-spring5</artifactId>
            <version>3.0.12.RELEASE</version>
        </dependency>
    </dependencies>

</project>
添加web模块

2.3 配置web.xml
注册SpringMVC的前端控制器DispatcherServlet
2.3.1 默认配置方式

<?xml version="1.0" encoding="UTF-8"?>
<web-app xmlns="http://xmlns.jcp.org/xml/ns/javaee"
         xmlns:xsi="http://www.w3.org/2001/XMLSchema-instance"
         xsi:schemaLocation="http://xmlns.jcp.org/xml/ns/javaee http://xmlns.jcp.org/xml/ns/javaee/web-app_4_0.xsd"
         version="4.0">

    <!-- 配置SpringMVC的前端控制器,对浏览器发送的请求统一进行处理 -->
    <servlet>
        <servlet-name>springMVC</servlet-name>
        <servlet-class>org.springframework.web.servlet.DispatcherServlet</servlet-class>
    </servlet>
    <servlet-mapping>
        <servlet-name>springMVC</servlet-name>
        <!--
            设置springMVC的核心控制器所能处理的请求的请求路径
            /所匹配的请求可以是/login或.html或.js或.css方式的请求路径
            但是/不能匹配.jsp请求路径的请求
        -->
        <url-pattern>/</url-pattern>
    </servlet-mapping>
</web-app>
2.3.2 扩展配置方式

<?xml version="1.0" encoding="UTF-8"?>
<web-app xmlns="http://xmlns.jcp.org/xml/ns/javaee"
         xmlns:xsi="http://www.w3.org/2001/XMLSchema-instance"
         xsi:schemaLocation="http://xmlns.jcp.org/xml/ns/javaee http://xmlns.jcp.org/xml/ns/javaee/web-app_4_0.xsd"
         version="4.0">

    <!-- 配置SpringMVC的前端控制器,对浏览器发送的请求统一进行处理 -->
    <servlet>
        <servlet-name>springMVC</servlet-name>
        <servlet-class>org.springframework.web.servlet.DispatcherServlet</servlet-class>
        <!-- 通过初始化参数指定SpringMVC配置文件的位置和名称 -->
        <init-param>
            <param-name>contextConfigLocation</param-name>
            <!-- 使用classpath:表示从类路径查找配置文件,例如maven工程中的 src/main/resources -->
            <param-value>classpath:springMVC.xml</param-value>
        </init-param>
        <!--
            作为框架的核心组件,在启动过程中有大量的初始化操作要做
            而这些操作放在第一次请求时才执行会严重影响访问速度
            因此需要通过此标签将启动控制DispatcherServlet的初始化时间提前到服务器启动时
        -->
        <load-on-startup>1</load-on-startup>
    </servlet>

    <servlet-mapping>
        <servlet-name>springMVC</servlet-name>
        <!--
            设置springMVC的核心控制器所能处理的请求的请求路径
            /所匹配的请求可以是/login或.html或.js或.css方式的请求路径
            但是/不能匹配.jsp请求路径的请求
        -->
        <url-pattern>/</url-pattern>
    </servlet-mapping>
</web-app>

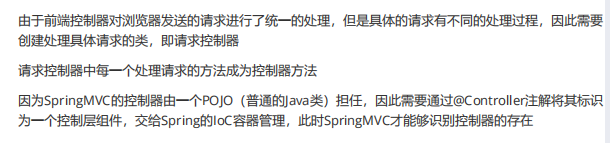
2.4 创建请求控制器
package com.atguigu.mvc.controller;

import org.springframework.stereotype.Controller;
//注解创建bean对象并在xml文件中进行扫描
@Controller
public class HelloController {
}
<?xml version="1.0" encoding="UTF-8"?>
<beans xmlns="http://www.springframework.org/schema/beans"
       xmlns:xsi="http://www.w3.org/2001/XMLSchema-instance"
       xmlns:context="http://www.springframework.org/schema/context"
       xsi:schemaLocation="http://www.springframework.org/schema/beans http://www.springframework.org/schema/beans/spring-beans.xsd http://www.springframework.org/schema/context https://www.springframework.org/schema/context/spring-context.xsd">

    <!--自动扫描包-->
    <context:component-scan base-package="com.atguigu.mvc.controller"></context:component-scan>
    <!-- 配置Thymeleaf视图解析器 -->
    <bean id="viewResolver" class="org.thymeleaf.spring5.view.ThymeleafViewResolver">
        <!--设置视图的优先级-->
        <property name="order" value="1"/>
        <!--视图编码-->
        <property name="characterEncoding" value="UTF-8"/>
        <!--模板-->
        <property name="templateEngine">
            <bean class="org.thymeleaf.spring5.SpringTemplateEngine">
                <property name="templateResolver">
                    <!--这个内部bean为解析视图的策略-->
                    <bean class="org.thymeleaf.spring5.templateresolver.SpringResourceTemplateResolver">
                        <!-- 视图前缀 -->
                        <property name="prefix" value="/WEB-INF/templates/"/>
                        <!-- 视图后缀 -->
                        <property name="suffix" value=".html"/>
                        <!--模板的模型-->
                        <property name="templateMode" value="HTML5"/>
                        <property name="characterEncoding" value="UTF-8" />
                    </bean>
                </property>
            </bean>
        </property>
    </bean>
</beans>
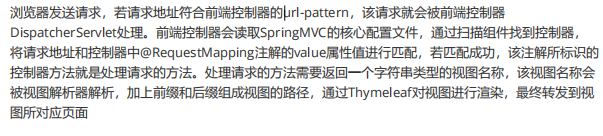
2.5 实现对首页的访问
配置tomcat服务器,编写代码
package com.atguigu.mvc.controller;

import org.springframework.stereotype.Controller;
import org.springframework.web.bind.annotation.RequestMapping;

@Controller
public class HelloController {

    // @RequestMapping注解:处理请求和控制器方法之间的映射关系
    // @RequestMapping注解的value属性可以通过请求地址匹配请求,/表示的当前工程的上下文路径
    // localhost:8080/springMVC/
    @RequestMapping("/")
    public String index(){
        //设置视图名称
        return "index";
    }
}
2.6 使用超链接跳转到指定页面
在主页index.html中设置超链接

在请求控制器中创建处理请求的方法
package com.atguigu.mvc.controller;

import org.springframework.stereotype.Controller;
import org.springframework.web.bind.annotation.RequestMapping;

@Controller
public class HelloController {

    // @RequestMapping注解:处理请求和控制器方法之间的映射关系
    // @RequestMapping注解的value属性可以通过请求地址匹配请求,/表示的当前工程的上下文路径
    // localhost:8080/springMVC/
    @RequestMapping("/")
    public String index(){
        //设置视图名称
        return "index";
    }

    @RequestMapping("/target")
    public String toTarget(){
        return "target";
    }
}
2.7 总结
3.@RequestMapping注解
3.1 @RequestMapping注解的功能

注意:如果多个控制器,多个控制器中如果类上没有注解的话,每一个@RequestMapping注解的值要确保唯一,不然会报错。
3.2 @RequestMapping注解的位置

3.3 @RequestMapping注解的value属性
多个value值有一个匹配及请求成功

@Controller
//@RequestMapping("/hello")
public class RequestMappingController {

    @RequestMapping(value={"/testRequestMapping","/test"})
    public String success(){
        return "success";
    }
}
<body>
<h1>首页</h1>
<a th:href="@{/hello/testRequestMapping}">测试RequestMapping注解的位置</a><br>
<a th:href="@{/testRequestMapping}">测试value值->/testRequestMapping</a><br>
<a th:href="@{/testRequestMapping}">测试value值->/test</a><br>
</body>
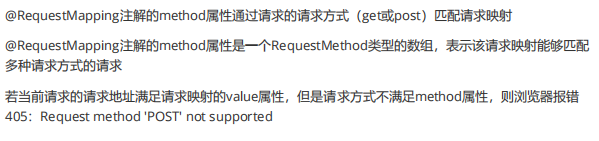
3.4 @RequestMapping注解的method属性
多个method值有一个匹配及请求成功
<body>
<h1>首页</h1>
<a th:href="@{/hello/testRequestMapping}">测试RequestMapping注解的位置</a><br>
<a th:href="@{/testRequestMapping}">测试value值->/testRequestMapping</a><br>
<a th:href="@{/testRequestMapping}">测试value值->/test</a><br>
<a th:href="@{/testRequestMapping}">测试method属性->get</a><br><!--可以请求-->

<form th:action="@{/test}" method="post"><!--无法请求-->
    <input type="submit" value="测试method属性->post">
</form>
</body>
@Controller
//@RequestMapping("/hello")
public class RequestMappingController {

    @RequestMapping(value={"/testRequestMapping","/test"},
                    method={RequestMethod.GET})//只能匹配get请求,如果没有设置method属性则对请求方法没有限制
    public String success(){
        return "success";
    }
}
3.5 @RequestMapping的派生注解


    @GetMapping(value="/testGetMapping")//只有get请求能够匹配
    public String testGetMapping(){
        return "success";
    }
测试代码
<a th:href="@{/testGetMapping}">测试派生注解->GetMapping</a><br>
3.6 @RequestMapping注解的params属性
多个params值必须全部满足才能匹配成功


测试代码
<a th:href="@{/testParams(username='admin')}">测试params属性->/testParams</a>
   @RequestMapping(value = "/testParams",
                    params = "username")
    public String testParams(){
        return "success";
    }
3.7 @RequestMapping注解的headers属性(了解)

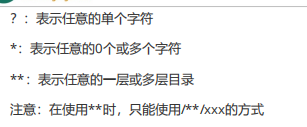
3.8 SpringMVC支持ant风格的路径
//    @RequestMapping("/a?a/testAnt")
//    @RequestMapping("/a*a/testAnt")
    @RequestMapping("/**/testAnt")
    public String testAnt(){
        return "success";
    }
测试代码
<a th:href="@{/a1a/testAnt}">测试ant风格的路径->使用?</a><br>
<a th:href="@{/a11a/testAnt}">测试ant风格的路径->使用*</a><br>
<a th:href="@{/a/b/a/testAnt}">测试ant风格的路径->使用**</a><br>
3.8 SpringMVC支持路径中的占位符(重点)
在控制器注解中有几个占位符,在请求地址中都要赋上几个参数

    @RequestMapping("/testPath/{id}/{username}")
    public String testPath(@PathVariable("id") Integer id,@PathVariable("username") String username){
        System.out.println("id:"+id+",username:"+username);
        return "success";
    }
<a th:href="@{/testPath/1/'admin'}">测试占位符</a><br>
4.SpringMVC获取请求参数
4.1 通过ServletAPI获取

    @RequestMapping("/testServletAPI")
    public String testServletAPI(HttpServletRequest request){
        String username = request.getParameter("username");
        String password = request.getParameter("password");
        System.out.println("username:"+username+",password:"+password);
        return "success";
    }
<a th:href="@{/testServletAPI(username = 'admin',password=123456)}">测试servletAPI</a>
4.2 通过控制器方法的形参获取请求参数

表单代码
<form th:action="@{/testParam}" method="get">
    用户:<input type="text" name="username"><br>
    密码:<input type="password" name="password"><br>
    爱好:<input type="checkbox" name="hobby" value="a">a<br>
        <input type="checkbox" name="hobby" value="b">b<br>
        <input type="checkbox" name="hobby" value="c">c<br>
    <input type="submit">
</form>

控制器代码
 @RequestMapping("/testParam")
    //若请求参数出现多个同名,可以采用字符串或者字符串数组进行接收
    //若采用字符串,则结果为每个值用逗号隔开
    //若采用字符串数组,则将每个值存到数组当中
    public String testParam(String username,String password,String hobby){
        System.out.println("username:"+username+",password:"+password+",bobby:"+hobby);
        //输出结果:username:admin,password:123456,bobby:a,b,c
        return "success";
    }
4.3 @RequestParam

java代码
 @RequestMapping("/testParam")
    public String testParam(
            //表示该形参用于接收请求参数username,required = false表示请求参数可以没有username
            //defaultValue = "111"表示如果username参数没有传或者为空字符串时的默认值
            @RequestParam(value = "username",required = false,defaultValue = "111") String username,
            //表示该形参用于接收请求参数password
            @RequestParam("password") String password,
            //表示该形参用于接收请求参数hobby
            @RequestParam("hobby") String hobby){
        System.out.println("username:"+username+",password:"+password+",bobby:"+hobby);
        //输出结果:username:admin,password:123456,bobby:a,b,c
        return "success";
    }
4.4 @RequestHeader
用法和@RequstParam类似,但需要注意的是,@RequstParam中如果没有写注释,请求参数会和形参自动映射,但获取请求头参数时不会自动映射,必须写上注释。

4.5 @CookieValues
用法跟@RequestParam类似


    @RequestMapping("/testParam")
    public String testParam(
            @RequestParam(value = "username",required = false,defaultValue = "111") String username,
            @RequestParam("password") String password,
            @RequestParam("hobby") String hobby,
            //表示该形参用于接收键为JSESSIONID的cookie的值
            @CookieValue("JSESSIONID") String JSESSIONID){
        System.out.println("username:"+username+",password:"+password+",bobby:"+hobby+",JSESSIONID:"+JSESSIONID);
        //运行结果:username:lwb123,password:456,bobby:a,b,JSESSIONID:3CCBE836C7819ACFB4C347171F983B1B
        return "success";
    }
4.6 通过POJO获取请求参数

表单代码
<form th:action="@{/testBean}" method="get">
    用户:<input type="text" name="name"><br>
    密码:<input type="password" name="password"><br>
    性别:<input type="radio" name="sex" value="男">男
        <input type="radio" name="sex" value="女">女<br>
    邮箱:<input type="email" name="email"><br>
    <input type="submit" value="测试通过POJO获取请求参数">
</form>
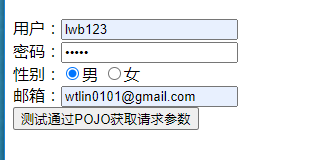
java代码
    @RequestMapping("/testBean")
    public String testParam(User user){
        System.out.println(user);
        //运行结果:User{id='null', name='lwb123', password='fefef', sex='男', email='wtlin0101@gmail.com'}
        return "success";
    }
4.7 解决获取请求参数乱码的问题
注意:
(1)获取get请求参数的时候不会发生乱码问题,因为tomcat已经在配置文件中帮我们解决了,获取post请求则需要解决乱码问题
(2)解决乱码问题要在请求参数获取之前
(3)执行控制器之前,DispatcherServlet就已经获取完请求参数了,所以要修改编码,应该得在过滤器中配置(过滤器的执行在servlet程序之前)
(4)SpringMVC中处理编码的过滤器一定要配置到其他过滤器之前,否则无效

<!--配置springMVC编码过滤器-->
    <filter>
        <filter-name>CharacterEncodingFilter</filter-name>
        <filter-class>org.springframework.web.filter.CharacterEncodingFilter</filter-class>
        <!--设置请求的编码-->
        <init-param>
            <param-name>encoding</param-name>
            <param-value>UTF-8</param-value>
        </init-param>
        <!--设置响应的编码-->
        <init-param>
            <param-name>forceResponseEncoding</param-name>
            <param-value>true</param-value>
        </init-param>
    </filter>
  <filter-mapping>
      <filter-name>CharacterEncodingFilter</filter-name>
      <url-pattern>/*</url-pattern>
  </filter-mapping>
5.域对象共享数据
5.1 使用ServletAPI向request域对象共享数据
@Controller
public class scopeController {
    @RequestMapping("/testServletAPI")
    public String testServletAPI(HttpServletRequest request){
        request.setAttribute("testScope","hello,servletAPI");
        return "success";
    }
测试页面
<a th:href="@{/testServletAPI}">测试使用ServletAPI向request域对象共享数据</a><br>
success页面获取request域数据
<body>
success
<!--获取request域中的参数-->
<p th:text="${testScope}"></p>
</body>
5.2 使用ModelAndView向request域对象共享数据
//使用ModelAndView向request域对象共享数据
    @RequestMapping("/modelAndView")
    public ModelAndView modelAndView(){
        /**
         * ModelAndView有Model和View的功能
         * Model主要用于向请求域共享数据
         * View主要用于设置视图,实现页面跳转
         */
        ModelAndView mav = new ModelAndView();
        //向请求域共享数据
        mav.addObject("testScope","hello,modelAndView");
        //设置视图,实现页面跳转
        mav.setViewName("success");
        return mav;
    }
测试页面
<a th:href="@{/modelAndView}">测试使用modelAndView向request域对象共享数据</a><br>
5.3 使用Model向request域对象共享数据
java代码
//使用Model向request域对象共享数据
    @RequestMapping("/testModel")
    public String testModel(Model model){
        model.addAttribute("testScope","hello,Model");
        return "success";
    }
测试页面
<a th:href="@{/testModel}">测试使用Model向request域对象共享数据</a><br>
5.4使用map向request域对象共享数据
java代码
    //使用map向request域对象共享数据
    @RequestMapping("/testMap")
    public String testMap(Map<String,Object> map){
        map.put("testScope","hello,map");
        return "success";
    }
测试页面
<a th:href="@{/testMap}">测试使用Map向request域对象共享数据</a><br>
5.5 使用ModelMap向request域对象共享数据
java代码
    //使用ModelMap向request域对象共享数据
    @RequestMapping("/testModelMap")
    public String testModelMap(ModelMap modelMap){
        modelMap.addAttribute("testScope","hello,ModelMap");
        return "success";
    }
测试页面
<a th:href="@{/testModelMap}">测试使用ModelMap向request域对象共享数据</a><br>
5.6 Model、ModelMap、Map的关系


5.7 向session和application域共享数据
两种都是通过原始的servletAPI
java代码
 //向session域共享数据
    @RequestMapping("/testSessionScope")
    public String testSessionScope(HttpSession session){
        session.setAttribute("testSessionScope","hello,Session");
        return "success";
    }

    //向application域共享数据
    @RequestMapping("/testApplicationScope")
    public String testApplicationScope(HttpSession session){
        ServletContext application = session.getServletContext();
        application.setAttribute("testApplicationScope","hello,application");
        return "success";
    }
success页面代码
<!DOCTYPE html>
<html lang="en" xmlns:th="http://www.thymeleaf.org">
<head>
    <meta charset="UTF-8">
    <title>Title</title>
</head>
<body>
success
<!--获取request域中的参数-->
<p th:text="${testScope}"></p>
<!--获取session域中的参数-->
<p th:text="${session.testSessionScope}"></p>
<!--获取application域中的参数-->
<p th:text="${application.testApplicationScope}"></p>
</body>
</html>


 4万+
4万+


 被折叠的 条评论
为什么被折叠?
被折叠的 条评论
为什么被折叠?
 到【灌水乐园】发言


