1.添加docker-ce源信息 (换镜像源,下载速度更快)
[root@node1 yum.repos.d]# wget -O /etc/yum.repos.d/docker-ce.repo https://mirrors.tuna.tsinghua.edu.cn/docker-ce/linux/centos/docker-ce.repo --no-check-certificate
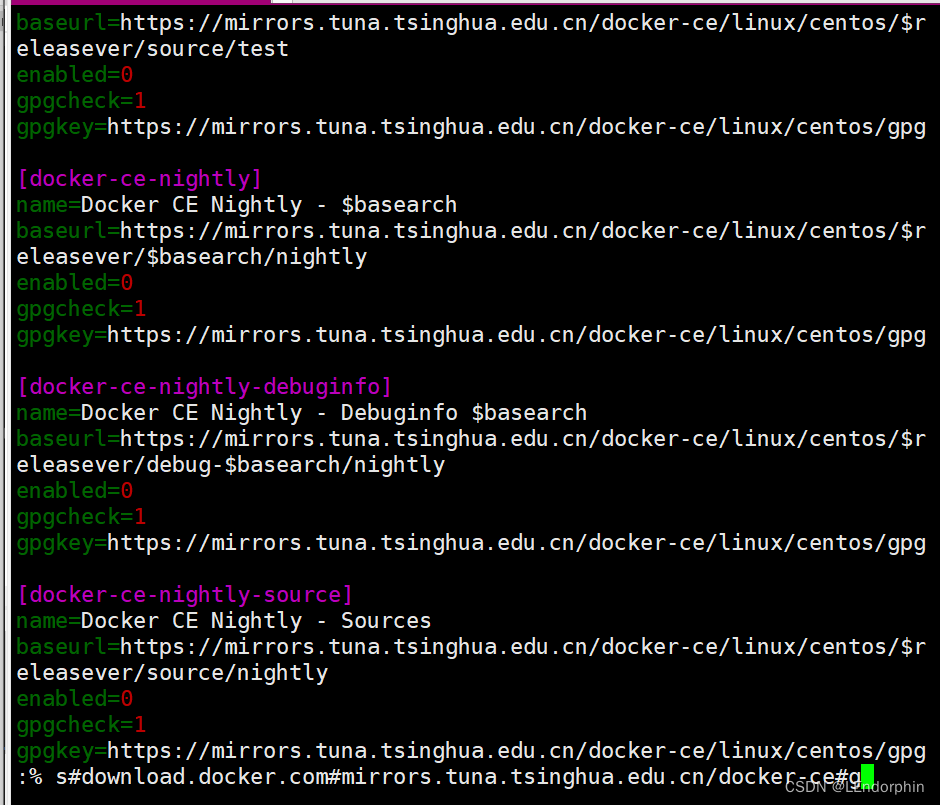
2.修改docker-ce源
[root@node1 system]# vi /etc/yum.repos.d/docker-ce.repo
:% s#download.docker.com#mirrors.tuna.tsinghua.edu.cn/docker-ce#g
#上面那行在编辑模式回车即可
[root@node1 ~]# yum makecache fast
[root@node1 ~]# yum install docker-ce -y
[root@node1 ~]# systemctl start docker
[root@node1 ~]# docker version
[root@node1 lib]# more /usr/lib/systemd/system/docker.s
docker.service docker.socket
[root@node1 lib]# more /usr/lib/systemd/system/docker.service
[Unit]
Description=Docker Application Container Engine
Documentation=https://docs.docker.com
After=network-online.target docker.socket firewalld.service containerd
.service
Wants=network-online.target
Requires=docker.socket containerd.service
[Service]
Type=notify
# the default is not to use systemd for cgroups because the delegate i
ssues still
# exists and systemd currently does not support the cgroup feature set
required
# for containers run by docker
ExecStart=/usr/bin/dockerd -H fd:// --containerd=/run/containerd/conta
inerd.sock
ExecReload=/bin/kill -s HUP $MAINPID
TimeoutSec=0
RestartSec=2
Restart=always
[root@node2 system]# cat docker.socket
[Unit]
Description=Docker Socket for the API

[Socket]
ListenStream=/var/run/docker.sock
SocketMode=0660
SocketUser=root
SocketGroup=docker

[Install]
WantedBy=sockets.target
docker.service
[root@node2 system]# cat docker.service
[Unit]
Description=Docker Application Container Engine
Documentation=https://docs.docker.com
After=network-online.target docker.socket firewalld.service containerd.service
Wants=network-online.target
Requires=docker.socket containerd.service

[Service]
Type=notify
# the default is not to use systemd for cgroups because the delegate issues still
# exists and systemd currently does not support the cgroup feature set required
# for containers run by docker
ExecStart=/usr/bin/dockerd -H fd:// --containerd=/run/containerd/containerd.sock
ExecReload=/bin/kill -s HUP $MAINPID
TimeoutSec=0
RestartSec=2
Restart=always

# Note that StartLimit* options were moved from "Service" to "Unit" in systemd 229.
# Both the old, and new location are accepted by systemd 229 and up, so using the old location
# to make them work for either version of systemd.
StartLimitBurst=3

# Note that StartLimitInterval was renamed to StartLimitIntervalSec in systemd 230.
# Both the old, and new name are accepted by systemd 230 and up, so using the old name to make
# this option work for either version of systemd.
StartLimitInterval=60s

# Having non-zero Limit*s causes performance problems due to accounting overhead
# in the kernel. We recommend using cgroups to do container-local accounting.
LimitNOFILE=infinity
LimitNPROC=infinity
LimitCORE=infinity

# Comment TasksMax if your systemd version does not support it.
# Only systemd 226 and above support this option.
TasksMax=infinity

# set delegate yes so that systemd does not reset the cgroups of docker containers
Delegate=yes

# kill only the docker process, not all processes in the cgroup
KillMode=process
OOMScoreAdjust=-500

[Install]
WantedBy=multi-user.target
containerd.service
[root@node2 system]# cat containerd.service
# Copyright The containerd Authors.
#
# Licensed under the Apache License, Version 2.0 (the "License");
# you may not use this file except in compliance with the License.
# You may obtain a copy of the License at
#
#     http://www.apache.org/licenses/LICENSE-2.0
#
# Unless required by applicable law or agreed to in writing, software
# distributed under the License is distributed on an "AS IS" BASIS,
# WITHOUT WARRANTIES OR CONDITIONS OF ANY KIND, either express or implied.
# See the License for the specific language governing permissions and
# limitations under the License.

[Unit]
Description=containerd container runtime
Documentation=https://containerd.io
After=network.target local-fs.target

[Service]
ExecStartPre=-/sbin/modprobe overlay
ExecStart=/usr/bin/containerd

Type=notify
Delegate=yes
KillMode=process
Restart=always
RestartSec=5
# Having non-zero Limit*s causes performance problems due to accounting overhead
# in the kernel. We recommend using cgroups to do container-local accounting.
LimitNPROC=infinity
LimitCORE=infinity
LimitNOFILE=infinity
# Comment TasksMax if your systemd version does not supports it.
# Only systemd 226 and above support this version.
TasksMax=infinity
OOMScoreAdjust=-999

[Install]
WantedBy=multi-user.target


 4362
4362


 被折叠的 条评论
为什么被折叠?
被折叠的 条评论
为什么被折叠?
 到【灌水乐园】发言


