


Centos7 安装mysql5.7的方式
1.1.1 yum源在线安装OK
首先,这里说明一下安装的以5.7版本为例子。现在官网找到MYSQL5.7版本,然后找到RPM,复制链接,用wget下载
wget -i -c https://mirrors.aliyun.com/mysql/MySQL-5.7/mysql-community-server-5.7.37-1.el7.x86_64.rpm
https://repo.huaweicloud.com/mysql/Downloads/MySQL-5.7/mysql-community-server-5.7.37-1.el7.x86_64.rpm
第二步:添加Mysql yum源 配置
yum install mysql80-community-release-el7-5.noarch.rpm
第三步:选择发行版
yum -y install yum-utils
#禁用8.0:
yum-config-manager --disable mysql80-community
#启用5.7:
yum-config-manager --enable mysql57-community
第四步:
#在线安装(如果找不到server,那就是这里缺少一个禁用模块yum module disable mysql

	yum install mysql mysql-server mysql-libs mysql-server -y
#查看是否安装好,这里可以直接确定就是5.7版本,因为上面已经有命令执行yum repolist enabled | grep mysql
#启动mysql数据库:
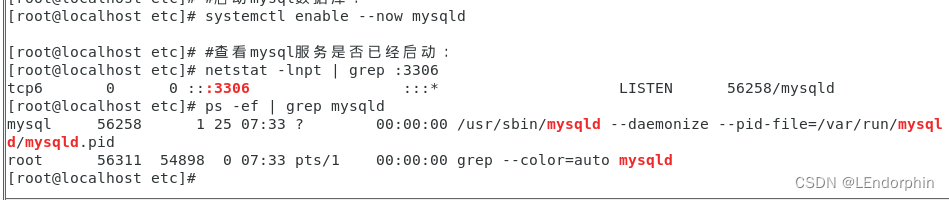
systemctl enable --now mysqld
#查看mysql服务是否已经启动:
netstat -lnpt | grep :3306
ps -ef | grep mysqld
1.1.2 rpm压缩包安装OK
RPM压缩包地址:mysql-5.7.37-1.el7.x86_64.rpm-bundle.tar (huaweicloud.com)
[root@localhost ~]# tar xf   mysql-5.7.37-1.sles12.x86_64.rpm-bundle.tar
[root@localhost ~]# ll mysql-community*
#其中:
#mysql-community-client 客户端(必安装,提供客户使用)
#mysql-community-devel 开发库
#mysql-community-common 服务端和客户端的公共文件(必安装)
#mysql-community-embedded 嵌入式
#mysql-community-server 服务端(必安装)
#mysql-community-test 测试组件
#mysql-community-libs 共享库(必安装)
#mysql-community-libs-compat MySQL之前版本的共享兼容库


[root@localhost ~]# rpm -ivh mysql-community-client-5.7.37-1.el7.x86_64.rpm mysql-community-common-5.7.37-1.el7.x86_64.rpm mysql-community-libs-5.7.37-1.el7.x86_64.rpm mysql-community-server-5.7.37-1.el7.x86_64.rpm
warning: mysql-community-client-5.7.37-1.el7.x86_64.rpm: Header V4 RSA/SHA256 Signature, key ID 3a79bd29: NOKEY
error: Failed dependencies:
	mariadb-libs is obsoleted by mysql-community-libs-5.7.37-1.el7.x86_64
[root@localhost ~]# yum remove mariadb-libs
[root@localhost ~]# rpm -ivh mysql-community-client-5.7.37-1.el7.x86_64.rpm mysql-community-common-5.7.37-1.el7.x86_64.rpm mysql-community-libs-5.7.37-1.el7.x86_64.rpm mysql-community-server-5.7.37-1.el7.x86_64.rpm
[root@localhost ~]# systemctl restart mysqld
[root@localhost ~]# systemctl enable mysqld
2.源码安装mysql–OK
这里给大家整理了这个过程里面几乎全部会用到的软件,大家可以先下载。
如果对于源码安装一些不懂可以打卡mysql官网查看文档
https://dev.mysql.com/doc/refman/8.0/en/source-configuration-options.html
(1)yum install make gcc gcc-c++ cmake bison* ncurses-devel -y yum install libaio libaio-devel openssl-devel -y yum install perl-Data-Dumper -y yum install net-tools -y

yum install -y openssl-devel

#这个下面问题是在可能会在安装mysql的时候出现的问题
(2)问题:Checking for module 'libtirpc'
解决办法:
yum install pkg-config

(3)而这个问题:Could not find rpcgen,是极其少见的,下面软件包可以不这么快下载,后续下载也来得及。
解决:
[root@localhost ~]#  wget https://github.com/thkukuk/rpcsvc-proto/releases/download/v1.4/rpcsvc-proto-1.4.tar.gz
[root@localhost ~]# tar xf rpcsvc-proto-1.4.tar.gz
[root@localhost ~]# cd rpcsvc-proto-1.4
[root@localhost ~]# ./configure
[root@localhost ~]# make
[root@localhost ~]# make install
然后这里开始下载mysql5.7源码安装包
[root@localhost mysql]# wget  https://repo.huaweicloud.com/mysql/Downloads/MySQL-5.7/mysql-boost-5.7.37.tar.gz
#这个链接直接下载
[root@localhost ~]# tar -xf mysql-boost-5.7.37.tar.gz -C /usr/local/src/
    解压到固定文件夹
创建系统用户和用户组,是用来将mysql服务加进系统用户的用户
[root@localhost ~]#  groupadd -r -g 306 mysql
[root@localhost ~]#   useradd -g 306 -r -u 306 mysql -s  /sbin/nologin
然后进行编译,安装
[root@localhost mysql]# cmake -DWITH_BOOST=/usr/local/src/mysql-5.7.37/boost \
-DWITH_SSL=system \
-DWITH_ZLIB=system \
-DSYSCONFDIR=/etc \
-DMYSQL_DATADIR=/usr/local/mysql/data
#这里如果编译出了问题,记得删除那个编译目录下面的CMakeCache.txt然后再进行重新编译
#编译完了不报错就没事
[root@localhost mysql]# cd /usr/local/src/mysql-5.7.37
[root@localhost mysql-5.7.37]#   make install
#这个命令按下去之后需要等待挺长一段时间

[root@localhost mysql-5.7.37]#  vim /etc/my.cnf
#添加如下行指定mysql数据文件的存放位置:
[mysqld]
datadir=/usr/local/mysql/data
socket=/tmp/mysql.sock
symbolic-links=0

[mysqld_safe]
log-error=/var/log/mysqld.log
pid-file=mysqld.pid

!includedir /etc/my.cnf.d


#添加服务脚本,并给与权限
[root@localhost mysql-5.7.37]#  \cp /usr/local/src/mysql-5.7.37/support-files/mysql.server  /etc/init.d/mysqld
[root@localhost mysql-5.7.37]#  chmod +x /etc/init.d/mysqld

 #配置环境变量
[root@localhost mysql-5.7.37]# vim /etc/profile.d/mysql.sh
  export PATH=$PATH:/usr/local/mysql/bin
[root@localhost mysql-5.7.37]#  source  /etc/profile.d/mysql.sh
#初始化
[root@localhost mysql-5.7.37]#  /usr/local/mysql/bin/mysqld --initialize --user=mysql --datadir=/usr/local/mysql/data --basedir=/usr/local/mysql/


这里不用担心文件夹的问题,即使没有创建也不会出错
然后,添加mysqld服务为系统服务,并且开机自启动
[root@localhost mysql-5.7.37]# chkconfig --add mysqld
[root@localhost mysql-5.7.37]# chkconfig mysqld on
然后启动mysqld
[root@localhost mysql-5.7.37]#  systemctl start mysqld
[root@localhost mysql-5.7.37]# systemctl enable  mysqld
必要时如果重新修改了mysql的一些内容,可以重新加载系统服务
#[root@localhost mysql]# systemctl daemon-reload
3.采用二进制格式安装OK
mysql-5.7.37-linux-glibc2.12-x86_64.tar (huaweicloud.com)

找到华为镜像站下载带有glibc2的压缩包,这里下载tar包
下载下来转到虚拟机上面
[root@localhost ~]# groupadd -r -g 306 mysql
[root@localhost ~]# useradd -r -g  306  -u 306 mysql -s /bin/false


#解压成gzip格式压缩包:
[root@localhost ~]# tar xf mysql-5.7.37-linux-glibc2.12-x86_64.tar -C  /usr/local
[root@localhost ~]# tar -xzvf /usr/local/mysql-5.7.37-linux-glibc2.12-x86_64.tar.gz -C /usr/local/

#创建软链接:
[root@localhost ~]# ln -sv /usr/local/mysql-5.7.37-linux-glibc2.12-x86_64  /usr/local/mysql
‘/usr/local/mysql’ -> ‘/usr/local/mysql-5.7.37-linux-glibc2.12-x86_64’

[root@localhost ~]# ll /usr/local/mysql
lrwxrwxrwx. 1 root root 46 Aug 30 19:18 /usr/local/mysql -> /usr/local/mysql-5.7.37-linux-glibc2.12-x86_64

#将这个目的归到mysql这个系统用户管:
root@localhost ~]# chown -R mysql.mysql /usr/local/mysql/*
[root@localhost ~]# vim /etc/profile.d/mysql.sh
export PATH=$PATH:/usr/local/mysql/bin
[root@localhost ~]#source //etc/profile.d/mysql.sh

#通用二进制安装和源码安装需要手工做初始化
[root@localhost ~]# mysqld --initialize --user=mysql --basedir=/usr/local/mysql    --datadir=/usr/local/mysql/data
2022-08-31T03:17:29.819392Z 0 [Warning] TIMESTAMP with implicit DEFAULT value is deprecated. Please use --explicit_defaults_for_timestamp server option (see documentation for more details).
2022-08-31T03:17:30.045609Z 0 [Warning] InnoDB: New log files created, LSN=45790
2022-08-31T03:17:30.078587Z 0 [Warning] InnoDB: Creating foreign key constraint system tables.
2022-08-31T03:17:30.153702Z 0 [Warning] No existing UUID has been found, so we assume that this is the first time that this server has been started. Generating a new UUID: 7274744b-28db-11ed-9564-000c29d17352.
2022-08-31T03:17:30.154144Z 0 [Warning] Gtid table is not ready to be used. Table 'mysql.gtid_executed' cannot be opened.
2022-08-31T03:17:30.788693Z 0 [Warning] A deprecated TLS version TLSv1 is enabled. Please use TLSv1.2 or higher.
2022-08-31T03:17:30.788710Z 0 [Warning] A deprecated TLS version TLSv1.1 is enabled. Please use TLSv1.2 or higher.
2022-08-31T03:17:30.789461Z 0 [Warning] CA certificate ca.pem is self signed.
2022-08-31T03:17:31.023830Z 1 [Note] A temporary password is generated for root@localhost: YnvY#KpeD9-2


#提供主配置文件:

[root@localhost ~]# vim  /etc/my.cnf
#编辑这个文件要修改的内容在以下:
[mysqld]
datadir=/usr/local/mysql/data
socket=/tmp/mysql.sock
[mysqld_safe]
log-error=/var/mysqld.log
pid-file=mysqld.pid

#一般这时候,sock文件会自动创建,这个试验过。但是那个日志文件必须得有,不然后面服务起不来
[root@localhost ~]# touch /var/mysqld.log
[root@localhost ~]# ll /var/mysqld.log
-rw-r--r--. 1 root root 0 Aug 30 20:21 /var/mysqld.log
[root@localhost ~]# chown mysql:mysql /var/mysqld.log
[root@localhost ~]#  systemctl start mysqld

#创建服务脚本
[root@localhost ~]# cp /usr/local/mysql/support-files/mysql.server /etc/rc.d/init.d/mysqld

[root@localhost ~]# ll /etc/rc.d/init.d/mysqld
#如果没有执行权限,就给一个执行权限
 [root@localhost ~]# chmod +x /etc/rc.d/init.d/mysqld

#然后添加成系统服务
[root@localhost ~]# chkconfig --add mysqld
# 开机自启动
[root@localhost ~]# chkconfig --add mysqld
[root@localhost ~]# chkconfig mysqld on
[root@localhost ~]# systemctl start mysqld.service
[root@localhost ~]# mysql -uroot -p
Enter password:
Welcome to the MySQL monitor.  Commands end with ; or \g.
Your MySQL connection id is 2
Server version: 5.7.37

Copyright (c) 2000, 2022, Oracle and/or its affiliates.

Oracle is a registered trademark of Oracle Corporation and/or its
affiliates. Other names may be trademarks of their respective
owners.

Type 'help;' or '\h' for help. Type '\c' to clear the current input statement.

mysql>


二进制方式企业用的多,直接解压,安装初始化,再配置就能使用,非常方便
采用源码安装,优势就是启用部分功能就部分功能,禁用什么功能就可以禁用什么功能,而且还可以使用软件最新版本。缺点是安装耗时,优点就是可以定制和优化。
#这是一个官方二进制包安装mysql的启动服务脚本
[root@localhost ~]# cat /usr/local/mysql/support-files/mysql.server
#!/bin/sh
# Copyright Abandoned 1996 TCX DataKonsult AB & Monty Program KB & Detron HB
# This file is public domain and comes with NO WARRANTY of any kind

# MySQL daemon start/stop script.

# Usually this is put in /etc/init.d (at least on machines SYSV R4 based
# systems) and linked to /etc/rc3.d/S99mysql and /etc/rc0.d/K01mysql.
# When this is done the mysql server will be started when the machine is
# started and shut down when the systems goes down.

# Comments to support chkconfig on RedHat Linux
# chkconfig: 2345 64 36
# description: A very fast and reliable SQL database engine.

# Comments to support LSB init script conventions
### BEGIN INIT INFO
# Provides: mysql
# Required-Start: $local_fs $network $remote_fs
# Should-Start: ypbind nscd ldap ntpd xntpd
# Required-Stop: $local_fs $network $remote_fs
# Default-Start:  2 3 4 5
# Default-Stop: 0 1 6
# Short-Description: start and stop MySQL
# Description: MySQL is a very fast and reliable SQL database engine.
### END INIT INFO

# If you install MySQL on some other places than /usr/local/mysql, then you
# have to do one of the following things for this script to work:
#
# - Run this script from within the MySQL installation directory
# - Create a /etc/my.cnf file with the following information:
#   [mysqld]
#   basedir=<path-to-mysql-installation-directory>
# - Add the above to any other configuration file (for example ~/.my.ini)
#   and copy my_print_defaults to /usr/bin
# - Add the path to the mysql-installation-directory to the basedir variable
#   below.
#
# If you want to affect other MySQL variables, you should make your changes
# in the /etc/my.cnf, ~/.my.cnf or other MySQL configuration files.

# If you change base dir, you must also change datadir. These may get
# overwritten by settings in the MySQL configuration files.

basedir=
datadir=

# Default value, in seconds, afterwhich the script should timeout waiting
# for server start.
# Value here is overriden by value in my.cnf.
# 0 means don't wait at all
# Negative numbers mean to wait indefinitely
service_startup_timeout=900

# Lock directory for RedHat / SuSE.
lockdir='/var/lock/subsys'
lock_file_path="$lockdir/mysql"

# The following variables are only set for letting mysql.server find things.

# Set some defaults
mysqld_pid_file_path=
if test -z "$basedir"
then
  basedir=/usr/local/mysql
  bindir=/usr/local/mysql/bin
  if test -z "$datadir"
  then
    datadir=/usr/local/mysql/data
  fi
  sbindir=/usr/local/mysql/bin
  libexecdir=/usr/local/mysql/bin
else
  bindir="$basedir/bin"
  if test -z "$datadir"
  then
    datadir="$basedir/data"
  fi
  sbindir="$basedir/sbin"
  libexecdir="$basedir/libexec"
fi

# datadir_set is used to determine if datadir was set (and so should be
# *not* set inside of the --basedir= handler.)
datadir_set=

#
# Use LSB init script functions for printing messages, if possible
#
lsb_functions="/lib/lsb/init-functions"
if test -f $lsb_functions ; then
  . $lsb_functions
else
  log_success_msg()
  {
    echo " SUCCESS! $@"
  }
  log_failure_msg()
  {
    echo " ERROR! $@"
  }
fi

PATH="/sbin:/usr/sbin:/bin:/usr/bin:$basedir/bin"
export PATH

mode=$1    # start or stop

[ $# -ge 1 ] && shift


other_args="$*"   # uncommon, but needed when called from an RPM upgrade action
           # Expected: "--skip-networking --skip-grant-tables"
           # They are not checked here, intentionally, as it is the resposibility
           # of the "spec" file author to give correct arguments only.

case `echo "testing\c"`,`echo -n testing` in
    *c*,-n*) echo_n=   echo_c=     ;;
    *c*,*)   echo_n=-n echo_c=     ;;
    *)       echo_n=   echo_c='\c' ;;
esac

parse_server_arguments() {
  for arg do
    case "$arg" in
      --basedir=*)  basedir=`echo "$arg" | sed -e 's/^[^=]*=//'`
                    bindir="$basedir/bin"
		    if test -z "$datadir_set"; then
		      datadir="$basedir/data"
		    fi
		    sbindir="$basedir/sbin"
		    libexecdir="$basedir/libexec"
        ;;
      --datadir=*)  datadir=`echo "$arg" | sed -e 's/^[^=]*=//'`
		    datadir_set=1
	;;
      --pid-file=*) mysqld_pid_file_path=`echo "$arg" | sed -e 's/^[^=]*=//'` ;;
      --service-startup-timeout=*) service_startup_timeout=`echo "$arg" | sed -e 's/^[^=]*=//'` ;;
    esac
  done
}

wait_for_pid () {
  verb="$1"           # created | removed
  pid="$2"            # process ID of the program operating on the pid-file
  pid_file_path="$3" # path to the PID file.

  i=0
  avoid_race_condition="by checking again"

  while test $i -ne $service_startup_timeout ; do

    case "$verb" in
      'created')
        # wait for a PID-file to pop into existence.
        test -s "$pid_file_path" && i='' && break
        ;;
      'removed')
        # wait for this PID-file to disappear
        test ! -s "$pid_file_path" && i='' && break
        ;;
      *)
        echo "wait_for_pid () usage: wait_for_pid created|removed pid pid_file_path"
        exit 1
        ;;
    esac

    # if server isn't running, then pid-file will never be updated
    if test -n "$pid"; then
      if kill -0 "$pid" 2>/dev/null; then
        :  # the server still runs
      else
        # The server may have exited between the last pid-file check and now.
        if test -n "$avoid_race_condition"; then
          avoid_race_condition=""
          continue  # Check again.
        fi

        # there's nothing that will affect the file.
        log_failure_msg "The server quit without updating PID file ($pid_file_path)."
        return 1  # not waiting any more.
      fi
    fi

    echo $echo_n ".$echo_c"
    i=`expr $i + 1`
    sleep 1

  done

  if test -z "$i" ; then
    log_success_msg
    return 0
  else
    log_failure_msg
    return 1
  fi
}

# Get arguments from the my.cnf file,
# the only group, which is read from now on is [mysqld]
if test -x "$bindir/my_print_defaults";  then
  print_defaults="$bindir/my_print_defaults"
else
  # Try to find basedir in /etc/my.cnf
  conf=/etc/my.cnf
  print_defaults=
  if test -r $conf
  then
    subpat='^[^=]*basedir[^=]*=\(.*\)$'
    dirs=`sed -e "/$subpat/!d" -e 's//\1/' $conf`
    for d in $dirs
    do
      d=`echo $d | sed -e 's/[ 	]//g'`
      if test -x "$d/bin/my_print_defaults"
      then
        print_defaults="$d/bin/my_print_defaults"
        break
      fi
    done
  fi

  # Hope it's in the PATH ... but I doubt it
  test -z "$print_defaults" && print_defaults="my_print_defaults"
fi

#
# Read defaults file from 'basedir'.   If there is no defaults file there
# check if it's in the old (depricated) place (datadir) and read it from there
#

extra_args=""
if test -r "$basedir/my.cnf"
then
  extra_args="-e $basedir/my.cnf"
fi

parse_server_arguments `$print_defaults $extra_args mysqld server mysql_server mysql.server`

#
# Set pid file if not given
#
if test -z "$mysqld_pid_file_path"
then
  mysqld_pid_file_path=$datadir/`hostname`.pid
else
  case "$mysqld_pid_file_path" in
    /* ) ;;
    * )  mysqld_pid_file_path="$datadir/$mysqld_pid_file_path" ;;
  esac
fi

case "$mode" in
  'start')
    # Start daemon

    # Safeguard (relative paths, core dumps..)
    cd $basedir

    echo $echo_n "Starting MySQL"
    if test -x $bindir/mysqld_safe
    then
      # Give extra arguments to mysqld with the my.cnf file. This script
      # may be overwritten at next upgrade.
      $bindir/mysqld_safe --datadir="$datadir" --pid-file="$mysqld_pid_file_path" $other_args >/dev/null &
      wait_for_pid created "$!" "$mysqld_pid_file_path"; return_value=$?

      # Make lock for RedHat / SuSE
      if test -w "$lockdir"
      then
        touch "$lock_file_path"
      fi

      exit $return_value
    else
      log_failure_msg "Couldn't find MySQL server ($bindir/mysqld_safe)"
    fi
    ;;

  'stop')
    # Stop daemon. We use a signal here to avoid having to know the
    # root password.

    if test -s "$mysqld_pid_file_path"
    then
      # signal mysqld_safe that it needs to stop
      touch "$mysqld_pid_file_path.shutdown"

      mysqld_pid=`cat "$mysqld_pid_file_path"`

      if (kill -0 $mysqld_pid 2>/dev/null)
      then
        echo $echo_n "Shutting down MySQL"
        kill $mysqld_pid
        # mysqld should remove the pid file when it exits, so wait for it.
        wait_for_pid removed "$mysqld_pid" "$mysqld_pid_file_path"; return_value=$?
      else
        log_failure_msg "MySQL server process #$mysqld_pid is not running!"
        rm "$mysqld_pid_file_path"
      fi

      # Delete lock for RedHat / SuSE
      if test -f "$lock_file_path"
      then
        rm -f "$lock_file_path"
      fi
      exit $return_value
    else
      log_failure_msg "MySQL server PID file could not be found!"
    fi
    ;;

  'restart')
    # Stop the service and regardless of whether it was
    # running or not, start it again.
    if $0 stop  $other_args; then
      $0 start $other_args
    else
      log_failure_msg "Failed to stop running server, so refusing to try to start."
      exit 1
    fi
    ;;

  'reload'|'force-reload')
    if test -s "$mysqld_pid_file_path" ; then
      read mysqld_pid <  "$mysqld_pid_file_path"
      kill -HUP $mysqld_pid && log_success_msg "Reloading service MySQL"
      touch "$mysqld_pid_file_path"
    else
      log_failure_msg "MySQL PID file could not be found!"
      exit 1
    fi
    ;;
  'status')
    # First, check to see if pid file exists
    if test -s "$mysqld_pid_file_path" ; then
      read mysqld_pid < "$mysqld_pid_file_path"
      if kill -0 $mysqld_pid 2>/dev/null ; then
        log_success_msg "MySQL running ($mysqld_pid)"
        exit 0
      else
        log_failure_msg "MySQL is not running, but PID file exists"
        exit 1
      fi
    else
      # Try to find appropriate mysqld process
      mysqld_pid=`pidof $libexecdir/mysqld`

      # test if multiple pids exist
      pid_count=`echo $mysqld_pid | wc -w`
      if test $pid_count -gt 1 ; then
        log_failure_msg "Multiple MySQL running but PID file could not be found ($mysqld_pid)"
        exit 5
      elif test -z $mysqld_pid ; then
        if test -f "$lock_file_path" ; then
          log_failure_msg "MySQL is not running, but lock file ($lock_file_path) exists"
          exit 2
        fi
        log_failure_msg "MySQL is not running"
        exit 3
      else
        log_failure_msg "MySQL is running but PID file could not be found"
        exit 4
      fi
    fi
    ;;
    *)
      # usage
      basename=`basename "$0"`
      echo "Usage: $basename  {start|stop|restart|reload|force-reload|status}  [ MySQL server options ]"
      exit 1
    ;;
esac

exit 0
4.多实例安装mysql–每个实例有一个配置文件
当只有一台机器有数据库,系统一停数据库就不能跑,影响用户具体使用,衍生出多实例安装
如果一台机器,配置比较高,只跑一个数据库显得资源有点浪费,那就可以创建多个数据库。而且到情景维护的时候,数据库一停影响用户使用。
一台机器跑多台mysql数据库,就是意味着跑一台数据库能用3306,再跑一台就不能使用3306端口。端口之间产生冲突。
所以端口不能相同,还有存储数据目录datadir不能相同。这就就可以在维护的时候想停哪个停哪个。
如果我们能在一个应用上面跑一个数据库,是hr的,只需要把这个停了,不影响别的数据库。
这就是一台机器跑多台数据库。
多实例安装建议采用通用二进制安装,glibc2
核心思想:单独为每一个实例提供一个配置文件
1.什么是mysqld_safe?

 在Unix和NetWare中推荐使用mysqld_safe来启动mysqld服务器。mysqld_safe增加了一些安全特性,例如当出现错误时重启服务器并向错误日志文件写入运行时间信息。本节后面列出了NetWare的特定行为。


2./tmp/mysql.sock文件的作用是什么?

ERROR 2002 (HY000): Can't connect to local MySQL server through socket '/tmp/mysql.sock' (2)

这个文件是用于socket连接的文件。
也就是只有你的守护进程启动起来这个文件才存在。
但是你的mysql程序(这个程序是客户端,服务器端时mysqld)可以选择是否使用mysql.sock文件来连接(因为这个方法只适合在Unix主 机上面连接本地的mysqld),对于非本地的任何类型的主机。这些在MySQL的手册(包括晏子翻译的中文版本,覆盖3.23/4.0版本)都有说明。 只要看看就可以明白。
mysql下载链接 https://repo.huaweicloud.com/mysql/Downloads/MySQL-5.7/mysql-5.7.37-linux-glibc2.12-x86_64.tar
[root@localhost my.cnf.d]# wget -c https://repo.huaweicloud.com/mysql/Downloads/MySQL-5.7/mysql-5.7.37-linux-glibc2.12-x86_64.tar
#准备数据目录
[root@localhost ~]# mkdir -p /data/330{6..8}/data
[root@localhost ~]# tree /data
#创建用户和组
[root@localhost ~]# groupadd mysql -r -g 306
[root@localhost ~]# useradd -r -g mysql -s /bin/false -u 306 mysql
#解压,创建软链接
[root@localhost ~]# tar -xf mysql-5.7.37-linux-glibc2.12-x86_64.tar
[root@localhost ~]# tar -xzvf mysql-5.7.37-linux-glibc2.12-x86_64.tar.gz -C /usr/local/
[root@localhost ~]# ln -sv /usr/local/mysql-5.7.37-linux-glibc2.12-x86_64/ /usr/local/mysql
[root@localhost ~]# vim /data/3306/my.cnf
[client]
port = 3306
socket = /data/3306/mysql.sock
[mysqld]
user = mysql
port = 3306
socket = /data/3306/mysql.sock
basedir = /usr/local/mysql
datadir = /data/3306/data
server-id = 3306
[mysqldump]
quick
max_allowed_packet = 16M
[mysqld_safe]
log-error=/data/3306/mysql_3306.err
pid-file=/data/3306/mysqld.pid
#补充未创建的日志文件
[root@localhost ~]# touch /data/3306/mysql_3306.err /data/3307/mysql_3307.err /data/3308/mysql_3308.err
[root@localhost ~]# chown mysql.mysql /data/3306/mysql_3306.err /data/3307/mysql_3307.err /data/3308/mysql_3308.err
[root@localhost ~]# cp /data/3306/my.cnf /data/3307/my.cnf
[root@localhost ~]# cp /data/3306/my.cnf /data/3308/my.cnf
[root@localhost ~]# sed -i 's/3306/3307/g' /data/3307/my.cnf
[root@localhost ~]# sed -i 's/3306/3308/g' /data/3308/my.cnf
sed小插曲
#这里-i不能省略,要不然会导致无法替换字符,直接编辑文件选项-i ,会匹配file文件中每一行的所有3306替换为3307:
#sed是一种流编辑器,它是文本处理中非常有用的工具,能够完美的配合正则表达式使用,功能不同凡响。处理时,把当前处理的行存储在临时缓冲区中,称为『模式空间』(pattern space),接着用sed命令处理缓冲区中的内容,处理完成后,把缓冲区的内容送往屏幕。接着处理下一行,这样不断重复,直到文件末尾。文件内容并没有改变,除非你使用重定向存储输出。sed主要用来自动编辑一个或多个文件,简化对文件的反复操作,编写转换程序等。
#修改MySQL多实例的文件权限
[root@localhost ~]# chown -R mysql.mysql /data/330{6..8}

#配置mysql环境变量
[root@localhost ~]# echo 'export PATH=$PATH:/usr/local/mysql/bin' > /etc/profile.d/mysql.sh
[root@localhost ~]# source /etc/profile.d/mysql.sh

#初始化多实例,这里得记住初始化命令敲下去之后会,下面会显示初始的登陆密码,需登记
#而且这里有三个多实例,要初始化三次
[root@localhost ~]# mysqld --initialize --datadir=/data/3306/data --basedir=/usr/local/mysql --user=mysql
[root@localhost ~]# mysqld --initialize --datadir=/data/3307/data --basedir=/usr/local/mysql --user=mysql
[root@localhost ~]# mysqld --initialize --datadir=/data/3308/data --basedir=/usr/local/mysql --user=mysql

#上面如果中途出现的warning可以不用理
#3306:56Lf:N7o7ht*
#3307:uKN.r%sii8qg
#3308:kaxfTx1-kKr1
#启动mysql多实例---这里的&就是后台启动,顺便方便我们观察mysql启动时的端口
[root@localhost ~]# mysqld_safe --defaults-file=/data/3306/my.cnf &
[root@localhost ~]# mysqld_safe --defaults-file=/data/3307/my.cnf &
[root@localhost ~]# mysqld_safe --defaults-file=/data/3308/my.cnf &

[root@localhost ~]# netstat -lnpt | grep :330
tcp6       0      0 :::3306                 :::*                    LISTEN      4622/mysqld
tcp6       0      0 :::3307                 :::*                    LISTEN      5454/mysqld
tcp6       0      0 :::3308                 :::*                    LISTEN      5650/mysqld

#登录
[root@localhost ~]# mysql -uroot -p -S /data/3306/mysql.sock

#修改密码
[root@localhost ~]# mysqladmin -uroot -p'56Lf:N7o7ht*' password 'MySQL@123' -S /data/3306/mysql.sock

#关闭mysql
[root@localhost ~]# mysqladmin -uroot -p'MySQL@123' -S /data/3306/mysql.sock shutdown
5.(推荐使用)多实例安装mysql–同一个配置文件 (前提是关闭所有的多实例)
这里的安装方式与上面不同的是:上面三实例就有三个配置文件,这里不管多少个实例都是公用一个实例文件,只不过是把一些配置参数写在同一个文件里面
mysqld_multi --example
#这个命令是显示具体的命令详情的
#PID文件存放位置/path/to/mysqld_multi
#ledir=/path/to/mysqld-binary

准备工作:
[root@localhost my.cnf.d]# wget -c https://repo.huaweicloud.com/mysql/Downloads/MySQL-5.7/mysql-5.7.37-linux-glibc2.12-x86_64.tar
[root@localhost ~]# tar -xf mysql-5.7.37-linux-glibc2.12-x86_64.tar
[root@localhost ~]# tar -xzvf mysql-5.7.37-linux-glibc2.12-x86_64.tar.gz -C /usr/local/
[root@localhost ~]# ln -sv /usr/local/mysql-5.7.37-linux-glibc2.12-x86_64/ /usr/local/mysql

#文件名字有要求
#1.创建多实例配置文件
首先说明日志文件、PID文件路径都不对,所以/etc/my.cnf只保留最后一行
[root@localhost my.cnf.d]# cat /etc/my.cnf
!includedir /etc/my.cnf.d


[root@localhost my.cnf.d]# vim /etc/my.cnf

[mysqld_multi]
	mysqld     = /usr/local/mysql/bin/mysqld_safe
	mysqladmin = /usr/local/mysql/bin/mysqladmin
	user       = multi_admin
	pass       = MySQL@123
#这个用户是用来关机的,所以一般不要给管理员用户。
	#官方bug:官方模板为password,应该修改为pass

	[mysqld3306]
	socket     = /data/3306/mysql.sock
	port       = 3306
	pid-file   = /data/3306/mysqld.pid
	datadir    = /data/3306/data
	log-error  = /data/3306/mysql_3306.err

	[mysqld3307]
	socket     = /data/3307/mysql.sock
	port       = 3307
	pid-file   = /data/3307/mysqld.pid
	datadir    = /data/3307/data
	log-error  = /data/3307/mysql_3307.err

	[mysqld3308]
	socket     = /data/3308/mysql.sock
	port       = 3308
	pid-file   = /data/3308/mysqld.pid
	datadir    = /data/3308/data
	log-error  = /data/3308/mysql_3308.err

	!includedir /etc/my.cnf.d

#2.修改MySQL多实例的文件权限
[root@localhost ~]# groupadd mysql -r -g 306
[root@localhost ~]# useradd -r -g mysql -s /bin/false -u 306 mysql
[root@localhost ~]# mkdir /data/330{6..8} -p

[root@localhost my.cnf.d]# chown -R mysql.mysql /data/330{6..8}

#补充未创建的日志文件
[root@localhost ~]# touch /data/3306/mysql_3306.err /data/3307/mysql_3307.err /data/3308/mysql_3308.err
[root@localhost ~]# chown mysql.mysql /data/3306/mysql_3306.err /data/3307/mysql_3307.err /data/3308/mysql_3308.err
[root@localhost 3306]# touch /data/3306/mysqld.pid /data/3307/mysqld.pid /data/3308/mysqld.pid
[root@localhost 3306]# chown mysql.mysql /data/3306/mysqld.pid /data/3307/mysqld.pid /data/3308/mysqld.pid


#3、配置mysql环境变量
[root@localhost ~]# echo 'export PATH=$PATH:/usr/local/mysql/bin' > /etc/profile.d/mysql.sh
[root@localhost ~]# source /etc/profile.d/mysql.sh


#4、初始化多实例
#初始化多实例,这里得记住初始化命令敲下去之后会,下面会显示初始的登陆密码,需登记
#而且这里有三个多实例,要初始化三次
[root@localhost ~]# mysqld --initialize --datadir=/data/3306/data --basedir=/usr/local/mysql --user=mysql
[root@localhost ~]# mysqld --initialize --datadir=/data/3307/data --basedir=/usr/local/mysql --user=mysql
[root@localhost ~]# mysqld --initialize --datadir=/data/3308/data --basedir=/usr/local/mysql --user=mysql

#3306:jp6pWW=Rg#i7
#3307:3y_p6h(qV.M/
#3308:#*ubeVlxf5lI

#5、启动多实例
mysqld_multi start 3306-3308
mysqld_multi report

#6.授权用户
[root@localhost ~]# mysql -uroot -p'jp6pWW=Rg#i7' -S /data/3306/mysql.sock -e "GRANT SHUTDOWN ON *.* TO multi_admin@localhost IDENTIFIED BY 'MySQL@123'"
[root@localhost ~]# mysql -uroot -p'3y_p6h(qV.M/' -S /data/3307/mysql.sock -e "GRANT SHUTDOWN ON *.* TO multi_admin@localhost IDENTIFIED BY 'MySQL@123'" --connect-expired-password
[root@localhost ~]# mysql -uroot -p'#*ubeVlxf5lI' -S /data/3308/mysql.sock -e "GRANT SHUTDOWN ON *.* TO multi_admin@localhost IDENTIFIED BY 'MySQL@123'" --connect-expired-password

#如果上面命令输入后,可能会遇到提示修改密码:
#ERROR 1045 (28000): Access denied for user 'root'@'localhost' (using password: YES)
#那么也可以直接进行下面的步骤,先登录之后,再输入以下命令进行修改:
#ALTER USER root@localhost identified by '123456';

#7登录多实例
mysql -uroot -p'jp6pWW=Rg#i7' -S /data/3306/mysql.sock

#8、停止多实例
mysqld_multi stop 3306,3308
netstat -lnupt | grep :330
以上就是centos7安装mysql的方式,至于其他还有容器安装的方式就等到时候再讲吧。


 3591
3591


 被折叠的 条评论
为什么被折叠?
被折叠的 条评论
为什么被折叠?
 到【灌水乐园】发言


