


学习目标: 布局QLayout
前置环境
运行环境:qt creator 4.12
学习内容:
QLayout; //最常见的布局工具 包含:垂直布局 水平布局 网格布局
StackWidget(); //在一个固定的区域内,允许用户进行切换数据
详细代码和运行测试
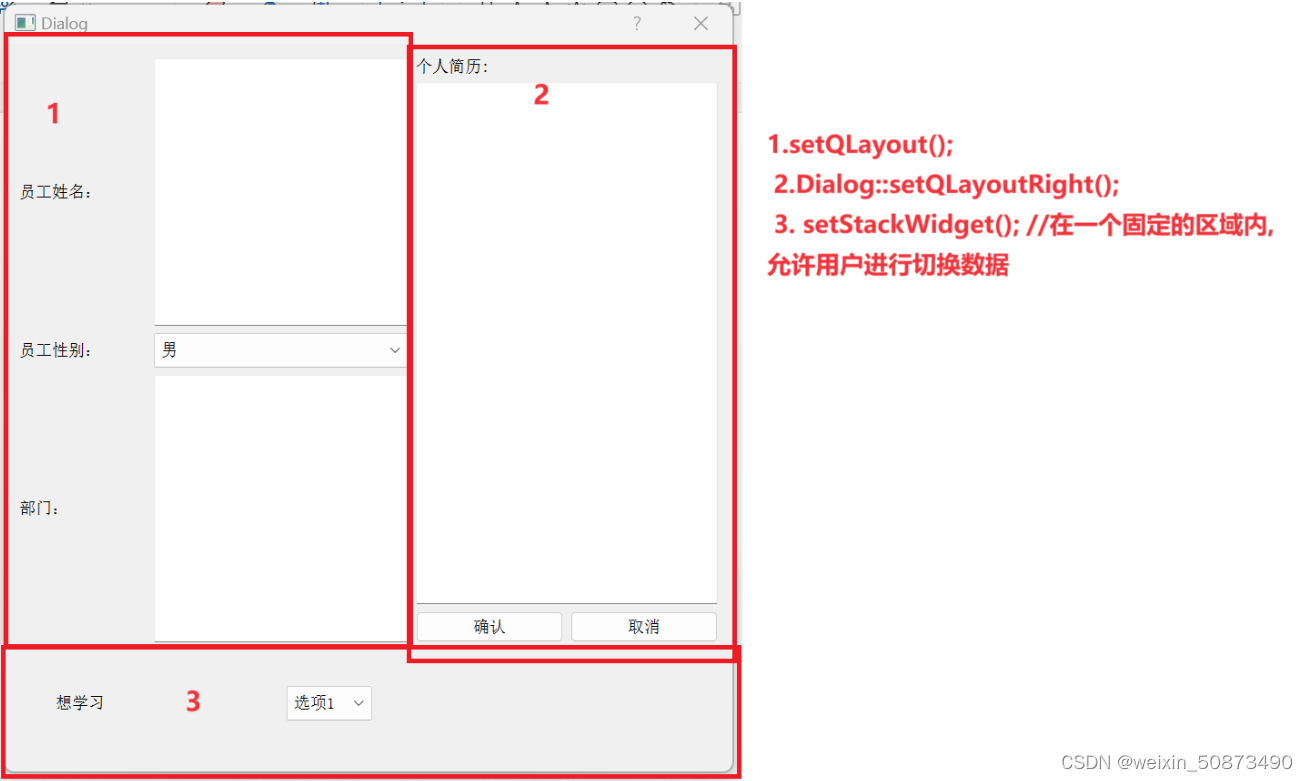
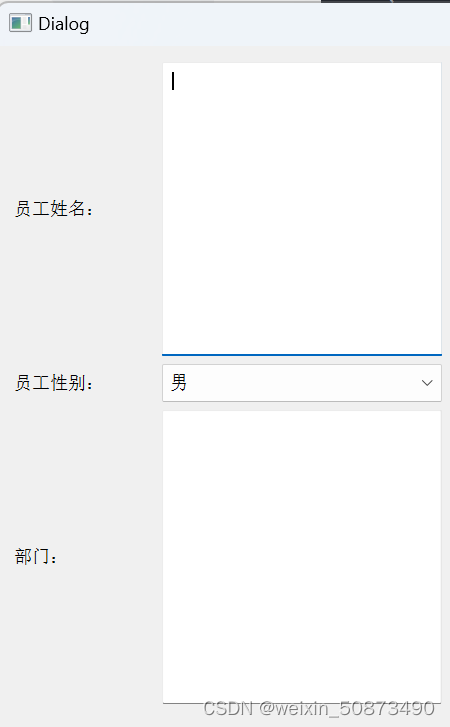
QLayout 左侧
使用常用的网格布局
void Dialog::setQLayout(){
    QLabel* namek = new QLabel("员工姓名:");
    QTextEdit* nameV=new QTextEdit(this);

    QLabel* sexK =new QLabel("员工性别:");
    QComboBox* sexV = new QComboBox();
    sexV->addItem("男");
    sexV->addItem("女");

    QLabel* sexDepartK = new QLabel("部门:");
    QTextEdit* sexDepartV = new QTextEdit();

    QGridLayout* leftgrid = new QGridLayout(this);
    leftgrid->addWidget(namek,0,0);
    leftgrid->addWidget(nameV,0,1);
    leftgrid->addWidget(sexK,1,0);
    leftgrid->addWidget(sexV,1,1);
    leftgrid->addWidget(sexDepartK,2,0);
    leftgrid->addWidget(sexDepartV,2,1);
    //用于设置布局中列/行的拉伸系数   拉伸系数:当窗口比例拉大,会根据系数占比扩大。
    leftgrid->setColumnStretch(0, 1); // 第1列拉伸系数为1
    leftgrid->setColumnStretch(1, 2); // 第2列拉伸系数为2

    grid->addLayout(leftgrid,0,0);
} 
QLayout 右侧
使用垂直布局和水平布局
void Dialog::setQLayoutRight(){
    QLabel* title = new QLabel("个人简历:");
    QTextEdit* data = new QTextEdit();
    QPushButton* yes = new QPushButton("确认");
    QPushButton* no = new QPushButton("取消");

    QVBoxLayout * v = new QVBoxLayout;
    v->addWidget(title);
    v->addWidget(data);
    QHBoxLayout* h = new QHBoxLayout;
    h->addWidget(yes);
    h->addWidget(no);
    v->addLayout(h);

    grid->addLayout(v,0,1);
}
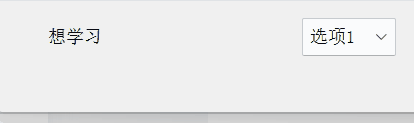
QStackedWidget 堆栈窗
简述:设置多个子窗口,但是只显示一个。
void Dialog::setStackWidget(){
    //跟单例模式类似一样,尽管设置了很多 但是只有一个显示。
    QStackedWidget * single = new QStackedWidget();
    single->addWidget(new QLabel("想吃饭"));
    single->addWidget(new QLabel("想睡觉"));
    single->addWidget(new QLabel("想学习"));
    single->setCurrentIndex(2);
    qDebug()<<single->count();  //获取界面数量  3


    QComboBox * combox = new QComboBox(this);
    combox->addItem("选项1");
    combox->addItem("选项2");
    combox->addItem("选项3");

    QHBoxLayout* h = new QHBoxLayout();
    h->addWidget(single);
    h->addWidget(combox);
    h->setMargin(20);
    h->setSpacing(20);

    QObject::connect(combox,QOverload<const int>::of(&QComboBox::currentIndexChanged),
                     this,[single](const  int index){
            single->setCurrentIndex(index);
    });

    grid->addLayout(h,1,0);
} 
总结:
本次学习布局控件,网格,水平,垂直,堆栈窗口布局。


 3955
3955


 被折叠的 条评论
为什么被折叠?
被折叠的 条评论
为什么被折叠?
 到【灌水乐园】发言


