


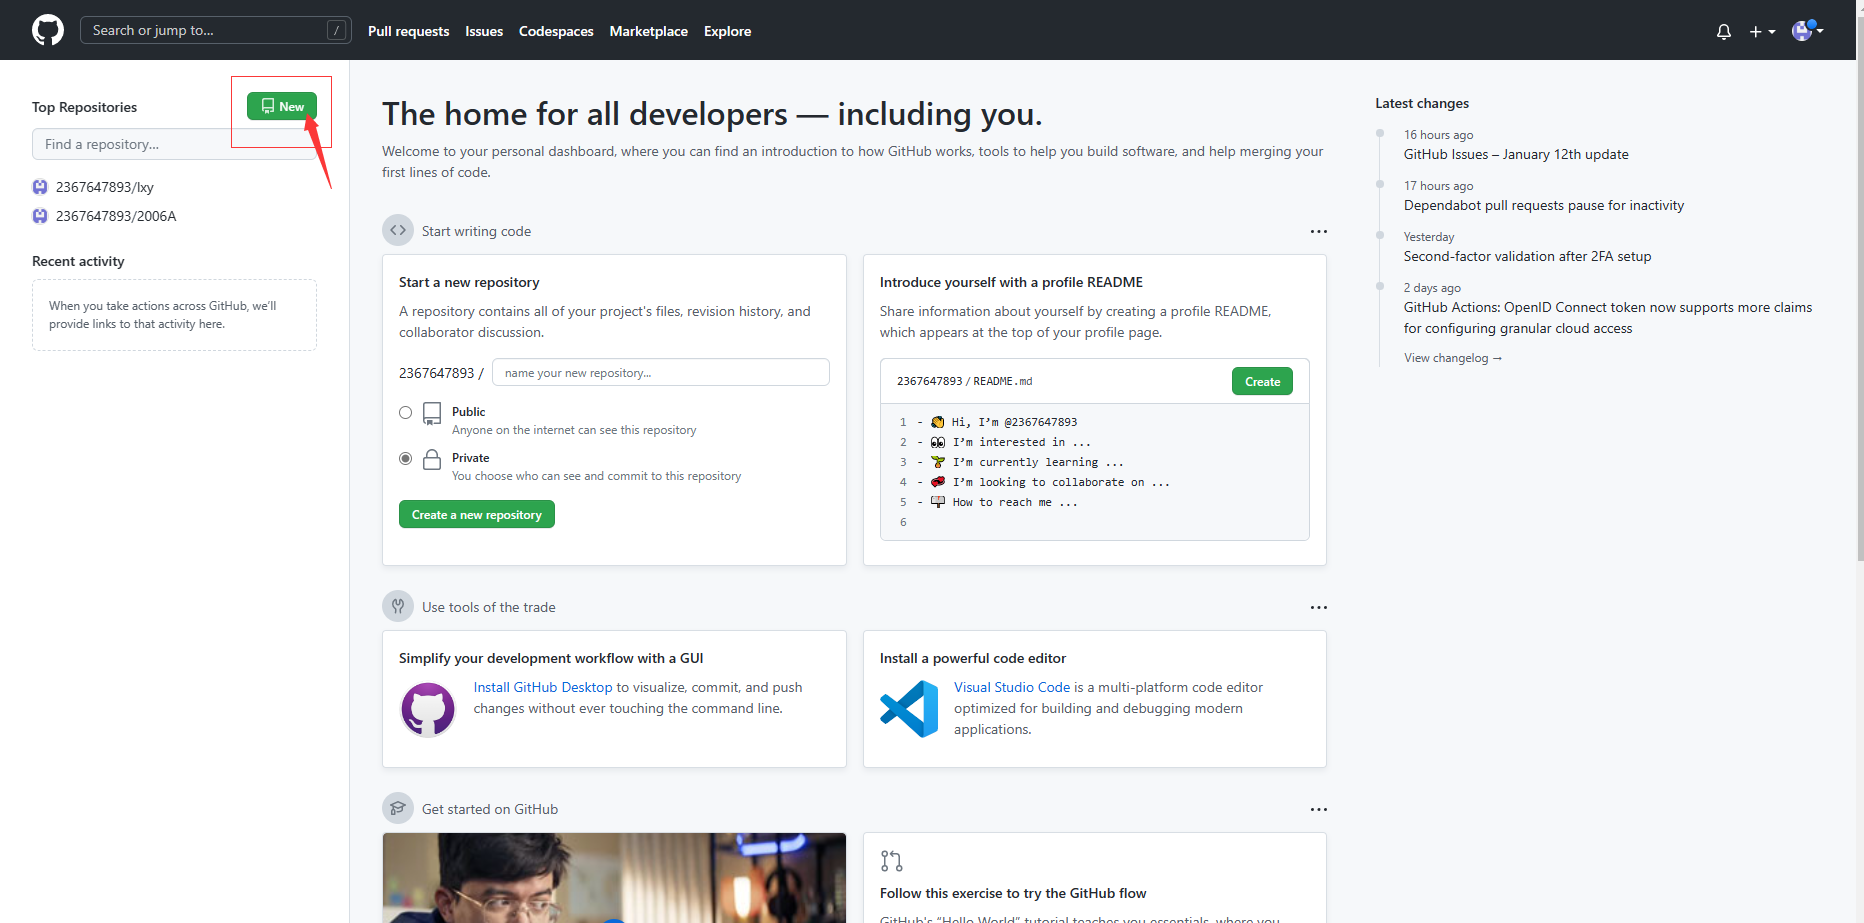
进入到github,省略掉创建账号等步骤点击主页绿色按钮 new
点击完之后会出现以下页面
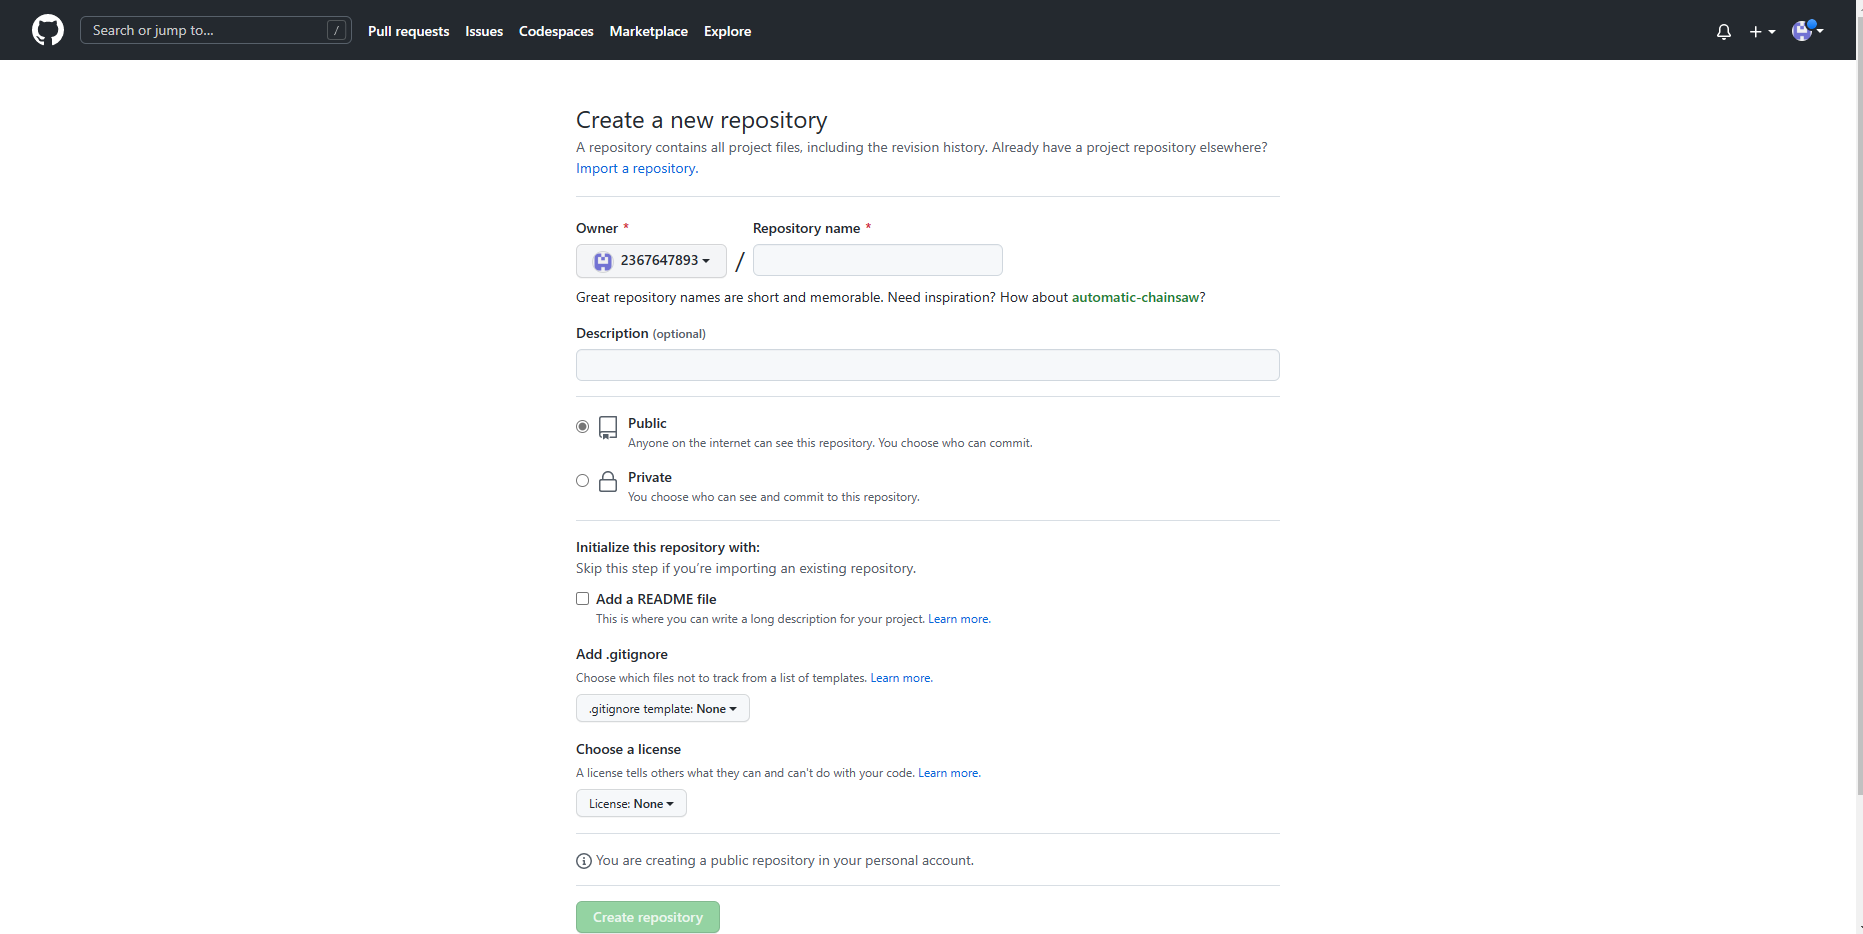
我们所需要填写的就是自己项目的名字

然后选择自己的仓库类型 请根据自己的需求准确的选择项目类型

选择好仓库类型以后就可以提交自己的仓库

创建成功示例
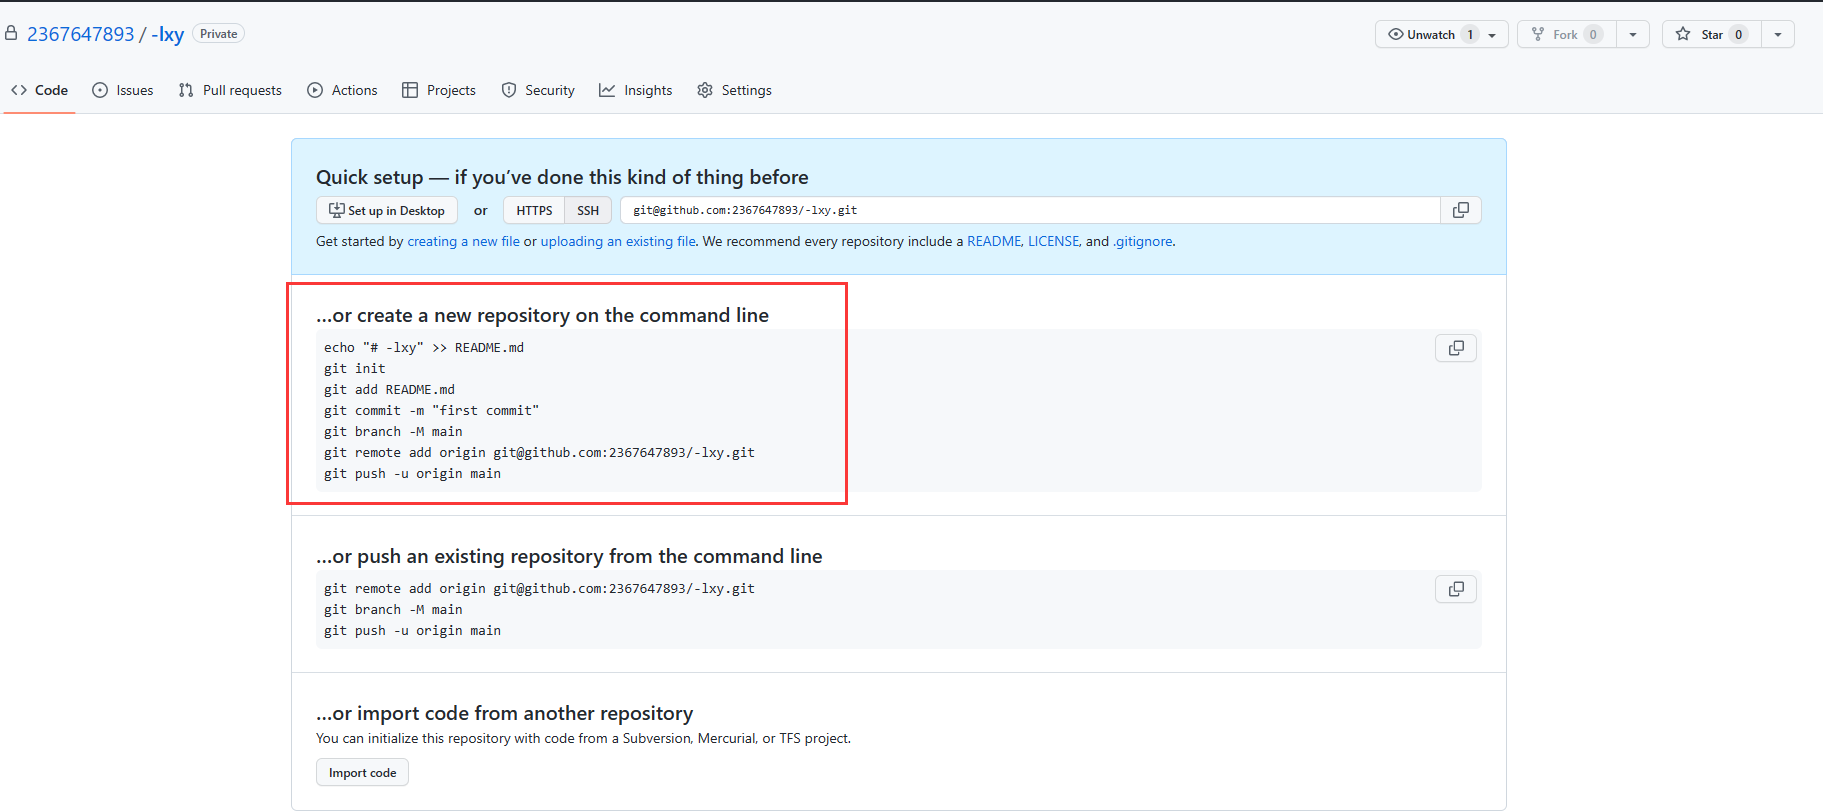
到了这一步就完成了新仓库的创建,接下来就要连接我们的项目和仓库
接下来我们要找到自己的项目文件在里面右键
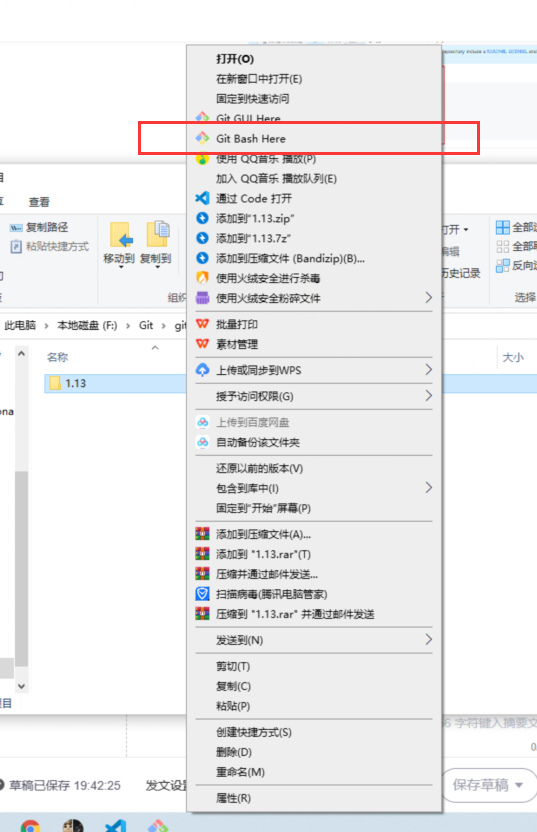
这样我们会打开一个运行窗口
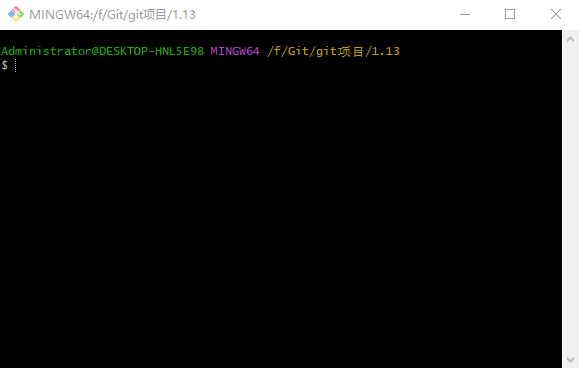
在里面首先输入 git init 初始化git
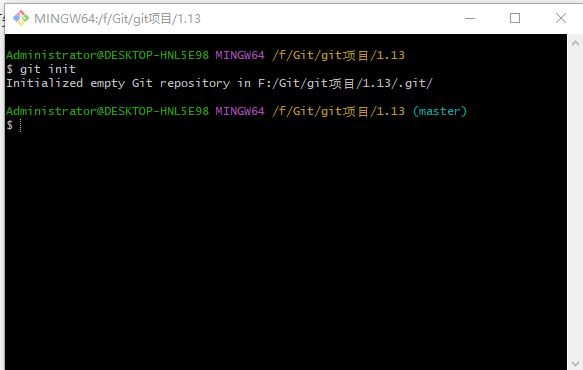
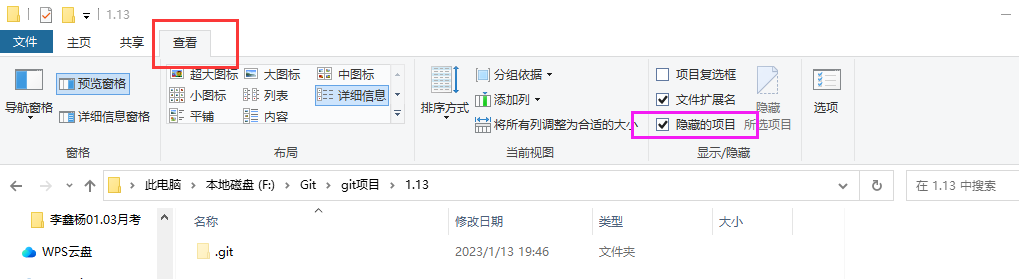
这时我们的项目里面会生成一个git文件 这是一个隐藏文件需要我们手动去打开
这之后我们按照刚才创建好的新的仓库 按照命令一步一步执行
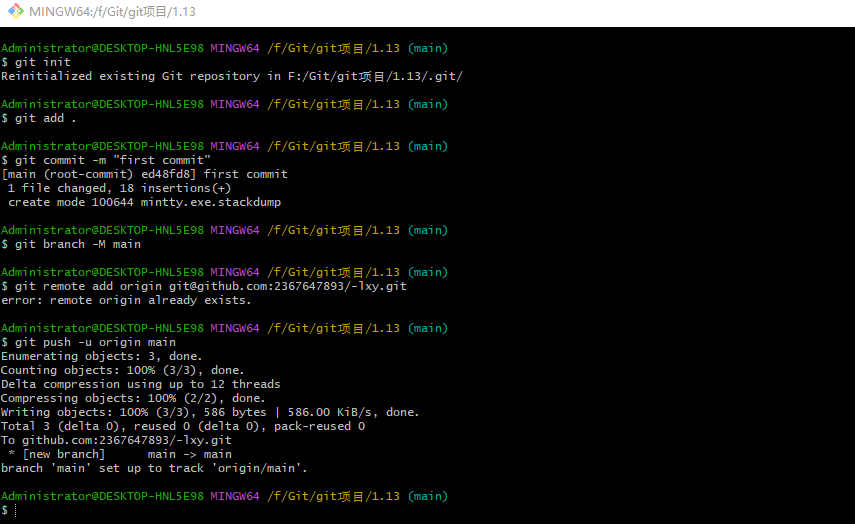
这样就把项目提交到仓库内了
之后就是配置秘钥
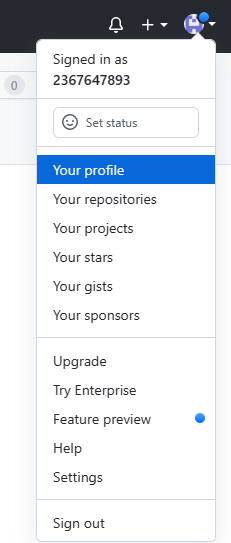
点击自己的头像然后点击settings
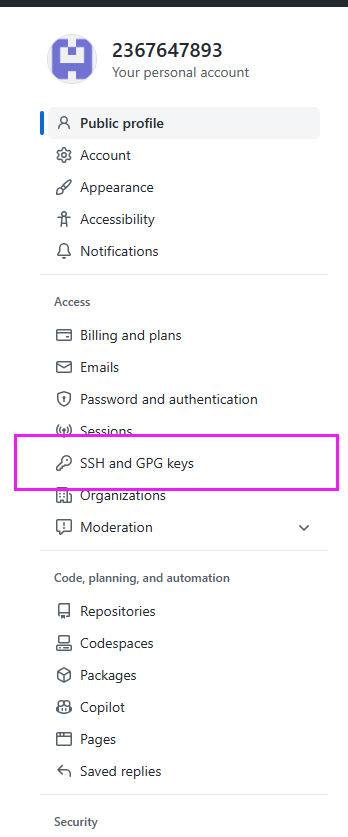
之后找到一个小钥匙图案点击
然后要找到自己的秘钥
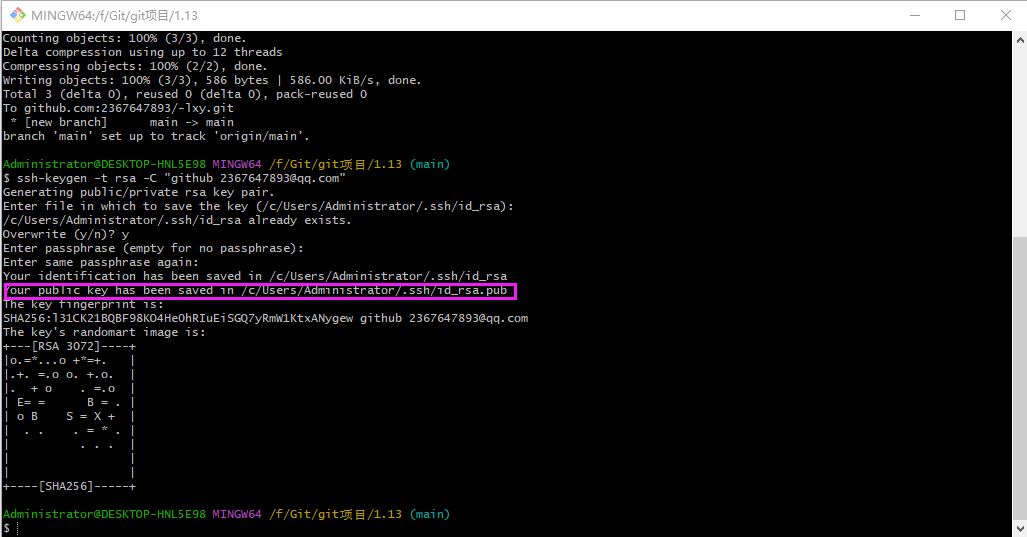
在刚才的命令框输入 ssh-keygen -t rsa -C "github 登录账号"
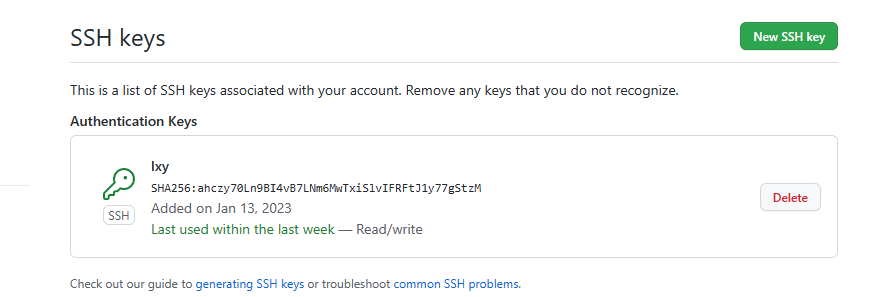
从这个路径找到自己的秘钥然后复制粘贴到刚才的小钥匙页面 要设置个秘钥的名字
设置好之后就可以使用了


 3819
3819


 被折叠的 条评论
为什么被折叠?
被折叠的 条评论
为什么被折叠?
 到【灌水乐园】发言


