


目录
准备库
安装nanoid库,可以调用这个库生成唯一主键
npm i nanoid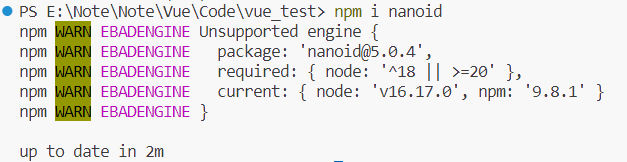
安装完成后便可以使用
<script>
// 引入nanoid库,他使用了分别暴露的形式
// {nanoid} 是一个函数,我们直接调用就可以给我们一个唯一id
import { nanoid } from "nanoid";
export default {
name: "MyHeader",
data() {
return {
title: "",
};
},
methods: {
add(event) {
console.log(this.title);
// 下面这样也能获取到文本框中的内容
// console.log(event.target.value)
// 将用户的输入包装秤一个todo对象
// id可以使用uuid,或者nanoid
const todoObj = {
id: nanoid(),
titel: this.title,
done: false,
};
console.log(todoObj)
},
},
};
</script>效果

一、添加复选框
我们要在MyHeader组件中的文本框执行add函数添加一个复选框,但是现在面临一个问题:
复选框的数据要存储在MyList.vue组件中,但是以目前所学的之后还无法将MyHeader.vue中的对象传输到MyList.vue组件中,因为MyHeader组件和MyList组件并没有互相引用的关系(而是兄弟关系),所以传输数据还是挺麻烦的
具体实现
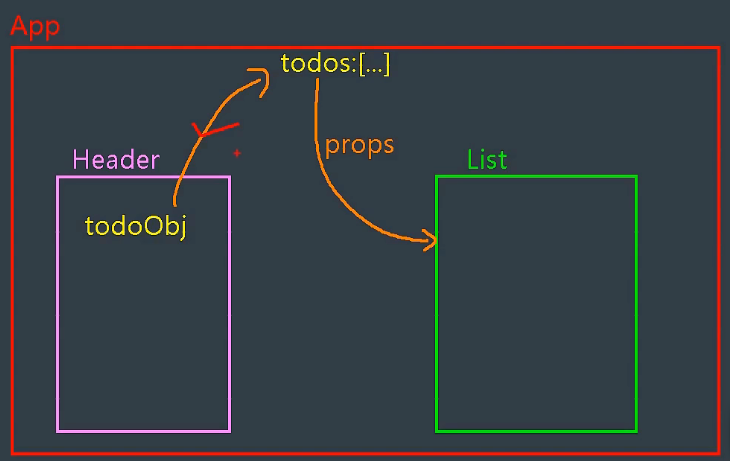
我们将数据集合todos放到App.vue中,不放在MyList.vue组件中,因为App组件是所有组件的父组件
这样App可以和MyHeader组件通信,App又可以和MyList组件通信,这样其实就可以实现MyHeader和MyList组件通信了
也就是下图所示的模式
1.1 main.js
//引入Vue
import Vue from 'vue'
//引入所有组件的外壳组件
import App from './App.vue'
//关闭Vue生产提示
Vue.config.productionTip = false
//创建vm
new Vue({
render: h => h(App),
}).$mount('#app')
1.2 App.vue
<template>
<div id="root">
<div class="todo-container">
<div class="todo-wrap">
<!-- 头部 -->
<!-- :receive="receive" 将receive函数传递给MyHeader组件
这一步是为了子组件向父组件进行通信 -->
<MyHeader :receive="receive"></MyHeader>
<!-- List -->
<MyList :todos="todos"></MyList>
<!-- 底部 -->
<MyFooter></MyFooter>
</div>
</div>
</div>
</template>
<script>
//引入组件
import MyList from "./components/MyList.vue";
import MyHeader from "./components/MyHeader.vue";
// 不用引入MyItem组件,当我们引入MyList父组件后,子组件MyItem也会跟着引入
// import MyItem from "./components/MyItem.vue";
import MyFooter from "./components/MyFooter.vue";
export default {
name: "App",
components: {
MyList,
MyHeader,
// MyItem,
MyFooter,
},
data() {
return {
todos: [
{ id: "0001", title: "抽烟", done: true },
{ id: "0002", title: "喝酒", done: false },
{ id: "0003", title: "开车", done: true },
],
};
},
methods: {
receive(x) {
console.log("我是app组件,我收到了数据", x);
this.todos.unshift(x)
},
},
};
</script>
<style>
/*base*/
body {
background: #fff;
}
.btn {
display: inline-block;
padding: 4px 12px;
margin-bottom: 0;
font-size: 14px;
line-height: 20px;
text-align: center;
vertical-align: middle;
cursor: pointer;
box-shadow: inset 0 1px 0 rgba(255, 255, 255, 0.2),
0 1px 2px rgba(0, 0, 0, 0.05);
border-radius: 4px;
}
.btn-danger {
color: #fff;
background-color: #da4f49;
border: 1px solid #bd362f;
}
.btn-danger:hover {
color: #fff;
background-color: #bd362f;
}
.btn:focus {
outline: none;
}
.todo-container {
width: 600px;
margin: 0 auto;
}
.todo-container .todo-wrap {
padding: 10px;
border: 1px solid #ddd;
border-radius: 5px;
}
</style>1.3 MyHeader.vue
面临兄弟之前传输数据的难题,现阶段的知识无法很简洁的完成,但是之后会优化
这个地方面临的难题其实是给App.vue组件传输一组数据
<template>
<div class="todo-header">
<!-- 当按下回车后会执行add回调函数 -->
<input
type="text"
placeholder="请输入你的任务名称,按回车键确认"
v-model="title"
@keyup.enter="add"
/>
</div>
</template>
<script>
// 引入nanoid库,他使用了分别暴露的形式
// {nanoid} 是一个函数,我们直接调用就可以给我们一个唯一id
import { nanoid } from "nanoid";
export default {
name: "MyHeader",
data() {
return {
title: "",
};
},
// 父组件APP传递过来的函数receive
props: ["receive"],
methods: {
add(event) {
console.log(this.title);
// 下面这样也能获取到文本框中的内容
// console.log(event.target.value)
// 将用户的输入包装秤一个todo对象
// id可以使用uuid,或者nanoid
const todoObj = {
id: nanoid(),
title: this.title,
done: false,
};
console.log(todoObj);
this.receive(todoObj);
//清空文本框
this.title = "";
},
},
};
</script>
<style scoped>
/*header*/
.todo-header input {
width: 560px;
height: 28px;
font-size: 14px;
border: 1px solid #ccc;
border-radius: 4px;
padding: 4px 7px;
}
.todo-header input:focus {
outline: none;
border-color: rgba(82, 168, 236, 0.8);
box-shadow: inset 0 1px 1px rgba(0, 0, 0, 0.075),
0 0 8px rgba(82, 168, 236, 0.6);
}
</style>1.4 MyList
<template>
<ul class="todo-main">
<MyItem v-for="todoObjItem in todos" :key="todoObjItem.id"
:todo="todoObjItem">
</MyItem>
</ul>
</template>
<script>
import MyItem from "./MyItem.vue";
// 引入组件
export default {
components: { MyItem },
name: "MyList",
// data() {
// return {
// todos: [
// { id: "0001", title: "抽烟", done: true },
// { id: "0002", title: "喝酒", done: false },
// { id: "0003", title: "开车", done: true },
// ],
// };
// },
props:['todos']
};
</script>
<style scoped>
.todo-main {
margin-left: 0px;
border: 1px solid #ddd;
border-radius: 2px;
padding: 0px;
}
.todo-empty {
height: 40px;
line-height: 40px;
border: 1px solid #ddd;
border-radius: 2px;
padding-left: 5px;
margin-top: 10px;
}
</style>1.5 MyItem
<template>
<li>
<label>
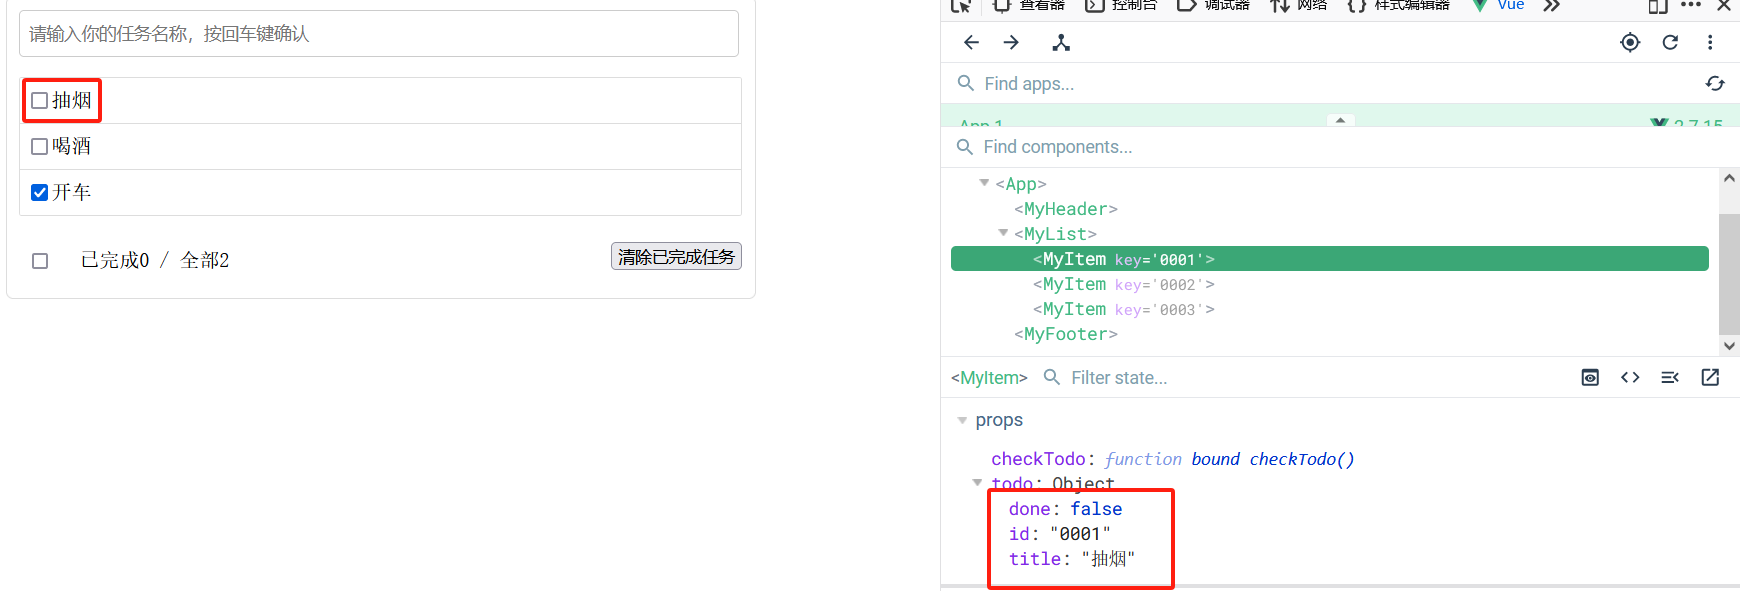
<input type="checkbox" :checked="todo.done"/>
<span>{{todo.title}}</span>
</label>
<button class="btn btn-danger" style="display: none">删除</button>
</li>
</template>
<script>
export default {
name:'MyItem',
props:['todo']
}
</script>
<style scoped>
/*item*/
li {
list-style: none;
height: 36px;
line-height: 36px;
padding: 0 5px;
border-bottom: 1px solid #ddd;
}
li label {
float: left;
cursor: pointer;
}
li label li input {
vertical-align: middle;
margin-right: 6px;
position: relative;
top: -1px;
}
li button {
float: right;
display: none;
margin-top: 3px;
}
li:before {
content: initial;
}
li:last-child {
border-bottom: none;
}
</style>1.6 MyFoot
<template>
<div class="todo-footer">
<label>
<input type="checkbox" />
</label>
<span> <span>已完成0</span> / 全部2 </span>
<button >清除已完成任务</button>
</div>
</template>
<script>
export default {
name: "MyFooter",
};
</script>
<style scoped>
/*footer*/
.todo-footer {
height: 40px;
line-height: 40px;
padding-left: 6px;
margin-top: 5px;
}
.todo-footer label {
display: inline-block;
margin-right: 20px;
cursor: pointer;
}
.todo-footer label input {
position: relative;
top: -1px;
vertical-align: middle;
margin-right: 5px;
}
.todo-footer button {
float: right;
margin-top: 5px;
}
</style>二、勾选
我们勾选或者取消勾选之后要引起数据的变化
2.1 App.vue
<template>
  <div id="root">
    <div class="todo-container">
      <div class="todo-wrap">
        <!-- 头部 -->
        <!-- :receive="receive" 将receive函数传递给MyHeader组件
          这一步是为了子组件向父组件进行通信 -->
        <MyHeader :receive="receive"></MyHeader>

        <!-- List -->
        <MyList :todos="todos" :checkTodo="checkTodo"></MyList>

        <!-- 底部 -->
        <MyFooter></MyFooter>
      </div>
    </div>
  </div>
</template>

<script>
//引入组件
import MyList from "./components/MyList.vue";
import MyHeader from "./components/MyHeader.vue";
// 不用引入MyItem组件,当我们引入MyList父组件后,子组件MyItem也会跟着引入
// import MyItem from "./components/MyItem.vue";
import MyFooter from "./components/MyFooter.vue";

export default {
  name: "App",

  components: {
    MyList,
    MyHeader,
    // MyItem,
    MyFooter,
  },
  data() {
    return {
      todos: [
        { id: "0001", title: "抽烟", done: true },
        { id: "0002", title: "喝酒", done: false },
        { id: "0003", title: "开车", done: true },
      ],
    };
  },

  methods: {
    // 添加一个todo
    receive(x) {
      console.log("我是app组件,我收到了数据", x);
      this.todos.unshift(x);
    },
    // 勾选 or 取消勾选一个todo
    checkTodo(id) {
      this.todos.forEach((todo) => {
        if (todo.id === id) {
          todo.done = !todo.done;
        }
      });
    },
  },
};
</script>

<style>
.....
</style>
2.2 MyList.vue
在这个地方倒了一下手,MyItem组件要通过MyList组件给App组件传递内容
<template>
  <ul class="todo-main">
    <MyItem v-for="todoObjItem in todos" :key="todoObjItem.id"
     :todo="todoObjItem"
     :checkTodo="checkTodo">
    </MyItem >
  </ul>
</template>

<script>
import MyItem from "./MyItem.vue";
// 引入组件

export default {
  components: { MyItem },
  name: "MyList",
  props:['todos','checkTodo']
};
</script>

<style scoped>
.....
</style>
2.3 MyItem.vue
<template>
<li>
<label>
<input
type="checkbox"
:checked="todo.done"
@click="handleCheck(todo.id)"
/>
<span>{{ todo.title }}</span>
</label>
<button class="btn btn-danger" style="display: none">删除</button>
</li>
</template>
<script>
export default {
name: "MyItem",
props: ["todo","checkTodo"],
methods: {
//响应勾选的函数
handleCheck(id) {
console.log("复选框id:" + id);
// 通知App组将将对应的todo对象的done值取反
this.checkTodo(id)
},
},
};
</script>
<style scoped>
.....
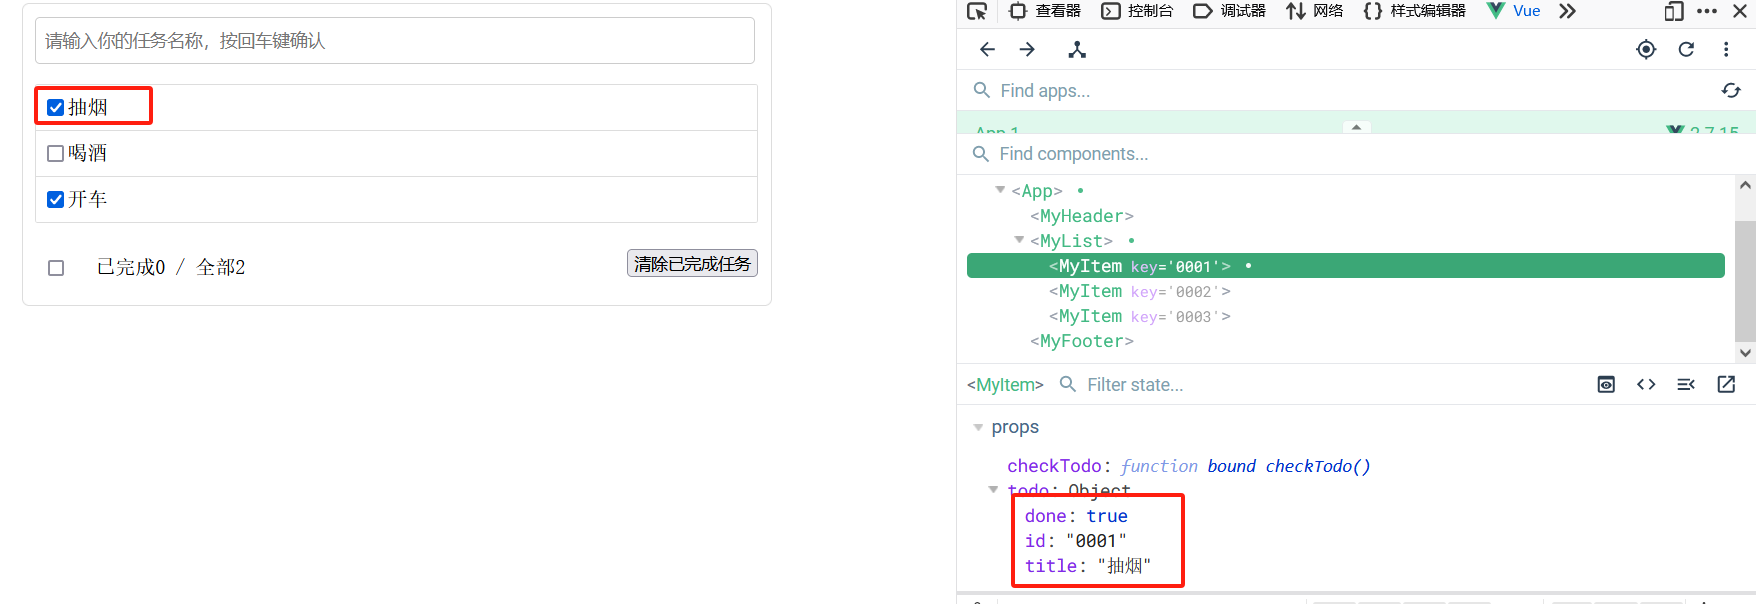
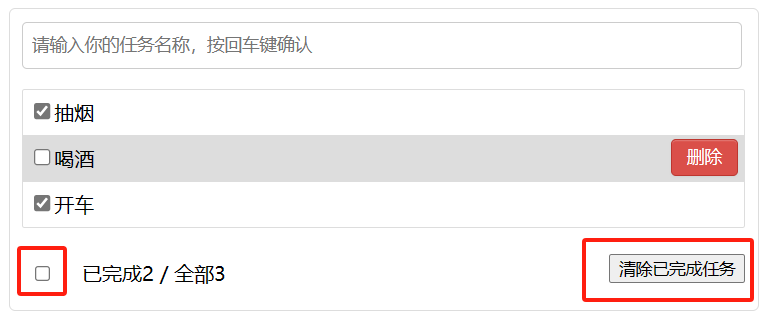
</style>2.4 效果
2.5 借助 v-model 实现
虽然这种情况可以实现也不报错,但是这种不建议使用
为什么props配置是只读的,还能使用 v-model="todo.done"修改掉App组件中的数据呢?
假如一个数据如下
let obj = {a:1,b:2}修改obj对象中的某个属性值
obj.a=666或者修改为下面这个形式,这种情况直接把obj修改了
obj={x:100,y:200}在我们看来这两次修改都是修改,但是在vue看来只有第二次叫做修改,第一次不叫,也就是说Vue只能监测到把对象直接修改掉的情况,监测不到修改某个对象中某个值的情况
所以我们下面修改todo.done的值的时候,vue是监测不到的,vue监测的东西都是浅层次的,不会监测深层次的
藏在对象中的数据修改Vue会发现不了,但是直接修改对象会被Vue发现
这种情况为什么不建议使用v-model?
不要把props传过来的数据直接使用v-model绑定或者修改,拍出现意外情况对对象直接做出修改后报错,建议是另外定义一个变量来使用
MyItem组件代码
<template>
  <li>
    <label>
      <!-- <input
        type="checkbox"
        :checked="todo.done"
        @click="handleCheck(todo.id)"
      /> -->

      <!-- :checked="todo.done"是想实现初始时是勾线的还是非勾选的 -->
      <!-- @click="handleCheck(todo.id)是想实现之后(更新)是勾线的还是非勾选的 -->
      <!-- 我们可以将其合成一个,合二为一 -->
      <!-- 因为我们的input类型是checkbox并且v-model绑定的是一个布尔类型的数据,这个布尔值就能决定复选框能勾选还是不能勾选 -->
      <!-- v-model双向绑定,归根到底此处改变的是App组件中的内容 -->
      <input type="checkbox" v-model="todo.done" />
      <span>{{ todo.title }}</span>
    </label>
    <button class="btn btn-danger" style="display: none">删除</button>
  </li>
</template>

<script>
export default {
  name: "MyItem",
  props: ["todo", "checkTodo"],
  methods: {
    //响应勾选的函数
    handleCheck(id) {
      console.log("复选框id:" + id);
      // 通知App组将将对应的todo对象的done值取反
      this.checkTodo(id);
    },
  },
};
</script>

<style scoped>
......
</style>
三、删除

3.1 App.vue
<template>
  <div id="root">
    <div class="todo-container">
      <div class="todo-wrap">
        <!-- 头部 -->
        <!-- :receive="receive" 将receive函数传递给MyHeader组件
          这一步是为了子组件向父组件进行通信 -->
        <MyHeader :receive="receive"></MyHeader>

        <!-- List -->
        <MyList
          :todos="todos"
          :checkTodo="checkTodo"
          :deleteItem="deleteItem"
        ></MyList>

        <!-- 底部 -->
        <MyFooter></MyFooter>
      </div>
    </div>
  </div>
</template>

<script>
//引入组件
import MyList from "./components/MyList.vue";
import MyHeader from "./components/MyHeader.vue";
// 不用引入MyItem组件,当我们引入MyList父组件后,子组件MyItem也会跟着引入
// import MyItem from "./components/MyItem.vue";
import MyFooter from "./components/MyFooter.vue";

export default {
  name: "App",

  components: {
    MyList,
    MyHeader,
    // MyItem,
    MyFooter,
  },
  data() {
    return {
      todos: [
        { id: "0001", title: "抽烟", done: true },
        { id: "0002", title: "喝酒", done: false },
        { id: "0003", title: "开车", done: true },
      ],
    };
  },

  methods: {
    // 添加一个todo
    receive(x) {
      console.log("我是app组件,我收到了数据", x);
      this.todos.unshift(x);
    },
    // 勾选 or 取消勾选一个todo
    checkTodo(id) {
      this.todos.forEach((todo) => {
        if (todo.id === id) {
          todo.done = !todo.done;
        }
      });
    },
    //删除某个item
    deleteItem(id) {
      console.log("app组件删除item的id:" + id);
      this.todos = this.todos.filter((todo) => {
        return todo.id !== id;
      });
    },
  },
};
</script>

<style>
....
</style>
3.2 MyList.vue
  <MyItem v-for="todoObjItem in todos" :key="todoObjItem.id"
     :todo="todoObjItem"
     :checkTodo="checkTodo"
     :deleteItem="deleteItem">
</MyItem > props:['todos','checkTodo','deleteItem']3.3 MyItem.vue
<template>
  <li>
    <label>
      <input
        type="checkbox"
        :checked="todo.done"
        @click="handleCheck(todo.id)"
      />
      <span>{{ todo.title }}</span>
    </label>
    <button class="btn btn-danger" @click="toDeleteItem(todo.id)">删除</button>
  </li>
</template>

<script>
export default {
  name: "MyItem",
  props: ["todo", "checkTodo", "deleteItem"],
  methods: {
    //响应勾选的函数
    handleCheck(id) {
      console.log("复选框id:" + id);
      // 通知App组将将对应的todo对象的done值取反
      this.checkTodo(id);
    },
    // 删除item
    toDeleteItem(id) {
      if (confirm("确定删除吗?")) {
        console.log("复选框id:" + id);
        this.deleteItem(id);
      }
    },
  },
};
</script>

<style scoped>
/* 鼠标悬浮时会有一个背景色 */
li:hover {
  background: #ddd;
}
/* 当鼠标悬浮在哪个item时,哪个item的悬浮按钮就会出现 */
li:hover button {
  float: right;
  display: block;
  margin-top: 3px;
}
li button {
  float: right;
  display: none;
  margin-top: 3px;
}

.......
</style>
四、底部统计
4.1 App.vue
<!-- 底部 -->
<MyFooter :todos="todos"></MyFooter>
4.2 MyFooter.vue
<template>
  <div class="todo-footer">
    <label>
      <input type="checkbox" />
    </label>
    <span>
      <span>已完成{{ doneTotal }}</span> / 全部{{ todos.length }}
    </span>
    <button>清除已完成任务</button>
  </div>
</template>

<script>
export default {
  name: "MyFooter",
  props: ["todos"],
  computed: {
    doneTotal() {
      // 参数1 函数,数组长度是几,这个函数就会被调用几次
      //  此函数参数1 pre 上一次的值
      // 第一次调用的时候,pre是0,因为我们统计的初始值是0,之后开始处理逻辑
      // 第二次调用的时候,pre的值是上一次调用的完成后的值,如果上一次没return的话就是undefined
      // 最后一次调用的返回值就是reduce函数的返回值
      //  此函数参数2 current 当前的值,在这里指的就是todo项
      // 参数2 计数起始数
      return this.todos.reduce((pre, current) => {
        return pre + (current.done ? 1 : 0);
      }, 0);

      // 下面这样可以实现,但是不高端
      // let i = 0;
      // this.todos.forEach((element) => {
      //   if (element.done) i++;
      // });
      // return i;
    },
  },
};
</script>

<style scoped>
    .....
</style>
五、底部交互
完成下面两个任务

5.1 App.vue
<!-- 底部 -->
<MyFooter :todos="todos" :checkAllTodo="checkAllTodo" :clearAllTodo="clearAllTodo"></MyFooter>
// 全选或者全不选
checkAllTodo(done) {
this.todos.forEach((todo) => {
todo.done = done;
});
},
// 清除所有已经完成的todo
clearAllTodo(){
this.todos = this.todos.filter((todo) => {
return !todo.done
})
}5.2 MyFooter.vue
<template>
  <!-- v-show="total" 当任务数是0的时候,不展示此组件了 -->
  <div class="todo-footer" v-show="total">
    <label>
      <!-- 下面这个方式可以实现 -->
      <!-- <input type="checkbox" :checked="isAll" @change="checkAll" /> -->
      <input type="checkbox" v-model="isAll" />
    </label>
    <span>
      <span>已完成{{ doneTotal }}</span> / 全部{{ total }}
    </span>
    <button class="btn btn-danger">清除已完成任务</button>
  </div>
</template>

<script>
export default {
  name: "MyFooter",
  props: ["todos", "checkAllTodo"],
  methods: {
    // 选择所有(全选或者全不选)
    checkAll(e) {
      this.checkAllTodo(e.target.checked);
    },
  },
  computed: {
    total() {
      return this.todos.length;
    },
    doneTotal() {
      // 参数1 函数,数组长度是几,这个函数就会被调用几次
      //  此函数参数1 pre 上一次的值
      // 第一次调用的时候,pre是0,因为我们统计的初始值是0,之后开始处理逻辑
      // 第二次调用的时候,pre的值是上一次调用的完成后的值,如果上一次没return的话就是undefined
      // 最后一次调用的返回值就是reduce函数的返回值
      //  此函数参数2 current 当前的值,在这里指的就是todo项
      // 参数2 计数起始数
      return this.todos.reduce((pre, current) => {
        return pre + (current.done ? 1 : 0);
      }, 0);

      // 下面这样可以实现,但是不高端
      // let i = 0;
      // this.todos.forEach((element) => {
      //   if (element.done) i++;
      // });
      // return i;
    },
    // 计算属性完整版写法
    isAll: {
      get(){
        return this.doneTotal === this.total && this.total !== 0;
      },
      set(value){
        this.checkAllTodo(value);
      }
    },
  },
};
</script>

<style scoped>
/*footer*/
.todo-footer {
  height: 40px;
  line-height: 40px;
  padding-left: 6px;
  margin-top: 5px;
}

.todo-footer label {
  display: inline-block;
  margin-right: 20px;
  cursor: pointer;
}

.todo-footer label input {
  position: relative;
  top: -1px;
  vertical-align: middle;
  margin-right: 5px;
}

.todo-footer button {
  float: right;
  margin-top: 5px;
}
</style>


 1148
1148


 被折叠的 条评论
为什么被折叠?
被折叠的 条评论
为什么被折叠?
 到【灌水乐园】发言


