


文章目录
效果预览
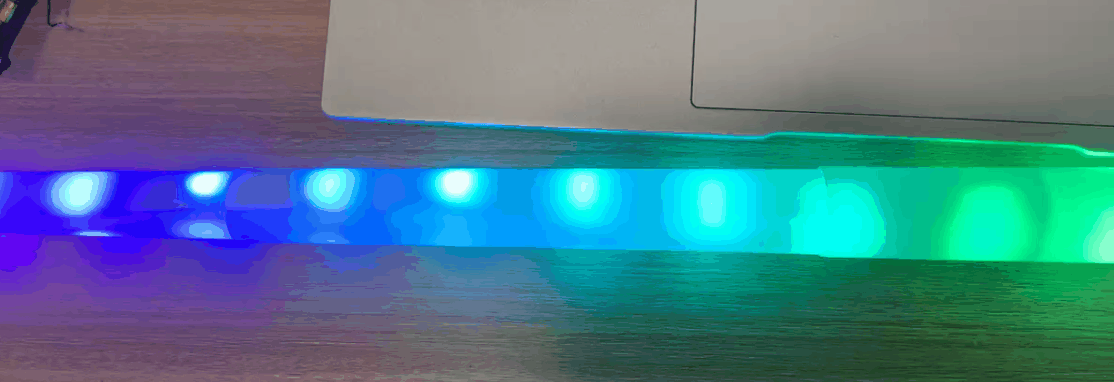
这是色板这一的例子 从左到右分别为:
3-1 3-2 3-3 三个例子

EVERY_N_MILLISECONDS(10)
EVERY_N_SECONDS(5)
EVERY_N_MILLISECONDS(10);
如
EVERY_N_SECONDS(5) {
    whichPalette++;
    if (whichPalette > 2) whichPalette = 0;
    Serial.println(currentPalette[0]);
  }
fill_solid(leds, NUM_LEDS, CRGB::Red);
fill_solid(leds, NUM_LEDS, CRGB::Red);
  FastLED.show();
fill_gradient_RGB

CRGB startColor = CRGB::Red;
CRGB endColor = CRGB::Blue;


fill_gradient_RGB(leds, 0, startColor, NUM_LEDS / 2, endColor ); //从第 0 个LED到第 NUM_LEDS/2个LED,颜色从红到蓝
fill_gradient_RGB(leds, NUM_LEDS / 2, endColor, NUM_LEDS - 1, startColor ); //从第 NUM_LEDS/2 起,颜色从蓝到红
FastLED.show();
fill_rainbow(leds, NUM_LEDS, i, 255 / NUM_LEDS);
fill_rainbow 是 FastLED 库中的一个函数,用于在 LED 灯带或矩阵上以彩虹色填充颜色。
fill_rainbow(leds, NUM_LEDS, beginHue, deltaHue);
beginHue++;在loop中不断循环,这样就能看到:

uint8_t beginHue;
void loop() {
  // put your main code here, to run repeatedly:
  beginHue++;
  fill_rainbow(myled,30,beginHue,9);
  FastLED.show();
  delay(25);//delay不能很大,很大效果会生硬

}
效果1
fadeToBlackBy(leds, NUM_LEDS, 1);

#include <FastLED.h>

#define NUM_LEDS  14
#define LED_PIN   8

CRGB leds[NUM_LEDS];

void setup() {
  FastLED.addLeds<WS2812B, LED_PIN, GRB>(leds, NUM_LEDS);
  FastLED.setBrightness(50);

  Serial.begin(57600);
}

void loop() {

for(int i=0;i<14;i++){
  uint16_t sinBeat = beatsin16(30, 0, NUM_LEDS - 1, 0, 0);

  leds[sinBeat ] = CRGB::Red;


 fadeToBlackBy(leds, NUM_LEDS, 1);

  FastLED.show();}

}
效果2
FastLED.setBrightness(2*i);//
也是逐个点亮,并且有个拖尾

#include <FastLED.h>

#define NUM_LEDS  14
#define LED_PIN   8

CRGB leds[NUM_LEDS];

void setup() {
  FastLED.addLeds<WS2812B, LED_PIN, GRB>(leds, NUM_LEDS);
  FastLED.setBrightness(50);

  Serial.begin(57600);
}

void loop() {


  for (int i=0; i<NUM_LEDS; i++){
    leds[i] = CRGB(0, 255 - 4*i, 4*i );
    FastLED.setBrightness(2*i);//
    FastLED.show();
    delay(50);


}FastLED.clear();}
效果3
leds[i] = CHSV(hue + (i * 10), 255, 255);
#include <FastLED.h>

#define NUM_LEDS  14
#define LED_PIN   8
int hue=0;
CRGB leds[NUM_LEDS];

void setup() {
  FastLED.addLeds<WS2812B, LED_PIN, GRB>(leds, NUM_LEDS);
  FastLED.setBrightness(50);

  Serial.begin(57600);
}
void loop() {

for (int i = 0; i < NUM_LEDS; i++) {
    //leds[i] = CHSV(hue, 255, 255);
 leds[i] = CHSV(hue + (i * 10), 255, 255);
}

delay(15);
hue++;


 FastLED.show();
}
效果4
复制别的LED颜色 leds[i] = leds[i - 1];

#include <FastLED.h>

#define NUM_LEDS  14
#define LED_PIN   8
int hue=0;
CRGB leds[NUM_LEDS];

void setup() {
  FastLED.addLeds<WS2812B, LED_PIN, GRB>(leds, NUM_LEDS);
  FastLED.setBrightness(50);

  Serial.begin(57600);
}
void loop() {
effect3();
}

void effect3() {

  delay(50) ;{

    // Create a new HSV color for led[0]
    leds[0] = CHSV(160, random8(), random8(100, 255));

    // 把上一个颜色值复制过来Copy each pixel to the next one, starting at the far end
    // thereby 'moving' the pattern along the strip
    for (int i = NUM_LEDS - 1; i > 0; i--) {
      leds[i] = leds[i - 1];
    }
  }

  FastLED.show();
}


  FastLED.show();
}
3-4 fadeToBlackBy(leds, NUM_LEDS, 10);
效果:每隔5s,逐个点亮LED,并有个拖尾;
fadeToBlackBy(leds, NUM_LEDS, 50);最后一个参数越大,拖尾越短

void loop(){
   for(int i = 0; i < NUM_LEDS; i++) {
    leds[i] = CRGB::Red;
   fadeToBlackBy(leds, NUM_LEDS, 50);
    FastLED.show();
    delay(50);
    }
    //FastLED.clear(); //这个Fastled.clear不应该加的,加了会直接让灯灭了,效果会生硬

for(int i = 0; i < NUM_LEDS; i++) {
    leds[NUM_LEDS-i] = CRGB::Blue;
   fadeToBlackBy(leds, NUM_LEDS, 10);
    FastLED.show();
    delay(50);
    }

}
————————————————————————————————————————————
3 色板
这是从哔哩哔哩教程总结的

色板工具_______
工具1:渐变色生成工具 PaletteKnife for FastLED
1 工具地址
http://fastled.io/tools/paletteknife/
2.操作步骤

3.程序模版
 3-1 把例子中的 : //-----1------内容替换
 3-2  把  **Sunset_Real_gp**  替换掉就行了
#include <FastLED.h>

#define NUM_LEDS  18
#define LED_PIN   2

CRGB leds[NUM_LEDS];

uint8_t paletteIndex = 0;
//------------------------------------------------------------------------------1--------------------------------------------------------------------------------------------------
// Gradient palette "Sunset_Real_gp", originally from
// http://soliton.vm.bytemark.co.uk/pub/cpt-city/nd/atmospheric/tn/Sunset_Real.png.index.html
// converted for FastLED with gammas (2.6, 2.2, 2.5)
// Size: 28 bytes of program space.

DEFINE_GRADIENT_PALETTE( Sunset_Real_gp ) {
    0, 120,  0,  0,
   22, 179, 22,  0,
   51, 255,104,  0,
   85, 167, 22, 18,
  135, 100,  0,103,
  198,  16,  0,130,
  255,   0,  0,160};
//------------------------------------------------------------------------------1--------------------------------------------------------------------------------------------------

CRGBPalette16 myPal = Sunset_Real_gp;

void setup() {
  FastLED.addLeds<WS2812B, LED_PIN, GRB>(leds, NUM_LEDS);
  FastLED.setBrightness(50);
}

void loop() {
  fill_palette(leds, NUM_LEDS, paletteIndex, 255 / NUM_LEDS, myPal, 255, LINEARBLEND);

  EVERY_N_MILLISECONDS(10){
    paletteIndex++;
  }

  FastLED.show();
}
工具2:cssgradient 工具
工具地址:

3-1 CRGBPalette16
 fill_palette(leds, NUM_LEDS, paletteIndex, 255 / NUM_LEDS, myPal, 255, LINEARBLEND);
 fill_palette(leds, NUM_LEDS, 开始的位置, 相邻颜色变化是多少, 调色板名字, 亮度, 融合类型;


#include <FastLED.h>

#define NUM_LEDS  14
#define LED_PIN   8

CRGB leds[NUM_LEDS];

uint8_t paletteIndex = 0;
//这个调色板,只能写16个颜色  ,多了不能写
//调色板如上图所示
CRGBPalette16 purplePalette = CRGBPalette16 (
    CRGB::DarkViolet,
    CRGB::DarkViolet,
    CRGB::DarkViolet,
    CRGB::DarkViolet,

    CRGB::Magenta,
    CRGB::Magenta,
    CRGB::Linen,
    CRGB::Linen,

    CRGB::Magenta,
    CRGB::Magenta,
    CRGB::DarkViolet,
    CRGB::DarkViolet,

    CRGB::DarkViolet,
    CRGB::DarkViolet,
    CRGB::Linen,
    CRGB::Linen
);

void setup() {
  FastLED.addLeds<WS2812B, LED_PIN, GRB>(leds, NUM_LEDS);
  FastLED.setBrightness(50);
}

void loop() {
  fill_palette(leds, NUM_LEDS, paletteIndex, 255 / NUM_LEDS, purplePalette, 255, LINEARBLEND);

  EVERY_N_MILLISECONDS(10){
    paletteIndex++;
  }

  FastLED.show();
}
3-2 CRGBPalette16 进阶

#include <FastLED.h>

#define NUM_LEDS  18
#define LED_PIN   2

CRGB leds[NUM_LEDS];

uint8_t paletteIndex = 0;

CRGBPalette16 purplePalette = CRGBPalette16 (
    CRGB::DarkViolet,
    CRGB::DarkViolet,
    CRGB::DarkViolet,
    CRGB::DarkViolet,

    CRGB::Magenta,
    CRGB::Magenta,
    CRGB::Linen,
    CRGB::Linen,

    CRGB::Magenta,
    CRGB::Magenta,
    CRGB::DarkViolet,
    CRGB::DarkViolet,

    CRGB::DarkViolet,
    CRGB::DarkViolet,
    CRGB::Linen,
    CRGB::Linen
);


CRGBPalette16 myPal = purplePalette;

void setup() {
  FastLED.addLeds<WS2812B, LED_PIN, GRB>(leds, NUM_LEDS);
  FastLED.setBrightness(50);
}

void loop() {

  EVERY_N_MILLISECONDS(50){
    //Switch on an LED at random, choosing a random color from the palette
    leds[random8(0, NUM_LEDS - 1)] = ColorFromPalette(myPal, random8(), 255, LINEARBLEND);
  }

   // Fade all LEDs down by 1 in brightness each time this is called
   fadeToBlackBy(leds, NUM_LEDS, 1);

  FastLED.show();
}
3-3 heatmap_gp 另一种定义色板的方式 ,据说是比较新的!(效果6)

这个可以增加好多索引
如
DEFINE_GRADIENT_PALETTE (heatmap_gp) {
    0,   0,   0,   0,   //black
  128, 255,   0,   0,   //red

  150, 255,   125,   0,   //新加的

  200, 255, 255,   0,   //bright yellow
  255, 255, 255, 255    //full white
};
#include <FastLED.h>

#define NUM_LEDS  14
#define LED_PIN   8

CRGB leds[NUM_LEDS];

uint8_t paletteIndex = 0;

DEFINE_GRADIENT_PALETTE (heatmap_gp) {
    0,   0,   0,   0,   //black
  128, 255,   0,   0,   //red
  200, 255, 255,   0,   //bright yellow
  255, 255, 255, 255    //full white
};

CRGBPalette16 myPal = heatmap_gp;//这个名字是可以变的heatmap_gp1.。。等等

void setup() {
  FastLED.addLeds<WS2812B, LED_PIN, GRB>(leds, NUM_LEDS);
  FastLED.setBrightness(50);
}

void loop() {
  fill_palette(leds, NUM_LEDS, paletteIndex, 255 / NUM_LEDS, myPal, 255, LINEARBLEND);

  EVERY_N_MILLISECONDS(10){
    paletteIndex++;
  }

  FastLED.show();
}
3-4 色板融合
nblendPaletteTowardPalette( currentPalette, targetPalette, 10 );
//nblendPaletteTowardPalette(currentPalette, targetPalette, amount);最后一参数是过渡量,越大过渡越快,!!!
//并且当前色板是变动的,如当融合后, 当前色板 由greenblue_gp---->browngreen_gp
#include <FastLED.h>

#define NUM_LEDS  14
#define LED_PIN   8

CRGB leds[NUM_LEDS];

uint8_t colorIndex[NUM_LEDS];
uint8_t whichPalette = 0;

DEFINE_GRADIENT_PALETTE( greenblue_gp ) {
    0,    0,  194,  255,     //light blue
   46,    3,    0,  246,     //dark blue
  176,   55,  222,   70,     //bright green
  255,    0,  194,  255      //light blue
};

DEFINE_GRADIENT_PALETTE( orangepink_gp ) {
    0,  255,  100,    0,     //orange
   90,  255,    0,  255,     //magenta
  150,  255,  100,    0,     //orange
  255,  255,  100,    0      //orange
};

DEFINE_GRADIENT_PALETTE( browngreen_gp ) {
    0,    6,  255,    0,     //green
   71,    0,  255,  153,     //bluegreen
  122,  200,  200,  200,     //gray
  181,  110,   61,    6,     //brown
  255,    6,  255,    0      //green
};

CRGBPalette16 currentPalette(greenblue_gp);
CRGBPalette16 targetPalette(orangepink_gp);

void setup() {
  FastLED.addLeds<WS2812B, LED_PIN, GRB>(leds, NUM_LEDS);
  FastLED.setBrightness(50);

  Serial.begin(57600);

  //Fill the colorIndex array with random numbers
  for (int i = 0; i < NUM_LEDS; i++) {
    colorIndex[i] = random8();
  }
}

void loop() {
  //首先是随机(colorIndex[i] = random8();在setup中设置了颜色的随机位置)点亮所有 LED

  // Color each pixel from the palette using the index from colorIndex[]
  for (int i = 0; i < NUM_LEDS; i++) {
    leds[i] = ColorFromPalette(currentPalette, colorIndex[i]);
  }
//然后融合,
  nblendPaletteTowardPalette( currentPalette, targetPalette, 10 );//nblendPaletteTowardPalette(currentPalette, targetPalette, amount);最后一参数是过渡量,越大过渡越快,!!!
                                                                  //并且当前色板是变动的,如当融合后,  当前色板   由greenblue_gp---->browngreen_gp
  switch (whichPalette) {
    case 0:
      targetPalette = orangepink_gp;
      break;
    case 1:
      targetPalette = browngreen_gp;
      break;
     case 2:
      targetPalette = greenblue_gp;
      break;
  }
 // 5S切换一下色板
  EVERY_N_SECONDS(5) {
    whichPalette++;
    if (whichPalette > 2) whichPalette = 0;
    Serial.println(currentPalette[0]);
  }
   // 5ms  颜色的索引+1,然后再 leds[i] = ColorFromPalette(currentPalette, colorIndex[i]);这个函数中,更新颜色值,创建动态效果
  EVERY_N_MILLISECONDS(5){
    for (int i = 0; i < NUM_LEDS; i++) {
      colorIndex[i]++;
    }
  }

  FastLED.show();
}


 1万+
1万+

 被折叠的 条评论
为什么被折叠?
被折叠的 条评论
为什么被折叠?
 到【灌水乐园】发言


