


第一次直播
项目介绍
帮助找到志同道合的伙伴
需求分析
-
标签分类
-
主动搜索
-
组队
- 创建队伍
- 加入队伍
- 根据标签查询队伍
前端项目初始化
项目初始化文件夹中一定不要带空格! 使用npm(node包管理器)来安装
Vite
脚手架:
vue cli
vite
项目中使用:vite
src:
https://vitejs.cn/guide/#scaffolding-your-first-vite-project
1. npm init vite@latest

2.
√ Project namel

4. 启动项目:npm run dev
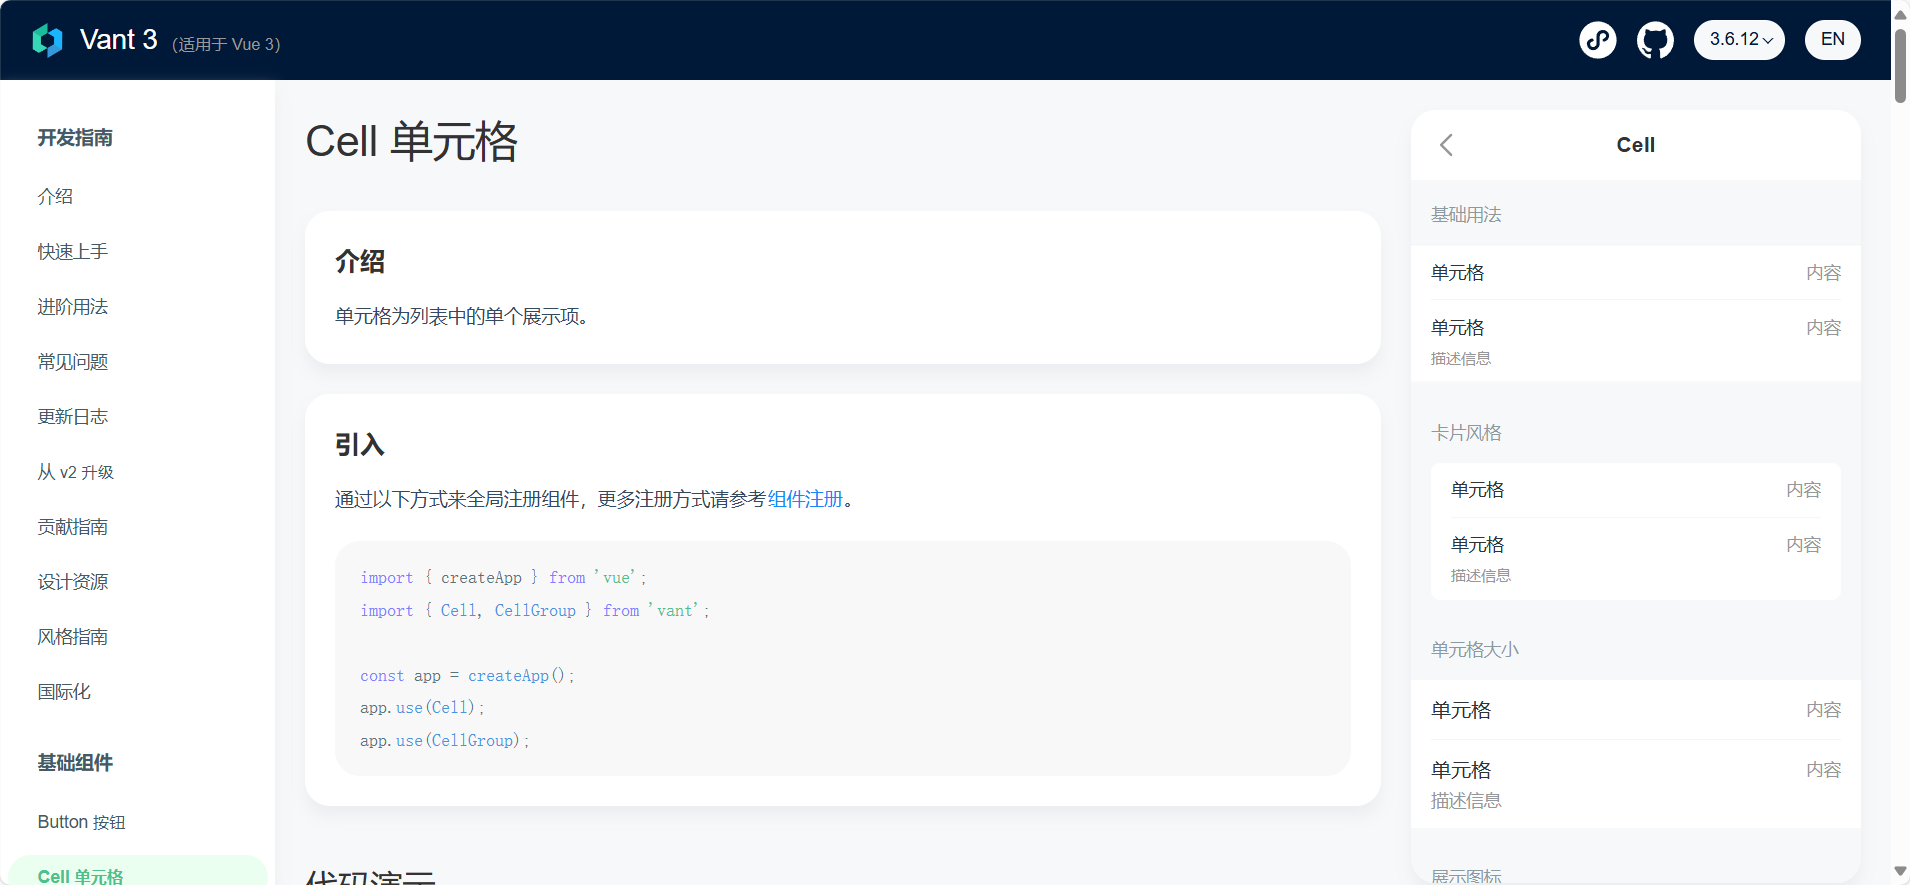
Vant
src:https://vant-ui.github.io/vant/v3/#/zh-CN
轻量、可靠的移动端 Vue 组件库
根据官方文档进行配置:
1. # 通过 npm 安装 npm i unplugin-vue-components -D(这个插件就是按需引入,没必要全部都下载)

2. 修改配置: 在config文件中
import vue from '@vitejs/plugin-vue';
import Components from 'unplugin-vue-components/vite';
import { VantResolver } from 'unplugin-vue-components/resolvers';

export default {
  plugins: [
    vue(),
    Components({
      resolvers: [VantResolver()],
    }),
  ],
};
在main文件中挂载需要的组件:
import { createApp } from 'vue'
import './style.css'
import App from './App.vue'
import { Button } from 'vant';
import 'vant/lib/index.css';

const app = createApp(App);
app.use(Button);
app.mount('#app');
在App.Vue首页写入组件代码:
<van-button type="primary">主要按钮</van-button>
<van-button type="success">成功按钮</van-button>
<van-button type="default">默认按钮</van-button>
<van-button type="warning">警告按钮</van-button>
<van-button type="danger">危险按钮</van-button>
整体框架设计
开发页面经验:
1.多参考
2.从整体到局部
3.先想清楚页面要做成什么样子,再写代码
设计
-
导航条
-
内容
-
tab栏
- 主页(推荐页 + 广告 )
- 搜索页
- banner
- 推荐信息流
- 队伍页
- 用户页
- 主页(推荐页 + 广告 )
总体浏览:
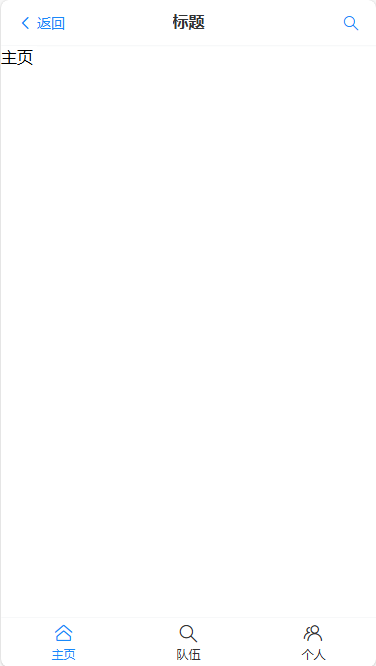
设置:
- 导航栏
<van-nav-bar
    title="标题"
    left-text="返回"
    left-arrow
    @click-left="onClickLeft"
    @click-right="onClickRight"
>
  %% 插槽 %%
  <template #right>
    <van-icon name="search" size="18"/>
  </template>
  </van-nav-bar>
- 标签栏
<!--  下面的边栏-->
  <van-tabbar v-model="active"  @change="onChange">
    <van-tabbar-item name="index" icon="home-o">主页</van-tabbar-item>
    <van-tabbar-item name="team" icon="search">队伍</van-tabbar-item>
    <van-tabbar-item name="user" icon="friends-o">个人</van-tabbar-item>
  </van-tabbar>
整体代码:
<script setup lang="ts">
    import {ref} from "vue";
    import {showToast} from "vant";
    import Index from "../pages/index.vue";  // 显示的页面需要引入
    import Team from "../pages/team.vue";
    import Profile from "../pages/profile.vue";
    const onClickLeft = () => console.log("左")
    const onClickRight = () => console.log("右")
    const active = ref("index");
    // 使用showToast展示相对应的标签 会有一个浮动的窗口
    const onChange = (index) => showToast(`标签 ${index}`);
</script>
<template>
  <van-nav-bar      title="标题"
      left-text="返回"
      left-arrow
      @click-left="onClickLeft"
      @click-right="onClickRight"
  >
    <template #right>
      <van-icon name="search" size="18"/>
    </template>    </van-nav-bar><!--  下面的边栏-->
  <van-tabbar v-model="active"  @change="onChange">
    <van-tabbar-item name="index" icon="home-o">主页</van-tabbar-item>
    <van-tabbar-item name="team" icon="search">队伍</van-tabbar-item>
    <van-tabbar-item name="user" icon="friends-o">个人</van-tabbar-item>
  </van-tabbar><!--通过active进行激活 判断显示哪一个页面-->
  <div id="content">
    <template v-if="active === 'index'">
      <index></index>    </template>    <template v-if="active === 'team'">
      <team></team>    </template>    <template v-if="active === 'user'">
      <profile></profile>    </template>  </div></template>
<style scoped>
</style>
后端数据库开发
- 标签表的开发
字段:
id int 主键
标签名 varchar 非空(必须唯一,唯一索引)
上传标签的用户 userId int(如果要根据 userId 查已上传标签的话,最好加上,普通索引)
父标签 id ,parentId,int(分类)
是否为父标签 isParent, tinyint(0 不是父标签、1 - 父标签)
创建时间 createTime,datetime
更新时间 updateTime,datetime
是否删除 isDelete, tinyint(0、1)
create table tag
(
    id         bigint auto_increment comment 'id'
        primary key,
    tagName    varchar(256)                       null comment '标签名称',
    userId     bigint                             null comment '用户 id',
    parentId   bigint                             null comment '父标签 id',
    isParent   tinyint                            null comment '0 - 不是, 1 - 父标签',
    createTime datetime default CURRENT_TIMESTAMP null comment '创建时间',
    updateTime datetime default CURRENT_TIMESTAMP null on update CURRENT_TIMESTAMP,
    isDelete   tinyint  default 0                 not null comment '是否删除',
    constraint uniIdx_tagName
        unique (tagName)
);
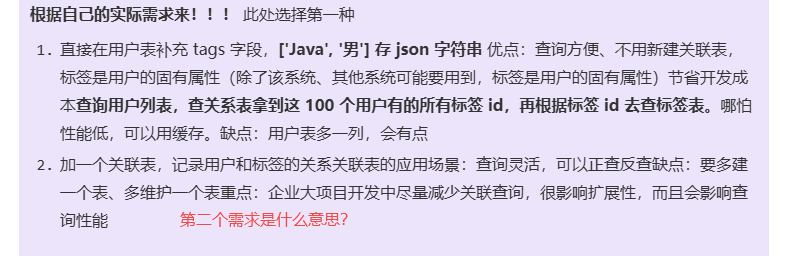
- 用户表 添加标签字段(表示这个用户具有什么标签)
后端开发接口
- 复制user-center的项目,删除相关的文件,把所有user-center名字修改为
partner-matching
标签
一个用户存在tag字段:包括了多个标签,mysql数据库中tag字段包含了json数据[“xxx”,“xxxx”]
通过tag字段去搜索相对应的用户
举个例子: 查询有java、python这两个标签的用户
1. 使用sql查询带有特定标签的用户
@Override
    public List<User> searchUserByTags(List<String> tagNameLists) {
//        如果搜索到的数据都是空的 报异常
        if (CollectionUtils.isEmpty(tagNameLists)) {
            throw new BusinessException(ErrorCode.PARAMS_ERROR);
        }
        QueryWrapper<User> queryWrapper = new QueryWrapper<>();
        // 拼接tag select * from user where tags like "xxx" and tag like "xxx"
        for (String tag : tagNameLists) {
            // 拼接操作
            queryWrapper = queryWrapper.like("tags", tag);
        }
        List<User> users = userMapper.selectList(queryWrapper);

        List<User> collect = users.stream().map(this::getSafetyUser).collect(Collectors.toList());
        return collect;
    }
具体操作:
- 通过前端传入数据
- 构造queryWrapper建立查询条件:tags like “xxx” and tag like “xxx”
- 拿到数据后使用stream中的map进行脱敏,返回数据
2. 内存中查询
gson依赖:
<!-- https://mvnrepository.com/artifact/com.google.code.gson/gson -->
<dependency>
    <groupId>com.google.code.gson</groupId>
    <artifactId>gson</artifactId>
    <version>2.8.9</version>
</dependency>
具体步骤:
- 通过前端传入数据
- 查询所有用户的数据
- 从数据中拿到tag并且将json格式的String字符串转换为set类型String字符串
- String json: =
"tag1,tag2,tag3"->Set<String>: [tag1, tag2, tag3]
- String json: =
- 比较数据,如果存在保存用户,不存在去除用户(使用的是stream流进行处理)
    @Override
    public List<User> searchUserByTags2(List<String> tagNameLists) {
        //        如果搜索到的数据都是空的 报异常
        if (CollectionUtils.isEmpty(tagNameLists)) {
            throw new BusinessException(ErrorCode.PARAMS_ERROR);
        }

        // 1. 查询所有的用户
        QueryWrapper<User> queryWrapper = new QueryWrapper<>();
        List<User> userList = userMapper.selectList(queryWrapper);
//        创建 gson:将json转换为java数据
        Gson gson = new Gson();
//        2. 判断前端的标签是否符合数据库中每一个用户存在的标签
        return userList.stream().filter(user ->{
            String taguser = user.getTags();
            if(StringUtils.isEmpty(taguser)){
                return false;
            }
            Type type = new TypeToken<Set<String>>() {
            }.getType();
            Set<String> tagSet = gson.fromJson(taguser, type);
            for (String tag : tagSet) {
                if(!tagSet.contains(tag)){ // 如果tagSet中不包含这个标签,直接跳过这个用户
                    return false;
                }
            }
            return true; // 到这边就是可以进入下一个步骤了
        }).map(this::getSafetyUser)
                .collect(Collectors.toList());
    }
如何测试方法运行时间
核心思想:System.currentTimeMillis()
List<String> tagList = Arrays.asList("Java", "Python");
long start1 = System.currentTimeMillis();
List<User> users1 = userService.searchUserByTags(tagList);
long result1 = System.currentTimeMillis() - start1;
long start2 = System.currentTimeMillis();
List<User> users2 = userService.searchUserByTags2(tagList);
long result2 = System.currentTimeMillis() - start2;
System.out.println("使用sql查询用时:" + result1);
System.out.println("使用内存查询用时:" + result2);
System.out.println("测试结束");
使用sql查询用时:1156
使用内存查询用时:59
- 根据业务的数据量可以自由选择查询方法
- 同时使用两种不同的查询,谁先返回用谁
第二次直播
规划
- 之前标签接口再调试
- 前端开发
- 整合路由 30-50
- 后端api swagger + knife4j
- 爬虫 用户信息
接口调试10
弃用接口方法:
-
在方法前+
@Deprecated -
将方法私有化 private (
❓设置有问题) -
stream / parallelStream 流失处理
-
Optional 可选类(java8 快速判断 是否为空 否则为xxx 类似ifnull)
Set<String> tagSet = gson.fromJson(taguser, type);
tagSet = Optional.ofNullable(tagSet).orElse(new HashSet<>());
如果json解析为null,则设置为空的HashSet
前端整合路由11
- 整合路由
地址:https://router.vuejs.org/zh/guide/#html
安装Vue route:一个html动态访问不同的组件
npm install vue-router@4
如何使用route?
配置信息:
const router = VueRouter.createRouter({
    // 4. 内部提供了 history 模式的实现。为了简单起见,我们在这里使用 hash 模式。
    history: VueRouter.createWebHashHistory(),
    routes, // `routes: routes` 的缩写
})

app.use(router)
const routes = [
    {path: '/', component: Index},
    {path: '/team', component: Team},
    {path: '/profile', component: Profile},
]
export default routes;
页面显示跳转:
显示route的跳转页面
  <div id="content">
    <router-view/>
    </div>
    <!--  下面的边栏-->
  <van-tabbar route @change="onChange">
    <van-tabbar-item to="/" icon="home-o" name="index">主页</van-tabbar-item>
    <van-tabbar-item to="/team" icon="search" name="team">队伍</van-tabbar-item>
    <van-tabbar-item to="/profile" icon="friends-o" name="profile">个人</van-tabbar-item>
  </van-tabbar>
在js中触发事件如何跳转页面?
const router = useRouter(); 创建一个实例

const onClickRight = () => {
  router.push('/search')   使用push到指定的页面
};
搜索页面
如何设计一个搜索页面:
去看其他客户端或者网页是怎么做的 模仿!
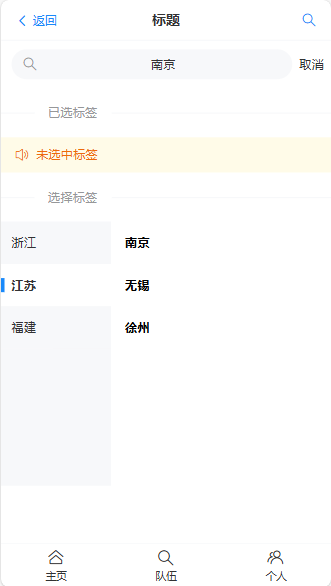
通过搜索 选中标签 添加到已选标签中
ref的用处:
const searchText = ref('');


建了一个初始值为空字符串的响应式引用。这个引用可以在组件中进行双向绑定,并且当其值发生变化时,Vue会自动更新所有使用这个引用的地方。
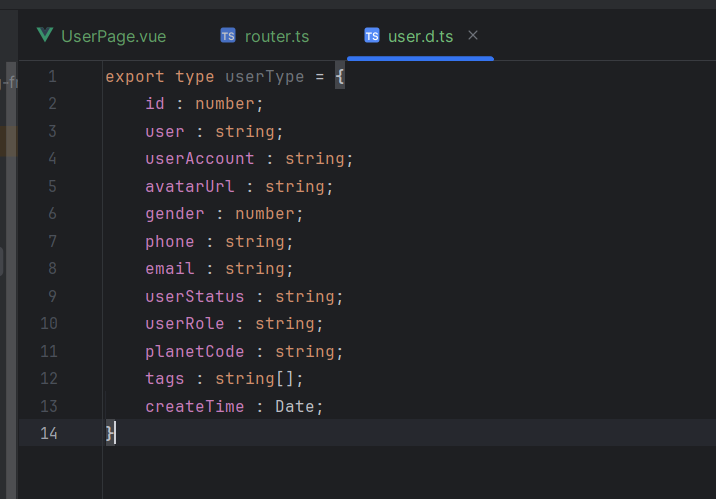
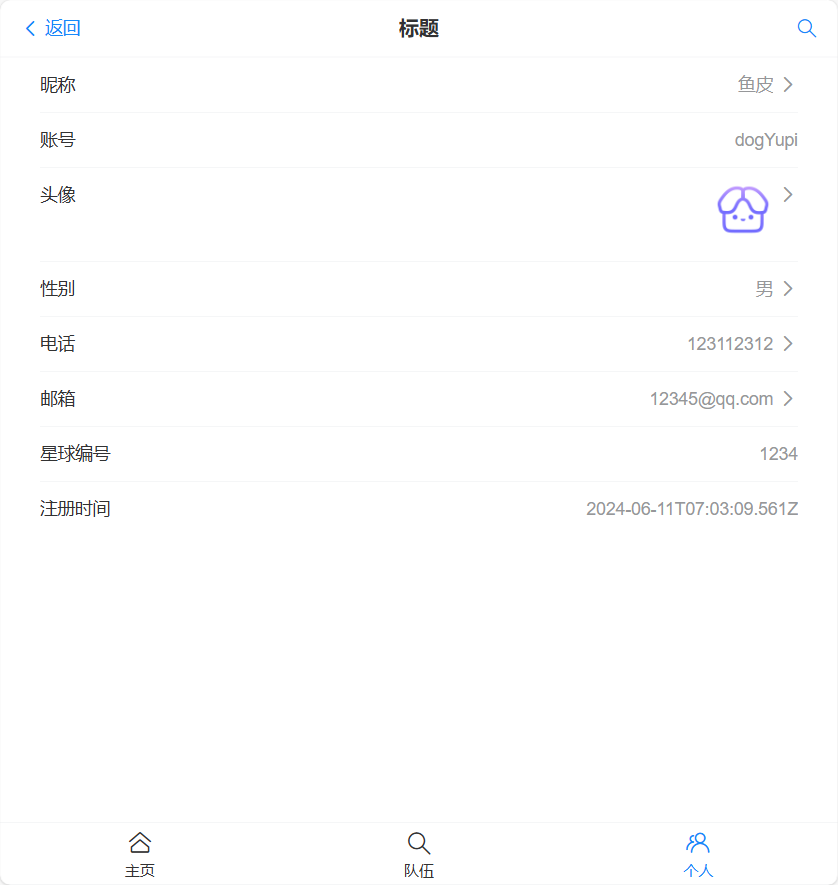
用户信息页面12
创建信息实体
export type userType = {
    id : number;
    user : string;
    userAccount : string;
    avatarUrl : string;
    gender : number;
    phone : string;
    email : string;
    userStatus : string;
    userRole : string;
    planetCode : string;
    tags : string[];
    createTime : Date;
}
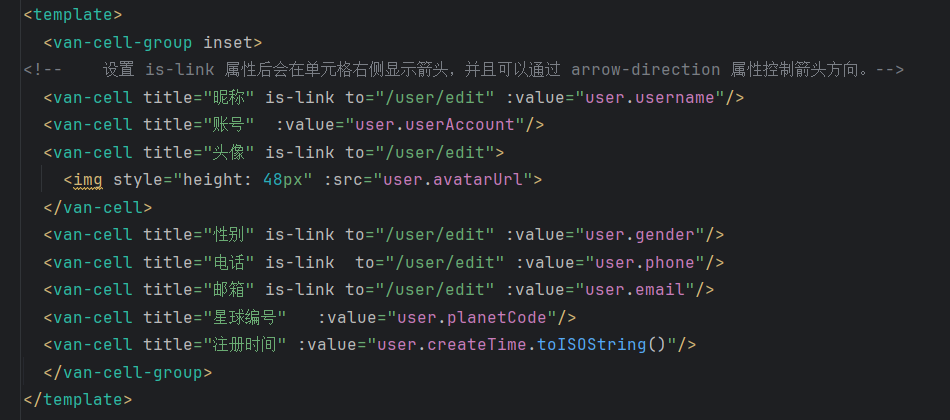
创建页面
使用vant组件cell:
  <van-cell-group inset>
<!--    设置 is-link 属性后会在单元格右侧显示箭头,并且可以通过 arrow-direction 属性控制箭头方向。-->
  <van-cell title="昵称" is-link to="/user/edit" :value="user.username"/>
  <van-cell title="账号"  :value="user.userAccount"/>
  <van-cell title="头像" is-link to="/user/edit">
    <img style="height: 48px" :src="user.avatarUrl">
  </van-cell>  <van-cell title="性别" is-link to="/user/edit" :value="user.gender"/>
  <van-cell title="电话" is-link  to="/user/edit" :value="user.phone"/>
  <van-cell title="邮箱" is-link to="/user/edit" :value="user.email"/>
  <van-cell title="星球编号"   :value="user.planetCode"/>
  <van-cell title="注册时间" :value="user.createTime.toISOString()"/>
  </van-cell-group>
使用route传参
创建的个人信息页面:
页面会进行跳转:to="/user/edit"
通过route传递参数到edit页面,然后进行修改回传


 被折叠的 条评论
为什么被折叠?
被折叠的 条评论
为什么被折叠?
 到【灌水乐园】发言


