


前面写过java配置双数据源对不同服务器上的数据库进行操作的文章,因为当初数据量不大,就没有分表,但随着时间的推移,数据量一定会越来越多,如果单表的数据量太大,就会影响SQL语句的执行性能。分表就是按照一定的策略将单表的数据拆分到多个表中,查询的时候也按照一定的策略去查询对应的表,这样就将一次查询的数据范围缩小了。比如按照用户id来分表,将一个用户的数据就放在一个表中,crud先通过用户id找到那个表在进行操作就可以了。这样就把每个表的数据量控制在一定范围内,提升SQL语句的执行性能。
目前常用的实现分库分表的方法是使用sharding-jdbc这个框架,网上随便都可以找到该框架的使用教程,但因为我上次写的多数据源配置没有用到该框架,所以就使用其他方式来实现分表操作--使用mybatis拦截器实现该功能;
接下来我将在配置好双数据源的基础上添加分表功能,配置多数据源地址:https://blog.csdn.net/weixin_51503235/article/details/123800584。
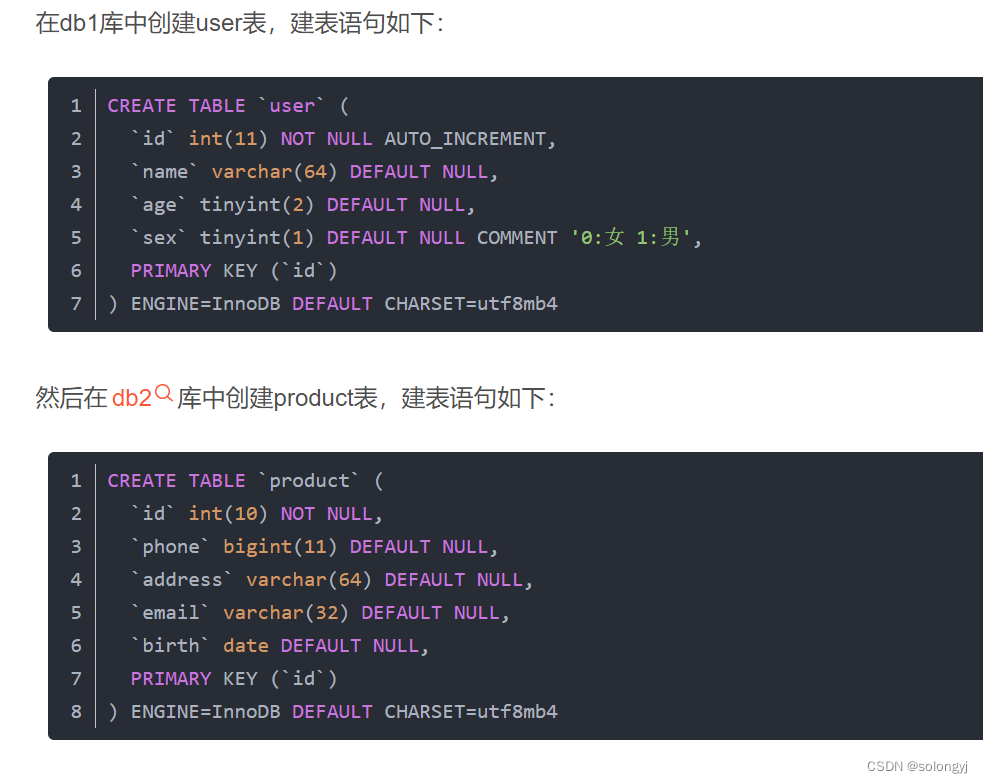
因为已经分别在两个不同的库创建了两张表,db1库里是user表,db2库里是product表,这里把product表中的id设为自增,然后先启动该项目执行一下插入一些数据(上面连接里有详细介绍):
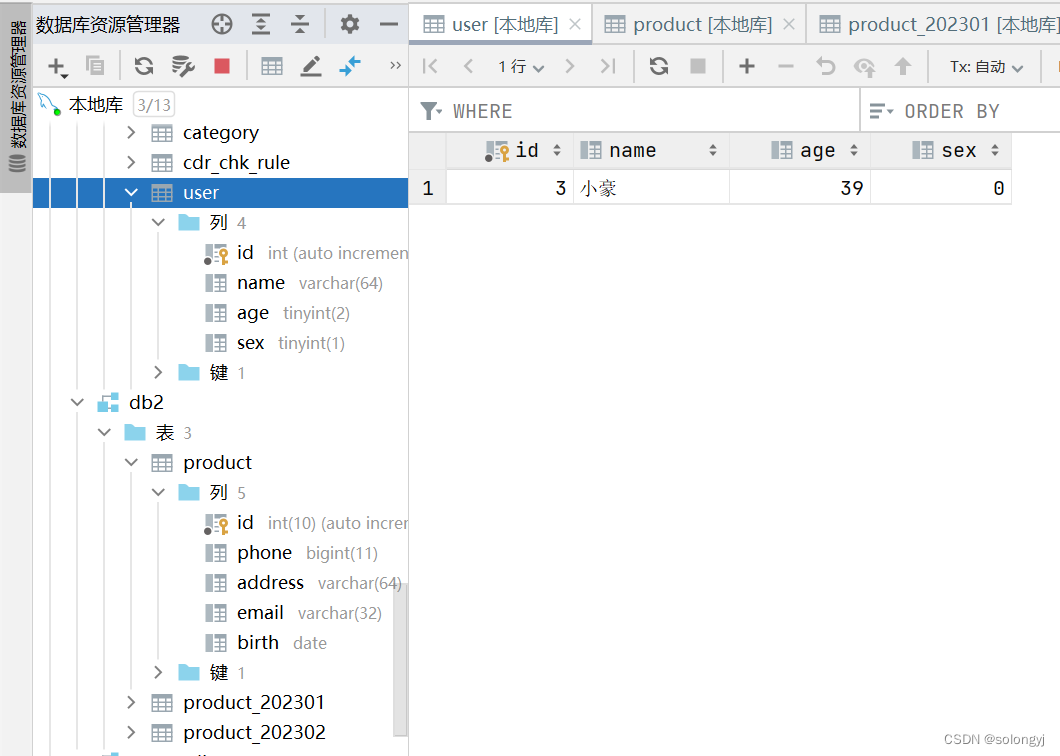
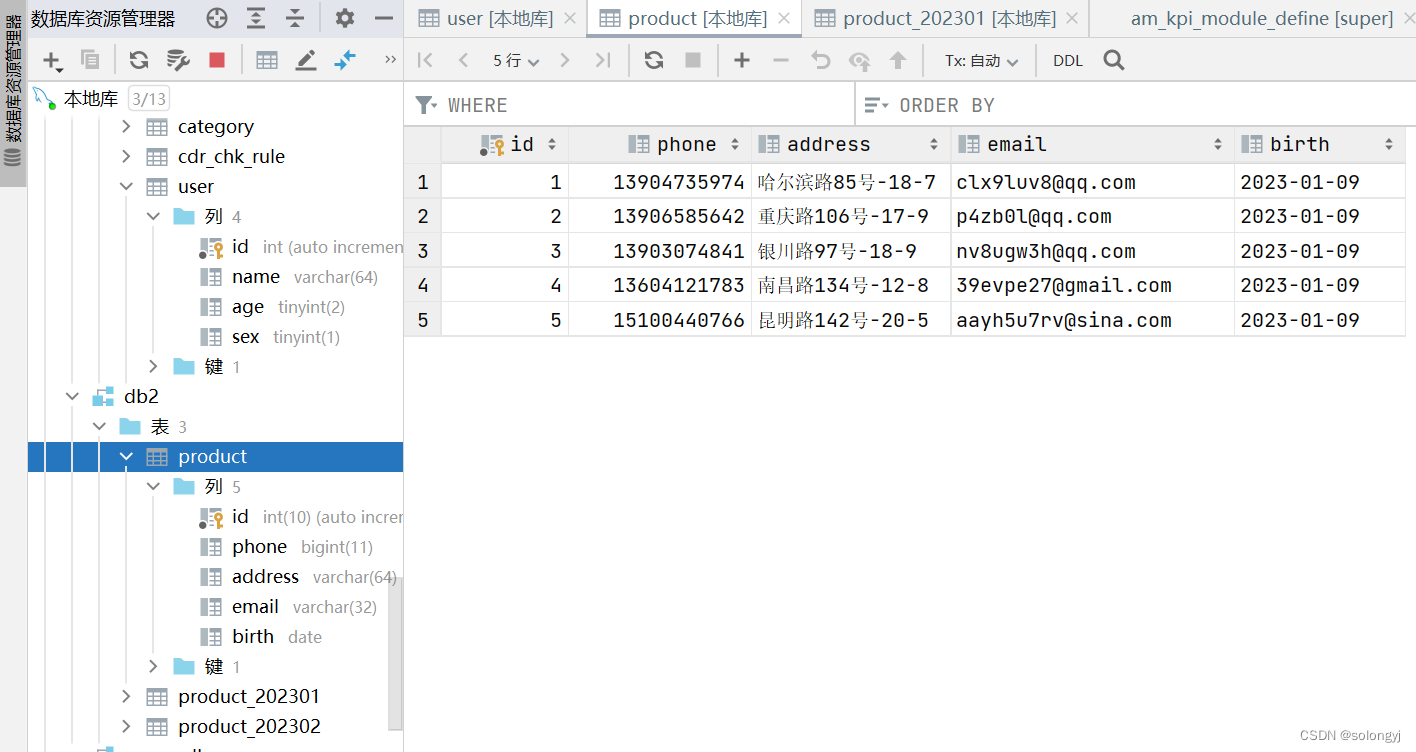
现在user表里有一条数据,product表里有五条数据,然后我们建两张product的月表product_202301和product_202302,接下来开始进行如何插入对应的月表开发:简单的说就是mybatis在执行sql的时候,拦截目标方法并且在前后加上我们的业务逻辑。实际上就是加@Intercepts注解和实现org.apache.ibatis.plugin.Interceptor接口;

首先创建一个类实现该接口,话不多说直接上代码:
//method = "query"拦截select方法、而method = "update"则能拦截insert、update、delete的方法
@Intercepts({@Signature(type = Executor.class, method = "update", args = {MappedStatement.class, Object.class})})
@Component
public class ReplaceTableInterceptor implements Interceptor {
    private final static Map<String, String> TABLE_MAP = new LinkedHashMap<>();

    static {
         //截取当前时间对应的月份,格式yyyyMM
        String month = new SimpleDateFormat("yyyyMM").format(new Date());
        //插入product表时,替换为对应的月表
        TABLE_MAP.put("product", "product_" + month);
    }

    @Override
    public Object intercept(Invocation invocation) throws Throwable {
        Object[] args = invocation.getArgs();
        //获取MappedStatement对象
        MappedStatement ms = (MappedStatement) args[0];
        //获取传入sql语句的参数对象
        Object parameterObject = args[1];

        BoundSql boundSql = ms.getBoundSql(parameterObject);
        //获取到拥有占位符的sql语句
        String sql = boundSql.getSql();
        System.out.println("拦截前sql :" + sql);

        //判断是否需要替换表名
        if(isReplaceTableName(sql)){
            for(Map.Entry<String, String> entry : TABLE_MAP.entrySet()){
                sql = sql.replace(entry.getKey(),entry.getValue());
            }
            System.out.println("拦截后sql :" + sql);

            //重新生成一个BoundSql对象
            BoundSql bs = new BoundSql(ms.getConfiguration(),sql,boundSql.getParameterMappings(),parameterObject);

            //重新生成一个MappedStatement对象
            MappedStatement newMs = copyMappedStatement(ms, new BoundSqlSqlSource(bs));

            //赋回给实际执行方法所需的参数中
            args[0] = newMs;
        }
        return invocation.proceed();
    }

    /***
     * 复制一个新的MappedStatement
     * @param ms
     * @param newSqlSource
     * @return
     */
    private MappedStatement copyMappedStatement (MappedStatement ms, SqlSource newSqlSource) {
        MappedStatement.Builder builder = new MappedStatement.Builder(ms.getConfiguration(), ms.getId(), newSqlSource, ms.getSqlCommandType());

        builder.resource(ms.getResource());
        builder.fetchSize(ms.getFetchSize());
        builder.statementType(ms.getStatementType());
        builder.keyGenerator(ms.getKeyGenerator());
        if (ms.getKeyProperties() != null && ms.getKeyProperties().length > 0) {
            builder.keyProperty(String.join(",",ms.getKeyProperties()));
        }
        builder.timeout(ms.getTimeout());
        builder.parameterMap(ms.getParameterMap());
        builder.resultMaps(ms.getResultMaps());
        builder.resultSetType(ms.getResultSetType());
        builder.cache(ms.getCache());
        builder.flushCacheRequired(ms.isFlushCacheRequired());
        builder.useCache(ms.isUseCache());
        return builder.build();
    }

    /***
     * 判断是否需要替换表名
     * @param sql
     * @return
     */
    private boolean isReplaceTableName(String sql){
        for(String tableName : TABLE_MAP.keySet()){
            if(sql.contains(tableName)){
                return true;
            }
        }
        return false;
    }

    /***
     * MappedStatement构造器接受的是SqlSource
     * 实现SqlSource接口,将BoundSql封装进去
     */
    public static class BoundSqlSqlSource implements SqlSource {
        private BoundSql boundSql;
        public BoundSqlSqlSource(BoundSql boundSql) {
            this.boundSql = boundSql;
        }
        @Override
        public BoundSql getBoundSql(Object parameterObject) {
            return boundSql;
        }
    }

    @Override
    public Object plugin(Object target) {
        return Plugin.wrap(target,this);
    }

    @Override
    public void setProperties(Properties properties) {
        Interceptor.super.setProperties(properties);
    }
}
注意:在intercept方法中有参数Invocation对象,里面有3个成员变量和@Signature对应
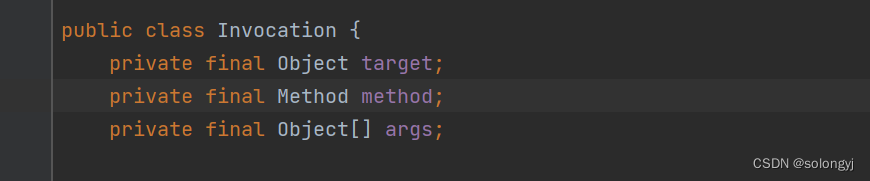
其中target为代理对象,method为被拦截的方法,args为被拦截方法执行所需的参数;
通过Invocation中的args变量。我们能拿到MappedStatement这个对象(args[0]),传入sql语句的参数Object(args[1])。而MappedStatement是一个记录了sql语句(sqlSource对象)、参数值结构、返回值结构、mapper配置等的一个对象。
sqlSource对象和传入sql语句的参数对象Object就能获得BoundSql。BoundSql的toString方法就能获取到有占位符的sql语句了,我们的业务逻辑就能在这里介入。
获取到sql语句,根据规则替换表名,塞回BoundSql对象中、再把BoundSql对象塞回MappedStatement对象中。最后再赋值给args[0](实际被拦截方法所需的参数)就搞定了。
到这里,mybatis拦截实现分表的功能就已经写好了,但这样还无法实现插入数据时到对应的月表,因为我们还缺少一些配置,因为我们是对db2库里的表进行按月分表的,所以找到db2的配置类:DataSourceDb2Config ,代码如下:
@Configuration
@MapperScan(basePackages = "com.solongyj.demo.mapper.db2", sqlSessionTemplateRef = "db2SqlSessionTemplate")
public class DataSourceDb2Config {

    /**
     * 获取映射文件所在的路径
     */
    @Value("${mybatis.db2.mapper-locations}")
    private String db2tMapperPath;

    /**
     * 数据源加载
     *
     * @return
     */
    @Bean(name = "db2DataSource")
    @ConfigurationProperties(prefix = "spring.datasource.db2.druid")
    public DataSource test1DataSource() {
        return DataSourceBuilder.create().build();
    }

    /**
     * 注入SqlSessionFactory,指定数据源和映射文件路径
     *
     * @param dataSource
     * @return
     * @throws Exception
     */
    @Bean(name = "db2SqlSessionFactory")
    public SqlSessionFactory testSqlSessionFactory(@Qualifier("db2DataSource") DataSource dataSource) throws Exception {
        MybatisSqlSessionFactoryBean bean = new MybatisSqlSessionFactoryBean();
        bean.setDataSource(dataSource);
        Resource[] resources = new PathMatchingResourcePatternResolver().getResources(db2tMapperPath);
        bean.setMapperLocations(resources);
        return bean.getObject();
    }

    /**
     * 注入DataSourceTransactionManager事物管理器
     *
     * @param dataSource
     * @return
     */
//    @Bean(name = "db2TransactionManager")
    public DataSourceTransactionManager testTransactionManager(@Qualifier("db2DataSource") DataSource dataSource) {
        return new DataSourceTransactionManager(dataSource);
    }

    /**
     * @param sqlSessionFactory
     * @return
     * @throws Exception
     */
    @Bean(name = "db2SqlSessionTemplate")
    public SqlSessionTemplate testSqlSessionTemplate(@Qualifier("db2SqlSessionFactory") SqlSessionFactory sqlSessionFactory) throws Exception {
        return new SqlSessionTemplate(sqlSessionFactory);
    }
此时还需要在testSqlSessionFactory方法中添加刚才写好的拦截器,最后代码为:
@Configuration
@MapperScan(basePackages = "com.solongyj.demo.mapper.db2", sqlSessionTemplateRef = "db2SqlSessionTemplate")
public class DataSourceDb2Config {

      /**
     * 获取映射文件所在的路径
     */
    @Value("${mybatis.db2.mapper-locations}")
    private String db2tMapperPath;

    /**
     * 数据源加载
     *
     * @return
     */
    @Bean(name = "db2DataSource")
    @ConfigurationProperties(prefix = "spring.datasource.db2.druid")
    public DataSource test1DataSource() {
        return DataSourceBuilder.create().build();
    }

    /**
     * 注入SqlSessionFactory,指定数据源和映射文件路径
     *
     * @param dataSource
     * @return
     * @throws Exception
     */
    @Bean(name = "db2SqlSessionFactory")
    public SqlSessionFactory testSqlSessionFactory(@Qualifier("db2DataSource") DataSource dataSource) throws Exception {
        MybatisSqlSessionFactoryBean bean = new MybatisSqlSessionFactoryBean();
        bean.setDataSource(dataSource);
        Resource[] resources = new PathMatchingResourcePatternResolver().getResources(db2tMapperPath);
        bean.setMapperLocations(resources);
        //添加对应的拦截器,如有多个拦截器可使用new Interceptor[]{拦截器,中间用逗号隔开}
        bean.setPlugins(new SplitTableInterceptor());
        return bean.getObject();
    }

    /**
     * 注入DataSourceTransactionManager事物管理器
     *
     * @param dataSource
     * @return
     */
//    @Bean(name = "db2TransactionManager")
    public DataSourceTransactionManager testTransactionManager(@Qualifier("db2DataSource") DataSource dataSource) {
        return new DataSourceTransactionManager(dataSource);
    }

    /**
     * @param sqlSessionFactory
     * @return
     * @throws Exception
     */
    @Bean(name = "db2SqlSessionTemplate")
    public SqlSessionTemplate testSqlSessionTemplate(@Qualifier("db2SqlSessionFactory") SqlSessionFactory sqlSessionFactory) throws Exception {
        return new SqlSessionTemplate(sqlSessionFactory);
    }
}
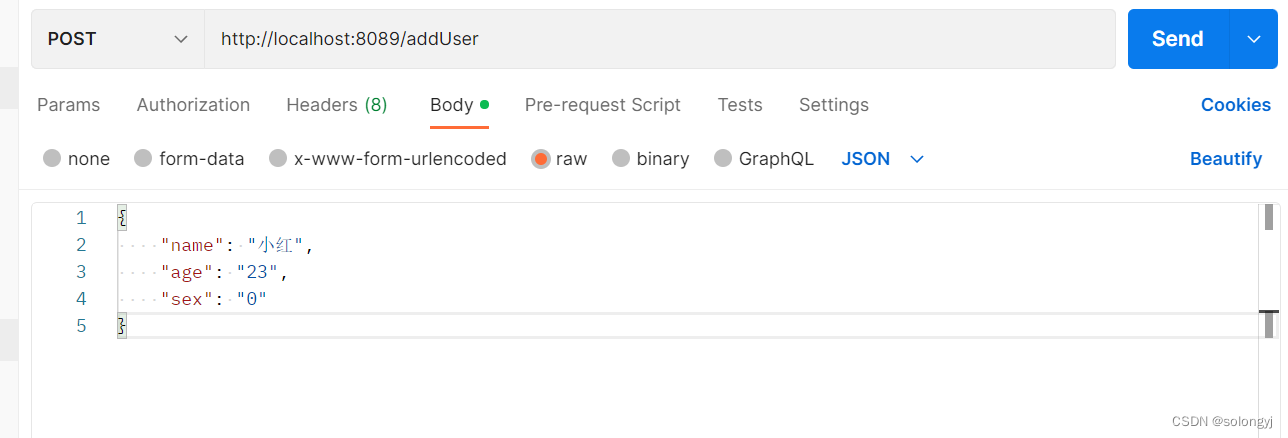
然后启动项目使用postman进行测试
可以通过日志看到:
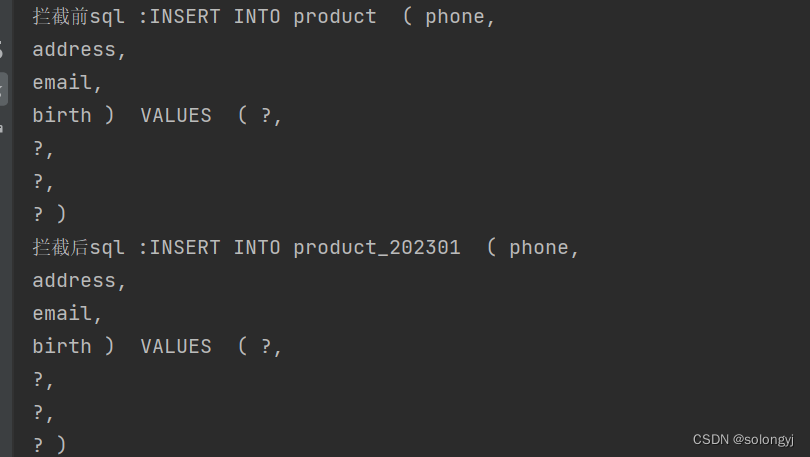

最后查看数据库:product_202301表中新增一条数据:
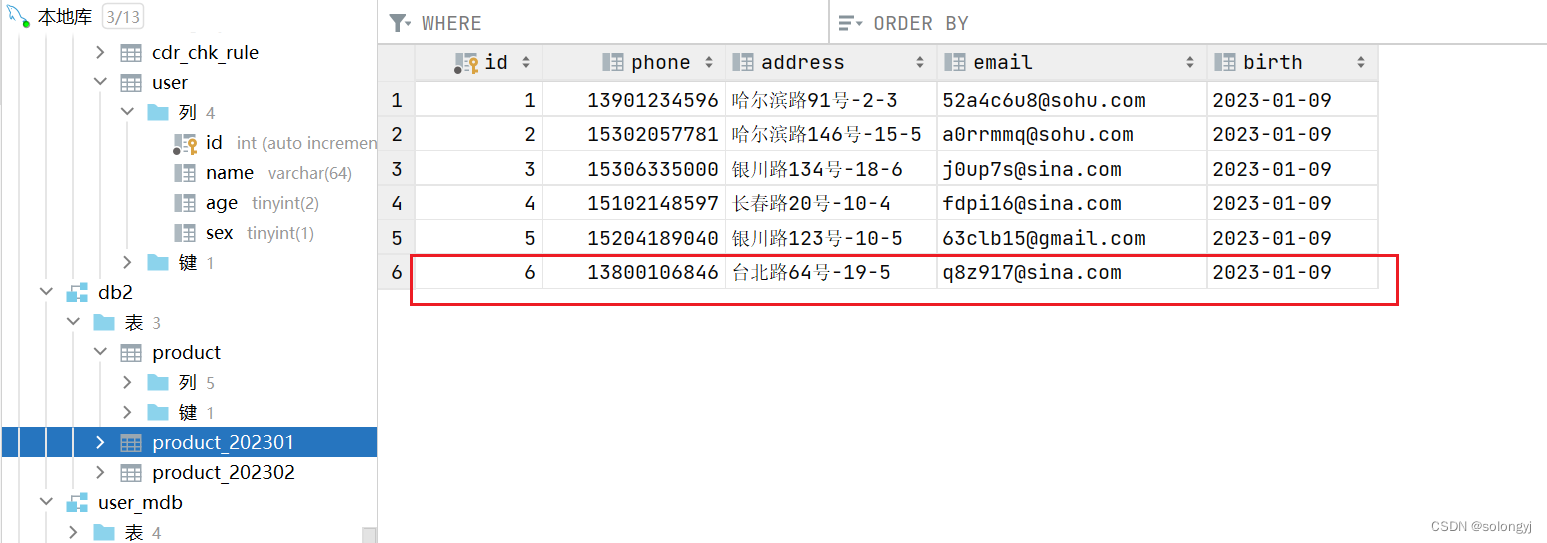
至此,使用mybatis拦截器实现分表功能已实现;该方法不仅适用于按月分表,也同样适用于根据用户id或手机尾号插入对应的分表中。与其说是分表,不如说它是动态替换表名更合适,哪怕没有product这个表,只要TABLE_MAP.put("product","value");中value值在数据库中有其对应的表,最后操作的都是value表;相关代码已上传至https://gitee.com/solongyj/spring2db.git,感兴趣的朋友可以了解下。


 448
448


 被折叠的 条评论
为什么被折叠?
被折叠的 条评论
为什么被折叠?
 到【灌水乐园】发言


