


首先在根目录public中的index.html引入高德地图
<script type="text/javascript" src="https://webapi.amap.com/maps?v=1.4.15&key=(你的key)&plugin=AMap.MouseTool,AMap.MapType,AMap.Autocomplete,AMap.PlaceSearch,AMap.MarkerClusterer,AMap.Driving,AMap.MoveAnimation"></script>
<template>
<!-- 地图 -->
<div id="container" style="width: 100%;height: 100%"></div>
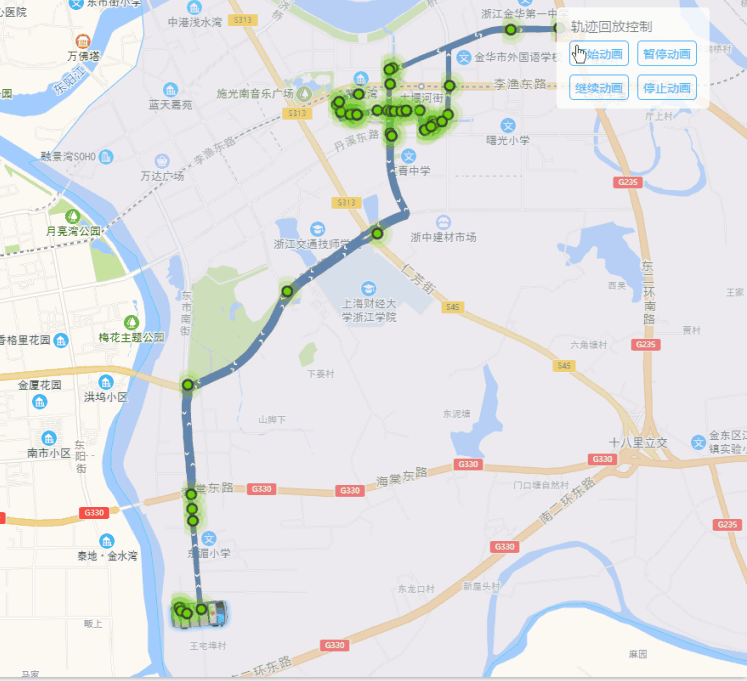
<!-- 触发按钮 -->
<div><a-button type="primary" @click="carSearch">搜索</a-button></div>
<!-- 轨迹回放控制 -->
<div class="controlBoxButton">
<div @click="startAnimation()">开始动画</div>
<div @click="pauseAnimation()">暂停动画</div>
<div @click="resumeAnimation()">继续动画</div>
<div @click="stopAnimation()">停止动画</div>
</div>
<!-- 标点弹窗 -->
<div id="mapInfoWindow">
<div>{{siteData.name}}</div>
<div>累计停留时间:{{siteData.time}}秒</div>
<div>{{siteData.startDate}}{{siteData.uploadTime}}</div>
</div>
</template>
data(){
  markerIcon:{
    car: require("@/assets/car.png"),
    label: require("@/assets/label.png"),
  },
},
mounted(){
  this.initMap();
},
methods: {
  //map初始化
  initMap() {
    this.map = new AMap.Map('container', {
      resizeEnable: true,
      zoom: 13,//缩放级别
      center: [119.761878, 29.126898],//地图中心点
    });
  },
  //小车线路回放
  carSearch() {
    let that =this;
    //处理接口返回数据格式 (格式为[[经度,纬度],[经度,纬度].......])
    this.lineArr = [];
    res为请求接口获得的线路数据
    res.result.points.map((item)=>{
      this.lineArr.push([item.longitude,item.latitude])
    });
    //设置小车icon
    let car = new AMap.Icon({
      image: that.markerIcon.car,//自定义小车图形
      size: new AMap.Size(140, 50),//图标大小
      imageSize: new AMap.Size(80, 50),//图标所用图片大小
      imageOffset: new AMap.Pixel(0, -10)//图标所用图片偏移量
    });
    //设置marker
    let position = [res.result.points[0].longitude,res.result.points[0].latitude];
    this.marker = new AMap.Marker({
      position: position,//小车开始时位置
      icon: car,
      autoRotation: true,//自动旋转
      angle:-90,//旋转角度
      map:that.map
    });
    // 绘制轨迹
    let polyline = new AMap.Polyline({
      map: that.map,
      path: that.lineArr,
      showDir:true,//显示折线箭头
      strokeColor: "#557aa6", //线颜色
      // strokeOpacity: 1, //线透明度
      strokeWeight: 6,  //线宽
      // strokeStyle: "solid"  //线样式
    });
    let passedPolyline = new AMap.Polyline({
      map: that.map,
      strokeColor: "#AF5",
      // strokeOpacity: 1, //线透明度
      strokeWeight: 6,
      // strokeStyle: "solid"  //线样式
    });
    this.marker.on('moving', function (e) {
      passedPolyline.setPath(e.passedPath);
      // that.map.setCenter(e.target.getPosition(),true) //设置后地图跟随小车移动
    });
    this.initCarSite();//配置线路中的标点位置
    //调整合适位置
    this.map.setFitView();
  },
  //配置线路中的标点
  initCarSite(){
    let that = this;
    //res为请求接口获得的站点数据
    res.result.slowPoints.map((item)=>{
      let icon = new AMap.Icon({
        image: that.markerIcon.label,
        size: new AMap.Size(80, 80),
        imageSize: new AMap.Size(40, 40),
        imageOffset: new AMap.Pixel(-10, 10)
      });
      let marker = new AMap.Marker({
        icon: icon,
        position: [item.longitude, item.latitude],
      });
      that.map.add(marker);
      //设置信息弹窗
      marker.siteData = item;
      AMap.event.addListener(marker, "click", function () {
        that.openInfoWindow(marker)
      });
    })
  },
  //配置信息窗口
  openInfoWindow(marker) {
    let that = this;
    that.siteData = marker.siteData;
    let content = document.getElementById("mapInfoWindow");
    let infoWindow = new AMap.InfoWindow({
      content: content,
      offset: new AMap.Pixel(0, 0)
    });
    infoWindow.on("close");
    infoWindow.open(that.map, marker.getPosition());
  },
  //控制小车的一些事件
  startAnimation(){
    this.marker.moveAlong(this.lineArr,800);//开始动画(800为速度)
  },
  pauseAnimation(){
    this.marker.pauseMove();//暂停动画
  },
  resumeAnimation(){
    this.marker.resumeMove();//继续动画
  },
  stopAnimation(){
    this.marker.stopMove();//停止动画
  },
}


 3165
3165


 被折叠的 条评论
为什么被折叠?
被折叠的 条评论
为什么被折叠?
 到【灌水乐园】发言


