


本篇文章一共用到了四个类
BufferedImage,Graphics2D,ImageIO,shape
First,生成一个照片对象
BufferedImage bi =new BufferedImage(150,50,BufferedImage.TYPE_INT_RGB);生成一张全黑的照片
Second:生成一个绘图对象
该绘图对象可以设置图片背景颜色,字体样式,数字内容
drawString(数字内容,x(数学中的x轴),y(数学中的y轴))
特别说明:即使桌面上已经有目标照片内容相等的名称,只会进行覆盖。
即可以运行下面程序无数次。
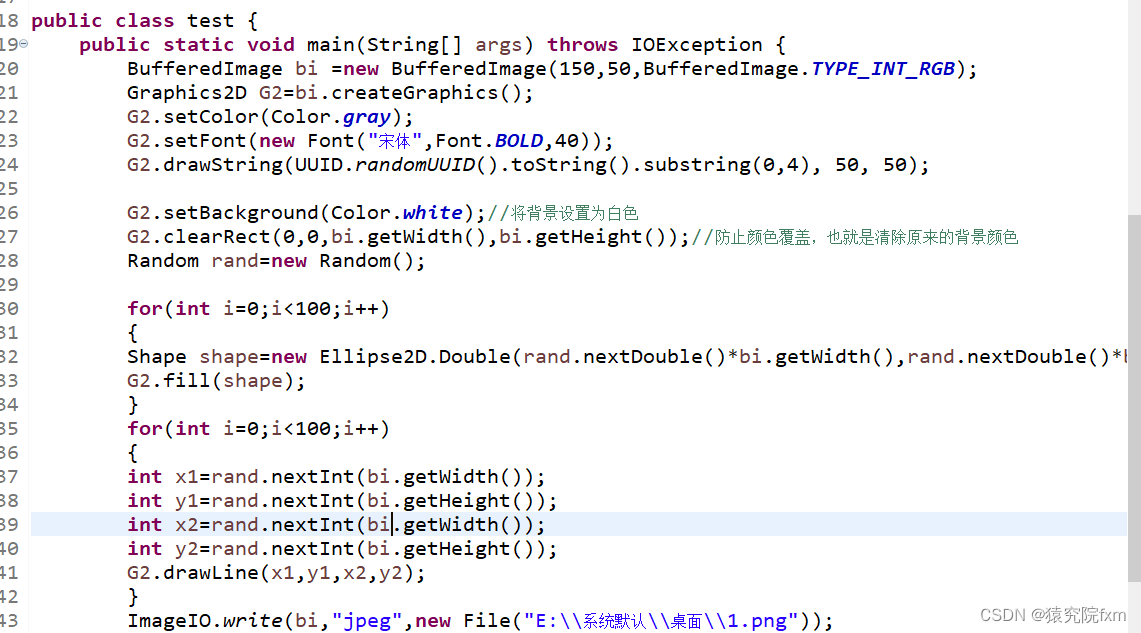
		BufferedImage bi =new BufferedImage(150,50,BufferedImage.TYPE_INT_RGB);
		Graphics2D G2=bi.createGraphics();
		G2.setColor(Color.gray);
		G2.setFont(new Font("宋体",Font.BOLD,40));
		G2.drawString(UUID.randomUUID().toString().substring(0,4), 50, 50);
		ImageIO.write(bi,"jpeg",new File("E:\\系统默认\\桌面\\1.png"));
third:给这张照片做一些其他的事情使其变得让机器看不懂
如何让生成的数字上面颜色随机!
之前的setColor是Graphic2D已经写好的,我们也可以对其参数进行重新设定一个对象
G2.setColor(new Color(rand.nextInt(256),rand.nextInt(256),rand.nextInt(256))
如何设置白色背景!
G2.setBackground(Color.white)//将背景设置为白色
G2.clearRect(0,0,bi.getWidth(),bi.getHeight());//防止颜色覆盖,也就是清除原来的背景颜色
如何添加噪点和线条!通常生成的验证码还是不可以防止爬虫,所以会增加一些噪点在里面
使用fill()函数进行填充
Random rand=new Random();
for(int i=0;i<100;i++)
{
Shape shape=new Ellipse2D.Double(rand.nextDouble()*bi.getWidth(),rand.nextDouble()*bi.getHeight(),rand.nextDouble()*5+1,rand.nextDouble()*5+1);
}
for(int i=0;i<100;i++)
{
int x1=rand.nextInt(bi.getWidth());
int y1=rand.nextInt(bi.getHeight());
int x2=rand.nextInt(bi.getWidth());
int y2=rand.nextInt(bi.getHeight());
G2.drawLine(x1,y1,x2,y2);
}其他的就可以自由发挥了,再见!


 1987
1987


 被折叠的 条评论
为什么被折叠?
被折叠的 条评论
为什么被折叠?
 到【灌水乐园】发言


