


一、环境
| 主机名 | IP地址 | 操作系统 | es版本 |
|---|---|---|---|
| es1 | 192.168.10.180 | Centos 7 | elasticsearch7.8.0 |
| es2 | 192.168.10.181 | Centos 7 | elasticsearch7.8.0 |
二、单机部署
1、解压安装包,创建elasticsearch用户,赋权
[root@es1 ~]# ls
elasticsearch-7.8.0-linux-x86_64.tar.gz
[root@es1 ~]# ls
elasticsearch-7.8.0-linux-x86_64.tar.gz
[root@es1 ~]# tar xf elasticsearch-7.8.0-linux-x86_64.tar.gz
[root@es1 ~]# useradd es && passwd es
Changing password for user es.
New password:
BAD PASSWORD: The password is shorter than 8 characters
Retype new password:
passwd: all authentication tokens updated successfully.
[root@es1 ~]# mv elasticsearch-7.8.0 elasticsearch
[root@es1 ~]# chown -R es:es elasticsearch
[root@es1 ~]#
2、修改配置文件
[root@es1 ~]# mv elasticsearch /data/
[root@es1 ~]# cd /data/
[root@es1 data]# ls
elasticsearch
[root@es1 data]# cd /data/elasticsearch/config/
[root@es1 config]# vim elasticsearch.yml

[root@es1 config]# cat elasticsearch.yml
node.name: node-1                          ##节点名称
path.data: /data/elasticsearch/data        ##数据存放路径
path.logs: /data/elasticsearch/logs        ##日志存放路径
bootstrap.memory_lock: true                ##避免es使用swap交换分区
indices.requests.cache.size: 5%            ##缓存配置
indices.queries.cache.size: 10%            ##缓存配置
network.host: 192.168.10.180               ##本机IP
http.port: 9200                            ##默认端口
cluster.initial_master_nodes: ["node-1"]   ##设置符合主节点条件的节点的主机名或 IP 地址来引导启动集群
http.cors.enabled: true                    ##跨域
http.cors.allow-origin: "*"                ##跨域
3、启动
报错1 没有jdk环境
[root@es1 config]# su es
[es@es1 config]$ cd ../bin/
[es@es1 bin]$ ./elasticsearch -d
could not find java in JAVA_HOME at /usr/local/java/bin/java
解决方法:
方法1:配置文件中添加jdk判断(将JAVA_HOME改为ES_JAVA_HOME)
[es@es1 bin]$ grep "JAVA_HOME" elasticsearch-env
ES_JAVA_HOME="/data/elasticsearch/jdk/"
if [ ! -z "$ES_JAVA_HOME" ]; then
  JAVA="$ES_JAVA_HOME/bin/java"
  JAVA_TYPE="ES_JAVA_HOME"
方法2:在环境变量中添加es自带的jdk
[root@es2 ~]# grep "JAVA_HOME" /etc/profile
export JAVA_HOME=/data/elasticsearch/jdk/
export PATH=$JAVA_HOME/bin:$PATH
报错2 都是因未对操作系统做优化导致
[es@es1 bin]$ ./elasticsearch -d
[es@es1 bin]$ ERROR: [3] bootstrap checks failed
[1]: max file descriptors [4096] for elasticsearch process is too low, increase to at least [65535]
[2]: memory locking requested for elasticsearch process but memory is not locked
[3]: max virtual memory areas vm.max_map_count [65530] is too low, increase to at least [262144]
ERROR: Elasticsearch did not exit normally - check the logs at /data/elasticsearch/logs/elasticsearch.log
解决方法:优化(只给结果,想了解自行百度)
[root@es1 config]# grep -v "#" /etc/security/limits.conf


* hard memlock unlimited
* soft memlock unlimited
* hard nofile 1024000
* soft nofile 1024000
* hard nproc  1024000
* soft nproc  1024000
[root@es1 config]# grep -v "#" /etc/systemd/system.conf

[Manager]
DefaultLimitNOFILE=65536
DefaultLimitNPROC=32000
DefaultLimitMEMLOCK=infinity
[root@es1 config]# grep -v "#" /etc/sysctl.conf
net.ipv4.tcp_timestamps = 0
net.ipv4.tcp_syncookies = 1
net.ipv4.tcp_tw_reuse = 1
net.core.somaxconn = 65535
net.ipv4.tcp_tw_recycle = 1
net.ipv4.tcp_fin_timeout = 5
fs.inotify.max_user_watches = 1048576
fs.inotify.max_user_instances = 256
net.ipv4.tcp_keepalive_time = 30
net.ipv4.ip_local_port_range = 1024 65535
net.ipv4.tcp_max_syn_backlog = 262144
net.ipv4.tcp_max_tw_buckets = 256000
vm.max_map_count = 262144
net.core.netdev_max_backlog = 262144
net.ipv4.tcp_max_orphans = 262144
net.ipv4.tcp_synack_retries = 1
net.ipv4.tcp_syn_retries = 1


##加载配置(ulimit修改完需要断开连接,重开终端)
[root@es1 config]# /bin/systemctl daemon-reload
[root@es1 config]# /sbin/sysctl -p
启动成功
[root@es1 ~]# su es
[es@es1 root]$ cd /data/elasticsearch/bin/
[es@es1 bin]$ ./elasticsearch -d
[es@es1 bin]$ ps -ef | grep elas
es        9544     1 99 16:27 pts/0    00:00:24 /data/elasticsearch/jdk//bin/java -Xshare:auto -Des.networkaddress.cache.ttl=60 -Des.networkaddress.cache.negative.ttl=10 -XX:+AlwaysPreTouch -Xss1m -Djava.awt.headless=true -Dfile.encoding=UTF-8 -Djna.nosys=true -XX:-OmitStackTraceInFastThrow -XX:+ShowCodeDetailsInExceptionMessages -Dio.netty.noUnsafe=true -Dio.netty.noKeySetOptimization=true -Dio.netty.recycler.maxCapacityPerThread=0 -Dio.netty.allocator.numDirectArenas=0 -Dlog4j.shutdownHookEnabled=false -Dlog4j2.disable.jmx=true -Djava.locale.providers=SPI,COMPAT -Xms1g -Xmx1g -XX:+UseG1GC -XX:G1ReservePercent=25 -XX:InitiatingHeapOccupancyPercent=30 -Djava.io.tmpdir=/tmp/elasticsearch-12986234859914472880 -XX:+HeapDumpOnOutOfMemoryError -XX:HeapDumpPath=data -XX:ErrorFile=logs/hs_err_pid%p.log -Xlog:gc*,gc+age=trace,safepoint:file=logs/gc.log:utctime,pid,tags:filecount=32,filesize=64m -XX:MaxDirectMemorySize=536870912 -Des.path.home=/data/elasticsearch -Des.path.conf=/data/elasticsearch/config -Des.distribution.flavor=default -Des.distribution.type=tar -Des.bundled_jdk=true -cp /data/elasticsearch/lib/* org.elasticsearch.bootstrap.Elasticsearch -d
es        9655  9544  0 16:27 pts/0    00:00:00 /data/elasticsearch/modules/x-pack-ml/platform/linux-x86_64/bin/controller
es       10179  9050  0 16:27 pts/0    00:00:00 grep --color=auto elas
[es@es1 bin]$
三、集群部署
1、安装es(同上,配置文件加入集群配置)
[root@es1 ~]# cat /data/elasticsearch/config/elasticsearch.yml
cluster.name: es-cluster     ##集群名称,所有集群下应用名称需一致,若名称一致则会自动加入集群
node.name: node-1
path.data: /data/elasticsearch/data
path.logs: /data/elasticsearch/logs
bootstrap.memory_lock: true
indices.requests.cache.size: 5%
indices.queries.cache.size: 10%
network.host: 192.168.10.180
http.port: 9200
transport.tcp.port: 9300
discovery.zen.ping.unicast.hosts: ["192.168.10.180:9300", "192.168.10.181:9300"]    ##集群内部监听的tcp端口号,默认9300
cluster.initial_master_nodes: ["node-1","node-2"]
http.cors.enabled: true
http.cors.allow-origin: "*"
[root@es2 config]# cat /data/elasticsearch/config/elasticsearch.yml
cluster.name: es-cluster
node.name: node-2
path.data: /data/elasticsearch/data
path.logs: /data/elasticsearch/logs
network.host: 192.168.10.181
http.port: 9200
transport.tcp.port: 9300
discovery.zen.ping.unicast.hosts: ["192.168.10.180:9300", "192.168.10.181:9300"]
cluster.initial_master_nodes: ["node-1", "node-2"]
bootstrap.memory_lock: true
indices.requests.cache.size: 5%
indices.queries.cache.size: 10%
http.cors.enabled: true
http.cors.allow-origin: "*"
[root@es2 config]#
2、启动,验证
[es@es1 bin]$ ps -ef | grep elas
es       16253     1 10 16:50 pts/0    00:00:42 /data/elasticsearch/jdk//bin/java -Xshare:auto -Des.networkaddress.cache.ttl=60 -Des.networkaddress.cache.negative.ttl=10 -XX:+AlwaysPreTouch -Xss1m -Djava.awt.headless=true -Dfile.encoding=UTF-8 -Djna.nosys=true -XX:-OmitStackTraceInFastThrow -XX:+ShowCodeDetailsInExceptionMessages -Dio.netty.noUnsafe=true -Dio.netty.noKeySetOptimization=true -Dio.netty.recycler.maxCapacityPerThread=0 -Dio.netty.allocator.numDirectArenas=0 -Dlog4j.shutdownHookEnabled=false -Dlog4j2.disable.jmx=true -Djava.locale.providers=SPI,COMPAT -Xms1g -Xmx1g -XX:+UseG1GC -XX:G1ReservePercent=25 -XX:InitiatingHeapOccupancyPercent=30 -Djava.io.tmpdir=/tmp/elasticsearch-8972888888703564096 -XX:+HeapDumpOnOutOfMemoryError -XX:HeapDumpPath=data -XX:ErrorFile=logs/hs_err_pid%p.log -Xlog:gc*,gc+age=trace,safepoint:file=logs/gc.log:utctime,pid,tags:filecount=32,filesize=64m -XX:MaxDirectMemorySize=536870912 -Des.path.home=/data/elasticsearch -Des.path.conf=/data/elasticsearch/config -Des.distribution.flavor=default -Des.distribution.type=tar -Des.bundled_jdk=true -cp /data/elasticsearch/lib/* org.elasticsearch.bootstrap.Elasticsearch -d
es       16353 16253  0 16:50 pts/0    00:00:00 /data/elasticsearch/modules/x-pack-ml/platform/linux-x86_64/bin/controller
es       31076 12154  0 16:56 pts/0    00:00:00 grep --color=auto elas
[es@es1 bin]$ kill -9 16253
[es@es1 bin]$ ./elasticsearch -d
[es@es1 bin]$ curl http://192.168.10.180:9200/_cat/nodes?v
ip             heap.percent ram.percent cpu load_1m load_5m load_15m node.role master name
192.168.10.180           36          98   7    0.31    0.15     0.14 dilmrt    *      node-1
[es@es1 bin]$ ^C
[es@es1 bin]$ curl http://192.168.10.180:9200/_cat/nodes?v
ip             heap.percent ram.percent cpu load_1m load_5m load_15m node.role master name
192.168.10.180           38          98   3    0.19    0.15     0.14 dilmrt    *      node-1
192.168.10.181           36          78   4    0.29    0.10     0.07 dilmrt    -      node-2
3、开启用户认证功能
3.1 生成证书
[es@es1 bin]$ ./elasticsearch-certutil cert -out config/elastic-certificates.p12 -pass ""
This tool assists you in the generation of X.509 certificates and certificate
signing requests for use with SSL/TLS in the Elastic stack.

The 'cert' mode generates X.509 certificate and private keys.
    * By default, this generates a single certificate and key for use
       on a single instance.
    * The '-multiple' option will prompt you to enter details for multiple
       instances and will generate a certificate and key for each one
    * The '-in' option allows for the certificate generation to be automated by describing
       the details of each instance in a YAML file

    * An instance is any piece of the Elastic Stack that requires an SSL certificate.
      Depending on your configuration, Elasticsearch, Logstash, Kibana, and Beats
      may all require a certificate and private key.
    * The minimum required value for each instance is a name. This can simply be the
      hostname, which will be used as the Common Name of the certificate. A full
      distinguished name may also be used.
    * A filename value may be required for each instance. This is necessary when the
      name would result in an invalid file or directory name. The name provided here
      is used as the directory name (within the zip) and the prefix for the key and
      certificate files. The filename is required if you are prompted and the name
      is not displayed in the prompt.
    * IP addresses and DNS names are optional. Multiple values can be specified as a
      comma separated string. If no IP addresses or DNS names are provided, you may
      disable hostname verification in your SSL configuration.

    * All certificates generated by this tool will be signed by a certificate authority (CA).
    * The tool can automatically generate a new CA for you, or you can provide your own with the
         -ca or -ca-cert command line options.

By default the 'cert' mode produces a single PKCS#12 output file which holds:
    * The instance certificate
    * The private key for the instance certificate
    * The CA certificate

If you specify any of the following options:
    * -pem (PEM formatted output)
    * -keep-ca-key (retain generated CA key)
    * -multiple (generate multiple certificates)
    * -in (generate certificates from an input file)
then the output will be be a zip file containing individual certificate/key files


Certificates written to /data/elasticsearch/config/elastic-certificates.p12

This file should be properly secured as it contains the private key for
your instance.

This file is a self contained file and can be copied and used 'as is'
For each Elastic product that you wish to configure, you should copy
this '.p12' file to the relevant configuration directory
and then follow the SSL configuration instructions in the product guide.
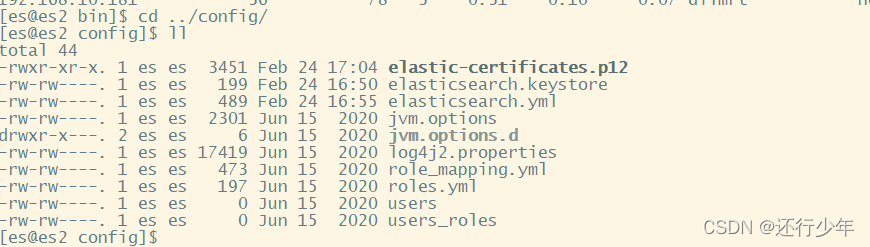
3.2 赋权,传到集群内的其他服务器相同目录
[es@es1 bin]$ cd ../config/
[es@es1 config]$ chmod 755 elastic-certificates.p12
[es@es1 config]$ scp elastic-certificates.p12 192.168.10.181:/data/elasticsearch/config/
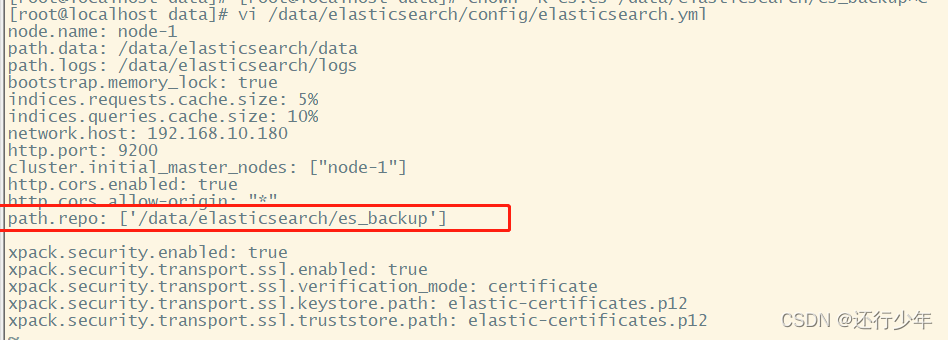
3.3 配置文件中开启xpack
[es@es1 config]$ cat /data/elasticsearch/config/elasticsearch.yml
cluster.name: es-cluster
node.name: node-1
path.data: /data/elasticsearch/data
path.logs: /data/elasticsearch/logs
bootstrap.memory_lock: true
indices.requests.cache.size: 5%
indices.queries.cache.size: 10%
network.host: 192.168.10.180
http.port: 9200
transport.tcp.port: 9300
discovery.zen.ping.unicast.hosts: ["192.168.10.180:9300","192.168.10.181:9300"]
cluster.initial_master_nodes: ["node-1","node-2"]
http.cors.enabled: true
http.cors.allow-origin: "*"

xpack.security.enabled: true
xpack.security.transport.ssl.enabled: true
xpack.security.transport.ssl.verification_mode: certificate
xpack.security.transport.ssl.keystore.path: elastic-certificates.p12
xpack.security.transport.ssl.truststore.path: elastic-certificates.p12
3.4 重启es,添加密码
[es@es1 config]$ ps -ef | grep elas
es        4477 12154  0 17:13 pts/0    00:00:00 grep --color=auto elas
es       31755     1  4 16:57 pts/0    00:00:49 /data/elasticsearch/jdk//bin/java -Xshare:auto -Des.networkaddress.cache.ttl=60 -Des.networkaddress.cache.negative.ttl=10 -XX:+AlwaysPreTouch -Xss1m -Djava.awt.headless=true -Dfile.encoding=UTF-8 -Djna.nosys=true -XX:-OmitStackTraceInFastThrow -XX:+ShowCodeDetailsInExceptionMessages -Dio.netty.noUnsafe=true -Dio.netty.noKeySetOptimization=true -Dio.netty.recycler.maxCapacityPerThread=0 -Dio.netty.allocator.numDirectArenas=0 -Dlog4j.shutdownHookEnabled=false -Dlog4j2.disable.jmx=true -Djava.locale.providers=SPI,COMPAT -Xms1g -Xmx1g -XX:+UseG1GC -XX:G1ReservePercent=25 -XX:InitiatingHeapOccupancyPercent=30 -Djava.io.tmpdir=/tmp/elasticsearch-12887036096412054470 -XX:+HeapDumpOnOutOfMemoryError -XX:HeapDumpPath=data -XX:ErrorFile=logs/hs_err_pid%p.log -Xlog:gc*,gc+age=trace,safepoint:file=logs/gc.log:utctime,pid,tags:filecount=32,filesize=64m -XX:MaxDirectMemorySize=536870912 -Des.path.home=/data/elasticsearch -Des.path.conf=/data/elasticsearch/config -Des.distribution.flavor=default -Des.distribution.type=tar -Des.bundled_jdk=true -cp /data/elasticsearch/lib/* org.elasticsearch.bootstrap.Elasticsearch -d
es       31854 31755  0 16:57 pts/0    00:00:00 /data/elasticsearch/modules/x-pack-ml/platform/linux-x86_64/bin/controller
[es@es1 config]$ kill -9 31755
[es@es1 config]$ cd ../bin/
[es@es1 bin]$ ./elasticsearch -d
创建密码(最少6位)
[es@es1 bin]$ ./elasticsearch-setup-passwords interactive
Initiating the setup of passwords for reserved users elastic,apm_system,kibana,kibana_system,logstash_system,beats_system,remote_monitoring_user.
You will be prompted to enter passwords as the process progresses.
Please confirm that you would like to continue [y/N]y


Enter password for [elastic]:
Reenter password for [elastic]:
Enter password for [apm_system]:
Reenter password for [apm_system]:
Enter password for [kibana_system]:
Reenter password for [kibana_system]:
Enter password for [logstash_system]:
Reenter password for [logstash_system]:
Enter password for [beats_system]:
Reenter password for [beats_system]:
Enter password for [remote_monitoring_user]:
Reenter password for [remote_monitoring_user]:
Changed password for user [apm_system]
Changed password for user [kibana_system]
Changed password for user [kibana]
Changed password for user [logstash_system]
Changed password for user [beats_system]
Changed password for user [remote_monitoring_user]
Changed password for user [elastic]
测试
[es@es1 bin]$ curl -u "elastic:123456" http://192.168.10.180:9200/_cat/nodes?v
ip             heap.percent ram.percent cpu load_1m load_5m load_15m node.role master name
192.168.10.181           13          79   5    0.82    0.88     0.65 dilmrt    -      node-2
192.168.10.180           14          98   5    0.10    0.14     0.12 dilmrt    *      node-1
3.5 修改密码
3.5.1 已知现在密码修改
-u 是现在的密码
-d 是将要修改成的密码
[es@es1 bin]$ curl -u "elastic:123456" http://192.168.10.180:9200/_cat/nodes?v
ip             heap.percent ram.percent cpu load_1m load_5m load_15m node.role master name
192.168.10.181           13          79   5    0.82    0.88     0.65 dilmrt    -      node-2
192.168.10.180           14          98   5    0.10    0.14     0.12 dilmrt    *      node-1

[es@es1 bin]$ curl -H "Content-Type:application/json" -XPOST -u elastic:123456 'http://192.168.10.180:9200/_xpack/security/user/elastic/_password' -d '{ "password" : "1234567" }'
{}

[es@es1 bin]$ curl -u "elastic:123456" http://192.168.10.180:9200/_cat/nodes?v{"error":{"root_cause":[{"type":"security_exception","reason":"unable to authenticate user [elastic] for REST request [/_cat/nodes?v]","header":{"WWW-Authenticate":"Basic realm=\"security\" charset=\"UTF-8\""}}],"type":"security_exception","reason":"unable to authenticate user [elastic] for REST request [/_cat/nodes?v]","header":{"WWW-Authenticate":"Basic realm=\"security\" charset=\"UTF-8\""}},"status":401}

[es@es1 bin]$ curl -u "elastic:1234567" http://192.168.10.180:9200/_cat/nodes?v
ip             heap.percent ram.percent cpu load_1m load_5m load_15m node.role master name
192.168.10.181           33          79   3    0.06    0.48     0.57 dilmrt    -      node-2
192.168.10.180           34          98   3    0.45    0.19     0.15 dilmrt    *      node-1
3.5.2 忘记密码
创建超级用户
[es@es1 bin]$ ./elasticsearch-users useradd myname -p mypassword -r superuser

[es@es1 bin]$ curl -u myname:mypassword -XPUT 'http://192.168.10.180:9200/_xpack/security/user/elastic/_password?pretty' -H 'Content-Type: application/json' -d '{"password" : "12345678"}'
{ }

[es@es1 bin]$ curl -u "elastic:1234567" http://192.168.10.180:9200/_cat/nodes?v{"error":{"root_cause":[{"type":"security_exception","reason":"unable to authenticate user [elastic] for REST request [/_cat/nodes?v]","header":{"WWW-Authenticate":"Basic realm=\"security\" charset=\"UTF-8\""}}],"type":"security_exception","reason":"unable to authenticate user [elastic] for REST request [/_cat/nodes?v]","header":{"WWW-Authenticate":"Basic realm=\"security\" charset=\"UTF-8\""}},"status":401}

[es@es1 bin]$ curl -u "elastic:12345678" http://192.168.10.180:9200/_cat/nodes?vip             heap.percent ram.percent cpu load_1m load_5m load_15m node.role master name
192.168.10.181           50          79   3    0.00    0.18     0.41 dilmrt    -      node-2
192.168.10.180           50          98   3    0.95    0.65     0.36 dilmrt    *      node-1
[es@es1 bin]$
四、ES升级
1 备份旧版本
[root@localhost data]# ps -ef | grep elas
es       26795     1  4 15:21 ?        00:02:00 /usr/local/java/bin/java -Xshare:auto -Des.networkaddress.cache.ttl=60 -Des.networkaddress.cache.negative.ttl=10 -XX:+AlwaysPreTouch -Xss1m -Djava.awt.headless=true -Dfile.encoding=UTF-8 -Djna.nosys=true -XX:-OmitStackTraceInFastThrow -Dio.netty.noUnsafe=true -Dio.netty.noKeySetOptimization=true -Dio.netty.recycler.maxCapacityPerThread=0 -Dio.netty.allocator.numDirectArenas=0 -Dlog4j.shutdownHookEnabled=false -Dlog4j2.disable.jmx=true -Djava.locale.providers=SPI,JRE -Xms3g -Xmx3g -XX:+UseConcMarkSweepGC -XX:CMSInitiatingOccupancyFraction=75 -XX:+UseCMSInitiatingOccupancyOnly -Djava.io.tmpdir=/tmp/elasticsearch-3796414330494870773 -XX:+HeapDumpOnOutOfMemoryError -XX:HeapDumpPath=data -XX:ErrorFile=logs/hs_err_pid%p.log -XX:+PrintGCDetails -XX:+PrintGCDateStamps -XX:+PrintTenuringDistribution -XX:+PrintGCApplicationStoppedTime -Xloggc:logs/gc.log -XX:+UseGCLogFileRotation -XX:NumberOfGCLogFiles=32 -XX:GCLogFileSize=64m -XX:MaxDirectMemorySize=1610612736 -Des.path.home=/data/elasticsearch -Des.path.conf=/data/elasticsearch/config -Des.distribution.flavor=default -Des.distribution.type=tar -Des.bundled_jdk=true -cp /data/elasticsearch/lib/* org.elasticsearch.bootstrap.Elasticsearch -d
es       26823 26795  0 15:21 ?        00:00:00 /data/elasticsearch/modules/x-pack-ml/platform/linux-x86_64/bin/controller
root     29695 29495  0 16:05 pts/1    00:00:00 grep --color=auto elas
[root@localhost data]# pkill -9 java
[root@localhost data]# ps -ef | grep elas
root     29752 29495  0 16:06 pts/1    00:00:00 grep --color=auto elas
2 解压新版本,替换旧版本
[root@localhost ~]# tar xf elasticsearch-7.16.2-linux-x86_64.tar.gz
[root@localhost ~]# mv elasticsearch-7.16.2 /data/elasticsearch
3 修改新版本的配置文件(拷贝旧版本的配置)
[root@localhost data]# cat /data/elasticsearch7.8.0/config/elasticsearch.yml > /data/elasticsearch/config/elasticsearch.yml
[root@localhost data]# cp -a /data/elasticsearch7.8.0/data /data/elasticsearch/
[root@localhost data]# cp -a /data/elasticsearch7.8.0/es_backup /data/elasticsearch/
[root@localhost config]# cp -a /data/elasticsearch7.8.0/config/elastic-certificates.p12 /data/elasticsearch/config/
4 修改新版本的属主
[root@localhost data]# chown -R es:es /data/elasticsearch
5 启动
[root@localhost config]# su es
[es@localhost config]$ cd /data/elasticsearch/bin/
[es@localhost bin]$ ./elasticsearch -d
6 测试
[es@localhost bin]$ curl -u elastic:123456 http://192.168.10.180:9200
{
  "name" : "node-1",
  "cluster_name" : "elasticsearch",
  "cluster_uuid" : "JFPQN70-RLaRCUIGYS5VuQ",
  "version" : {
    "number" : "7.16.2",
    "build_flavor" : "default",
    "build_type" : "tar",
    "build_hash" : "2b937c44140b6559905130a8650c64dbd0879cfb",
    "build_date" : "2021-12-18T19:42:46.604893745Z",
    "build_snapshot" : false,
    "lucene_version" : "8.10.1",
    "minimum_wire_compatibility_version" : "6.8.0",
    "minimum_index_compatibility_version" : "6.0.0-beta1"
  },
  "tagline" : "You Know, for Search"
}
[es@localhost bin]$ curl -u elastic:123456 http://192.168.10.180:9200/_cat/indices?v
health status index            uuid                   pri rep docs.count docs.deleted store.size pri.store.size
green  open   .geoip_databases 1D0788VhT6u_Vg9G-22T5g   1   0         44            0     41.5mb         41.5mb
green  open   .security-7      StBKKdhJQ6ySV-2lH6yJsg   1   0          7            0     23.9kb         23.9kb
五、es备份和恢复
1、 基于快照的方式
1.1 创建镜像仓库和镜像(所有节点)
1.1.1 新建目录作为镜像仓库并修改权限为es用户
##该目录使用共享的方式(nfs,glusterfs)
[root@localhost data]# mkdir -p /data/elasticsearch/es_backup
[root@localhost data]# chown -R es:es /data/elasticsearch/es_backup
1.1.2 修改所有es的配置文件,添加仓库地址,重启es
1.1.3 创建镜像仓库
[root@localhost data]# curl -XPUT -u elastic:123456 'http://192.168.10.180:9200/_snapshot/my_backup' -H "Content-Type: application/json" -d '{
    "type": "fs",
    "settings": {
        "location": "/data/elasticsearch/es_backup",
        "compress": true
    }
}'
{"acknowledged":true}
curl -XGET -u elastic:'123456' 'http://192.168.10.180:9200/_snapshot/_all?
pretty' #查看所有仓库
curl -XGET -u elastic:'123456' 'http://192.168.10.180:9200/_cat/repositories?v'
#查看仓库列表
curl -XGET -u elastic:'123456'
'http://192.168.10.180:9200/_snapshot/my_backup'  #查看指定仓库
curl -XDELETE -u elastic:'123456'
'http://192.168.10.180:9200/_snapshot/my_backup?pretty' #删除仓库
1.1.4 创建索引
[root@localhost ~]# curl -XPUT -u elastic:123456 '192.168.10.180:9200/index-demo/test/1?pretty' -H 'content-Type:application/json' -d '{"user":"zhangsan","mesg":"hello world"}'
{
  "_index" : "index-demo",
  "_type" : "test",
  "_id" : "1",
  "_version" : 1,
  "result" : "created",
  "_shards" : {
    "total" : 2,
    "successful" : 1,
    "failed" : 0
  },
  "_seq_no" : 0,
  "_primary_term" : 1
}
[root@localhost ~]# curl  -u elastic:'123456' "192.168.10.180:9200/_cat/indices?v"health status index            uuid                   pri rep docs.count docs.deleted store.size pri.store.size
green  open   .geoip_databases 1D0788VhT6u_Vg9G-22T5g   1   0         44            0     41.5mb         41.5mb
green  open   .security-7      StBKKdhJQ6ySV-2lH6yJsg   1   0          7            0     23.9kb         23.9kb
yellow open   index-demo       l9gCn03zQ0qR7kbU3XEA9Q   1   1          1            0      4.5kb          4.5kb
1.1.5 创建镜像快照
[root@localhost ~]# curl -X PUT -u elastic:'123456' "192.168.10.180:9200/_snapshot/my_backup/es_backup-20220330?wait_for_completion=true&pretty"
{
  "snapshot" : {
    "snapshot" : "es_backup-20220330",
    "uuid" : "Tv1hwsGRQpS5duLRYap39w",
    "repository" : "my_backup",
    "version_id" : 7160299,
    "version" : "7.16.2",
    "indices" : [
      ".ds-.logs-deprecation.elasticsearch-default-2022.03.30-000001",
      ".ds-ilm-history-5-2022.03.30-000001",
      ".security-7",
      "index-demo",
      ".geoip_databases"
    ],
    "data_streams" : [
      "ilm-history-5",
      ".logs-deprecation.elasticsearch-default"
    ],
    "include_global_state" : true,
    "state" : "SUCCESS",
    "start_time" : "2022-03-30T02:51:29.910Z",
    "start_time_in_millis" : 1648608689910,
    "end_time" : "2022-03-30T02:51:30.111Z",
    "end_time_in_millis" : 1648608690111,
    "duration_in_millis" : 201,
    "failures" : [ ],
    "shards" : {
      "total" : 5,
      "failed" : 0,
      "successful" : 5
    },
    "feature_states" : [
      {
        "feature_name" : "geoip",
        "indices" : [
          ".geoip_databases"
        ]
      },
      {
        "feature_name" : "security",
        "indices" : [
          ".security-7"
        ]
      }
    ]
  }
}
## 监视任何当前正在运行的快照
curl -XGET -u elastic:'123456'
"http://192.168.10.180:9200/_snapshot/my_backup/_current?pretty"
## 要获得参与任何当前正在运行的快照的每个分片的完整细分
curl -XGET -u elastic:'123456' 'http://192.168.10.180:9200/_snapshot/_status'
## 查看仓库中所有的镜像
curl -XGET -u elastic:'123456'
'http://192.168.10.180:9200/_snapshot/my_backup/_all?pretty'
## 获取特定存储库中的快照列表,这也会返回每个快照的内容。
curl -X GET -u elastic:'123456' "192.168.10.180:9200/_snapshot/my_backup/*?
verbose=false&pretty"
## 删除指定镜像
curl -X DELETE -u elastic:'123456'
"192.168.10.180:9200/_snapshot/my_backup/es_backup-20220330"
1.1.6 删除索引
[root@localhost ~]# curl -X DELETE -u elastic:123456 "192.168.10.180:9200/index-demo"
{"acknowledged":true}
[root@localhost ~]# curl  -u elastic:'123456' "192.168.10.180:9200/_cat/indices?v"
health status index            uuid                   pri rep docs.count docs.deleted store.size pri.store.size
green  open   .geoip_databases 1D0788VhT6u_Vg9G-22T5g   1   0         44            0     41.5mb         41.5mb
green  open   .security-7      StBKKdhJQ6ySV-2lH6yJsg   1   0          7            0     23.9kb         23.9kb
1.1.7 恢复单个索引
[root@localhost ~]# curl -X GET -u elastic:'123456' "192.168.10.180:9200/_snapshot/my_backup/*?verbose=false&pretty"
{
  "snapshots" : [
    {
      "snapshot" : "es_backup-20220329",
      "uuid" : "vfgjBu5tScCQzdNlP0swaA",
      "repository" : "my_backup",
      "indices" : [
        ".geoip_databases",
        ".security-7"
      ],
      "data_streams" : [ ],
      "state" : "SUCCESS"
    },
    {
      "snapshot" : "es_backup-20220330",
      "uuid" : "Tv1hwsGRQpS5duLRYap39w",
      "repository" : "my_backup",
      "indices" : [
        ".ds-.logs-deprecation.elasticsearch-default-2022.03.30-000001",
        ".ds-ilm-history-5-2022.03.30-000001",
        ".geoip_databases",
        ".security-7",
        "index-demo"
      ],
      "data_streams" : [ ],
      "state" : "SUCCESS"
    }
  ],
  "total" : 2,
  "remaining" : 0
}
[root@localhost ~]# curl -X POST -u elastic:'123456' "192.168.10.180:9200/_snapshot/my_backup/es_backup-20220330/_restore?pretty" -H 'Content-Type: application/json' -d' { "indices": "index-demo" }'
{
  "accepted" : true
}
[root@localhost ~]# curl  -u elastic:'123456' "192.168.10.180:9200/_cat/indices?v"                     health status index            uuid                   pri rep docs.count docs.deleted store.size pri.store.size
green  open   .geoip_databases 1D0788VhT6u_Vg9G-22T5g   1   0         44            0     41.5mb         41.5mb
green  open   .security-7      StBKKdhJQ6ySV-2lH6yJsg   1   0          7            0     23.9kb         23.9kb
yellow open   index-demo       j9Y6KTE8QiSuUCMdW6pn1g   1   1          1            0      4.5kb          4.5kb
1.1.8 异机恢复索引
异机需要创建镜像仓库和复制一份文件到仓库底下
[root@mysql2 indices]# curl -XPUT -u elastic:123456 'http://192.168.10.181:9200/_snapshot/my_backup' -H "Content-Type: application/json" -d '{
    "type": "fs",
    "settings": {
        "location": "/data/elasticsearch/es_backup",
        "compress": true
    }
}'
{"acknowledged":true}[root@mysql2 indices]#
[root@mysql2 indices]#
[root@mysql2 indices]#
[root@mysql2 indices]# curl -X GET -u elastic:'123456' "192.168.10.181:9200/_snapshot/my_backup/*?verbose=false&pretty"{
  "snapshots" : [
    {
      "snapshot" : "es_backup-20220329",
      "uuid" : "vfgjBu5tScCQzdNlP0swaA",
      "repository" : "my_backup",
      "indices" : [
        ".geoip_databases",
        ".security-7"
      ],
      "data_streams" : [ ],
      "state" : "SUCCESS"
    },
    {
      "snapshot" : "es_backup-20220330",
      "uuid" : "Tv1hwsGRQpS5duLRYap39w",
      "repository" : "my_backup",
      "indices" : [
        ".ds-.logs-deprecation.elasticsearch-default-2022.03.30-000001",
        ".ds-ilm-history-5-2022.03.30-000001",
        ".geoip_databases",
        ".security-7",
        "index-demo"
      ],
      "data_streams" : [ ],
      "state" : "SUCCESS"
    }
  ],
  "total" : 2,
  "remaining" : 0
}
[root@mysql2 ~]#  curl  -u elastic:'123456' "192.168.10.181:9200/_cat/indices?v"
health status index            uuid                   pri rep docs.count docs.deleted store.size pri.store.size
green  open   .geoip_databases jrIHBN1KTfqDAgKKeFZP8w   1   0         40            0       38mb           38mb
green  open   .security-7      Ahj0JDaARPq-OslsHxhohw   1   0          7            0     25.7kb         25.7kb
[root@mysql2 ~]# curl -X POST -u elastic:'123456' "192.168.10.181:9200/_snapshot/my_backup/es_backup-20220330/_restore?pretty" -H 'Content-Type: application/json' -d' { "indices": "index-demo" }'
{
  "accepted" : true
}
[root@mysql2 ~]# curl  -u elastic:'123456' "192.168.10.181:9200/_cat/indices?v"
health status index            uuid                   pri rep docs.count docs.deleted store.size pri.store.size
green  open   .geoip_databases jrIHBN1KTfqDAgKKeFZP8w   1   0         40            0       38mb           38mb
green  open   .security-7      Ahj0JDaARPq-OslsHxhohw   1   0          7            0     25.7kb         25.7kb
yellow open   index-demo       5-bajJbvSYyjODxAxFntQA   1   1          1            0      4.5kb          4.5kb
[root@mysql2 ~]#


 4947
4947


 被折叠的 条评论
为什么被折叠?
被折叠的 条评论
为什么被折叠?
 到【灌水乐园】发言


