


前面的学习中,
我们基于
HTML, CSS, JavaScript
实现了一个简单的博客系统的页面。
接下来我们基于博客系统页面来实现一个带服务器版本的博客程序.
1、准备工作
1)
创建
web
项目
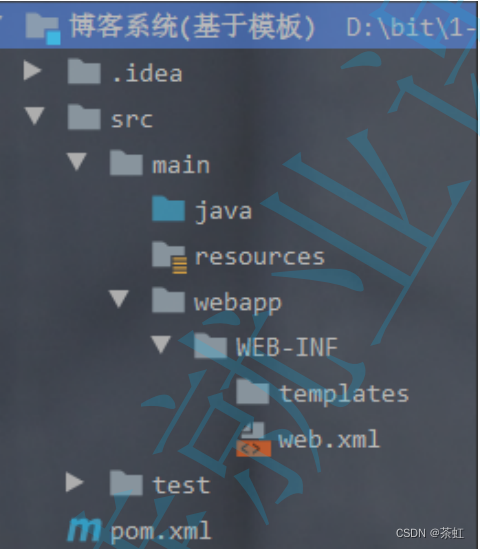
2)
创建目录结构
3) 配置 pom.xml
<?xml version="1.0" encoding="UTF-8"?>
<project xmlns="http://maven.apache.org/POM/4.0.0"
         xmlns:xsi="http://www.w3.org/2001/XMLSchema-instance"
         xsi:schemaLocation="http://maven.apache.org/POM/4.0.0
http://maven.apache.org/xsd/maven-4.0.0.xsd">
    <modelVersion>4.0.0</modelVersion>
    <groupId>org.example</groupId>
    <artifactId>博客系统(基于模板)</artifactId>
    <version>1.0-SNAPSHOT</version>
    <!-- 指定属性信息 -->
    <properties>
        <encoding>UTF-8</encoding>
        <maven.compiler.source>1.8</maven.compiler.source>
        <maven.compiler.target>1.8</maven.compiler.target>
    </properties>
    <dependencies>
        <!-- 加入 servlet 依赖 -->
        <dependency>
            <groupId>javax.servlet</groupId>
            <artifactId>javax.servlet-api</artifactId>
            <!-- servlet 版本和 tomcat 版本有对应关系,切记 -->
            <version>3.1.0</version>
            <!-- 这个意思是我们只在开发阶段需要这个依赖,部署到 tomcat 上时就不需要了 -->
            <scope>provided</scope>
        </dependency>
        <dependency>
            <groupId>junit</groupId>
            <artifactId>junit</artifactId>
            <version>4.11</version>
            <scope>test</scope>
        </dependency>
        <dependency>
            <groupId>mysql</groupId>
            <artifactId>mysql-connector-java</artifactId>
            <version>5.1.45</version>
        </dependency>
        <!--
https://mvnrepository.com/artifact/com.fasterxml.jackson.core/jackson-databind -
->
        <dependency>
            <groupId>com.fasterxml.jackson.core</groupId>
            <artifactId>jackson-databind</artifactId>
            <version>2.12.3</version>
        </dependency>
        <!-- https://mvnrepository.com/artifact/org.thymeleaf/thymeleaf -->
        <dependency>
            <groupId>org.thymeleaf</groupId>
            <artifactId>thymeleaf</artifactId>
            <version>3.0.12.RELEASE</version>
        </dependency>
    </dependencies>
    <packaging>war</packaging>
    <build>
        <!-- 指定最终 war 包的名称 -->
        <finalName>BlogSystem</finalName>
    </build>
</project>
2、数据库设计
2.1 表设计
当前需要设计两张表
,
文章表和用户表
.
- 文章表
create table blog(blogId int primary key auto_increment,    -- 博客 id
                 title varchar(1024), -- 博客标题
                 content mediumtext, -- 博客正文
                 userId int, -- 博客作者 id
postTime datetime); -- 发布时间- 用户表
create table user(userId int primary key auto_increment,
                 username varchar(128),
                 password varchar(128));
完整
SQL
create database if not exists BlogSystem;
use BlogSystem;
drop table if exists blog;
create table blog(blogId int primary key auto_increment,    -- 博客 id
                 title varchar(1024), -- 博客标题
                 content mediumtext, -- 博客正文
                 userId int, -- 博客作者 id
                 postTime datetime); -- 发布时间

drop table if exists user;
create table user(userId int primary key auto_increment,
                 username varchar(128),
                 password varchar(128));
2.2 封装数据库操作代码
- 创建 DBUtil
代码和之前版本相同
.
通过一个单例类来获取数据库连接
public class DBUtil {
    private static final String URL = "jdbc:mysql://127.0.0.1:3306/BlogSystem?
characterEncoding=utf8&useSSL=false";
    private static final String USERNAME = "root";
    private static final String PASSWORD = "2222";
    private static DataSource dataSource = null;
    private static DataSource getDataSource() {
        if (dataSource == null) {
            synchronized (DBUtil.class) {
                if (dataSource == null) {
                    dataSource = new MysqlDataSource();
                   ((MysqlDataSource)dataSource).setUrl(URL);
                   ((MysqlDataSource)dataSource).setUser(USERNAME);
                   ((MysqlDataSource)dataSource).setPassword(PASSWORD);
               }
           }
       }
        return dataSource;
   }
    public static Connection getConnection() {
        try {
            return getDataSource().getConnection();
       } catch (SQLException e) {
            e.printStackTrace();
       }
        return null;
   }
    public static void close(Connection connection,
                             PreparedStatement statement,
                             ResultSet resultSet) {
        try {
            if (resultSet != null) {
                resultSet.close();
           }
            if (statement != null) {
                statement.close();
           }
            if (connection != null) {
                connection.close();
           }
       } catch (SQLException e) {
            e.printStackTrace();
       }
   }
}- 创建 Blog 类 和 User 类
Blog
类表示一篇博客
public class Blog {
    private int blogId;
    private String title;
    private String content;
    private int userId;
    // 注意, 此处不能使用 java.sql.Date(这个类只有年月日, 没有时分秒)
    // 而应该使用 java.sql.TimeStamp
    private TimeStamp postTime;
    // getter / setter 略 }
User
类表示一个用户
public class User {
    private int userId;
    private String username;
    private String password;
// getter / setter 略 }- 创建 BlogDao 类和 UserDao 类
理解 DAODAO 全称为 "data access object",主要的功能就是对于某个数据库表进行增删改查.一般每张数据库表会对应一个 DAO 类. 这是一种给类命名的习惯做法, 并不是强制要求.
创建 BlogDao 类, 针对博客表进行操作
- insert: 插入一个 Blog 对象到 blog 表中.
- selectAll: 从 blog 表中查找所有的 Blog 对象.
- selectOne: 从 blog 表中查找指定的 Blog 对象.
- delete: 从 blog 表中删除指定的 Blog 对象.
public class BlogDao {
    // 把一个博客对象插入到 blog 表中
    public void insert(Blog blog) {
   }
    // 从 blog 表中查找到所有的 blog 对象
    public List<Blog> selectAll() {
        return null;
   }
    // 从 blog 表中查找到指定的 blog 对象
    public Blog selectOne(int blogId) {
        return null;
   }
    // 删除指定的 blog 对象
    public void delete(int blogId) {
   }
}
1)
实现
BlogDao
的
insert
public void insert(Blog blog) {
    Connection connection = DBUtil.getConnection();
    String sql = "insert into blog values(null, ?, ?, ?, ?)";
    PreparedStatement statement = null;
    try {
        statement = connection.prepareStatement(sql);
        statement.setString(1, blog.getTitle());
        statement.setString(2, blog.getContent());
        statement.setInt(3, blog.getUserId());
        statement.setTimeStamp(4, blog.getPostTime());
        statement.executeUpdate();
   } catch (SQLException e) {
        e.printStackTrace();
   } finally {
        DBUtil.close(connection, statement, null);
   }
}
2)
实现
BlogDao
的
selectAll
public List<Blog> selectAll() {
    List<Blog> blogs = new ArrayList<>();
    Connection connection = DBUtil.getConnection();
    String sql = "select * from blog";
    PreparedStatement statement = null;
    ResultSet resultSet = null;
    try {
        statement = connection.prepareStatement(sql);
        resultSet = statement.executeQuery();
        while (resultSet.next()) {
            Blog blog = new Blog();
            blog.setBlogId(resultSet.getInt("blogId"));
            blog.setTitle(resultSet.getString("title"));
            blog.setContent(resultSet.getString("content"));
            blog.setUserId(resultSet.getInt("userId"));
            blog.setPostTime(resultSet.getTimeStamp("postTime"));
            blogs.add(blog);
       }
        return blogs;
   } catch (SQLException e) {
        e.printStackTrace();
   } finally {
        DBUtil.close(connection, statement, resultSet);
   }
    return null; }
3)
实现
BlogDao
的
selectOne
public Blog selectOne(int blogId) {
    Connection connection = DBUtil.getConnection();
    String sql = "select * from blog where blogId = ?";
    PreparedStatement statement = null;
    ResultSet resultSet = null;
    try {
        statement = connection.prepareStatement(sql);
        statement.setInt(1, blogId);
        resultSet = statement.executeQuery();
        if (resultSet.next()) {
            Blog blog = new Blog();
            blog.setBlogId(resultSet.getInt("blogId"));
            blog.setTitle(resultSet.getString("title"));
            blog.setContent(resultSet.getString("content"));
            blog.setUserId(resultSet.getInt("userId"));
            blog.setPostTime(resultSet.getTimeStamp("postTime"));
            return blog;
       }
   } catch (SQLException e) {
        e.printStackTrace();
   } finally {
        DBUtil.close(connection, statement, resultSet);
   }
    return null; }
4)
实现
BlogDao
的
delete
public void delete(int blogId) {
    Connection connection = DBUtil.getConnection();
    String sql = "delete from blog where blogId = ?";
    PreparedStatement statement = null;
    try {
        statement = connection.prepareStatement(sql);
        statement.setInt(1, blogId);
        statement.executeUpdate();
   } catch (SQLException e) {
        e.printStackTrace();
   } finally {
        DBUtil.close(connection, statement, null);
   }
}
创建
UserDao
类
,
实现对于用户表的增删改查
.
注意: 登陆的时候需要根据用户名验证密码. 因此查找用户信息也是根据用户名查找.
public class UserDao {
    // 新增用户信息, 用于注册
    public void insert(User user) {
   }
    // 根据用户名查询 User 对象
    public User selectByName(String username) {
        return null;
   }

    // 根据用户 id 查询 User 对象
    public User selectById(int userId) {
   return null;
   }
}
1)
实现
insert
public void insert(User user) {
    Connection connection = DBUtil.getConnection();
    String sql = "insert into user values(null, ?, ?)";
    PreparedStatement statement = null;
    try {
        statement = connection.prepareStatement(sql);
        statement.setString(1, user.getUsername());
        statement.setString(2, user.getPassword());
        statement.executeUpdate();
   } catch (SQLException e) {
        e.printStackTrace();
   } finally {
        DBUtil.close(connection, statement, null);
   }
}
2)
实现
selectByName
// 查询用户信息, 用于登陆
public User selectByName(String username) {
    Connection connection = DBUtil.getConnection();
    String sql = "select * from user where username = ?";
    PreparedStatement statement = null;
    ResultSet resultSet = null;
    try {
        statement = connection.prepareStatement(sql);
        statement.setString(1, username);
        resultSet = statement.executeQuery();
        if (resultSet.next()) {
            User user = new User();
            user.setUserId(resultSet.getInt("userId"));
            user.setUsername(resultSet.getString("username"));
            user.setPassword(resultSet.getString("password"));
            return user;
       }
   } catch (SQLException e) {
        e.printStackTrace();
   } finally {
        DBUtil.close(connection, statement, resultSet);
   }
    return null; }
3)
实现
selectById
// 根据用户 id 查询 User 对象
public User selectById(int userId) {
    Connection connection = DBUtil.getConnection();
    String sql = "select * from user where userId = ?";
    PreparedStatement statement = null;
    ResultSet resultSet = null;
    try {
        statement = connection.prepareStatement(sql);
        statement.setInt(1, userId);
        resultSet = statement.executeQuery();
        if (resultSet.next()) {
            User user = new User();
            user.setUserId(resultSet.getInt("userId"));
            user.setUsername(resultSet.getString("username"));
            user.setPassword(resultSet.getString("password"));
            return user;
       }
   } catch (SQLException e) {
        e.printStackTrace();
   } finally {
        DBUtil.close(connection, statement, resultSet);
   }
    return null; }
2.3 验证数据库代码
创建 TestDB
类
,
针对上面封装的功能进行简单的测试验证
.
测试博客表操作
public class TestDB {
    // 1. 验证插入
    public static void testInsert() {
        Blog blog = new Blog();
        blog.setTitle("我的第一篇博客");
        blog.setContent("这是博客的正文");
        blog.setUserId(1);
        // 基于当前的时间戳, 创建 java.sql.Date 对象
        blog.setPostTime(new Timestamp(System.currentTimeMillis()));
        BlogDao blogDao = new BlogDao();
        blogDao.insert(blog);
   }
    public static void testSelectAll() {
        BlogDao blogDao = new BlogDao();
        List<Blog> blogs = blogDao.selectAll();
        System.out.println(blogs);
   }
    public static void testSelectOne() {
        BlogDao blogDao = new BlogDao();
        Blog blog = blogDao.selectOne(1);
        System.out.println(blog);
   }
    public static void testDelete() {
        BlogDao blogDao = new BlogDao();
        blogDao.delete(1);
   }
    public static void testUserInsert() {
        User user = new User();
        user.setUsername("测试用户");
        user.setPassword("123");
        UserDao userDao = new UserDao();
        userDao.insert(user);
   }
    public static void testUserSelectByName() {
        UserDao userDao = new UserDao();
        User user = userDao.selectByName("测试用户");
        System.out.println(user);
   }

    public static void testUserSelectById() {
        UserDao userDao = new UserDao();
        User user = userDao.selectById(1);
        System.out.println(user);
   }

    public static void main(String[] args) {
 // ......
   }
}
运行程序
,
验证每个接口是否正确.
3、实现博客列表
暂时不考虑用户登陆.
3.1 初始化 TemplateEngine
创建 ThymeleafConfig 类.
代码和之前版本一致.
@WebListener
public class ThymeleafConfig implements ServletContextListener {
    @Override
    public void contextInitialized(ServletContextEvent sce) {
        ServletContext context = sce.getServletContext();
        TemplateEngine engine = new TemplateEngine();
        ServletContextTemplateResolver resolver = new
ServletContextTemplateResolver(context);
        resolver.setCharacterEncoding("utf-8");
        resolver.setPrefix("/WEB-INF/templates/");
        resolver.setSuffix(".html");
        engine.setTemplateResolver(resolver);
        context.setAttribute("engine", engine);
   }
    @Override
    public void contextDestroyed(ServletContextEvent sce) {
   }
}
3.2 创建网页模板
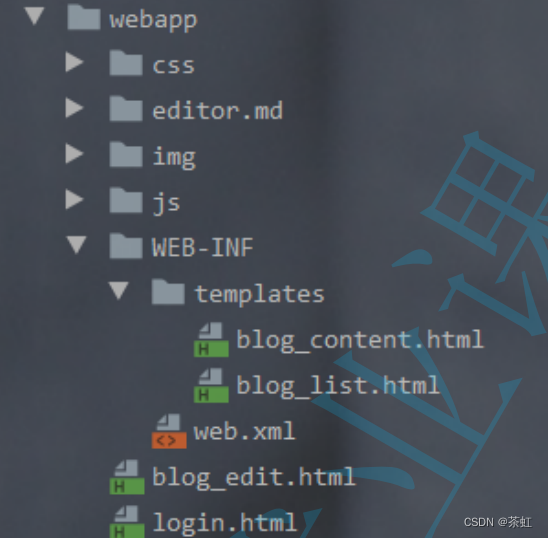
将我们之前写好的博客系统的静态页面拷贝到 webapp 目录中.
拷贝完成的目录结构如下:
其中 blog_content.html 和 blog_list.html 需要借助服务器进行渲染. 放到 templates 目录中.blog_edit.html 和 login.html 内容不需要服务器渲染, 直接放到 webapp 目录中.
修改 blog_list.html
- 导航栏和个人信息部分代码都不变.
- 把展示的博客列表, 替换成 ${blog.title} ${blog.content} 等
<!-- 导航栏 -->
<div class="nav">
... 导航栏代码不变
</div>
<!-- 版心 -->
<div class="container">
<!-- 左侧个人信息 -->
<div class="container-left">
... 个人信息代码不变
</div>
<!-- 右侧内容详情 -->
<div class="container-right">
<!-- 每一篇博客包含标题, 摘要, 时间 -->
<div class="blog" th:each="blog : ${blogs}">
<div class="title" th:text="${blog.title}">我的第一篇博客</div>
<div class="date" th:text="${blog.postTime}">2021-06-02</div>
<div class="desc" th:text="${blog.content}">
从今天起, 我要认真敲代码. Lorem ipsum, dolor sit amet consectetur
adipisicing elit. Cum distinctio ullam eum ut
veroab laborum numquam tenetur est in dolorum a sint, assumenda
adipisci similique quaerat vel.
Facere,
et.
</div>
<a href="blog_content.html?blogId=1" class="detail"
th:href="${'blog_content.html?blogId=' + blog.blogId}">查看全文 >></a>
</div>
</div>
</div>3.3 创建 BlogListServlet
- @WebServlet 中的路径为 "/blog_list.html", 注意此时通过 URL http://127.0.0.1:8080/BlogSystem/blog_list.html 访问的时候, 访问的是一个动态页面,而不再是一个静态的 HTML.
@WebServlet("/blog_list.html")
public class BlogListServlet extends HttpServlet {
@Override
protected void doGet(HttpServletRequest req, HttpServletResponse resp)
throws ServletException, IOException {
resp.setContentType("text/html; charset=utf-8");
// 1. 从数据库中查询博客数据
BlogDao blogDao = new BlogDao();
List<Blog> blogs = blogDao.selectAll();
// 2. 通过模板引擎渲染页面
ServletContext context = getServletContext();
WebContext webContext = new WebContext(req, resp, context);
webContext.setVariable("blogs", blogs);
TemplateEngine engine = (TemplateEngine) context.getAttribute("engine");
String html = engine.process("blog_list", webContext);
resp.getWriter().write(html);
}
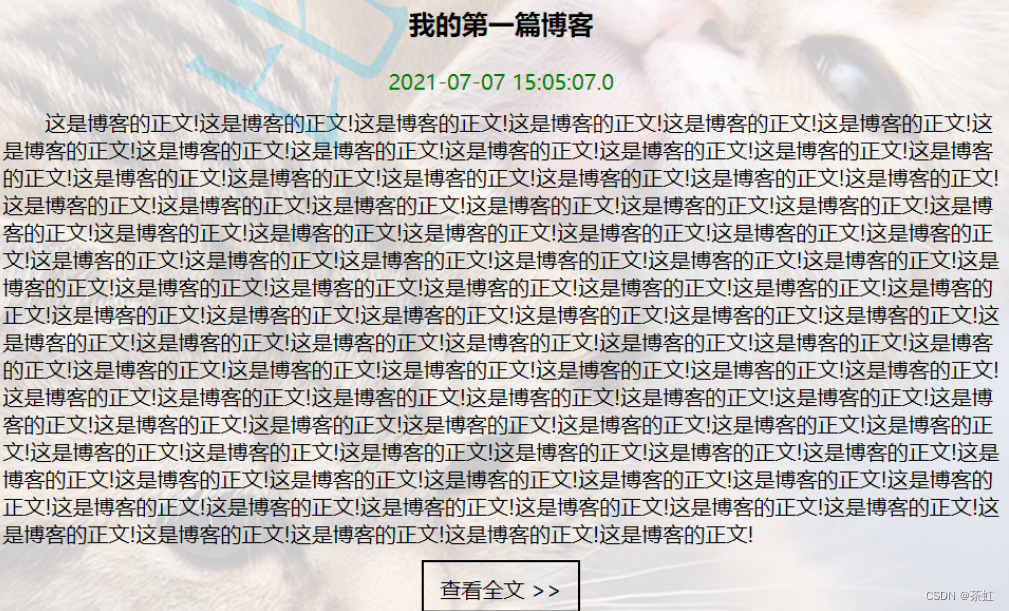
}
此时发现, 如果博客正文内容太长, 就会比较丑. 我们期望在博客列表页只显示一个博客内容的摘要即可.
形如:
修改 BlogDao.selectAll 方法, 对查询到的 content 进行字符串截取. (其他代码不变)
public List<Blog> selectAll() {
    // ......其他代码不变
    String content = resultSet.getString("content");
    if (content.length() > 90) {
        content = content.substring(0, 90) + "...";
   }
    blog.setContent(content);
    // ......其他代码不变
}
此时效果形如
:
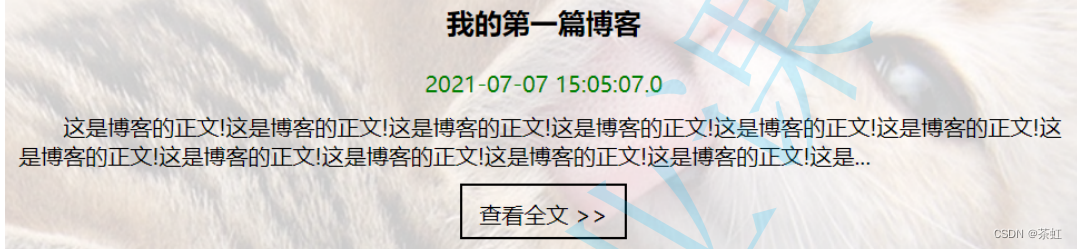
为啥是按照 90 个字符截取?
注意! 90 这个数字纯属拍脑门出来的. 只要让最终的界面显示的符合自己的审美就 OK 了~~
4、实现博客详情
4.1 创建网页模板
修改 blog_content.html
- 导航栏和个人信息代码不变.
- 把博客详情, 替换成 ${blog.title} ${blog.content} 等.
- 之前使用 p 标签 表示正文, 现在直接把正文放到一个 <div id="content"></div> 中.
<!-- 右侧内容详情 -->
<div class="container-right">
    <div class="blog-content">
        <!-- 博客标题 -->
        <h3 th:text="${blog.title}">我的第一篇博客</h3>
        <!-- 博客时间 -->
        <div class="date" th:text="${blog.postTime}">2021-06-02</div>
        <!-- 博客正文 -->
        <div id="content" th:text="${blog.content}"></div>
    </div>
</div>
4.2 创建 BlogContentServlet
@WebServlet("/blog_content.html")
public class BlogContentServlet extends HttpServlet {
    @Override
    protected void doGet(HttpServletRequest req, HttpServletResponse resp)
throws ServletException, IOException {
        resp.setContentType("text/html; charset=utf-8");
        // 1. 从请求中读取 blogId
        String blogId = req.getParameter("blogId");
        if (blogId == null || "".equals(blogId)) {
            String html = "<h3>blogId 字段填写错误!</h3>";
            resp.getWriter().write(html);
            return;
       }
        // 2. 根据 blogId 从数据库读取博客详情
        BlogDao blogDao = new BlogDao();
        Blog blog = blogDao.selectOne(Integer.parseInt(blogId));
        // 3. 根据 blog 对象渲染页面
        ServletContext context = getServletContext();
        WebContext webContext = new WebContext(req, resp, context);
        webContext.setVariable("blog", blog);
        TemplateEngine engine = (TemplateEngine) context.getAttribute("engine");
        String html = engine.process("blog_content", webContext);
        resp.getWriter().write(html);
   }
}
部署程序
,
执行效果如下
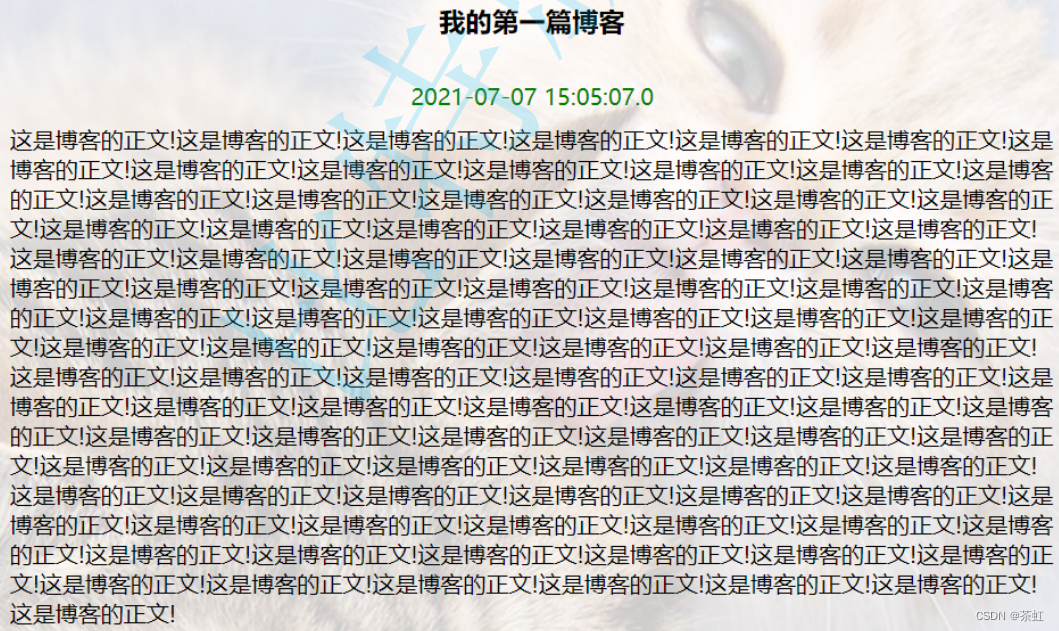
注意: 我们预期博客内容是 markdown 格式的内容, 而不是纯文本的内容. 当前还不能正确显示markdown 格式的数据. 这个我们后面再改进.
5、实现登陆
5.1 修改 login.html
login.html中的内容不需要服务器动态渲染。但是为了和服务器端进行交互, 我们需要引入form标签
- 在 输入框 和 按钮 外面套上一个 form 标签.
- 把用户名和密码两个输入框加上 name 属性
- 把按钮从 button 标签改成 <input type="submit">
<!-- 中间的登陆框 -->
<div class="login-dialog">
    <h3>登陆</h3>
    <form action="login" method="POST">
        <div class="row">
            <span>用户名</span>
            <input type="text" id="username" name="username">
        </div>
        <div class="row">
            <span>密码</span>
            <input type="password" id="password" name="password">
        </div>
        <div class="row">
            <input type="submit" id="submit" value="登陆">
        </div>
    </form>
</div>
5.2 创建 LoginServlet
实现登陆逻辑.
- 此处使用 doPost 来处理.
- 从 form 表单读取数据的时候别忘了 req.setCharacterEncoding("utf-8");
- 根据用户提交的用户名, 从数据库读取 User 对象, 并验证密码是否正确.
- 如果登陆成功, 则把该用户信息保存到 HttpSession 对象中.
- 最后重定向到博客列表页
@WebServlet("/login")
public class LoginServlet extends HttpServlet {
    @Override
    protected void doPost(HttpServletRequest req, HttpServletResponse resp)
throws ServletException, IOException {
        req.setCharacterEncoding("utf-8");
        resp.setContentType("text/html; charset=utf-8");
        // 1. 读取用户名和密码
        String username = req.getParameter("username");
        String password = req.getParameter("password");
        if (username == null || password == null || "".equals(username) ||
"".equals(password)) {
            String html = "<h3>登陆失败! 缺少 username 或 password 字段</h3>";
            resp.getWriter().write(html);
            return;
       }
        // 2. 在数据库中验证用户名密码
        UserDao userDao = new UserDao();
        User user = userDao.selectByName(username);
        if (!password.equals(user.getPassword())) {
            String html = "<h3>登陆失败! 用户名或者密码错误!</h3>";
            resp.getWriter().write(html);
            return;
       }
        // 3. 登陆成功, 设置 Session
        HttpSession session = req.getSession(true);
        session.setAttribute("user", user);
        // 4. 重定向到博客列表页.
        resp.sendRedirect("blog_list.html");
   }
}
部署程序
,
使用
URL
http://127.0.0.1:8080/BlogSystem/login.html
访问页面
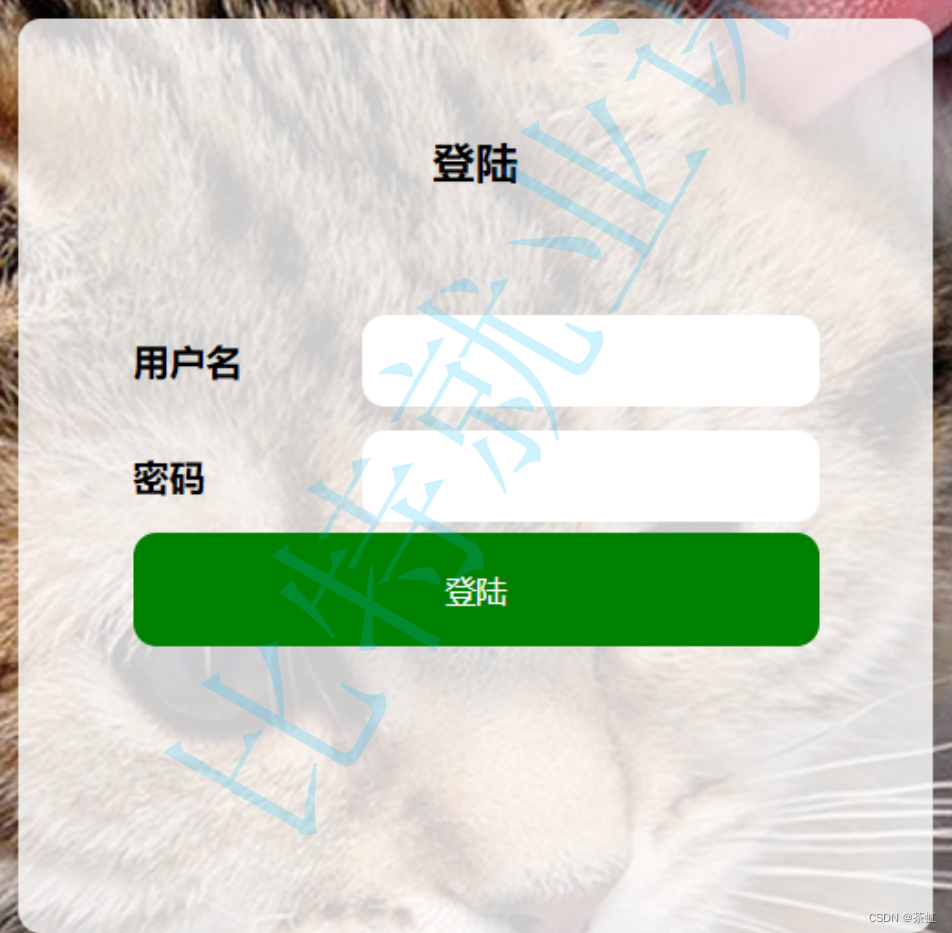
输入一个用户名和密码, 验证登陆效果.
6、实现强制要求登陆
当用户访问 博客列表页 和 博客详情页 时
,
如果用户当前尚未登陆
,
就自动跳转到登陆页面
.
6.1 创建 Util 类
实现
Util.checkLoginStatus
方法
,
用户检测当前用户的登陆状态
.
public class Util {
    public static User checkLoginStatus(HttpServletRequest req) {
        HttpSession session = req.getSession(false);
        if (session == null) {
            return null;
       }
        User user = (User) session.getAttribute("user");
        return user;
   }
}
6.2 修改 BlogListServlet 和 BlogContentServlet
在 doGet
方法的开头
,
调用
checkLoginStatus
判定当前用户的登陆状态
.
如果未登陆
,
则直接重定向到登陆页面.
- 修改 BlogListServlet
@WebServlet("/blog_list.html")
public class BlogListServlet extends HttpServlet {
    @Override
    protected void doGet(HttpServletRequest req, HttpServletResponse resp)
throws ServletException, IOException {
        resp.setContentType("text/html; charset=utf-8");
        // 1. 检测用户登陆状态
        User user = Util.checkLoginStatus(req);
        if (user == null) {
            System.out.println("当前用户尚未登陆!");
            resp.sendRedirect("login.html");
            return;
       }
 // ... 其他代码不变.
   }
}- 修改 BlogContentServlet
@WebServlet("/blog_content.html")
public class BlogContentServlet extends HttpServlet {
    @Override
    protected void doGet(HttpServletRequest req, HttpServletResponse resp)
throws ServletException, IOException {
        resp.setContentType("text/html; charset=utf-8");
        // 1. 验证登陆状态
        User user = Util.checkLoginStatus(req);
        if (user == null) {
            System.out.println("当前用户尚未登陆!");
            resp.sendRedirect("login.html");
            return;
       }
 // ... 其他代码不变
   }
}
重新部署程序, 使用 URL http://127.0.0.1:8080/BlogSystem/blog_list.html 和
http://127.0.0.1:8080/BlogSystem/blog_content.html 验证.
7、实现显示用户信息
目前页面的用户信息部分是写死的. 形如:

我们期望这个信息可以随着用户登陆而发生改变.
- 如果当前页面是博客列表页, 则显示当前登陆用户的信息.
- 如果当前页面是博客详情页, 则显示该博客的作者用户信息.
注意: 当前我们只是实现了显示用户名, 没有实现显示用户的头像以及文章数量等信息.
7.1 修改博客列表页
1) 修改 blog_list.html
- 修改用户信息展示部分 <h3 th:text="user.username">比特汤老湿</h3> , 其他部分不变.
- 预期在渲染模板的时候把 user 对象传到 模板 中.
<!-- 左侧个人信息 -->
<div class="container-left">
    <div class="card">
        <img src="img/doge.jpg" class="avtar" alt="">
        <h3 th:text="${user.username}">比特汤老湿</h3>
        <a href="http://www.github.com">github 地址</a>
        <div class="counter">
            <span>文章</span>
            <span>分类</span>
        </div>
        <div class="counter">
            <span>2</span>
            <span>1</span>
        </div>
    </div>
</div>
2)
修改
BlogListServlet
新增以下代码
:
在
WebContext
中新增
user
字段
.
webContext.setVariable("user", user);
运行程序
,
验证效果
.
7.2 修改博客详情页
1)
修改
blog_content.html
- 修改用户信息展示部分 <h3 th:text="user.username">比特汤老湿</h3> , 其他部分不变.
- 预期在渲染模板的时候把 user 对象传到 模板 中.
<!-- 左侧个人信息 -->
<div class="container-left">
    <div class="card">
        <img src="img/doge.jpg" class="avtar" alt="">
        <h3 th:text="${user.username}">比特汤老湿</h3>
        <a href="http://www.github.com">github 地址</a>
        <div class="counter">
            <span>文章</span>
            <span>分类</span>
        </div>
        <div class="counter">
            <span>2</span>
            <span>1</span>
        </div>
    </div>
</div>
2)
修改
BlogContentServlet
- 根据当前文章中的 userId, 查询对应的作者信息, 把作者信息设置到 WebContext 中.
@WebServlet("/blog_content.html")
public class BlogContentServlet extends HttpServlet {
    @Override
    protected void doGet(HttpServletRequest req, HttpServletResponse resp)
throws ServletException, IOException {
        // ... 代码不变
 // 根据当前 blog 的 userId 查询 User 对象
        UserDao userDao = new UserDao();
        User author = userDao.selectById(blog.getUserId());
        webContext.setVariable("user", author);
        // ... 代码不变
   }
}
运行程序
,
验证效果
.
8、实现注销登陆
注销操作其实就是把服务器中的 Session
对象清除掉。
在前面的页面的导航栏中,
已经包含了一个
"
注销
"
的
a
标签
,
并且点击后会访问
"logout"
路径
.
形如
:
<a href="logout">注销</a>
接下来在服务器端实现对应的代码来处理即可
.
8.1 创建 LogoutServlet
@WebServlet("/logout")
public class LogoutServlet extends HttpServlet {
    @Override
    protected void doGet(HttpServletRequest req, HttpServletResponse resp)
throws ServletException, IOException {
        resp.setContentType("text/html; charset=utf-8");
        // 1. 检测当前用户是否已经登陆
        HttpSession session = req.getSession(false);
        if (session == null) {
            String html = "<h3>当前尚未登陆, 无法注销!</h3>";
            resp.getWriter().write(html);
            return;
       }
        User user = (User) session.getAttribute("user");
        if (user == null) {
            String html = "<h3>当前尚未登陆, 无法注销!</h3>";
            resp.getWriter().write(html);
            return;
       }
        // 2. 删除 session 中的 user 属性
        session.removeAttribute("user");
        // 3. 重定向到登陆页面
        resp.sendRedirect("login.html");
   }
}
部署程序
,
验证注销效果
.
9、实现发布博客
9.1 给编辑页加入 form 表单
修改
blog_edit.html
页面结构
,
- 增加 form 标签, action 为 blog_edit , method 为 POST
- 给 form 指定 height: 100%; 防止编辑器高度不能正确展开.
- 给标题的 input 标签加上 name 属性
- 把提交按钮改成 <input type="submit" value="发布文章">
- 在 <div id="editor"> 里面加上一个隐藏的 textarea
<!-- 编辑框容器 -->
<div class="blog-edit-container">
    <form action="blog_edit" method="POST" style="height: 100%;">
        <!-- 标题编辑区 -->
        <div class="title">
            <input type="text" placeholder="在这里写下文章标题" id="title"
name="title">
            <input type="submit" id="submit" value="发布文章"></input>
        </div>
    <!-- 创建编辑器标签 -->
    <div id="editor">
        <textarea name="content" style="display: none;"></textarea>
    </div>
    </form>
</div>- 在 editor.md 的初始化代码中, 新增一个选项 saveHTMLToTextarea: true
// 初始化编辑器
var editor = editormd("editor", {
    // 这里的尺寸必须在这里设置. 设置样式会被 editormd 自动覆盖掉.
    width: "100%",
    // 高度 100% 意思是和父元素一样高. 要在父元素的基础上去掉标题编辑区的高度
    height: "calc(100% - 50px)",
    // 编辑器中的初始内容
    markdown: "# 在这里写下一篇博客",
    // 指定 editor.md 依赖的插件路径
    path: "editor.md/lib/",
    // 加上这个属性使 编辑器 的内容能保存到用户自己添加的 textarea 中.
    saveHTMLToTextarea: true,
});
此时点击
"
发布文章
"
按钮就能发送一个
POST
请求给服务器
.
9.2 创建 BlogEditServlet
当点击提交的时候会给服务器
blog_edit
这个路径发送一个
POST
请求
,
接下来就来处理这个请求
.
@WebServlet("/blog_edit")
public class BlogEditServlet extends HttpServlet {
    @Override
    protected void doPost(HttpServletRequest req, HttpServletResponse resp)
throws ServletException, IOException {
        req.setCharacterEncoding("utf-8");
        resp.setContentType("text/html; charset=utf-8");
        // 1. 验证是否已经登陆
        User user = Util.checkLoginStatus(req);
        if (user == null) {
            String html = "<h3>当前未登录, 不能新增博客</h3>";
            resp.getWriter().write(html);
            return;
       }
        // 2. 获取到提交的博客数据
        String title = req.getParameter("title");
        String content = req.getParameter("content");
        if (title == null || content == null || "".equals(title) ||
"".equals(content)) {
            String html = "<h3>title 或者 content 字段缺失! 新增博客失败!</h3>";
            resp.getWriter().write(html);
            return;
       }
        // 3. 构造博客对象
        Blog blog = new Blog();
        blog.setTitle(title);
        blog.setContent(content);
        blog.setUserId(user.getUserId());
        blog.setPostTime(new Timestamp(System.currentTimeMillis()));
        // 4. 把博客对象插入到数据库
        BlogDao blogDao = new BlogDao();
        blogDao.insert(blog);
        // 5. 重定向到博客列表页
        resp.sendRedirect("blog_list.html");
   }
}
部署程序
,
验证效果
.
9.3 支持 markdown 语法
当我们提交了一个博客之后, 发现博客详情页中显示的是 markdown 的原始内容, 我们更希望显示成markdown 渲染后的内容。形如:

此处的 # 为一级标题, 但是此处并没有渲染成一级标题的样子.
修改
blog_content.html
- 使用 editor.md 提供的 editormd.markdownToHTML 方法把 markdown 格式的数据转成 HTML
- editormd.markdownToHTML 的详细用法可以参考 editor.md/examples/html-preview-markdown-to-html.html
- 给 #content 加上一个 style="background-color: transparent;" 这样可以使渲染出来的markdown 也像父元素一样半透明显示.
<!-- 引入 editor.md -->
<link rel="stylesheet" href="editor.md/css/editormd.min.css" />
<script src="js/jquery.min.js"></script>
<script src="editor.md/lib/marked.min.js"></script>
<script src="editor.md/lib/prettify.min.js"></script>
<script src="editor.md/editormd.js"></script>
<!-- 右侧内容详情 -->
<div class="container-right">
<div class="blog-content">
<!-- 博客标题 -->
<h3 th:text="${blog.title}">我的第一篇博客</h3>
<!-- 博客时间 -->
<div class="date" th:text="${blog.postTime}">2021-06-02</div>
<!-- 博客正文 -->
<div id="content" style="background-color: transparent;"
th:text="${blog.content}"></div>
</div>
</div>// 把页面中的 #content 的内容按照 markdown 的格式进行解析
function renderMD() {
var markdown = document.querySelector("#content").innerHTML;
document.querySelector("#content").innerHTML = "";
// 这个函数能够把 markdown 格式的数据渲染成 HTML.
// 第一个参数表示把数据放到 id 为 "#content" 的标签中. 显示之前需要先清空之前的 html
内容.
editormd.markdownToHTML('content', { markdown: markdown });
}
renderMD();
部署程序
,
验证效果
.

10、实现删除博客
进入用户详情页时,
如果当前登陆用户正是文章作者
,
则在导航栏中显示
"
删除
"
按钮
,
用户点击时则删除该文章.
10.1 修改 blog_content.html
在导航栏代码中新增一个
a
标签
,
和
"
主页
" "
写博客
" "
注销
"
并列
.
<a th:if="${showDeleteButton}" th:href="${'blog_delete?blogId=' + blog.blogId}">
删除</a>
10.2 修改 BlogContentServlet
根据当前登陆用户的
userId
和文章作者的
userId,
判定该页面是否显示删除按钮
,
并把结果通过
showDeleteButton
传给页面
// 根据登陆用户的 userId 和文章作者的 userId, 决定是否要显示删除按钮
webContext.setVariable("showDeleteButton", user.getUserId() ==
author.getUserId());
10.3 创建 BlogDeleteServlet
处理删除逻辑
@WebServlet("/blog_delete")
public class BlogDeleteServlet extends HttpServlet {
    @Override
    protected void doGet(HttpServletRequest req, HttpServletResponse resp)
throws ServletException, IOException {
        // 1. 验证用户是否登陆
        User user = Util.checkLoginStatus(req);
        if (user == null) {
            String html = "<h3>当前未登陆, 不能删除</h3>";
            resp.getWriter().write(html);
            return;
       }
        // 2. 从请求中获取到要删除的博客 id
        String blogId = req.getParameter("blogId");
        if (blogId == null) {
            String html = "<h3>blogId 参数错误!</h3>";
            resp.getWriter().write(html);
            return;
       }
        // 3. 从数据库中删除博客
        BlogDao blogDao = new BlogDao();
        blogDao.delete(Integer.parseInt(blogId));
        // 4. 重定向到博客列表页
        resp.sendRedirect("blog_list.html");
   }
}
部署程序
,
验证效果
.
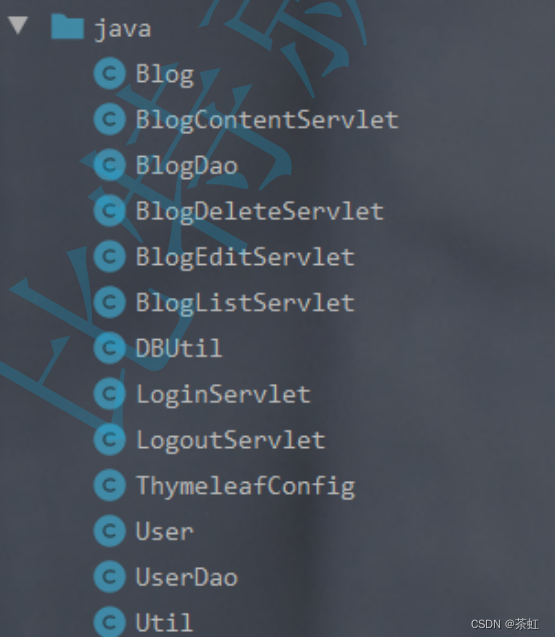
11、整理代码结构
此时我们的基本功能已经实现的差不多了.
但是我们也发现
,
此时的类已经比较多了
,
都放在一起
,
显的非常混乱.
此时我们可以按照类的功能的不同, 把这些类放到不同的包中.
整理之后的效果
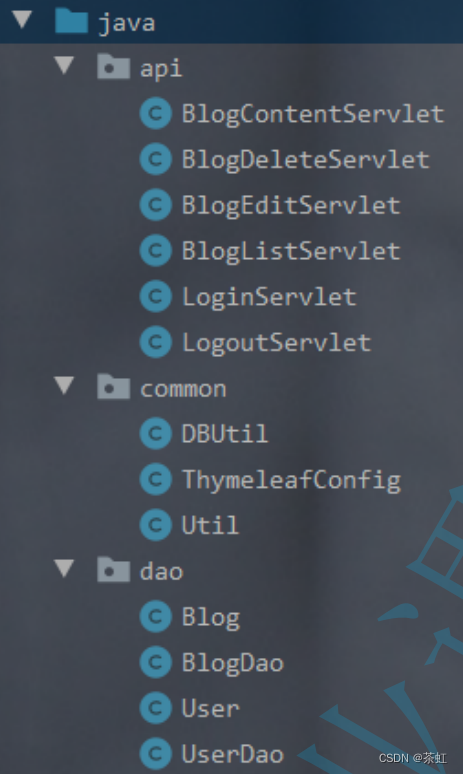
- api : 前后端交互的接口. 里面放了各种 Servlet 类.
- common: 一些公共的代码.
- dao: 操作数据的相关类.
12、其他功能
12.1 实现文章数目统计
提示:根据当前用户, 查询该用户有多少文章 , 显示在博客列表页和博客详情页的左侧用户信息区即可 .
12.2 实现编辑博客
提示
:
- 给博客详情页中的导航栏中增加 "编辑按钮", 也是一个 a 标签, href 为 blogUpdate?blogId=1 , 如果当前登陆的用户和文章作者相同, 则显示编辑按钮.
- 创建 BlogUpdateServlet. 点击 "编辑按钮" 进入访问该 Servlet 的 doGet 方法, 并返回一个博客编 辑页面. 这个页面基于 blog_edit.html 修改, 使编辑页面中的编辑框内已经显示出原来文章的内容.
- 点击 "提交按钮" 则访问 BlogUpdateServlet 的 doPost 方法, 此时根据请求中提交的新的博客标题和正文, 修改数据库的内容.
- 给 BlogDao 新增一个 update 方法, 用于修改数据库中的博客数据.
12.3 实现头像管理
提示
:
- 在数据库的 User 表中, 新增一列, 表示该用户的头像图片的地址, 形如 avtar/1.jpg . 使用 alter table 可以修改数据库表结构(同学们自行查找资料, 学习 alter table 的用法).
- 在博客列表页中, 点击用户头像, 则弹出对话框要求用户选择一张图片. 此时需要使用一个 form 标签把头像部分包裹起来.
- 服务器端创建一个 Servlet , 用来处理用户上传头像的请求, 把用户上传的图片保存到 webapps/avator 目录中. 同时修改数据库 User 表中的头像列为新的头像文件名.
- 修改 blog_list.html, blog_content.html, BlogListServlet, BlogContentServlet 使博客列表页和详情页能正确显示用户头像.
12.4 实现用户 github 链接管理
提示
:
- 在数据库的 User 表中, 新增一列, 表示该用户 github 主页. 使用 alter table 可以修改数据库表结构(同学们自行查找资料, 学习 alter table 的用法).
- 在博客列表页中, 如果用户当前的 github 为空, 则显示一个 a 标签, 提示 "设置 github 链接". 点击后跳转到一个新的页面, 新页面中包含一个 form 用来输入 github 链接.
- 在服务端创建一个 Servlet 来处理 github 链接设置的请求.
12.5 实现文章分类管理
提示
:
- 在数据库中创建一个分类表, 包含 id, 名称, 所属用户id 三列.
- 给 blog 表新增一列, 表示该博客的 分类 id (每个文章只能属于一个分类, 每个分类可以包含多个文章)
- 在用户新增博客的时候, 让用户在页面中指定当前文章的分类名, 并在提交的时候, 由服务器把分类名转成分类id, 并保存到 blog 表中.
- 在显示博客的页面中显示该博客所属的分类.
- 在左侧用户信息显示区域, 显示出当前用户所拥有的分类的数量(从数据库中统计)
- 点击该数字, 进入分类详细页, 页面中能显示当前一共都有哪些分类(实现一个新的 Servlet 实现). 点击具体分类能够展示该分类下的博客列表(复用 blog_list.html 的代码, 但是需要给 BlogDao 新增方法, 按照分类来查找博客列表)


 663
663


 被折叠的 条评论
为什么被折叠?
被折叠的 条评论
为什么被折叠?
 到【灌水乐园】发言


