


ssm整合
首先我们准备做一个关于书籍增删改查的项目
我们先明确我们需要的字段名bookID(书籍编号)和bookName(书籍名称)以及bookCounts(书籍数量)、detail(书籍描述)
1.创建数据库
明确好需要的字段名后,我们新建数据库,并插入几条数据
CREATE DATABASE `ssmbuild`;

USE `ssmbuild`;

DROP TABLE IF EXISTS `books`;

CREATE TABLE `books` (
`bookID` INT(10) NOT NULL AUTO_INCREMENT COMMENT '书id',
`bookName` VARCHAR(100) NOT NULL COMMENT '书名',
`bookCounts` INT(11) NOT NULL COMMENT '数量',
`detail` VARCHAR(200) NOT NULL COMMENT '描述',
KEY `bookID` (`bookID`)
) ENGINE=INNODB DEFAULT CHARSET=utf8

INSERT  INTO `books`(`bookID`,`bookName`,`bookCounts`,`detail`)VALUES
(1,'Java',1,'从入门到放弃'),
(2,'MySQL',10,'从删库到跑路'),
(3,'Linux',5,'从进门到进牢');
2.导入配置依赖
导入我们项目中需要的依赖mysql、数据库连接池、junit、mybatis、spring、servlet-jsp,以及如果需要的话可以导入我们的lombok懒人插件,但是在企业里面实际开发不建议使用,代码可读性降低了,还有我们必不可少的静态资源过滤也不能忘了
<dependencies>
    <!--Junit-->
    <dependency>
        <groupId>junit</groupId>
        <artifactId>junit</artifactId>
        <version>4.12</version>
    </dependency>
    <!--mysql-->
    <dependency>
        <groupId>mysql</groupId>
        <artifactId>mysql-connector-java</artifactId>
        <version>5.1.47</version>
    </dependency>
    <!--数据库连接池:c3p0:dbcp-->
    <dependency>
        <groupId>com.mchange</groupId>
        <artifactId>c3p0</artifactId>
        <version>0.9.5.5</version>
    </dependency>
    <!--Servlet - JSP -->
    <dependency>
        <groupId>javax.servlet</groupId>
        <artifactId>servlet-api</artifactId>
        <version>2.5</version>
    </dependency>
    <dependency>
        <groupId>javax.servlet.jsp</groupId>
        <artifactId>jsp-api</artifactId>
        <version>2.2</version>
    </dependency>
    <dependency>
        <groupId>javax.servlet</groupId>
        <artifactId>jstl</artifactId>
        <version>1.2</version>
    </dependency>
    <!--Mybatis-->
    <dependency>
        <groupId>org.mybatis</groupId>
        <artifactId>mybatis</artifactId>
        <version>3.5.2</version>
    </dependency>
    <dependency>
        <groupId>org.mybatis</groupId>
        <artifactId>mybatis-spring</artifactId>
        <version>2.0.2</version>
    </dependency>
    <!--Spring-->
    <dependency>
        <groupId>org.springframework</groupId>
        <artifactId>spring-webmvc</artifactId>
        <version>5.3.4</version>
    </dependency>
    <dependency>
        <groupId>org.springframework</groupId>
        <artifactId>spring-jdbc</artifactId>
        <version>5.3.4</version>
    </dependency>
    <dependency>
        <groupId>org.projectlombok</groupId>
        <artifactId>lombok</artifactId>
        <version>RELEASE</version>
        <scope>compile</scope>
    </dependency>
    <dependency>
        <groupId>org.aspectj</groupId>
        <artifactId>aspectjweaver</artifactId>
        <version>1.9.4</version>
    </dependency>
    <!--lombok-->
    <dependency>
        <groupId>io.mateu</groupId>
        <artifactId>lombok</artifactId>
        <version>1.18.11.97</version>
    </dependency>
</dependencies>
<!--静态资源扫描-->
<build>
    <resources>
        <resource>
            <directory>src/main/java</directory>
            <includes>
                <include>**/*.properties</include>
                <include>**/*.xml</include>
            </includes>
            <filtering>false</filtering>
        </resource>
        <resource>
            <directory>src/main/resources</directory>
            <includes>
                <include>**/*.properties</include>
                <include>**/*.xml</include>
            </includes>
            <filtering>false</filtering>
        </resource>
    </resources>
</build>
3.创建实体类及mapper文件和mapper.xml配置文件
新建一个pojo包,
包下创建我们的实体类,这里我使用的是lombok的注解来创建set get toString方法以及有参无参构造
@Data
@AllArgsConstructor
@NoArgsConstructor
public class Books {
    private int bookID;
    private String bookName;
    private int bookCounts;
    private String detail;
}
新建一个dao包,
包下创建我们的mapper文件,我们先将必要的增加书籍、删除书籍、更新书籍、查询书籍以及查询所有书籍进行实现操作
public interface BooksMapper {
    //增加一本书
    int addBook(Books books);
    //删除一本书
    int deleteById(@Param("booksId") int id);
    //更新一本书
    int updateBook(Books books);
    //查询一本书
    Books queryBookById(@Param("booksId") int id);
    //查询所有的书
    List<Books> queryAllBook();
}
mapper接口创建好了,在我们的dao包下再创建mapper.xml配置文件,写我们的sql语句
<?xml version="1.0" encoding="UTF-8" ?>
<!DOCTYPE mapper
        PUBLIC "-//mybatis.org//DTD Mapper 3.0//EN"
        "http://mybatis.org/dtd/mybatis-3-mapper.dtd">
<mapper namespace="com.xsq.dao.BooksMapper">
    <insert id="addBook" parameterType="books">
        insert into books(bookName,bookCounts,detail) values(#{bookName},#{bookCounts},#{detail})
    </insert>
    <delete id="deleteById" parameterType="int">
        delete from books where bookID = #{booksId}
    </delete>
    <update id="updateBook" parameterType="books">
        update books set bookName=#{bookName},bookCounts=#{bookCounts},detail=#{detail} where bookID=#{bookID} ;
    </update>
    <select id="queryBookById" resultType="books">
        select * from books where bookID=#{booksId}
    </select>
    <select id="queryAllBook" resultType="books">
        select * from books
    </select>
</mapper>
4.resources目录下创建mybatis-config.xml和spring-dao.xml文件
写好了实体类及mapper文件和mapper配置文件,我们就需要去设置日志及取别名、扫描包
在resources目录下新建一个新的mybatis-config.xml文件
<?xml version="1.0" encoding="UTF-8" ?>
<!DOCTYPE configuration
        PUBLIC "-//mybatis.org//DTD Config 3.0//EN"
        "http://mybatis.org/dtd/mybatis-3-config.dtd">
<configuration>
    <!--setting:控制mybatis全局行为-->
    <settings>
        <!--设置mybatis输出日志-->
        <setting name="logImpl" value="STDOUT_LOGGING"/>
    </settings>

    <!--设置别名-->
    <typeAliases>
        <!--name:实体类所在的包名-->
        <package name="com.xsq.pojo"/>
    </typeAliases>

    <!--sql mapper(sql映射文件)的位置-->
    <mappers>
        <!--
            name:是包名,这个包中的所有mapper.xml依次都能加载
        -->
        <package name="com.xsq.dao"/>
    </mappers>
</configuration>
接下来我们就需要创建一个spring-dao.xml文件去引入我们的外部配置文件,配置注册我们的连接池,sqlSessionFactory以及dao接口的动态扫描包
新建一个database.properties文件,用户名和密码都是自己的,不用多说
jdbc.driver=com.mysql.jdbc.Driver
jdbc.url=jdbc:mysql://localhost:3306/ssmbuild?useUnicode=true&characterEncoding=utf8
jdbc.username=root
jdbc.password=653060
新建一个spring-dao.xml文件,配置我们的数据源连接池
<?xml version="1.0" encoding="UTF-8"?>
<beans xmlns="http://www.springframework.org/schema/beans"
       xmlns:xsi="http://www.w3.org/2001/XMLSchema-instance"
       xmlns:context="http://www.springframework.org/schema/context"
       xsi:schemaLocation="http://www.springframework.org/schema/beans http://www.springframework.org/schema/beans/spring-beans.xsd http://www.springframework.org/schema/context https://www.springframework.org/schema/context/spring-context.xsd">
    <!--1.关联数据库配置文件-->
    <context:property-placeholder location="classpath:database.properties"/>
    <!--2.连接池:这里使用的是c3p0-->
    <bean id="dataSource" class="com.mchange.v2.c3p0.ComboPooledDataSource">
        <property name="driverClass" value="${jdbc.driver}"/>
        <property name="jdbcUrl" value="${jdbc.url}"/>
        <property name="user" value="${jdbc.username}"/>
        <property name="password" value="${jdbc.password}"/>
        <!-- c3p0连接池的私有属性 -->
        <property name="maxPoolSize" value="30"/>
        <property name="minPoolSize" value="10"/>
        <!-- 关闭连接后不自动commit -->
        <property name="autoCommitOnClose" value="false"/>
        <!-- 获取连接超时时间 -->
        <property name="checkoutTimeout" value="10000"/>
        <!-- 当获取连接失败重试次数 -->
        <property name="acquireRetryAttempts" value="2"/>
    </bean>
    <bean id="sqlSessionFactory" class="org.mybatis.spring.SqlSessionFactoryBean">
        <property name="dataSource" ref="dataSource"/>
        <!--绑定Mybatis的配置文件-->
        <property name="configLocation" value="classpath:mybatis-config.xml"/>
    </bean>
    <!--4.配置dao接口扫描包,动态的实现了Dao接口可以注入到Spring-->
    <bean class="org.mybatis.spring.mapper.MapperScannerConfigurer">
        <!--注入sqlSessionFactory-->
        <property name="sqlSessionFactoryBeanName" value="sqlSessionFactory"/>
        <property name="basePackage" value="com.xsq.dao"/>
    </bean>
</beans>
到这里我们dao层的相关配置基本完成了,接下来就是Service层了
5.service层的环境搭建及相关配置
我们新建一个Service包,
包下新建一个BooksService接口,
public interface BooksService {
    //增加一本书
    int addBook(Books books);
    //删除一本书
    int deleteById(int id);
    //更新一本书
    int updateBook(Books books);
    //查询一本书
    Books queryBookById(int id);
    //查询所有的书
    List<Books> queryAllBook();
}
接下来就是创建BooksServiceImpl实现类去调用我们的dao层
@Service
public class BooksServiceImpl implements BooksService {
    //service调用dao层
    @Autowired
    private BooksMapper bookMapper;

    public void setBookMapper(BooksMapper bookMapper) {
        this.bookMapper = bookMapper;
    }

    public int addBook(Books books) {
        return bookMapper.addBook(books);
    }

    public int deleteById(int id) {
        return bookMapper.deleteById(id);
    }

    public int updateBook(Books books) {
        return bookMapper.updateBook(books);
    }

    public Books queryBookById(int id) {
        return bookMapper.queryBookById(id);
    }

    public List<Books> queryAllBook() {
        return bookMapper.queryAllBook();
    }
}
resources目录下创建spring-service.xml文件,对我们的service层进行相关配置
<?xml version="1.0" encoding="UTF-8"?>
<beans xmlns="http://www.springframework.org/schema/beans"
       xmlns:xsi="http://www.w3.org/2001/XMLSchema-instance"
       xmlns:context="http://www.springframework.org/schema/context"
       xmlns:aop="http://www.springframework.org/schema/aop" xmlns:tx="http://www.springframework.org/schema/tx"
       xsi:schemaLocation="http://www.springframework.org/schema/beans http://www.springframework.org/schema/beans/spring-beans.xsd http://www.springframework.org/schema/context https://www.springframework.org/schema/context/spring-context.xsd http://www.springframework.org/schema/aop https://www.springframework.org/schema/aop/spring-aop.xsd http://www.springframework.org/schema/tx http://www.springframework.org/schema/tx/spring-tx.xsd">
    <!--1.扫描service下的包-->
    <context:component-scan base-package="com.xsq.service"/>
    <!--2.将我们的所有业务类,注入到Spring,可以通过配置,或者注解实现-->
    <bean id="BookServiceImpl" class="com.xsq.service.BooksServiceImpl">
        <property name="bookMapper" ref="booksMapper"/>
    </bean>
    <!--3.声明式事务配置-->
    <bean id="transactionManager" class="org.springframework.jdbc.datasource.DataSourceTransactionManager">
        <!--注入数据源-->
        <property name="dataSource" ref="dataSource"/>
    </bean>
    <!--配置事务通知-->
    <tx:advice id="txAdvice" transaction-manager="transactionManager">
        <tx:attributes>
            <!--给那些方法配置事务-->
            <!--配置事务的传播特性:new propagation= -->
            <tx:method name="*" propagation="REQUIRED"/>
        </tx:attributes>
    </tx:advice>
    <!--4.配置事务切入-->
    <aop:config>
        <aop:pointcut id="txPointCut" expression="execution(* com.xsq.dao.*.*(..))"/>
        <aop:advisor advice-ref="txAdvice" pointcut-ref="txPointCut"/>
    </aop:config>
</beans>
6.spring-mvc.xml及web.xml文件相关配置
web.xml中,注册我们的dispatcherServlet,以及乱码过滤
<?xml version="1.0" encoding="UTF-8"?>
<web-app xmlns="http://xmlns.jcp.org/xml/ns/javaee"
         xmlns:xsi="http://www.w3.org/2001/XMLSchema-instance"
         xsi:schemaLocation="http://xmlns.jcp.org/xml/ns/javaee http://xmlns.jcp.org/xml/ns/javaee/web-app_4_0.xsd"
         version="4.0">
    <!--DispatcherServlet-->
    <servlet>
        <servlet-name>SpringMVC</servlet-name>
        <servlet-class>org.springframework.web.servlet.DispatcherServlet</servlet-class>
        <init-param>
            <param-name>contextConfigLocation</param-name>
            <param-value>classpath:applicationContext.xml</param-value>
        </init-param>
        <load-on-startup>1</load-on-startup>
    </servlet>
    <servlet-mapping>
        <servlet-name>SpringMVC</servlet-name>
        <url-pattern>/</url-pattern>
    </servlet-mapping>
    <!--乱码过滤-->
    <filter>
        <filter-name>encodingFilter</filter-name>
        <filter-class>org.springframework.web.filter.CharacterEncodingFilter</filter-class>
        <init-param>
            <param-name>encoding</param-name>
            <param-value>utf-8</param-value>
        </init-param>
    </filter>
    <filter-mapping>
        <filter-name>encodingFilter</filter-name>
        <url-pattern>/*</url-pattern>
    </filter-mapping>
    <!--默认Session过期时间-->
    <session-config>
        <session-timeout>15</session-timeout>
    </session-config>
</web-app>
在resources目录下新建一个spring-mvc.xml文件,扫描注解驱动,视图解析器
<?xml version="1.0" encoding="UTF-8"?>
<beans xmlns="http://www.springframework.org/schema/beans"
       xmlns:xsi="http://www.w3.org/2001/XMLSchema-instance" xmlns:mvc="http://www.springframework.org/schema/mvc"
       xmlns:context="http://www.springframework.org/schema/context"
       xsi:schemaLocation="http://www.springframework.org/schema/beans http://www.springframework.org/schema/beans/spring-beans.xsd http://www.springframework.org/schema/mvc http://www.springframework.org/schema/mvc/spring-mvc.xsd http://www.springframework.org/schema/context https://www.springframework.org/schema/context/spring-context.xsd">

    <!--1.注解驱动-->
    <mvc:annotation-driven/>
    <!--2.静态资源过滤-->
    <mvc:default-servlet-handler/>
    <!--3.扫描包:controller-->
    <context:component-scan base-package="com.xsq.controller"/>
    <!--4.视图解析器-->
    <bean class="org.springframework.web.servlet.view.InternalResourceViewResolver">
        <property name="prefix" value="/WEB-INF/jsp/"/>
        <property name="suffix" value=".jsp"/>
    </bean>
</beans>
7.controller层和applicationContext.xml文件
创建一个controller包,
包下新建一个BookController类,环境搭建好之后,基本的逻辑代码都写在这个类里面
@Controller
@RequestMapping("/book")
public class BookController {
}
在resources目录下新建一个applicationContext.xml文件,将所有层的配置文件都到这个配置文件下
<?xml version="1.0" encoding="UTF-8"?>
<beans xmlns="http://www.springframework.org/schema/beans"
       xmlns:xsi="http://www.w3.org/2001/XMLSchema-instance"
       xsi:schemaLocation="http://www.springframework.org/schema/beans http://www.springframework.org/schema/beans/spring-beans.xsd">

    <import resource="classpath:spring-dao.xml"/>
    <import resource="classpath:spring-service.xml"/>
    <import resource="classpath:spring-mvc.xml"/>
</beans>
配置环境的问题都解决了,我们需要再做一步,以免后面出错,在我们的Project Structure中创建一个lib包,将我们需要的jar包引入
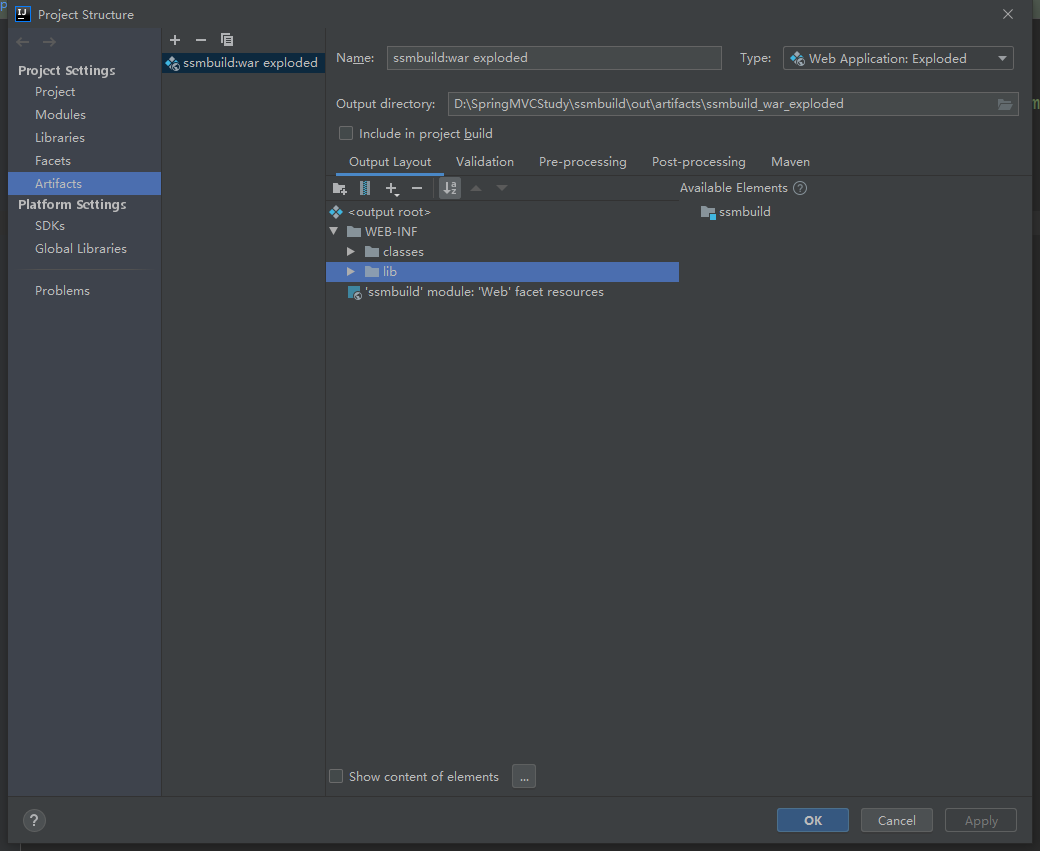
这样我们的环境配置基本上是大功告成了,接下来我们就可以开始实现我们的具体业务操作了
8.实现查询所有用户
在实现业务操作之前,我们先把首页先优化一下,面儿总得过的去
index.jsp:
<%@ page contentType="text/html;charset=UTF-8" language="java" %>
<html>
<head>
<title>$Title$</title>
<style>
a{
text-decoration: none;
color: black;
font-size:32px;
}
h2{
width: 280px;
height: 80px;
margin: 200px auto;
text-align: center;
line-height: 80px;
background: deepskyblue;
border-radius: 10px;
}
</style>
</head>
<body>
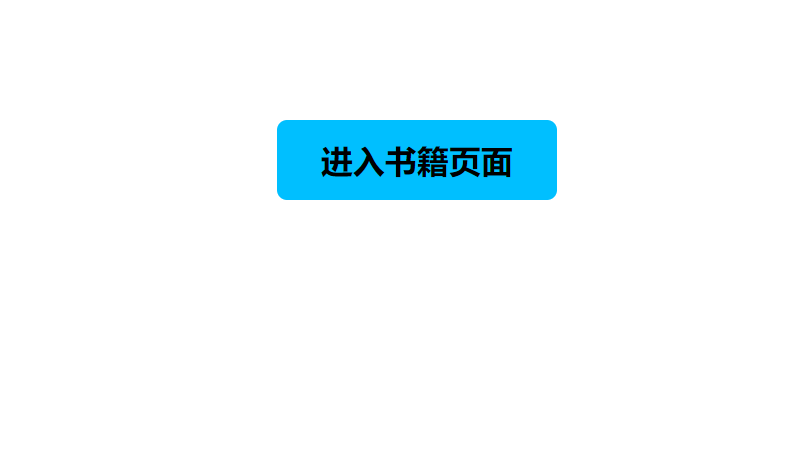
<h2>
<a href="${pageContext.request.contextPath}/book/allBook">进入书籍页面</>
</h2>
</body>
</html>
运行页面:
接下来先写我们的controller层,进行调用service层数据查询和跳转页面
@Controller
@RequestMapping("/book")
public class BookController {
    //controller 调用 service层
    @Autowired
    @Qualifier("BookServiceImpl")
    private BooksService booksService;

    //查询全部的书籍,并且返回到一个书籍展示页面
    @RequestMapping("/allBook")
    public String list(Model model) {
        List<Books> list = booksService.queryAllBook();
        model.addAttribute("list", list);
        return "allBook";
    }
}
现在我们还没有我们的allBook页面,我们先创建一个用来展示的allBook.jsp页面
<%@ taglib prefix="c" uri="http://java.sun.com/jsp/jstl/core" %>
<%@ page contentType="text/html;charset=UTF-8" language="java" %>
<html>
<head>
<title>书籍展示</title>
<%--BookStrap美化界面--%>
<link href="https://cdn.staticfile.org/twitter-bootstrap/3.3.7/css/bootstrap.min.css" rel="stylesheet">
</head>
<body>
<div class="container">
<div class="row clearfix">
<div class="col-md-12 column">
<div class="page-header">
<h1>
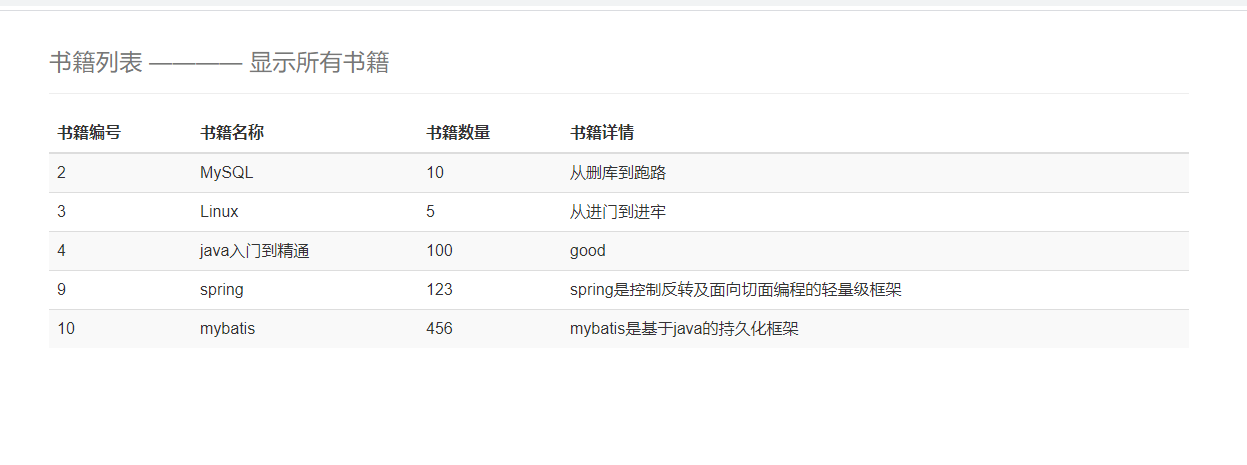
<small>书籍列表 ———— 显示所有书籍</small>
</h1>
</div>
</div>
</div>
<div class="row clearfix">
<div class="col-md-12 column">
<table class="table table-hover table-striped">
<thead>
<tr>
<th>书籍编号</th>
<th>书籍名称</th>
<th>书籍数量</th>
<th>书籍详情</th>
</tr>
</thead>
<%--书籍是从数据库中查询出来的,从这个list中遍历出来:foreach--%>
<tbody>
<c:forEach var="book" items="${list}">
<tr>
<td>${book.bookID}</td>
<td>${book.bookName}</td>
<td>${book.bookCounts}</td>
<td>${book.detail}</td>
</tr>
</c:forEach>
</tbody>
</table>
</div>
</div>
</div>
</body>
</html>
运行页面:
9.实现新增书籍,修改书籍,删除书籍功能
controller层:
@Controller
@RequestMapping("/book")
public class BookController {
    //controller 调用 service层
    @Autowired
    @Qualifier("BookServiceImpl")
    private BooksService booksService;

    //查询全部的书籍,并且返回到一个书籍展示页面
    @RequestMapping("/allBook")
    public String list(Model model) {
        List<Books> list = booksService.queryAllBook();
        model.addAttribute("list", list);
        return "allBook";
    }

    //跳转到增加书籍页面
    @RequestMapping("/toAddBook")
    public String toAddPaper() {
        return "addBook";
    }

    //添加书籍的请求
    @RequestMapping("/addBook")
    public String addBook(Books books) {
        System.out.println("books=>" + books);
        booksService.addBook(books);
        return "redirect:/book/allBook";//重定向到我们的@RequestMapping("/allBook")请求
    }

    //跳转到修改页面
    @RequestMapping("/toUpdate")
    public String toUpdatePaper(int id, Model model) {
        Books books = booksService.queryBookById(id);
        model.addAttribute("QBook", books);
        return "updateBook";
    }

    //修改书籍
    @RequestMapping("/updateBook")
    public String updateBook(Books books) {
        System.out.println("updateBook=>" + books);
        int i = booksService.updateBook(books);
        if (i > 0) {
            System.out.println("添加数据成功" + books.toString());
        }
        return "redirect:/book/allBook";
    }

    //删除书籍
    @RequestMapping("/deleteBook")
    public String deleteBook(int id) {
        booksService.deleteById(id);
        return "redirect:/book/allBook";
    }
}
allBook.jsp页面
<%@ taglib prefix="c" uri="http://java.sun.com/jsp/jstl/core" %>
<%@ page contentType="text/html;charset=UTF-8" language="java" %>
<html>
<head>
<title>书籍展示</title>
<%--BookStrap美化界面--%>
<link href="https://cdn.staticfile.org/twitter-bootstrap/3.3.7/css/bootstrap.min.css" rel="stylesheet">
</head>
<body>
<div class="container">
<div class="row clearfix">
<div class="col-md-12 column">
<div class="page-header">
<h1>
<small>书籍列表 ———— 显示所有书籍</small>
</h1>
</div>
</div>
<div class="row">
<div class="col-md-4 column">
<%--toAddBook--%>
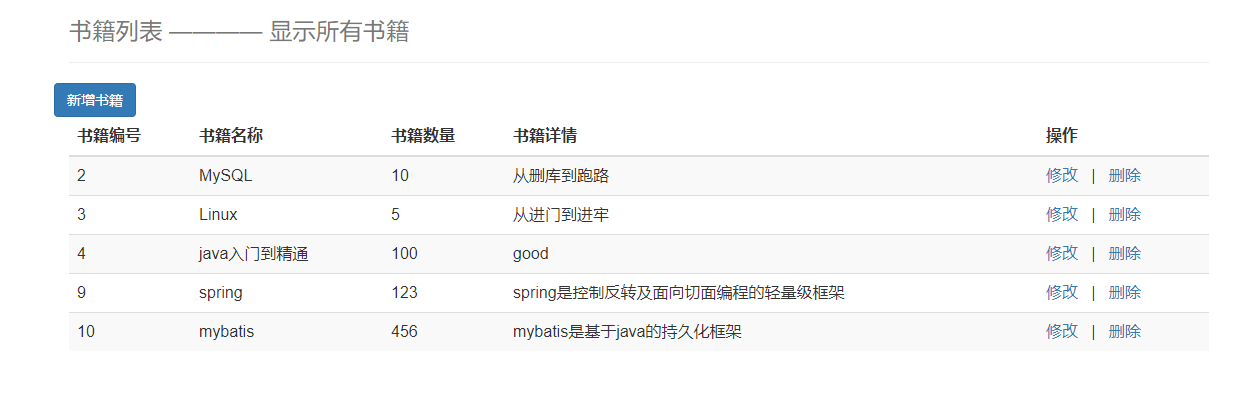
<a class="btn btn-primary" href="${pageContext.request.contextPath}/book/toAddBook">新增书籍</a>
</div>
</div>
</div>
<div class="row clearfix">
<div class="col-md-12 column">
<table class="table table-hover table-striped">
<thead>
<tr>
<th>书籍编号</th>
<th>书籍名称</th>
<th>书籍数量</th>
<th>书籍详情</th>
<th>操作</th>
</tr>
</thead>
<%--书籍是从数据库中查询出来的,从这个list中遍历出来:foreach--%>
<tbody>
<c:forEach var="book" items="${list}">
<tr>
<td>${book.bookID}</td>
<td>${book.bookName}</td>
<td>${book.bookCounts}</td>
<td>${book.detail}</td>
<td>
<a href="${pageContext.request.contextPath}/book/toUpdate?id=${book.bookID}">修改</a>
|
<a href="${pageContext.request.contextPath}/book/deleteBook?id=${book.bookID}">删除</a>
</td>
</tr>
</c:forEach>
</tbody>
</table>
</div>
</div>
</div>
</body>
</html>
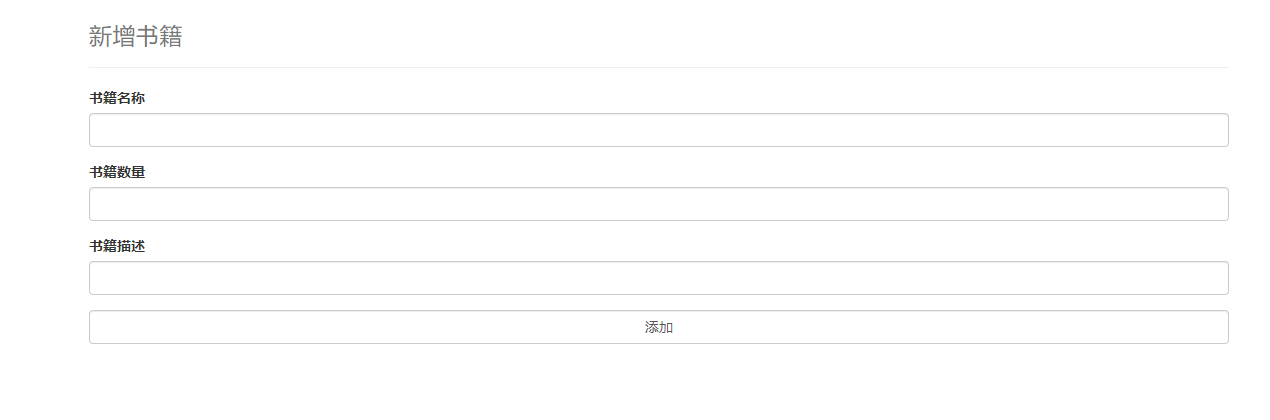
我们新增要跳转的addBook.jsp页面
<%--
  Created by IntelliJ IDEA.
  User: 谢世强
  Date: 2021/3/18
  Time: 15:19
  To change this template use File | Settings | File Templates.
--%>
<%@ page contentType="text/html;charset=UTF-8" language="java" %>
<html>
<head>
    <title>addBook</title>
    <%--BookStrap美化界面--%>
    <link href="https://cdn.staticfile.org/twitter-bootstrap/3.3.7/css/bootstrap.min.css" rel="stylesheet">
</head>
<body>
<div class="container">
    <div class="row clearfix">
        <div class="col-md-12 column">
            <div class="page-header">
                <h1>
                    <small>新增书籍</small>
                </h1>
            </div>
        </div>
    </div>
    <form action="${pageContext.request.contextPath}/book/addBook" method="post">
        <div class="form-group">
            <label >书籍名称</label>
            <input type="text" name="bookName" class="form-control" required>
        </div>
        <div class="form-group">
            <label >书籍数量</label>
            <input type="text" name="bookCounts" class="form-control" required>
        </div>
        <div class="form-group">
            <label >书籍描述</label>
            <input type="text" name="detail" class="form-control" required>
        </div>
        <div class="form-group">
            <input type="submit" class="form-control" value="添加">
        </div>
    </form>
</div>
</body>
</html>
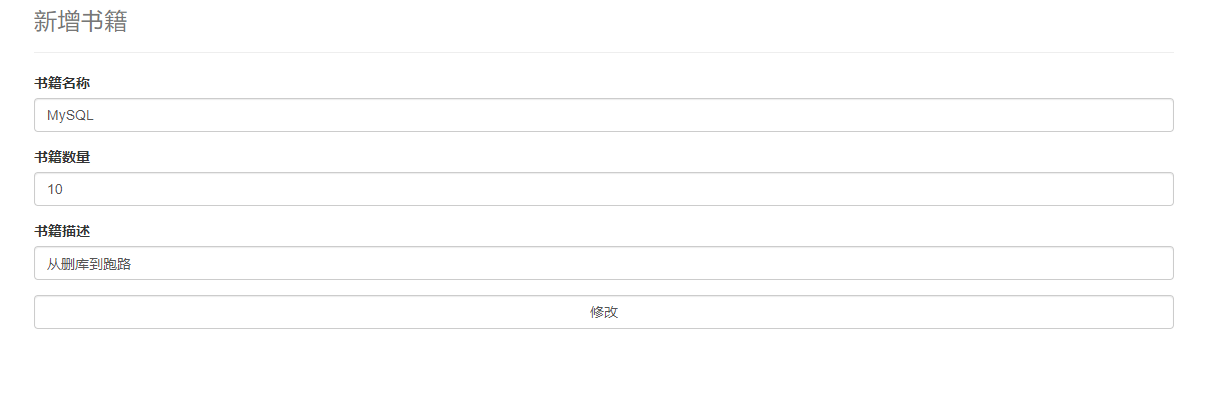
修改书籍跳转页面updateBook.jsp
<%@ page contentType="text/html;charset=UTF-8" language="java" %>
<html>
<head>
    <title>修改书籍</title>
    <%--BookStrap美化界面--%>
    <link href="https://cdn.staticfile.org/twitter-bootstrap/3.3.7/css/bootstrap.min.css" rel="stylesheet">
</head>
<body>
<div class="container">
    <div class="row clearfix">
        <div class="col-md-12 column">
            <div class="page-header">
                <h1>
                    <small>新增书籍</small>
                </h1>
            </div>
        </div>
    </div>
    <form action="${pageContext.request.contextPath}/book/updateBook" method="post">
        <%--出现问题:我们提交的了修改的SQL请求,但是修改失败,初次考虑,是事务的问题,配置完毕事务,依旧失败!--%>
        <%--看一下SQL语句,能否执行成功:SQL执行失败,修改未完成--%>
        <%--前端传递隐藏域--%>
        <input type="hidden" name="bookID" value="${QBook.bookID}">
        <div class="form-group">
            <label>书籍名称</label>
            <input type="text" name="bookName" class="form-control" value="${QBook.bookName}" required>
        </div>
        <div class="form-group">
            <label>书籍数量</label>
            <input type="text" name="bookCounts" class="form-control" value="${QBook.bookCounts}" required>
        </div>
        <div class="form-group">
            <label>书籍描述</label>
            <input type="text" name="detail" class="form-control" value="${QBook.detail}" required>
        </div>
        <div class="form-group">
            <input type="submit" class="form-control" value="修改">
        </div>
    </form>
</div>
</body>
</html>
运行页面:
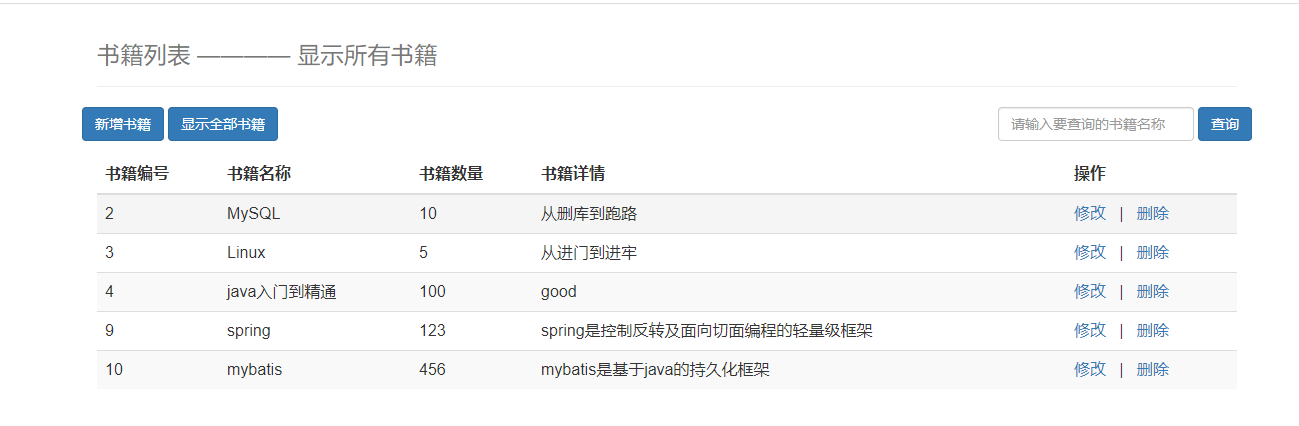
allBook页面:
新增页面(addBook):
修改书籍页面(updateBook):
10.新增一个查询书籍的搜索框功能
allBook.jsp:新增了一个搜索框,以及查询数据后想显示所有数据的按钮
<%@ taglib prefix="c" uri="http://java.sun.com/jsp/jstl/core" %>
<%@ page contentType="text/html;charset=UTF-8" language="java" %>
<html>
<head>
<title>书籍展示</title>
<%--BookStrap美化界面--%>
<link href="https://cdn.staticfile.org/twitter-bootstrap/3.3.7/css/bootstrap.min.css" rel="stylesheet">
</head>
<body>
<div class="container">
<div class="row clearfix">
<div class="col-md-12 column">
<div class="page-header">
<h1>
<small>书籍列表 ———— 显示所有书籍</small>
</h1>
</div>
</div>
<div class="row">
<div class="col-md-4 column">
<%--toAddBook--%>
<a class="btn btn-primary" href="${pageContext.request.contextPath}/book/toAddBook">新增书籍</a>
<a class="btn btn-primary" href="${pageContext.request.contextPath}/book/allBook">显示全部书籍</a>
</div>
<div class="col-md-8 column">
<%--查询书籍--%>
<form class="form-inline" action="${pageContext.request.contextPath}/book/queryBook" method="post" style="float: right">
<span style="color: red;font-width: bold;">${error}</span>
<input type="text" name="queryBookName" class="form-control" placeholder="请输入要查询的书籍名称">
<input type="submit" value="查询" class="btn btn-primary">
</form>
</div>
</div>
</div>
<div class="row clearfix">
<div class="col-md-12 column">
<table class="table table-hover table-striped">
<thead>
<tr>
<th>书籍编号</th>
<th>书籍名称</th>
<th>书籍数量</th>
<th>书籍详情</th>
<th>操作</th>
</tr>
</thead>
<%--书籍是从数据库中查询出来的,从这个list中遍历出来:foreach--%>
<tbody>
<c:forEach var="book" items="${list}">
<tr>
<td>${book.bookID}</td>
<td>${book.bookName}</td>
<td>${book.bookCounts}</td>
<td>${book.detail}</td>
<td>
<a href="${pageContext.request.contextPath}/book/toUpdate?id=${book.bookID}">修改</a>
|
<a href="${pageContext.request.contextPath}/book/deleteBook?id=${book.bookID}">删除</a>
</td>
</tr>
</c:forEach>
</tbody>
</table>
</div>
</div>
</div>
</body>
</html>
controller类:
	//查询书籍
    @RequestMapping("/queryBook")
    public String queryBook(String queryBookName, Model model) {
        Books books = booksService.queryBookByName(queryBookName);
        System.err.println("queryBookByName=>"+books);
        List<Books> list = new ArrayList<Books>();
        list.add(books);
        if (books==null){
            list = booksService.queryAllBook();
            model.addAttribute("error","未查到该书籍!");
        }
        model.addAttribute("list", list);
        return "allBook";
    }
运行页面:
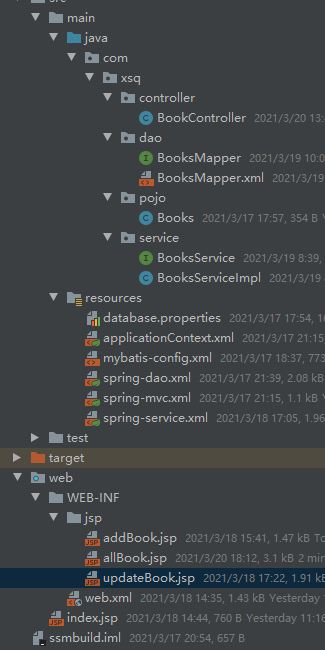
最终目录结构展示
Ajax
Ajax简介
-
AJAX = Asynchronous JavaScript and XML(异步的 JavaScript 和 XML)。
-
AJAX 是一种在无需重新加载整个网页的情况下,能够更新部分网页的技术。
-
Ajax 不是一种新的编程语言,而是一种用于创建更好更快以及交互性更强的Web应用程序的技术。
-
在 2005 年,Google 通过其 Google Suggest 使 AJAX 变得流行起来。Google Suggest能够自动帮你完成搜索单词。
-
Google Suggest 使用 AJAX 创造出动态性极强的 web 界面:当您在谷歌的搜索框输入关键字时,JavaScript 会把这些字符发送到服务器,然后服务器会返回一个搜索建议的列表。
-
就和国内百度的搜索框一样!
-
传统的网页(即不用ajax技术的网页),想要更新内容或者提交一个表单,都需要重新加载整个网页。
-
使用ajax技术的网页,通过在后台服务器进行少量的数据交换,就可以实现异步局部更新。
-
使用Ajax,用户可以创建接近本地桌面应用的直接、高可用、更丰富、更动态的Web用户界面。
伪造Ajax
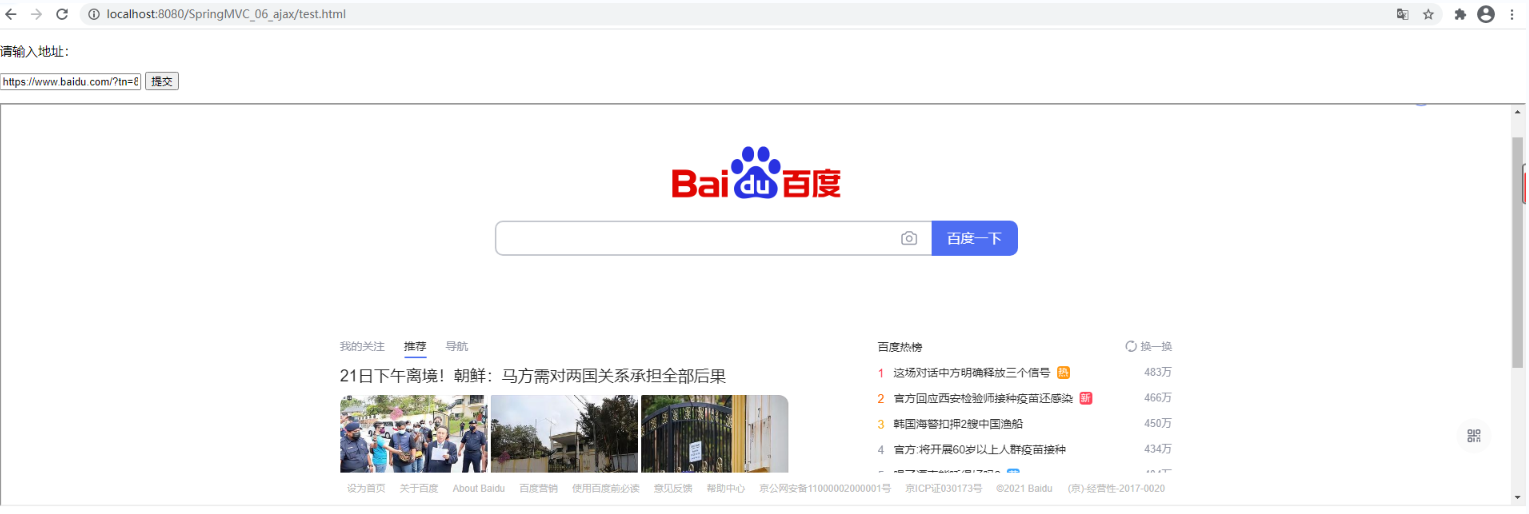
我们可以使用HTML中的iframe标签来伪造Ajax的效果
1.新建一个工程,加入web支持
2.在web目录下创建一个HTML文件
<!DOCTYPE html>
<html lang="en">
<head>
    <meta charset="UTF-8">
    <title>Title</title>
    <script>
        function go() {
            var url = document.getElementById("url").value;
            document.getElementById("iframel").src=url;
        }
    </script>
</head>
<body>
<div>
    <p>请输入地址:</p>
    <p>
        <input type="text" id="url">
        <input type="button" value="提交" onclick="go()">
    </p>
</div>
<div>
    <iframe id="iframel" style="width: 100%;height: 500px"></iframe>
</div>
</body>
</html>
运行测试:在这里我输入的是百度的url地址,可以看到地址栏没有发生变化,展示了百度的页面
踩坑记录
如果我们的代码,及文件夹建包和引包没有问题,就是跳转不了页面,或者404,查看一下我们在spring容器配置文件中是否加上了我们的静态资源过滤
<mvc:default-servlet-handler/>
使用Ajax我们可以做
- 注册时,输入用户名自动检测用户是否已经存在。
- 登陆时,提示用户名密码错误
- 删除数据行时,将行ID发送到后台,后台在数据库中删除,数据库删除成功后,在页面DOM中将数据行也删除。
- …等等
jQuery ajax
Ajax的核心是XMLHttpRequest对象(XHR)。XHR为向服务器发送请求和解析服务器响应提供了接口。能够以异步方式从服务器获取新数据。
jQuery 提供多个与 AJAX 有关的方法。
通过 jQuery AJAX 方法,您能够使用 HTTP Get 和 HTTP Post 从远程服务器上请求文本、HTML、XML 或 JSON – 同时您能够把这些外部数据直接载入网页的被选元素中。
jQuery 不是生产者,而是大自然搬运工。
jQuery Ajax本质就是 XMLHttpRequest,对他进行了封装,方便调用!
jQuery.ajax(...)
      部分参数:
            url:请求地址
            type:请求方式,GET、POST(1.9.0之后用method)
        headers:请求头
            data:要发送的数据
    contentType:即将发送信息至服务器的内容编码类型(默认: "application/x-www-form-urlencoded; charset=UTF-8")
          async:是否异步
        timeout:设置请求超时时间(毫秒)
      beforeSend:发送请求前执行的函数(全局)
        complete:完成之后执行的回调函数(全局)
        success:成功之后执行的回调函数(全局)
          error:失败之后执行的回调函数(全局)
        accepts:通过请求头发送给服务器,告诉服务器当前客户端可接受的数据类型
        dataType:将服务器端返回的数据转换成指定类型
          "xml": 将服务器端返回的内容转换成xml格式
          "text": 将服务器端返回的内容转换成普通文本格式
          "html": 将服务器端返回的内容转换成普通文本格式,在插入DOM中时,如果包含JavaScript标签,则会尝试去执行。
        "script": 尝试将返回值当作JavaScript去执行,然后再将服务器端返回的内容转换成普通文本格式
          "json": 将服务器端返回的内容转换成相应的JavaScript对象
        "jsonp": JSONP 格式使用 JSONP 形式调用函数时,如 "myurl?callback=?" jQuery 将自动替换 ? 为正确的函数名,以执行回调函数
我们来个简单的测试,使用最原始的HttpServletResponse处理 , .最简单 , 最通用的来展示数据的回显
在我们的resources文件夹下创建applicationContext.xml(静态资源过滤一定要加上)
<?xml version="1.0" encoding="UTF-8"?>
<beans xmlns="http://www.springframework.org/schema/beans"
       xmlns:xsi="http://www.w3.org/2001/XMLSchema-instance"
       xmlns:context="http://www.springframework.org/schema/context"
       xmlns:mvc="http://www.springframework.org/schema/mvc"
       xsi:schemaLocation="http://www.springframework.org/schema/beans http://www.springframework.org/schema/beans/spring-beans.xsd http://www.springframework.org/schema/context https://www.springframework.org/schema/context/spring-context.xsd http://www.springframework.org/schema/mvc https://www.springframework.org/schema/mvc/spring-mvc.xsd">
    <!--自动扫描包,让指定包下的注解生效,由IOC容器统一管理-->
    <context:component-scan base-package="com.xsq.controller"/>
    <!--静态资源过滤-->
    <mvc:default-servlet-handler/>
    <!--JSON乱码问题配置-->
    <mvc:annotation-driven/>
    <!-- 视图解析器 -->
    <bean class="org.springframework.web.servlet.view.InternalResourceViewResolver" id="internalResourceViewResolver">
        <!-- 前缀 -->
        <property name="prefix" value="/WEB-INF/jsp/"/>
        <!-- 后缀 -->
        <property name="suffix" value=".jsp"/>
    </bean>
</beans>
创建一个pojo包,包下创建一个user实体类(这里我偷懒使用了lombok懒人插件,不太建议大家学习)
@Data
@AllArgsConstructor
@NoArgsConstructor
public class User {
    private String name;
    private int age;
    private String sex;
}
编写一个AjaxController类:
@RestController
public class AjaxController {

    @RequestMapping("/t1")
    public String test() {
        return "hello";
    }
    @RequestMapping("/a1")
    public void a1(String name, HttpServletResponse response) throws IOException {
        System.out.println("a1:param=>"+name);
        if ("erha".equals(name)){
            response.getWriter().print("true");
        }else {
            response.getWriter().print("false");
        }
    }
}
在我们的web文件夹下创建包statics/js,将我们的jQuery的库导入
在我们的视图页面导入jQuery包
<script src="${pageContext.request.contextPath}/statics/js/jquery-3.1.0.js"></script>
视图页面:
<%@ page contentType="text/html;charset=UTF-8" language="java" %>
<html>
<head>
    <title>$Title$</title>
    <script src="${pageContext.request.contextPath}/statics/js/jquery-3.1.0.js"></script>
    <script>
        function a() {
            $.post({
                url: "${pageContext.request.contextPath}/a1",
                data: {"name": $("#username").val()},
                success: function (data) {
                    alert(data);
                }
            })
        }

    </script>
</head>
<body>
<%--失去焦点的时候,发起请求到后台--%>
用户名:<input type="text" id="username" οnblur="a()">
</body>
</html>
运行测试:如果我们在文本框上传入的是erha,当文本框失去焦点的时候就会弹出ajax请求为true,反之则为false,表示测试成功
Springmvc实现
实体类user
@Data
@AllArgsConstructor
@NoArgsConstructor
public class User {

   private String name;
   private int age;
   private String sex;

}
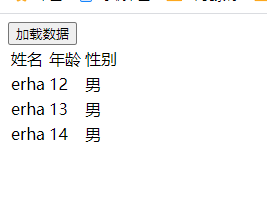
我们来获取一个集合对象,展示到前端页面
@RequestMapping("/a2")
public List<User> ajax2(){
   List<User> userList = new ArrayList<User>();
   //添加数据
   userList.add(new User("erha",12,"男"));
   userList.add(new User("erha",13,"男"));
   userList.add(new User("erha",14,"男"));

   return userList; //由于@RestController注解,将list转成json格式返回
}
前端页面
<%@ page contentType="text/html;charset=UTF-8" language="java" %>
<html>
<head>
    <title>test2</title>
</head>
<script src="${pageContext.request.contextPath}/statics/js/jquery-3.1.0.js"></script>
<script>
    $(function () {
        $("#btn").click(function () {
            $.post("${pageContext.request.contextPath}/a2",function (data) {
                // console.log(data);
                var html="";
                for (let i = 0;i<data.length;i++){
                    html +="<tr>"+
                            "<td>"+data[i].name + "</td>"+
                            "<td>"+data[i].age + "</td>"+
                            "<td>"+data[i].sex + "</td>"
                }
                $("#content").html(html);
            })
        })
    })
</script>
<body>
<input type="button" value="加载数据" id="btn">
<table>
    <tr>
        <td>姓名</td>
        <td>年龄</td>
        <td>性别</td>
    </tr>
    <tbody id="content">
    <%--数据:后台--%>
    </tbody>
</table>
</body>
</html>
测试结果:成功实现了数据回显!可以体会一下Ajax的好处!
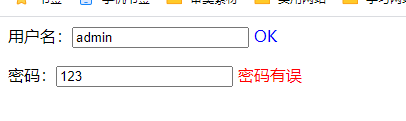
注册提示效果
我们再测试一个小Demo,思考一下我们平时注册时候,输入框后面的实时提示怎么做到的,如何优化
我们先写我们的controller类:
@RequestMapping("/a3")
public String a3(String name,String pwd){
    String msg="";
    if (name!=null){
        //admin 这些数据应该在数据库中查
        if ("admin".equals(name)){
            msg="OK";
        }
        else {
            msg="用户名有误";
        }
    }
    if (pwd!=null){
        //admin 这些数据应该在数据库中查
        if ("123456".equals(pwd)){
            msg="OK";
        }
        else {
            msg="密码有误";
        }
    }
    return msg; //由于@RestController注解,将msg转成json格式返回
}
视图页面(login.jsp):
<%@ page contentType="text/html;charset=UTF-8" language="java" %>
<html>
<head>
    <title>login</title>
    <script src="${pageContext.request.contextPath}/statics/js/jquery-3.1.0.js"></script>
    <script>
        function a1() {
            $.post({
                url:"${pageContext.request.contextPath}/a3",
                data:{"name":$("#name").val()},
                success:function (data) {
                    if (data.toString()=='OK'){
                        $("#userInfo").css("color","blue");
                    } else{
                        $("#userInfo").css("color","red");
                    }
                    $("#userInfo").html(data);
                }
            })
        }
        function a2() {
            $.post({
                url:"${pageContext.request.contextPath}/a3",
                data:{"pwd":$("#pwd").val()},
                success:function (data) {
                    if (data.toString()=='OK'){
                        $("#pwdInfo").css("color","blue");
                    } else{
                        $("#pwdInfo").css("color","red");
                    }
                    $("#pwdInfo").html(data);
                }
            })
        }
    </script>
</head>
<body>
<p>
    用户名:<input type="text" id="name" οnblur="a1()">
    <span id="userInfo"></span>
</p>
<p>
    密码:<input type="text" id="pwd" οnblur="a2()">
    <span id="pwdInfo"></span>
</p>
</body>
</html>
最后记得在我们的applicationContext.xml文件中处理json乱码问题
<!--JSON乱码问题配置-->
<mvc:annotation-driven>
    <mvc:message-converters register-defaults="true">
        <bean class="org.springframework.http.converter.StringHttpMessageConverter">
            <constructor-arg value="UTF-8"/>
        </bean>
        <bean class="org.springframework.http.converter.json.MappingJackson2HttpMessageConverter">
            <property name="objectMapper">
                <bean class="org.springframework.http.converter.json.Jackson2ObjectMapperFactoryBean">
                    <property name="failOnEmptyBeans" value="false"/>
                </bean>
            </property>
        </bean>
    </mvc:message-converters>
</mvc:annotation-driven>
运行测试:
拦截器
概述:
SpringMVC的处理器拦截器类似于Servlet开发中的过滤器Filter,用于对处理器进行预处理和后处理。开发者可以自己定义一些拦截器来实现特定的功能。
**过滤器与拦截器的区别:**拦截器是AOP思想的具体应用。
过滤器
- servlet规范中的一部分,任何java web工程都可以使用
- 在url-pattern中配置了/*之后,可以对所有要访问的资源进行拦截
拦截器
- 拦截器是SpringMVC框架自己的,只有使用了SpringMVC框架的工程才能使用
- 拦截器只会拦截访问的控制器方法, 如果访问的是jsp/html/css/image/js是不会进行拦截的
自定义拦截器
新建一个工程,添加web项目支持
在resources文件目录下创建spring配置容器文件(applicationContext.xml)
<?xml version="1.0" encoding="UTF-8"?>
<beans xmlns="http://www.springframework.org/schema/beans"
       xmlns:xsi="http://www.w3.org/2001/XMLSchema-instance"
       xmlns:context="http://www.springframework.org/schema/context"
       xmlns:mvc="http://www.springframework.org/schema/mvc"
       xsi:schemaLocation="http://www.springframework.org/schema/beans
        http://www.springframework.org/schema/beans/spring-beans.xsd
        http://www.springframework.org/schema/context
        https://www.springframework.org/schema/context/spring-context.xsd
        http://www.springframework.org/schema/mvc
        https://www.springframework.org/schema/mvc/spring-mvc.xsd">
    <!--自动扫描包,让指定包下的注解生效,由IOC容器统一管理-->
    <context:component-scan base-package="priv.xsq.controller"/>
    <!--静态资源过滤-->
    <mvc:default-servlet-handler/>
    <!--JSON乱码问题配置-->
    <mvc:annotation-driven>
        <mvc:message-converters register-defaults="true">
            <bean class="org.springframework.http.converter.StringHttpMessageConverter">
                <constructor-arg value="UTF-8"/>
            </bean>
            <bean class="org.springframework.http.converter.json.MappingJackson2HttpMessageConverter">
                <property name="objectMapper">
                    <bean class="org.springframework.http.converter.json.Jackson2ObjectMapperFactoryBean">
                        <property name="failOnEmptyBeans" value="false"/>
                    </bean>
                </property>
            </bean>
        </mvc:message-converters>
    </mvc:annotation-driven>
    <!-- 视图解析器 -->
    <bean class="org.springframework.web.servlet.view.InternalResourceViewResolver" id="internalResourceViewResolver">
        <!-- 前缀 -->
        <property name="prefix" value="/WEB-INF/jsp/"/>
        <!-- 后缀 -->
        <property name="suffix" value=".jsp"/>
    </bean>
</beans>
web.xml文件:
<?xml version="1.0" encoding="UTF-8"?>
<web-app xmlns="http://xmlns.jcp.org/xml/ns/javaee"
         xmlns:xsi="http://www.w3.org/2001/XMLSchema-instance"
         xsi:schemaLocation="http://xmlns.jcp.org/xml/ns/javaee http://xmlns.jcp.org/xml/ns/javaee/web-app_4_0.xsd"
         version="4.0">
    <servlet>
        <servlet-name>SpringMVC</servlet-name>
        <servlet-class>org.springframework.web.servlet.DispatcherServlet</servlet-class>
        <init-param>
            <param-name>contextConfigLocation</param-name>
            <param-value>classpath:applicationContext.xml</param-value>
        </init-param>
        <load-on-startup>1</load-on-startup>
    </servlet>
    <servlet-mapping>
        <servlet-name>SpringMVC</servlet-name>
        <url-pattern>/</url-pattern>
    </servlet-mapping>

    <filter>
        <filter-name>spring filter</filter-name>
        <filter-class>org.springframework.web.filter.CharacterEncodingFilter</filter-class>
        <init-param>
            <param-name>encoding</param-name>
            <param-value>utf-8</param-value>
        </init-param>
    </filter>
    <filter-mapping>
        <filter-name>spring filter</filter-name>
        <url-pattern>/*</url-pattern>
    </filter-mapping>
</web-app>
创建一个controller类:
@RestController
public class TestController {
    @GetMapping("/t1")
    public String test(){
        System.out.println("TestController==>test()执行了");
        return "OK";
    }
}
创建一个config包,包下创建一个拦截器类,继承HandInterceptor类,然而这里的方法不是和我们的过滤器一样强制重写的,可以为空,但是我们自定义的话就需要进行重写
public class MyInterceptor implements HandlerInterceptor {
    //return true:执行下一个拦截器,放行
    //return true:不执行下一个拦截器
    public boolean preHandle(HttpServletRequest request, HttpServletResponse response, Object handler) throws Exception {
        System.out.println("==========执行前===========");
        return true;
    }

    public void postHandle(HttpServletRequest request, HttpServletResponse response, Object handler, ModelAndView modelAndView) throws Exception {
        System.out.println("===========执行后===========");
    }

    public void afterCompletion(HttpServletRequest request, HttpServletResponse response, Object handler, Exception ex) throws Exception {
        System.out.println("===========清理=============");
    }
}
运行结果:
执行前=
TestController==>test()执行了
=执行后=
=清理===
运行页面:
使用拦截器进行登录判断验证
首先进入我们的跳转页面
<h1><a href="${pageContext.request.contextPath}/user/goLogin">登录页面</a></h1>
<h1><a href="${pageContext.request.contextPath}/user/main">首页</a></h1>
创建我们的登录页面(login.jsp)
<h1>登录页面</h1>
<form action="${pageContext.request.contextPath}/user/login" method="post">
    用户名:<input type="text" name="username"><br/>
    密码:<input type="password" name="password"><br/>
    <input type="submit" value="提交"><input type="reset" value="重置">
</form>
创建我们的控制类
@Controller
@RequestMapping("/user")
public class LoginController {
    //首页
    @RequestMapping("/main")
    public String main(){
        return "main";
    }
    //去登录页
    @RequestMapping("/goLogin")
    public String goLogin(){
        return "login";
    }
    @RequestMapping("/login")
    public String login(HttpSession httpSession,String username, String password){
        //将我们的值传入到session当中
        httpSession.setAttribute("username",username);
        return "main";
    }
    @RequestMapping("/goOut")
    public String goOut(HttpSession session){
        session.removeAttribute("username");
        return "main";
    }
}
main.jsp
欢迎您:
<%=session.getAttribute("username")%>
<h3>
    <a href="${pageContext.request.contextPath}/user/goOut">
        注销
    </a>
</h3>
创建一个拦截器类,继承HandlerInterceptor
public class LoginInterceptor implements HandlerInterceptor {
    public boolean preHandle(HttpServletRequest request, HttpServletResponse response, Object handler) throws Exception {
        HttpSession session = request.getSession();

        if (request.getRequestURI().contains("goLogin")){
            return true;
        }
        //登录页面也放行
        if (request.getRequestURI().contains("login")){
            return true;
        }
        //session中有值也放行
        if (session.getAttribute("username")!=null){
            return true;
        }
        //都不满足,回去重新登录
        request.getRequestDispatcher("/WEB-INF/jsp/login.jsp").forward(request,response);
        return false;
    }
}
在spring容器中配置我们的拦截器
<mvc:interceptors>
        <mvc:interceptor>
            <!--包括这个请求下面的所有的请求-->
            <mvc:mapping path="/user/**"/>
            <bean class="priv.xsq.config.LoginInterceptor"/>
        </mvc:interceptor>
    </mvc:interceptors>
文件上传与下载
简介
文件上传是项目开发中最常见的功能之一 ,springMVC 可以很好的支持文件上传,但是SpringMVC上下文中默认没有装配MultipartResolver,因此默认情况下其不能处理文件上传工作。如果想使用Spring的文件上传功能,则需要在上下文中配置MultipartResolver。
前端表单要求:为了能上传文件,必须将表单的method设置为POST,并将enctype设置为multipart/form-data。只有在这样的情况下,浏览器才会把用户选择的文件以二进制数据发送给服务器;
对表单中的 enctype 属性做个详细的说明:
- application/x-www=form-urlencoded:默认方式,只处理表单域中的 value 属性值,采用这种编码方式的表单会将表单域中的值处理成 URL 编码方式。
- multipart/form-data:这种编码方式会以二进制流的方式来处理表单数据,这种编码方式会把文件域指定文件的内容也封装到请求参数中,不会对字符编码。
- text/plain:除了把空格转换为 “+” 号外,其他字符都不做编码处理,这种方式适用直接通过表单发送邮件。
<form action="" enctype="multipart/form-data" method="post">
   <input type="file" name="file"/>
   <input type="submit">
</form>
一旦设置了enctype为multipart/form-data,浏览器即会采用二进制流的方式来处理表单数据,而对于文件上传的处理则涉及在服务器端解析原始的HTTP响应。在2003年,Apache Software Foundation发布了开源的Commons FileUpload组件,其很快成为Servlet/JSP程序员上传文件的最佳选择。
- Servlet3.0规范已经提供方法来处理文件上传,但这种上传需要在Servlet中完成。
- 而Spring MVC则提供了更简单的封装。
- Spring MVC为文件上传提供了直接的支持,这种支持是用即插即用的MultipartResolver实现的。
- Spring MVC使用Apache Commons FileUpload技术实现了一个MultipartResolver实现类:
- CommonsMultipartResolver。因此,SpringMVC的文件上传还需要依赖Apache Commons FileUpload的组件。
具体实现
文件上传
新建一个工程
导入驱动:
<dependencies>
    <!--文件上传-->
    <dependency>
        <groupId>commons-fileupload</groupId>
        <artifactId>commons-fileupload</artifactId>
        <version>1.3.3</version>
    </dependency>
    <!--servlet-api导入高版本的-->
    <dependency>
        <groupId>javax.servlet</groupId>
        <artifactId>javax.servlet-api</artifactId>
        <version>4.0.1</version>
    </dependency>
</dependencies>
applicationContext.xml(【注意!!!这个bena的id必须为:multipartResolver , 否则上传文件会报400的错误!在这里栽过坑,教训!】)
CommonsMultipartFile 的 常用方法:
- String getOriginalFilename():获取上传文件的原名
- InputStream getInputStream():获取文件流
- void transferTo(File dest):将上传文件保存到一个目录文件中
我们去实际测试一下
<?xml version="1.0" encoding="UTF-8"?>
<beans xmlns="http://www.springframework.org/schema/beans"
       xmlns:xsi="http://www.w3.org/2001/XMLSchema-instance"
       xmlns:context="http://www.springframework.org/schema/context"
       xmlns:mvc="http://www.springframework.org/schema/mvc"
       xsi:schemaLocation="http://www.springframework.org/schema/beans
        http://www.springframework.org/schema/beans/spring-beans.xsd
        http://www.springframework.org/schema/context
        https://www.springframework.org/schema/context/spring-context.xsd
        http://www.springframework.org/schema/mvc
        https://www.springframework.org/schema/mvc/spring-mvc.xsd">
    <!--自动扫描包,让指定包下的注解生效,由IOC容器统一管理-->
    <context:component-scan base-package="priv.xsq.controller"/>
    <!--静态资源过滤-->
    <mvc:default-servlet-handler/>
    <!--JSON乱码问题配置-->
    <mvc:annotation-driven>
        <mvc:message-converters register-defaults="true">
            <bean class="org.springframework.http.converter.StringHttpMessageConverter">
                <constructor-arg value="UTF-8"/>
            </bean>
            <bean class="org.springframework.http.converter.json.MappingJackson2HttpMessageConverter">
                <property name="objectMapper">
                    <bean class="org.springframework.http.converter.json.Jackson2ObjectMapperFactoryBean">
                        <property name="failOnEmptyBeans" value="false"/>
                    </bean>
                </property>
            </bean>
        </mvc:message-converters>
    </mvc:annotation-driven>
    <!-- 视图解析器 -->
    <bean class="org.springframework.web.servlet.view.InternalResourceViewResolver" id="internalResourceViewResolver">
        <!-- 前缀 -->
        <property name="prefix" value="/WEB-INF/jsp/"/>
        <!-- 后缀 -->
        <property name="suffix" value=".jsp"/>
    </bean>
    <!--文件上传配置-->
    <bean id="multipartResolver"  class="org.springframework.web.multipart.commons.CommonsMultipartResolver">
        <!-- 请求的编码格式,必须和jSP的pageEncoding属性一致,以便正确读取表单的内容,默认为ISO-8859-1 -->
        <property name="defaultEncoding" value="utf-8"/>
        <!-- 上传文件大小上限,单位为字节(10485760=10M) -->
        <property name="maxUploadSize" value="10485760"/>
        <property name="maxInMemorySize" value="40960"/>
    </bean>
</beans>
web.xml
<?xml version="1.0" encoding="UTF-8"?>
<web-app xmlns="http://xmlns.jcp.org/xml/ns/javaee"
         xmlns:xsi="http://www.w3.org/2001/XMLSchema-instance"
         xsi:schemaLocation="http://xmlns.jcp.org/xml/ns/javaee http://xmlns.jcp.org/xml/ns/javaee/web-app_4_0.xsd"
         version="4.0">
    <servlet>
        <servlet-name>SpringMVC</servlet-name>
        <servlet-class>org.springframework.web.servlet.DispatcherServlet</servlet-class>
        <init-param>
            <param-name>contextConfigLocation</param-name>
            <param-value>classpath:applicationContext.xml</param-value>
        </init-param>
        <load-on-startup>1</load-on-startup>
    </servlet>
    <servlet-mapping>
        <servlet-name>SpringMVC</servlet-name>
        <url-pattern>/</url-pattern>
    </servlet-mapping>

    <filter>
        <filter-name>spring filter</filter-name>
        <filter-class>org.springframework.web.filter.CharacterEncodingFilter</filter-class>
        <init-param>
            <param-name>encoding</param-name>
            <param-value>utf-8</param-value>
        </init-param>
    </filter>
    <filter-mapping>
        <filter-name>spring filter</filter-name>
        <url-pattern>/*</url-pattern>
    </filter-mapping>
</web-app>
index.jsp
<%@ page contentType="text/html;charset=UTF-8" language="java" %>
<html>
  <head>
    <title>$Title$</title>
  </head>
  <body>
 <form action="${pageContext.request.contextPath}/upload" enctype="multipart/form-data" method="post">
     <input type="file" name="file"/>
     <input type="submit" value="upload">
 </form>
 <a href="${pageContext.request.contextPath}/download">点击下载</a>
  </body>
</html>
文件上传的第一种方式:
@RestController
public class FileController {
    //@RequestParam("file") 将name=file控件得到的文件封装成CommonsMultipartFile 对象
    //批量上传CommonsMultipartFile则为数组即可
    @RequestMapping("/upload")
    public String fileUpload(@RequestParam("file") CommonsMultipartFile file , HttpServletRequest request) throws IOException {

        //获取文件名 : file.getOriginalFilename();
        String uploadFileName = file.getOriginalFilename();

        //如果文件名为空,直接回到首页!
        if ("".equals(uploadFileName)){
            return "redirect:/index.jsp";
        }
        System.out.println("上传文件名 : "+uploadFileName);

        //上传路径保存设置
        String path = request.getServletContext().getRealPath("/upload");
        //如果路径不存在,创建一个
        File realPath = new File(path);
        if (!realPath.exists()){
            realPath.mkdir();
        }
        System.out.println("上传文件保存地址:"+realPath);

        InputStream is = file.getInputStream(); //文件输入流
        OutputStream os = new FileOutputStream(new File(realPath,uploadFileName)); //文件输出流

        //读取写出
        int len=0;
        byte[] buffer = new byte[1024];
        while ((len=is.read(buffer))!=-1){
            os.write(buffer,0,len);
            os.flush();
        }
        os.close();
        is.close();
        return "redirect:/index.jsp";
    }
第二种方式
/*
 * 采用file.Transto 来保存上传的文件
 */
@RequestMapping("/upload2")
public String  fileUpload2(@RequestParam("file") CommonsMultipartFile file, HttpServletRequest request) throws IOException {

    //上传路径保存设置
    String path = request.getServletContext().getRealPath("/upload");
    File realPath = new File(path);
    if (!realPath.exists()){
        realPath.mkdir();
    }
    //上传文件地址
    System.out.println("上传文件保存地址:"+realPath);

    //通过CommonsMultipartFile的方法直接写文件(注意这个时候)
    file.transferTo(new File(realPath +"/"+ file.getOriginalFilename()));

    return "redirect:/index.jsp";
}
文件下载
文件下载步骤:
1、设置 response 响应头
2、读取文件 – InputStream
3、写出文件 – OutputStream
4、执行操作
5、关闭流 (先开后关)
文件下载:先在我们的web下面新建一个statics的包,包下放入我们要下载的图片
//文件下载
@RequestMapping(value = "/download")
public String downloads(HttpServletResponse response , HttpServletRequest request) throws Exception{
    //要下载的图片地址
    System.out.println("download()");
    String  path = request.getServletContext().getRealPath("/upload");
    String  fileName = "1.png";
    //1、设置response 响应头
    response.reset(); //设置页面不缓存,清空buffer
    response.setCharacterEncoding("UTF-8"); //字符编码
    response.setContentType("multipart/form-data"); //二进制传输数据
    //设置响应头
    response.setHeader("Content-Disposition",
            "attachment;fileName="+ URLEncoder.encode(fileName, "UTF-8"));
    File file = new File(path,fileName);
    //2、 读取文件--输入流
    InputStream input=new FileInputStream(file);
    //3、 写出文件--输出流
    OutputStream out = response.getOutputStream();

    byte[] buff =new byte[1024];
    int index=0;
    //4、执行 写出操作
    while((index= input.read(buff))!= -1){
        out.write(buff, 0, index);
        out.flush();
    }
    out.close();
    input.close();

    return "OK";
}


 8991
8991


 被折叠的 条评论
为什么被折叠?
被折叠的 条评论
为什么被折叠?
 到【灌水乐园】发言


