


大家好~ 我是前端uio,本文主要使用 CSS 实现圆环流水灯、跑马灯、加载动画效果,以及介绍了常见的几种 transform 的变形函数。有什么疑问都欢迎私聊或者在评论区留言。如果需要开发web网页或者微信小程序都可以找我私聊,我会尽可能回答我了解的内容。
一、最终效果展示
圆环流水灯
二、基本步骤
1.创建圆环上的圆点,自定义圆环上分布的圆点数量(圆点分布的疏密程度)本文使用的数量为50
        <div class="ringBox">
            <div v-for="(item, index) in 50" :key="index" class="circle"></div>
        </div>
.ringBox {
margin: 80px;
position: relative;
width: 400px;
height: 400px;
background-color: pink;
}
.circle {
position: absolute;
top: 50%;
left: 50%;
width: 10px;
height: 10px;
background-color: red;
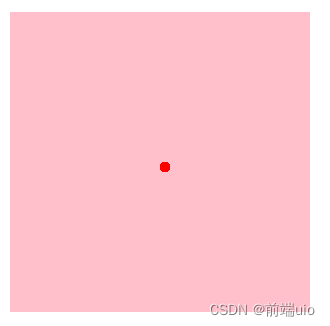
}为了方便看到效果,这里给ringBox背景设置为粉色,如下图所示,此时所有的圆点都在class为ringBox的元素的中心点上,以便设置旋转点。也可以通过调试助手查看圆点元素的位置情况。
2 .设置CSS变量(CSS自定义属性)
-
这里使用 ‘ - - i ’ 作为CSS变量,将序号index传递给该变量,从而可以使用CSS变量进行旋转操作。
-
通过 transform-origin 属性设置圆心为旋转点。
由于 transform 的变形函数是进行矩阵的相乘运算的,所以实际上复合变换效果是从右到左应用的, translate(150px) 表示在水平方向上向右移动150像素,rotate(calc(var(--i) * calc(360deg / 50))) 表示将角度平均分成50份,与 index 进行相乘,即可得到对应的旋转角度,从而确定分布位置。
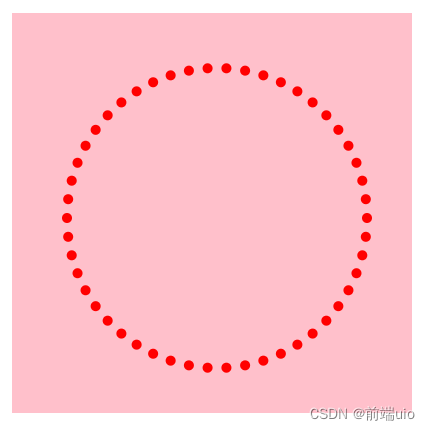
        <div class="ringBox">
            <div v-for="(item, index) in 50" :key="index" class="circle" :style="{ '--i': index }"></div>
        </div>
.ringBox {
margin: 80px;
position: relative;
width: 400px;
height: 400px;
background-color: pink;
}
.circle {
position: absolute;
top: 50%;
left: 50%;
width: 10px;
height: 10px;
background-color: red;
border-radius: 50%;
transform-origin: center center;
transform: rotate(calc(var(--i) * calc(360deg / 50))) translate(150px) ;
}-
transform-origin属性
i)介绍
transform-origin 属性用于指定元素变换的中心点,这个中心点可以是二维的也可以是三维的。当你对一个元素应用变换(如旋转、缩放、倾斜等)时,变换会围绕这个中心点进行。
ii)使用
transform-origin属性可以接受一个、两个或三个值,分别代表水平偏移、垂直偏移和深度偏移。这些值可以是长度单位(如像素、百分比),也可以是关键词(如 left、center、right、top、bottom)。
① 单个值:表示水平偏移,垂直偏移默认为 center。
② 两个值:第一个值表示水平偏移,第二个值表示垂直偏移。
③ 三个值:前两个值表示水平和垂直偏移,第三个值表示深度偏移。
-
transform 属性
i)介绍
transform 属性是CSS3中用于对元素进行二维或三维变换的属性。它可以包含一个或多个变换函数,每个函数代表一种变换操作,如旋转、缩放、倾斜或位移。这些变换函数可以单独使用,也可以组合使用,以创造出复杂的视觉效果。
ii)常见的变形函数
① translate():用于在水平或垂直方向上移动元素。
② rotate():用于围绕元素的中心点旋转元素。
③ scale():用于放大或缩小元素。
④ skew():用于沿水平或垂直方向倾斜元素。
⑤ matrix():用于应用自定义的2D变换矩阵。
3.添加动画效果
-
使用 keyframes 定义关键帧
@keyframes colorChange {
    0% {
        background: green;
    }
    100% {
        background: #fff;
    }
} @keyframes 是CSS中的一个规则,用于定义动画的关键帧。通过 @keyframes,可以指定动画在特定时间点的样式,从而创建复杂的动画效果。
在 colorChange 动画开始时(0%),元素背景颜色为绿色。
在 colorChange 动画结束时(100%),元素背景颜色为白色。
-
使用 animation 应用该动画
    animation: colorChange 2.5s infinite;
animation-delay: calc(var(--i) * 0.05s); i)animation 属性,是 CSS 中用于同时设置多个动画相关属性的简写属性。本文设置了以下几个子属性:
① animation-name:指定了应用到元素上的动画名称,这里是 colorChange。这意味着之前定义的 @keyframes colorChange {...} 规则将被用于这个动画。
② animation-duration:定义了动画完成一个周期所需的时间,这里是 2.5s(2.5秒)。这意味着动画的每一轮循环都将持续2.5秒。
③ animation-iteration-count:指定动画循环的次数,infinite 意味着动画将无限次地重复播放。
ii)animation-delay 属性,定义了动画开始前的延迟时间。这里使用了 CSS 的计算函数calc() 和自定义变量 - - i 来动态计算延迟时间 。
iii)注意:请确保 var(--i) * 0.05s = 2.5s ,即其中的数值都可以改变,但是需要确保在动画周期内所有圆形恰好完成动画,否则动画效果不能达到预期,感兴趣的话,也可自行调整查看效果。
三、主要代码
<template>
    <div>
        <div class="ringBox">
            <div v-for="(item, index) in 50" :key="index" class="circle" :style="{ '--i': index }"></div>
        </div>
    </div>
</template>
<style scoped>
.ringBox {
    margin: 80px;
    position: relative;
    width: 400px;
    height: 400px;
}

.circle {
    position: absolute;
    top: 50%;
    left: 50%;
    width: 10px;
    height: 10px;
    background-color: #fff;
    border-radius: 50%;
    transform-origin: center center;
    transform: rotate(calc(var(--i) * calc(360deg / 50))) translate(150px) ;
    animation: colorChange 2.5s infinite;
    animation-delay: calc(var(--i) * 0.05s);
}
@keyframes colorChange {
    0% {
        background: green;
    }
    100% {
        background: #fff;
    }
}
</style>
四、拓展与练习
1.圆环页面加载动画
-
最终效果
圆环加载效果
-
实现关键:关键帧动画
在动画开始时,将圆形变大,利用人眼视觉的滞后性,即可实现圆环加载效果。
@keyframes colorChange {
    0% {
        background: green;
        width: 30px;
        height: 30px;
    }
    100% {
        background: #fff;

    }
}-
代码实现
<template>
    <div>
        <div class="ringBox">
            <div v-for="(item, index) in 20" :key="index" class="circle" :style="{ '--i': index }"></div>
        </div>
    </div>
</template>
<style scoped>


.ringBox {
    margin: 80px;
    position: relative;
    width: 400px;
    height: 400px;
}

.circle {
    position: absolute;
    top: 50%;
    left: 50%;
    width: 10px;
    height: 10px;
    background-color: #fff;
    border-radius: 50%;
    transform-origin: center center;
    transform: rotate(calc(var(--i) * calc(360deg / 20))) translate(150px) ;
    animation: colorChange 2s infinite;
    animation-delay: calc(var(--i) * 0.1s);
}
@keyframes colorChange {
    0% {
        background: green;
        width: 30px;
        height: 30px;
    }
    100% {
        background: #fff;

    }
}
</style>
2.圆环颜色渐变效果
-
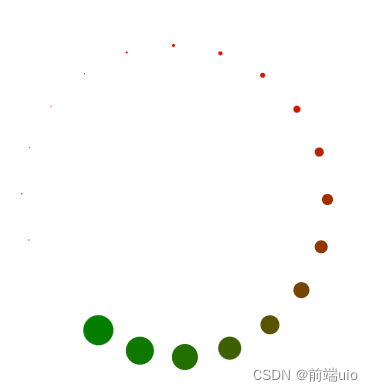
最终效果
-
实现关键:关键帧动画
由一个颜色渐变到另一个颜色,可多设置几个关键帧。
@keyframes colorChange {
    0% {
        background: green;
        width: 30px;
        height: 30px;
    }
    100% {
        background: red;
        width: 0px;
        height: 0px;

    }
}-
代码实现
<template>
    <div>
        <div class="ringBox">
            <div v-for="(item, index) in 20" :key="index" class="circle" :style="{ '--i': index }"></div>
        </div>
    </div>
</template>
<style scoped>
.ringBox {
    margin: 80px;
    position: relative;
    width: 400px;
    height: 400px;
}

.circle {
    position: absolute;
    top: 50%;
    left: 50%;
    width: 10px;
    height: 10px;
    background-color: #fff;
    border-radius: 50%;
    transform-origin: center center;
    transform: rotate(calc(var(--i) * calc(360deg / 20))) translate(150px) ;
    animation: colorChange 2s infinite;
    animation-delay: calc(var(--i) * 0.1s);
}
@keyframes colorChange {
    0% {
        background: green;
        width: 30px;
        height: 30px;
    }
    100% {
        background: red;
        width: 0px;
        height: 0px;

    }
}
</style>


 65
65


 被折叠的 条评论
为什么被折叠?
被折叠的 条评论
为什么被折叠?
 到【灌水乐园】发言


