


微信小程序~整合springboot
登录封装
整合微信小程序.我们得先去看微信小程序的文档
我们先来看登录的流程是什么
登录流程时序

首先,我们小程序要wx.login 获取code,这个code是临时登录凭证code,一次只能用一次
,这个是前端的代码,我这里也就不赘述了,其实很简单的,就是调用这个方法wx.login(),
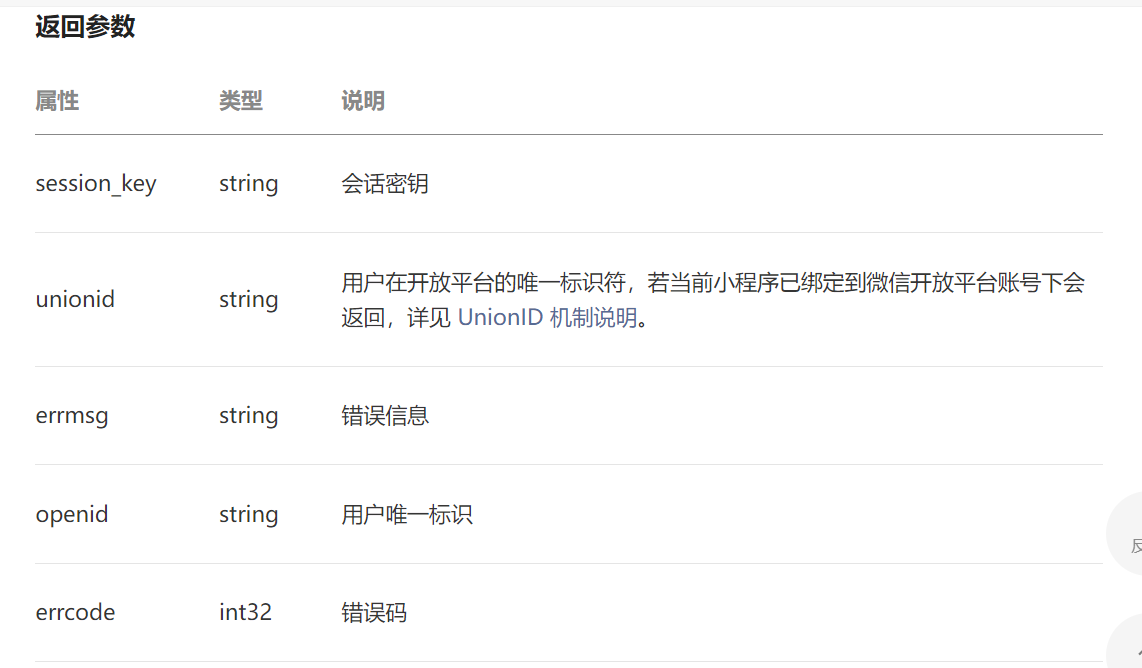
然后带着这个code发送到我们后端的服务器,再后端服务器中,我们要像微信的接口api发送请求,获得session_id + openid
比较重要的就是这个openid,openid是用户的唯一标识,反而这个session_id不太中重要,因为我们这里用到是token,返回请求之后,我们要生成token返回给前端,前端其他的请求要发过来的化,就要带着这个token
整体的逻辑很简单,前端给到后端,code,后端带着这个code去请求wx的api,返回用户的唯一id,openid,然后,我们得到openid之后,生成token,最后返回给前端
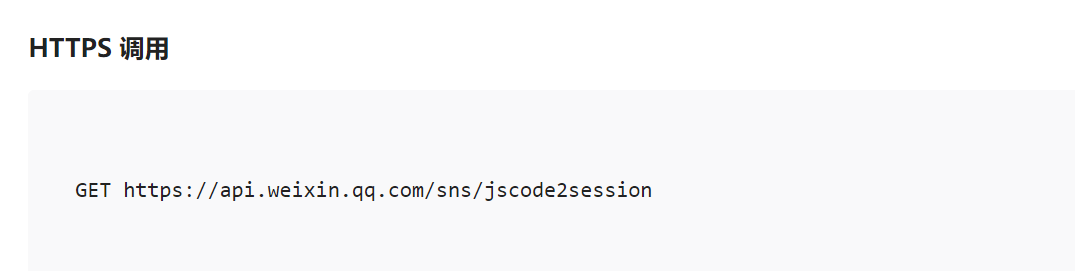
wx 登录api
然后是这里的向微信发送的api的情况
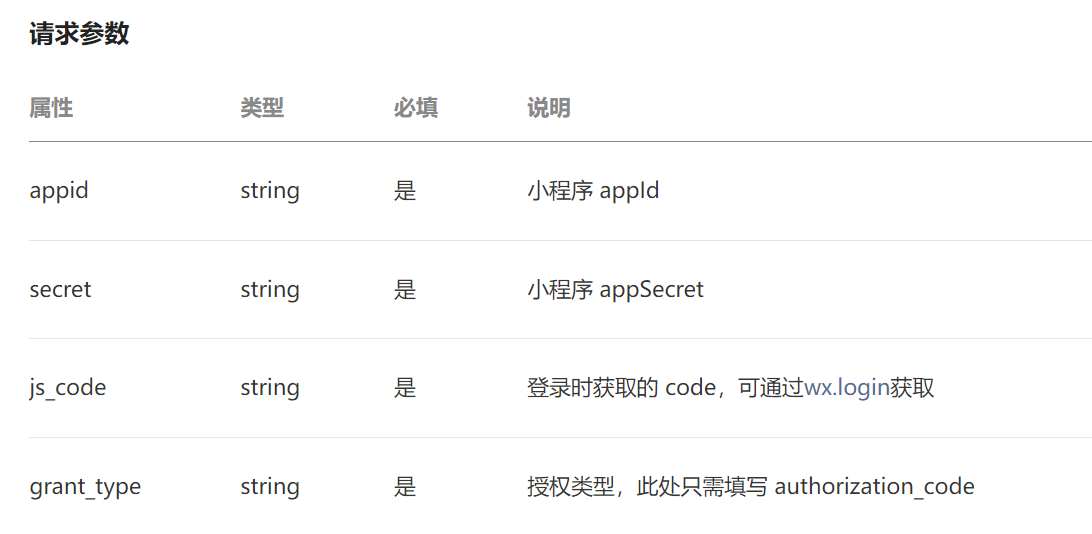
我们来看这里的几个请求参数
我们先来看,已经有的,这里的js_code 就是我们从前端得到的code,;临时登录凭证
然后第四个参数是grant_type是固定参数 authorization_code
然后有两个参数分别是appid,secret这个我们得再小程序里边拿到
位置再如下
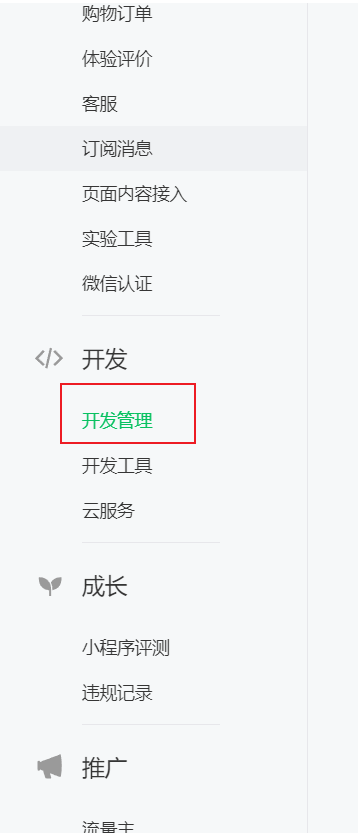
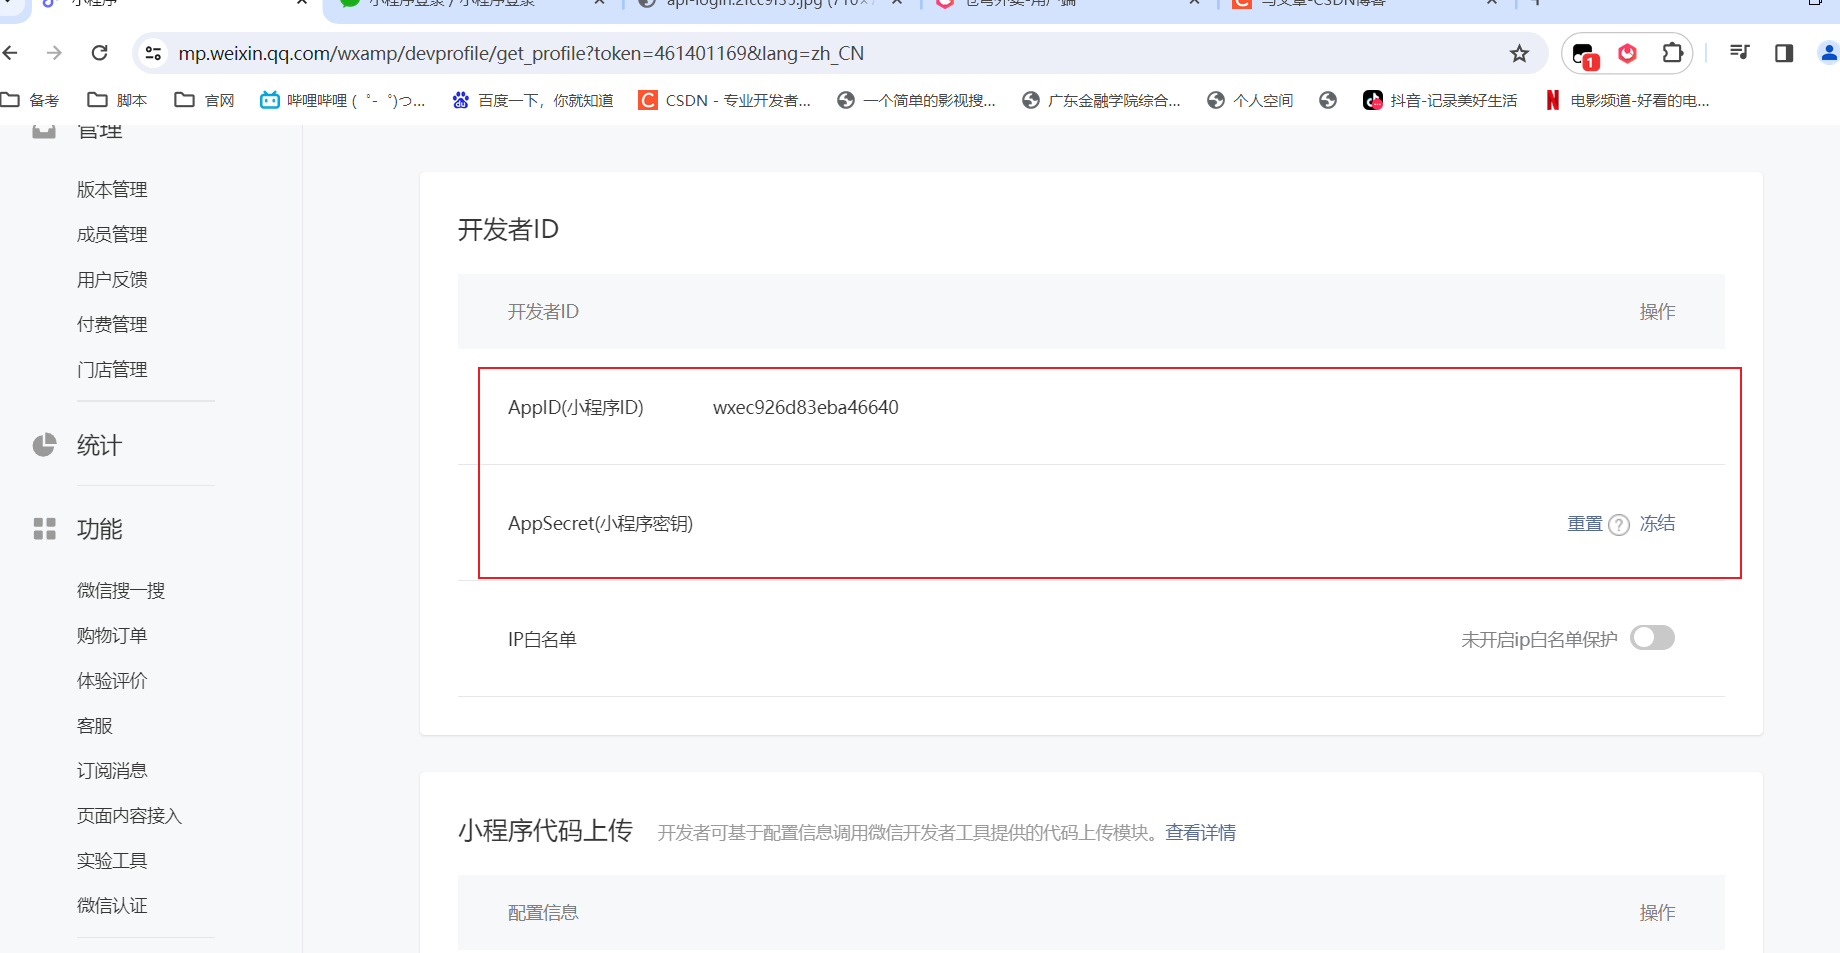
这两个东西都在这里
代码准备工作
httpClient的封装
第一,因为涉及到了要发请求,我们得有发请求的组件,我这里用到的是httpClient,我另外也写了一个httpClient的封装,另外,我另外一个博客也有写,可以去看,我这里就贴出来,httpClient的工具类
/**
 * Http工具类
 */
public class HttpClientUtil {

    static final  int TIMEOUT_MSEC = 5 * 1000;

    /**
     * 发送GET方式请求
     * @param url
     * @param paramMap
     * @return
     */
    public static String doGet(String url,Map<String,String> paramMap){
        // 创建Httpclient对象
        CloseableHttpClient httpClient = HttpClients.createDefault();

        String result = "";
        CloseableHttpResponse response = null;

        try{
            URIBuilder builder = new URIBuilder(url);
            //填入参数
            if(paramMap != null){
                for (String key : paramMap.keySet()) {
                    builder.addParameter(key,paramMap.get(key));
                }
            }
            URI uri = builder.build();

            //创建GET请求
            HttpGet httpGet = new HttpGet(uri);

            //发送请求
            response = httpClient.execute(httpGet);

            //判断响应状态
            if(response.getStatusLine().getStatusCode() == 200){
                result = EntityUtils.toString(response.getEntity(),"UTF-8");
            }
        }catch (Exception e){
            e.printStackTrace();
        }finally {
            try {
                response.close();
                httpClient.close();
            } catch (IOException e) {
                e.printStackTrace();
            }
        }

        return result;
    }

    /**
     * 发送POST方式请求
     * @param url
     * @param paramMap
     * @return
     * @throws IOException
     */
    public static String doPost(String url, Map<String, String> paramMap) throws IOException {
        // 创建Httpclient对象
        CloseableHttpClient httpClient = HttpClients.createDefault();
        CloseableHttpResponse response = null;
        String resultString = "";

        try {
            // 创建Http Post请求
            HttpPost httpPost = new HttpPost(url);

            // 创建参数列表
            if (paramMap != null) {
                List<NameValuePair> paramList = new ArrayList();
                for (Map.Entry<String, String> param : paramMap.entrySet()) {
                    paramList.add(new BasicNameValuePair(param.getKey(), param.getValue()));
                }
                // 模拟表单
                UrlEncodedFormEntity entity = new UrlEncodedFormEntity(paramList);
                httpPost.setEntity(entity);
            }

            httpPost.setConfig(builderRequestConfig());

            // 执行http请求
            response = httpClient.execute(httpPost);

            resultString = EntityUtils.toString(response.getEntity(), "UTF-8");
        } catch (Exception e) {
            throw e;
        } finally {
            try {
                response.close();
            } catch (IOException e) {
                e.printStackTrace();
            }
        }

        return resultString;
    }

    /**
     * 发送POST方式请求
     * @param url
     * @param paramMap
     * @return
     * @throws IOException
     */
    public static String doPost4Json(String url, Map<String, String> paramMap) throws IOException {
        // 创建Httpclient对象
        CloseableHttpClient httpClient = HttpClients.createDefault();
        CloseableHttpResponse response = null;
        String resultString = "";

        try {
            // 创建Http Post请求
            HttpPost httpPost = new HttpPost(url);

            if (paramMap != null) {
                //构造json格式数据
                JSONObject jsonObject = new JSONObject();
                for (Map.Entry<String, String> param : paramMap.entrySet()) {
                    jsonObject.put(param.getKey(),param.getValue());
                }
                StringEntity entity = new StringEntity(jsonObject.toString(),"utf-8");
                //设置请求编码
                entity.setContentEncoding("utf-8");
                //设置数据类型
                entity.setContentType("application/json");
                httpPost.setEntity(entity);
            }

            httpPost.setConfig(builderRequestConfig());

            // 执行http请求
            response = httpClient.execute(httpPost);

            resultString = EntityUtils.toString(response.getEntity(), "UTF-8");
        } catch (Exception e) {
            throw e;
        } finally {
            try {
                response.close();
            } catch (IOException e) {
                e.printStackTrace();
            }
        }

        return resultString;
    }
    private static RequestConfig builderRequestConfig() {
        return RequestConfig.custom()
                .setConnectTimeout(TIMEOUT_MSEC)
                .setConnectionRequestTimeout(TIMEOUT_MSEC)
                .setSocketTimeout(TIMEOUT_MSEC).build();
    }

}
属性的设置
首先是微信相关的属性的设置
@Component
@ConfigurationProperties(prefix = "sky.wechat")
@Data
public class WeChatProperties {

    private String appid; //小程序的appid
    private String secret; //小程序的秘钥
    private String mchid; //商户号
    private String mchSerialNo; //商户API证书的证书序列号
    private String privateKeyFilePath; //商户私钥文件
    private String apiV3Key; //证书解密的密钥
    private String weChatPayCertFilePath; //平台证书
    private String notifyUrl; //支付成功的回调地址
    private String refundNotifyUrl; //退款成功的回调地址

}
然后是这里的jwt token相关的属性,我这里因为是后端和小程序端是分开的,所以我这里也得写
@Component
@ConfigurationProperties(prefix = "sky.jwt")
@Data
public class JwtProperties {

    /**
     * 管理端员工生成jwt令牌相关配置
     */
    private String adminSecretKey;
    private long adminTtl;
    private String adminTokenName;

    /**
     * 用户端微信用户生成jwt令牌相关配置
     */
    private String userSecretKey;
    private long userTtl;
    private String userTokenName;

}
分别在yml中进行设置
sky:
  jwt:
    user-secret-key: itheima
    user-ttl: 7200000
    user-token-name: authentication
  wechat:
    appid: ${sky.wechat.appid}
    secret: ${sky.wechat.secret}
我这里做了一个解耦,这里是主yml,真正的配置我写到了dev.yml中
sky:
  wechat:
    appid: 自己的appid
    secret: 自己的密码
这里就差不多准备工作做完了
核心代码
/**
 * @author jjking
 * @date 2024-01-25 21:10
 */
@RestController
@RequestMapping("/user/user")
@Slf4j
@Api(tags = "用户相关")
public class UserController {

    @Autowired
    private UserService userService;

    @Autowired
    private JwtProperties jwtProperties;

    /**
     * 微信登录
     * @param userLoginDTO
     * @return
     */
    @PostMapping("/login")
    @ApiOperation("微信登录")
    public Result<UserLoginVO> login(@RequestBody UserLoginDTO userLoginDTO) {
        log.info("微信用户登录: {}",userLoginDTO.getCode());


        //获得用户信息
        User user = userService.wxLogin(userLoginDTO);


        //生成jwt令牌
        Map<String, Object> claims = new HashMap<>();
        claims.put(JwtClaimsConstant.USER_ID,user.getId());
        String token = JwtUtil.createJWT(jwtProperties.getUserSecretKey(), jwtProperties.getUserTtl(), claims);

        UserLoginVO userLoginVO = UserLoginVO.builder()
                .id(user.getId())
                .openid(user.getOpenid())
                .token(token)
                .build();
        return Result.success(userLoginVO);
    }
}
这里真正的核心代码在userService.wxLogin(userLoginDTO);里边,我们这里外边就是获得openid,然后生成jwt token
这里的jwt Util这里我也贴出来
public class JwtUtil {
    /**
     * 生成jwt
     * 使用Hs256算法, 私匙使用固定秘钥
     *
     * @param secretKey jwt秘钥
     * @param ttlMillis jwt过期时间(毫秒)
     * @param claims    设置的信息
     * @return
     */
    public static String createJWT(String secretKey, long ttlMillis, Map<String, Object> claims) {
        // 指定签名的时候使用的签名算法,也就是header那部分
        SignatureAlgorithm signatureAlgorithm = SignatureAlgorithm.HS256;

        // 生成JWT的时间
        long expMillis = System.currentTimeMillis() + ttlMillis;
        Date exp = new Date(expMillis);

        // 设置jwt的body
        JwtBuilder builder = Jwts.builder()
                // 如果有私有声明,一定要先设置这个自己创建的私有的声明,这个是给builder的claim赋值,一旦写在标准的声明赋值之后,就是覆盖了那些标准的声明的
                .setClaims(claims)
                // 设置签名使用的签名算法和签名使用的秘钥
                .signWith(signatureAlgorithm, secretKey.getBytes(StandardCharsets.UTF_8))
                // 设置过期时间
                .setExpiration(exp);

        return builder.compact();
    }

    /**
     * Token解密
     *
     * @param secretKey jwt秘钥 此秘钥一定要保留好在服务端, 不能暴露出去, 否则sign就可以被伪造, 如果对接多个客户端建议改造成多个
     * @param token     加密后的token
     * @return
     */
    public static Claims parseJWT(String secretKey, String token) {
        // 得到DefaultJwtParser
        Claims claims = Jwts.parser()
                // 设置签名的秘钥
                .setSigningKey(secretKey.getBytes(StandardCharsets.UTF_8))
                // 设置需要解析的jwt
                .parseClaimsJws(token).getBody();
        return claims;
    }

}
最核心的代码
我门在service中的写的这个方法就是最核心的代码
/**
 * 用户信息(User)表服务实现类
 *
 * @author makejava
 * @since 2024-01-25 21:06:35
 */
@Service("userService")
public class UserServiceImpl extends ServiceImpl<UserMapper, User> implements UserService {

    @Override
    public User wxLogin(UserLoginDTO userLoginDTO) {
        String openid = getOpenId(userLoginDTO.getCode());

        //如果返回的是空,说明没有这个用固话,表示登录失败,抛出业务异常
        if(StrUtil.isBlankOrUndefined(openid)) {
            //返回登录失败
            throw new LoginFailedException(MessageConstant.LOGIN_FAILED);
        }

        //查数据库,中是否有这个用户
        LambdaQueryWrapper<User> wrapper = new LambdaQueryWrapper<>();
        wrapper.eq(User::getOpenid,openid);
        User user = getOne(wrapper);

        //如果当前用户是新用户,那么就要存入进入
        if(Objects.isNull(user)) {
            user = User.builder().openid(openid).build();
            save(user);
        }

        //如果不是直接返回
        return user;
    }

    //wx登录api
    public static final String WX_LOGIN = "https://api.weixin.qq.com/sns/jscode2session";

    @Autowired
    private WeChatProperties weChatProperties;

    public String getOpenId(String code) {
        Map<String, String> paramMap = new HashMap<>();
        paramMap.put("appid",weChatProperties.getAppid());
        paramMap.put("secret",weChatProperties.getSecret());
        paramMap.put("js_code",code);
        paramMap.put("grant_type","authorization_code");
        //发送请求
        String json = HttpClientUtil.doGet(WX_LOGIN, paramMap);
        //解码json数据
        JSONObject jsonObject = JSON.parseObject(json);
        String openid = jsonObject.getString("openid");
        return openid;
    }
}
拦截器设置
/**
 * jwt令牌校验的拦截器
 */
@Component
@Slf4j
public class JwtTokenUserInterceptor implements HandlerInterceptor {

    @Autowired
    private JwtProperties jwtProperties;

    /**
     * 校验jwt
     *
     * @param request
     * @param response
     * @param handler
     * @return
     * @throws Exception
     */
    public boolean preHandle(HttpServletRequest request, HttpServletResponse response, Object handler) throws Exception {
        //判断当前拦截到的是Controller的方法还是其他资源
        if (!(handler instanceof HandlerMethod)) {
            //当前拦截到的不是动态方法,直接放行
            return true;
        }

        //1、从请求头中获取令牌
        String token = request.getHeader(jwtProperties.getUserTokenName());

        //2、校验令牌
        try {
            log.info("jwt校验:{}", token);
            Claims claims = JwtUtil.parseJWT(jwtProperties.getUserSecretKey(), token);
            Long userId = Long.valueOf(claims.get(JwtClaimsConstant.USER_ID).toString());
            log.info("当前用户id:", userId);

            //设置当前用户id,到ThreadLocal中
            BaseContext.setCurrentId(userId);
            //3、通过,放行
            return true;
        } catch (Exception ex) {
            //4、不通过,响应401状态码
            response.setStatus(401);
            return false;
        }
    }
}
我们一定得写这个拦截器,要实现校验jwt的功能,
写了这个配置类,我们还得把它写道mvc的配置里边
/**
 * 注册自定义拦截器
 *
 * @param registry
 */
protected void addInterceptors(InterceptorRegistry registry) {
    log.info("开始注册自定义拦截器...");
    //添加后端蓝机器
    registry.addInterceptor(jwtTokenAdminInterceptor)
            .addPathPatterns("/admin/**")
            .excludePathPatterns("/admin/employee/login");

    //添加用户拦截器
    registry.addInterceptor(jwtTokenUserInterceptor)
            .addPathPatterns("/user/**")
            .excludePathPatterns("/user/user/login")
            .excludePathPatterns("/user/shop/status");
}
这里的代码就是我刚刚说的流程差不多
测试
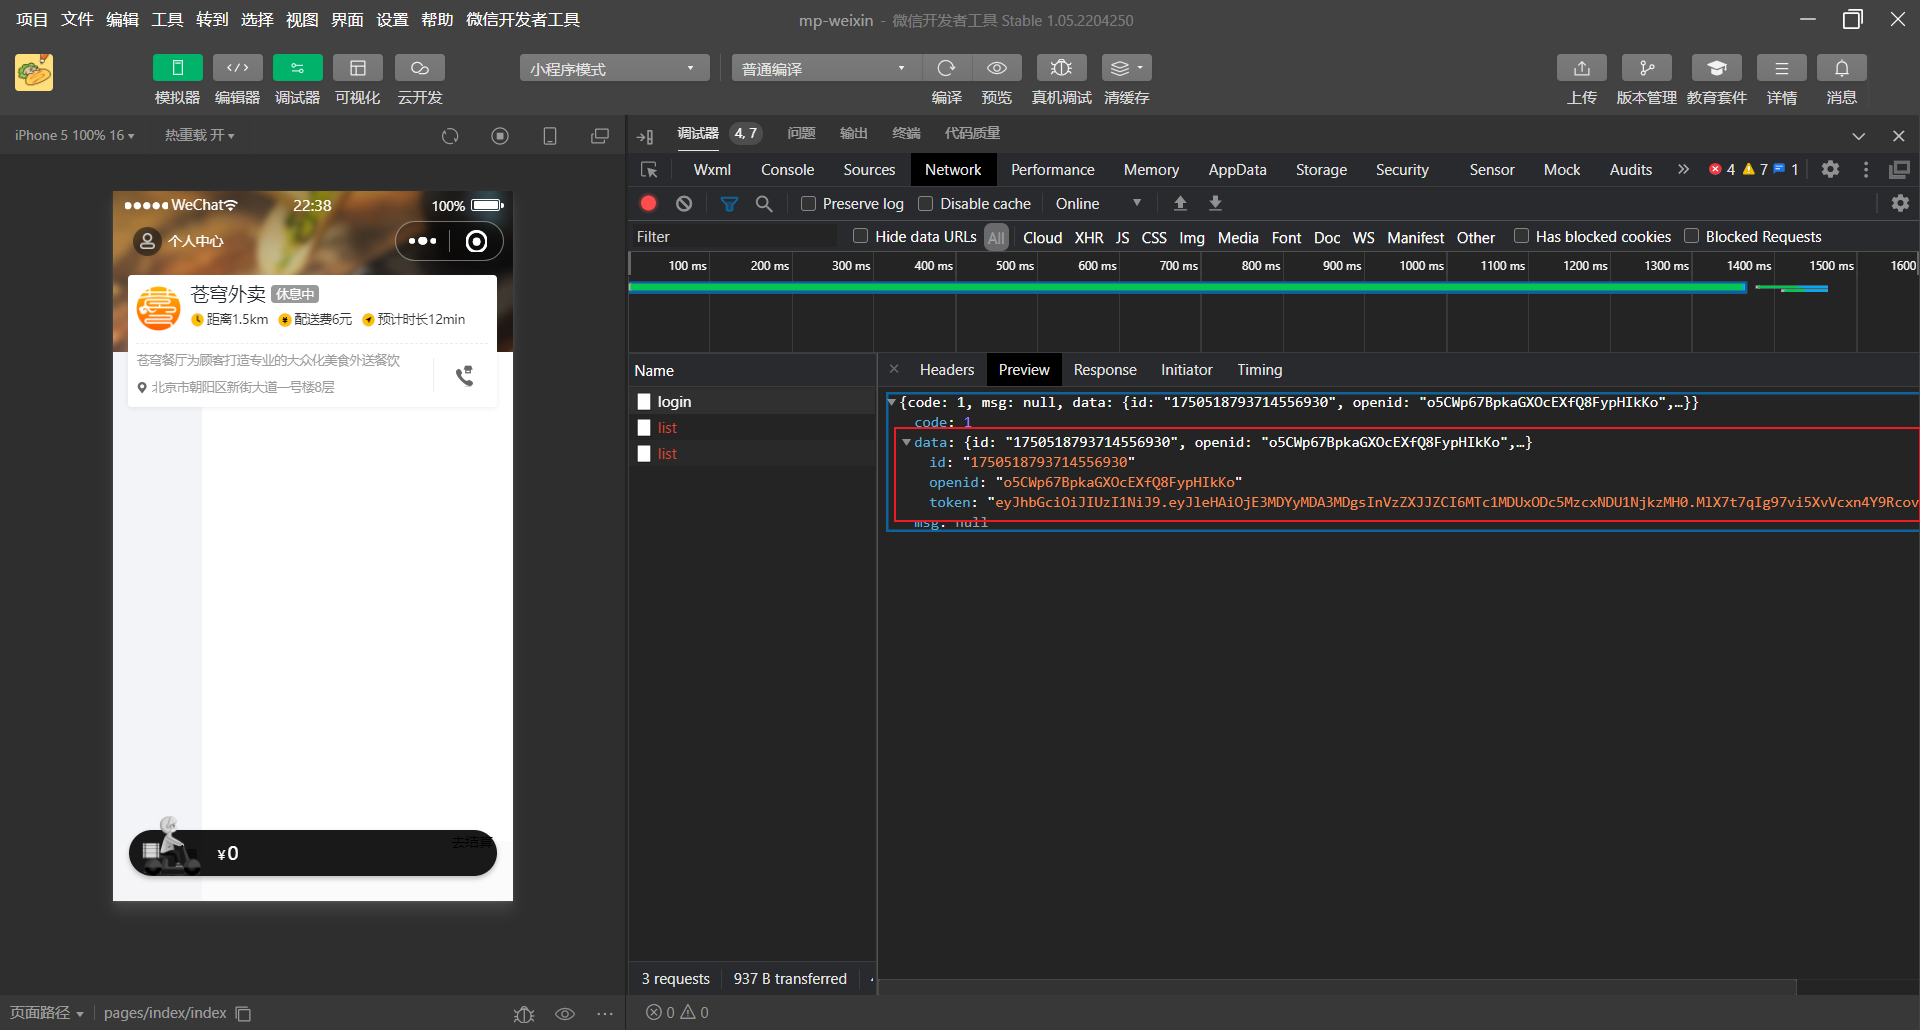
最后我们能得到token就没问题


 1946
1946


 被折叠的 条评论
为什么被折叠?
被折叠的 条评论
为什么被折叠?
 到【灌水乐园】发言


