


站点的安全管理
实验准备
软件:VMware Workstation Pro
虚拟机:Red Hat Enterprise Linux 7 服务器,windows客户端
网络模式:仅主机模式
实验背景
学院内部有一台FTP 和Web 服务器,其功能主要是维护学院的网站,内容包括上传文件、创建目录、更新网页等。学院的这些维护工作是委派给计算机系学习部的学生进行的,现需要对该服务器进行一定的安全设置,实现对站点的安全管理。

配置环境
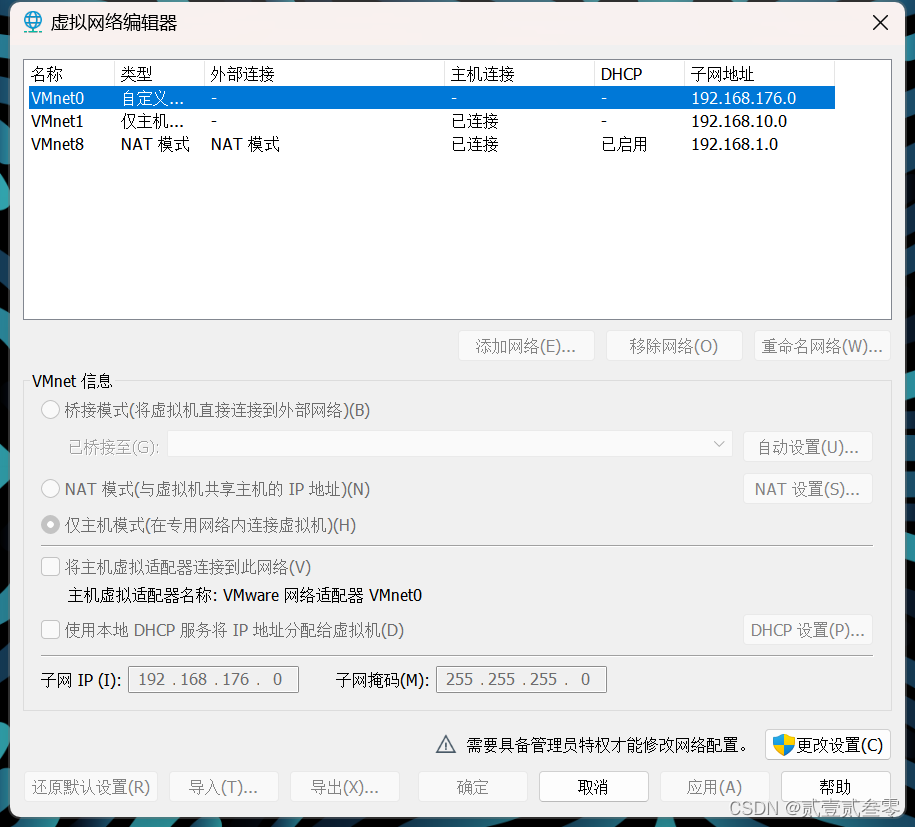
1、网络配置
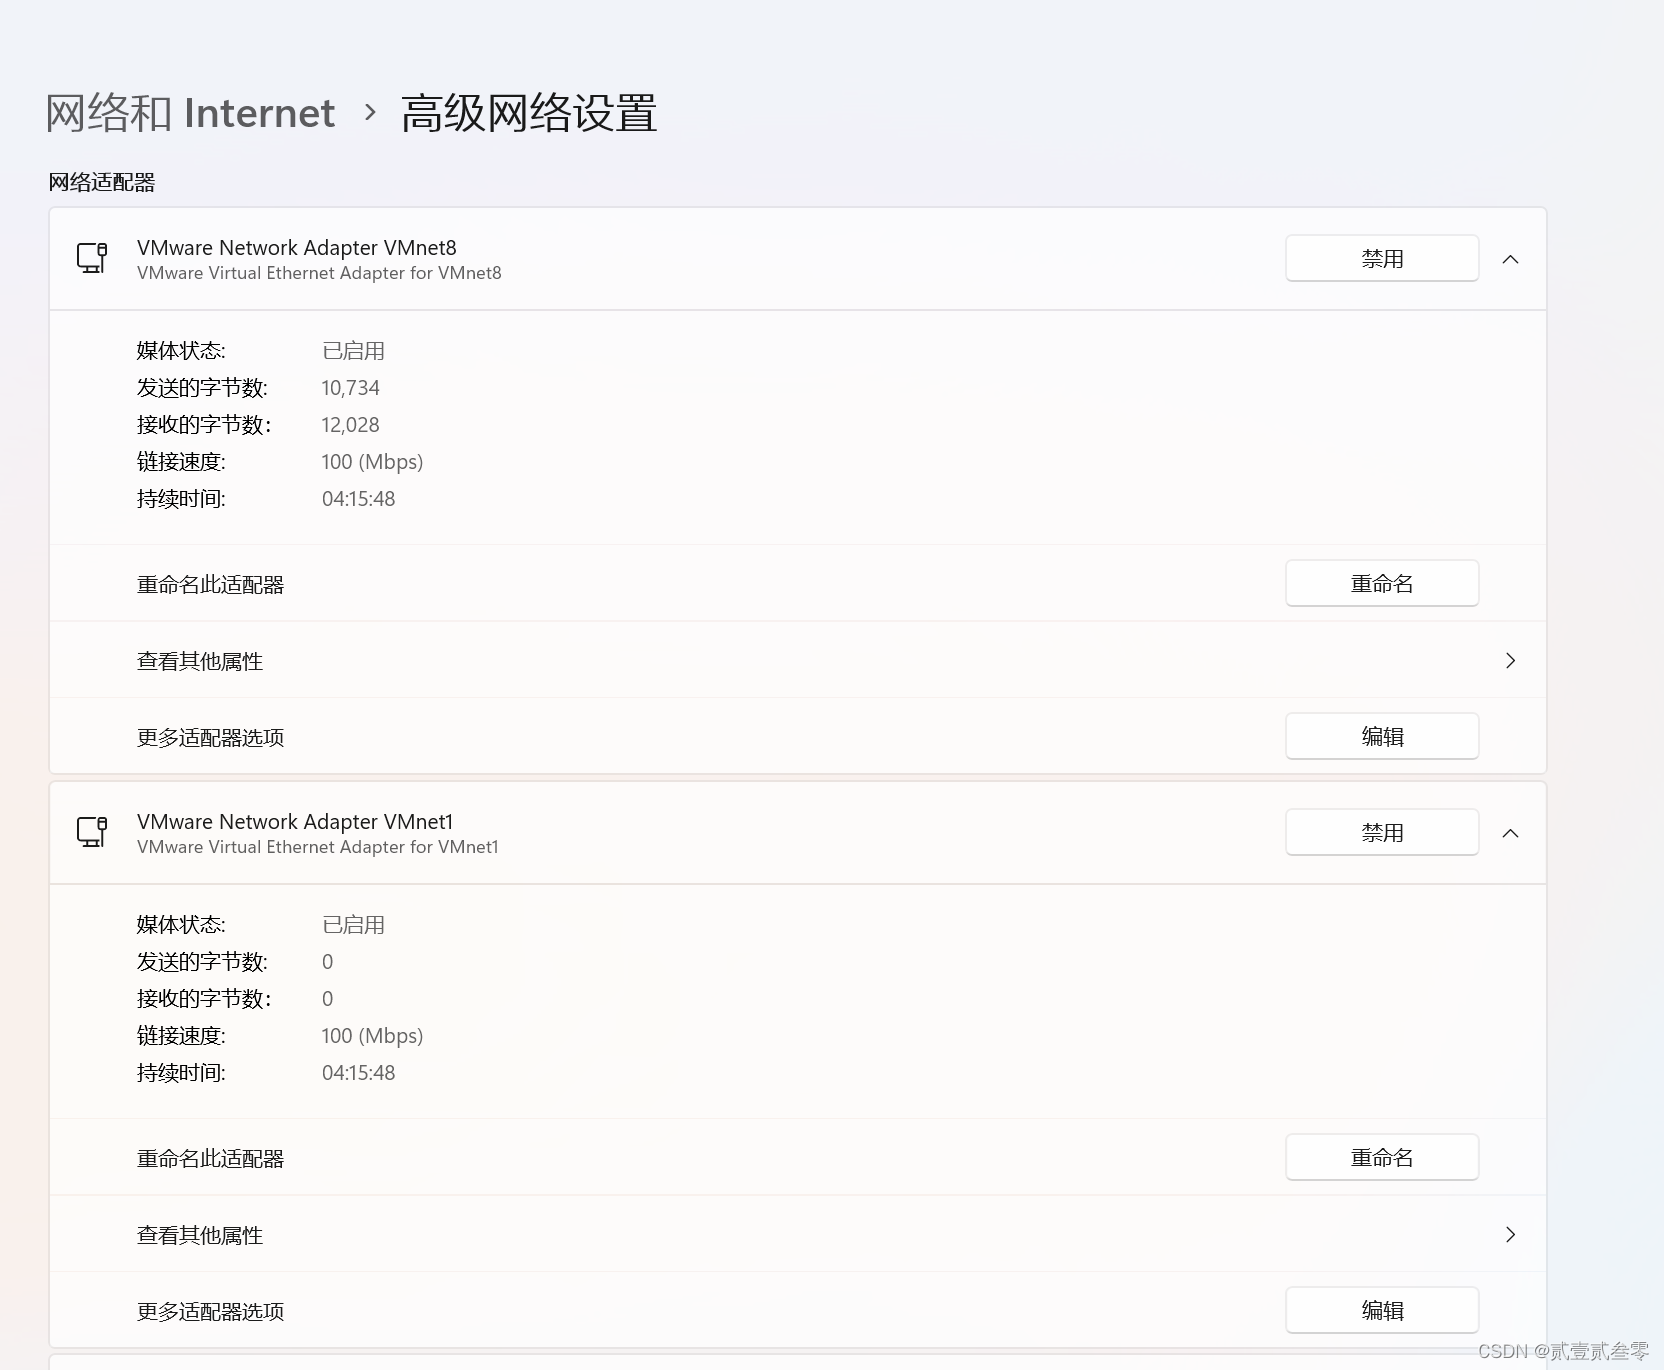
确定物理机上的vmnet1和vmnet8处于启用状态。并设置实验机器网络模式为仅主机模式。
[root@localhost 桌面]# ifconfig
eno16777736: flags=4163<UP,BROADCAST,RUNNING,MULTICAST> mtu 1500
ether 00:0c:29:22:a2:9b txqueuelen 1000 (Ethernet)
RX packets 0 bytes 0 (0.0 B)
RX errors 0 dropped 0 overruns 0 frame 0
TX packets 0 bytes 0 (0.0 B)
TX errors 0 dropped 0 overruns 0 carrier 0 collisions 0
lo: flags=73<UP,LOOPBACK,RUNNING> mtu 65536
inet 127.0.0.1 netmask 255.0.0.0
inet6 ::1 prefixlen 128 scopeid 0x10
loop txqueuelen 0 (Local Loopback)
RX packets 258 bytes 21900 (21.3 KiB)
RX errors 0 dropped 0 overruns 0 frame 0
TX packets 258 bytes 21900 (21.3 KiB)
TX errors 0 dropped 0 overruns 0 carrier 0 collisions 0

[root@localhost 桌面]# ifconfig
eno16777736: flags=4163<UP,BROADCAST,RUNNING,MULTICAST> mtu 1500
inet 192.168.10.10 netmask 255.255.255.0 broadcast 192.168.10.255
inet6 fe80::20c:29ff:fe22:a29b prefixlen 64 scopeid 0x20
ether 00:0c:29:22:a2:9b txqueuelen 1000 (Ethernet)
RX packets 58 bytes 8596 (8.3 KiB)
RX errors 0 dropped 0 overruns 0 frame 0
TX packets 89 bytes 10617 (10.3 KiB)
TX errors 0 dropped 0 overruns 0 carrier 0 collisions 0
lo: flags=73<UP,LOOPBACK,RUNNING> mtu 65536
inet 127.0.0.1 netmask 255.0.0.0
inet6 ::1 prefixlen 128 scopeid 0x10
loop txqueuelen 0 (Local Loopback)
RX packets 398 bytes 34040 (33.2 KiB)
RX errors 0 dropped 0 overruns 0 frame 0
TX packets 398 bytes 34040 (33.2 KiB)
TX errors 0 dropped 0 overruns 0 carrier 0 collisions 0
2、配置yum仓库
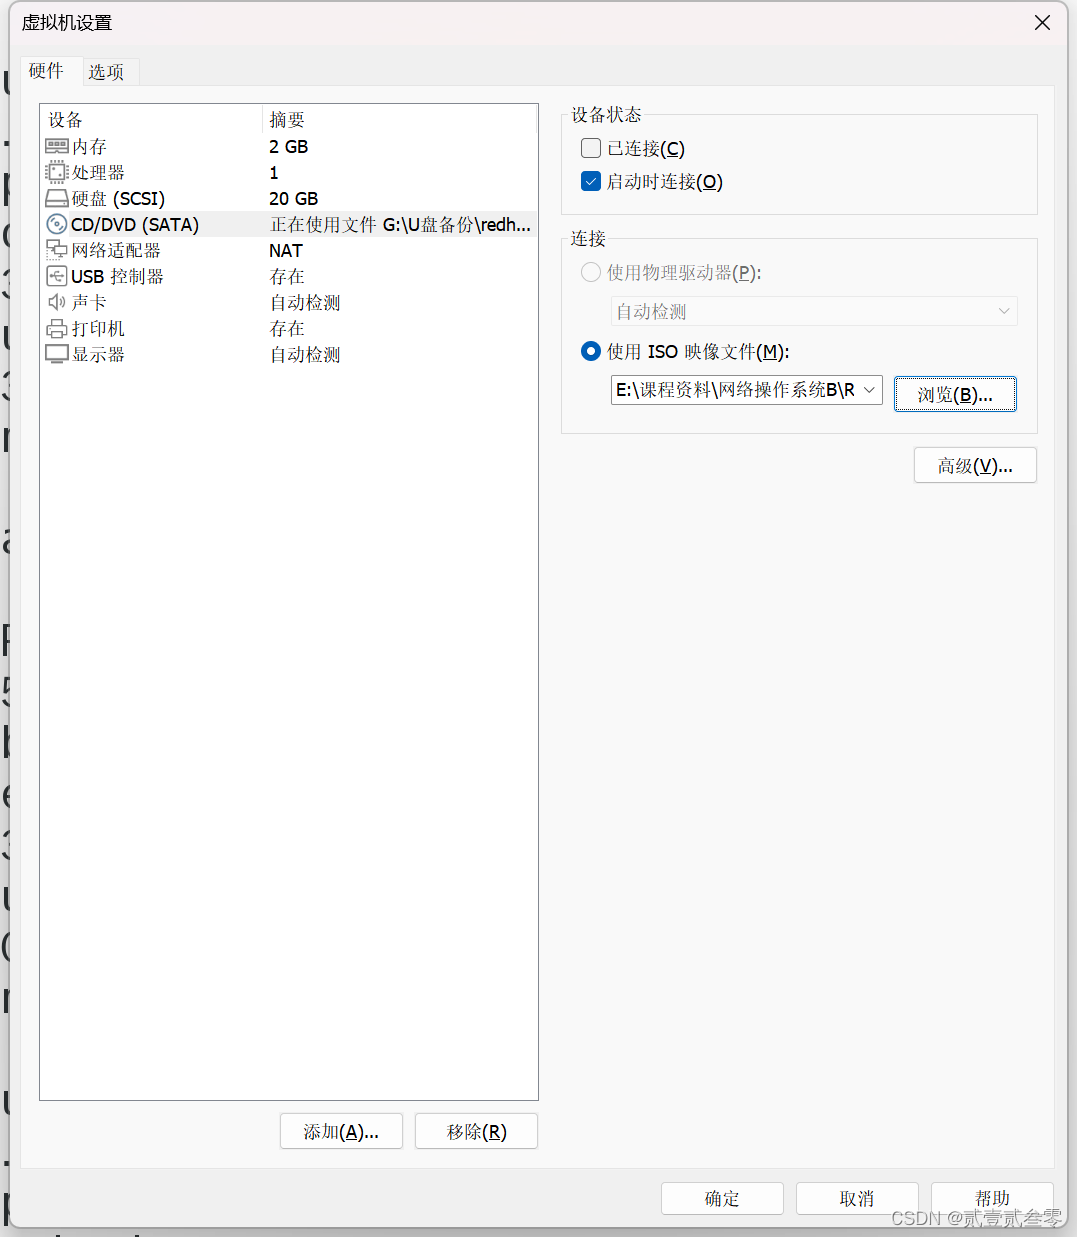

[root@localhost 桌面]# df -h
文件系统 容量 已用 可用 已用% 挂载点
/dev/mapper/rhel-root 18G 2.9G 15G 17% /
devtmpfs 905M 0 905M 0% /dev
tmpfs 914M 140K 914M 1% /dev/shm
tmpfs 914M 8.9M 905M 1% /run
tmpfs 914M 0 914M 0% /sys/fs/cgroup
/dev/sda1 497M 119M 379M 24% /boot
/dev/sr0 3.5G 3.5G 0 100% /run/media/root/RHEL-7.0 Server.x86_64
[root@localhost 桌面]# mkdir /mnt/cdrom
[root@localhost 桌面]# mount /dev/sr0 /mnt/cdrom/
mount: /dev/sr0 写保护,将以只读方式挂载
[root@localhost 桌面]# df -h
文件系统 容量 已用 可用 已用% 挂载点
/dev/mapper/rhel-root 18G 2.9G 15G 17% /
devtmpfs 905M 0 905M 0% /dev
tmpfs 914M 140K 914M 1% /dev/shm
tmpfs 914M 8.9M 905M 1% /run
tmpfs 914M 0 914M 0% /sys/fs/cgroup
/dev/sda1 497M 119M 379M 24% /boot
/dev/sr0 3.5G 3.5G 0 100% /mnt/cdrom
[root@localhost 桌面]# vim /etc/yum.repos.d/a.repo
[root@localhost 桌面]# cat /etc/yum.repos.d/a.repo
[a]
name=a
baseurl=file:///mnt/cdrom
enable=1
gpgcheck=0
[root@localhost 桌面]# yum repolist
已加载插件:langpacks, product-id, subscription-manager
This system is not registered to Red Hat Subscription Management. You can use subscription-manager to register.
a | 4.1 kB 00:00:00
(1/2): a/group_gz | 134 kB 00:00:00
(2/2): a/primary_db | 3.4 MB 00:00:00
源标识 源名称 状态
a
3、安装web服务HTTPD及ftp服务vsftpd.
[root@localhost 桌面]# yum install httpd -y
已加载插件:langpacks, product-id, subscription-manager
This system is not registered to Red Hat Subscription Management. You can use subscription-manager to register.
正在解决依赖关系
–> 正在检查事务
—> 软件包 httpd.x86_64.0.2.4.6-17.el7 将被 安装
–> 正在处理依赖关系 httpd-tools = 2.4.6-17.el7,它被软件包 httpd-2.4.6-17.el7.x86_64 需要
–> 正在处理依赖关系 /etc/mime.types,它被软件包 httpd-2.4.6-17.el7.x86_64 需要
–> 正在处理依赖关系 libapr-1.so.0()(64bit),它被软件包 httpd-2.4.6-17.el7.x86_64 需要
–> 正在处理依赖关系 libaprutil-1.so.0()(64bit),它被软件包 httpd-2.4.6-17.el7.x86_64 需要
–> 正在检查事务
—> 软件包 apr.x86_64.0.1.4.8-3.el7 将被 安装
—> 软件包 apr-util.x86_64.0.1.5.2-6.el7 将被 安装
—> 软件包 httpd-tools.x86_64.0.2.4.6-17.el7 将被 安装
—> 软件包 mailcap.noarch.0.2.1.41-2.el7 将被 安装
–> 解决依赖关系完成
依赖关系解决
Package 架构 版本 源 大小
正在安装:
httpd x86_64 2.4.6-17.el7 a 1.2 M
为依赖而安装:
apr x86_64 1.4.8-3.el7 a 103 k
apr-util x86_64 1.5.2-6.el7 a 92 k
httpd-tools x86_64 2.4.6-17.el7 a 77 k
mailcap noarch 2.1.41-2.el7 a 31 k
事务概要
安装 1 软件包 (+4 依赖软件包)
总下载量:1.5 M
安装大小:4.3 M
Downloading packages:
总计 12 MB/s | 1.5 MB 00:00:00
Running transaction check
Running transaction test
Transaction test succeeded
Running transaction
正在安装 : apr-1.4.8-3.el7.x86_64 1/5
正在安装 : apr-util-1.5.2-6.el7.x86_64 2/5
正在安装 : httpd-tools-2.4.6-17.el7.x86_64 3/5
正在安装 : mailcap-2.1.41-2.el7.noarch 4/5
正在安装 : httpd-2.4.6-17.el7.x86_64 5/5
a/productid | 1.6 kB 00:00:00
验证中 : mailcap-2.1.41-2.el7.noarch 1/5
验证中 : httpd-tools-2.4.6-17.el7.x86_64 2/5
验证中 : apr-1.4.8-3.el7.x86_64 3/5
验证中 : apr-util-1.5.2-6.el7.x86_64 4/5
验证中 : httpd-2.4.6-17.el7.x86_64 5/5
已安装:
httpd.x86_64 0:2.4.6-17.el7
作为依赖被安装:
apr.x86_64 0:1.4.8-3.el7 apr-util.x86_64 0:1.5.2-6.el7 httpd-tools.x86_64 0:2.4.6-17.el7 mailcap.noarch 0:2.1.41-2.el7
完毕!
[root@localhost 桌面]# yum install -y vsftpd*
已加载插件:langpacks, product-id, subscription-manager
This system is not registered to Red Hat Subscription Management. You can use subscription-manager to register.
正在解决依赖关系
–> 正在检查事务
—> 软件包 vsftpd.x86_64.0.3.0.2-9.el7 将被 安装
–> 解决依赖关系完成
依赖关系解决
Package 架构 版本 源 大小
正在安装:
vsftpd x86_64 3.0.2-9.el7 a 166 k
事务概要
安装 1 软件包
总下载量:166 k
安装大小:343 k
Downloading packages:
Running transaction check
Running transaction test
Transaction test succeeded
Running transaction
正在安装 : vsftpd-3.0.2-9.el7.x86_64 1/1
验证中 : vsftpd-3.0.2-9.el7.x86_64 1/1
已安装:
vsftpd.x86_64 0:3.0.2-9.el7
完毕!
4、启动web服务,创建网页
[root@localhost 桌面]# systemctl start httpd
[root@localhost 桌面]# systemctl status httpd
httpd.service - The Apache HTTP Server
Loaded: loaded (/usr/lib/systemd/system/httpd.service; disabled)
Active: active (running) since 五 2024-03-15 12:13:11 CST; 7s ago
Main PID: 14451 (httpd)
Status: “Processing requests…”
CGroup: /system.slice/httpd.service
├─14451 /usr/sbin/httpd -DFOREGROUND
├─14452 /usr/sbin/httpd -DFOREGROUND
├─14453 /usr/sbin/httpd -DFOREGROUND
├─14454 /usr/sbin/httpd -DFOREGROUND
├─14455 /usr/sbin/httpd -DFOREGROUND
└─14456 /usr/sbin/httpd -DFOREGROUND
3月 15 12:13:11 localhost.localdomain systemd[1]: Starting The Apache HTTP Server…
3月 15 12:13:11 localhost.localdomain httpd[14451]: AH00558: httpd: Could not reliably determine the server’s fully quali…ssage
3月 15 12:13:11 localhost.localdomain systemd[1]: Started The Apache HTTP Server.
Hint: Some lines were ellipsized, use -l to show in full.
[root@localhost 桌面]# cd /var/www/html/
[root@localhost html]# echo “this is hnsw’s website” > /var/www/html/index.html
[root@localhost html]# systemctl restart httpd.service
配置完成后,可以看到本地是可以通过浏览器访问网页内容。但其他主机无法访问。

这是由于web服务器的防火墙未放行httpd的流量,故其他主机无法访问。设置防火墙,放行httpd的流量
[root@localhost html]# firewall-config
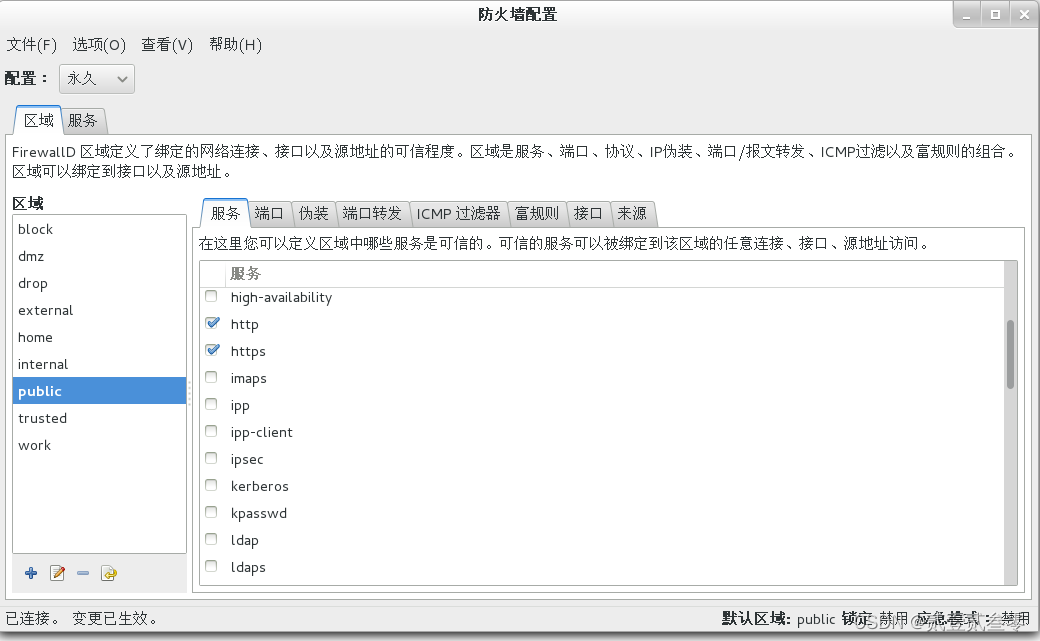
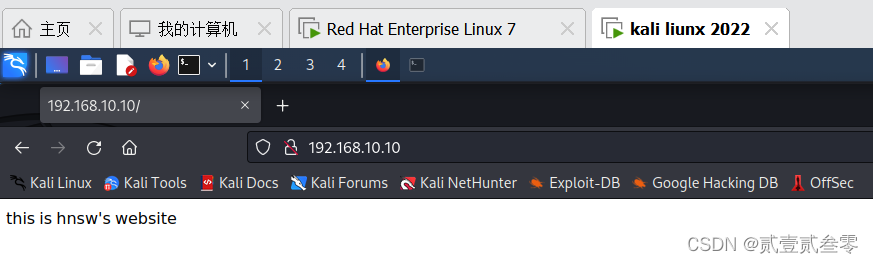
成功访问。
5、启动VSFTPD服务,并进行安全配置。
[root@localhost html]# systemctl start vsftpd
[root@localhost html]# systemctl status vsftpd.service
vsftpd.service - Vsftpd ftp daemon
Loaded: loaded (/usr/lib/systemd/system/vsftpd.service; disabled)
Active: active (running) since 五 2024-03-15 12:37:33 CST; 4s ago
Process: 42408 ExecStart=/usr/sbin/vsftpd /etc/vsftpd/vsftpd.conf (code=exited, status=0/SUCCESS)
Main PID: 42409 (vsftpd)
CGroup: /system.slice/vsftpd.service
└─42409 /usr/sbin/vsftpd /etc/vsftpd/vsftpd.conf
3月 15 12:37:33 localhost.localdomain systemd[1]: Starting Vsftpd ftp daemon…
3月 15 12:37:33 localhost.localdomain systemd[1]: Started Vsftpd ftp daemon.
[root@localhost html]# firewall-config
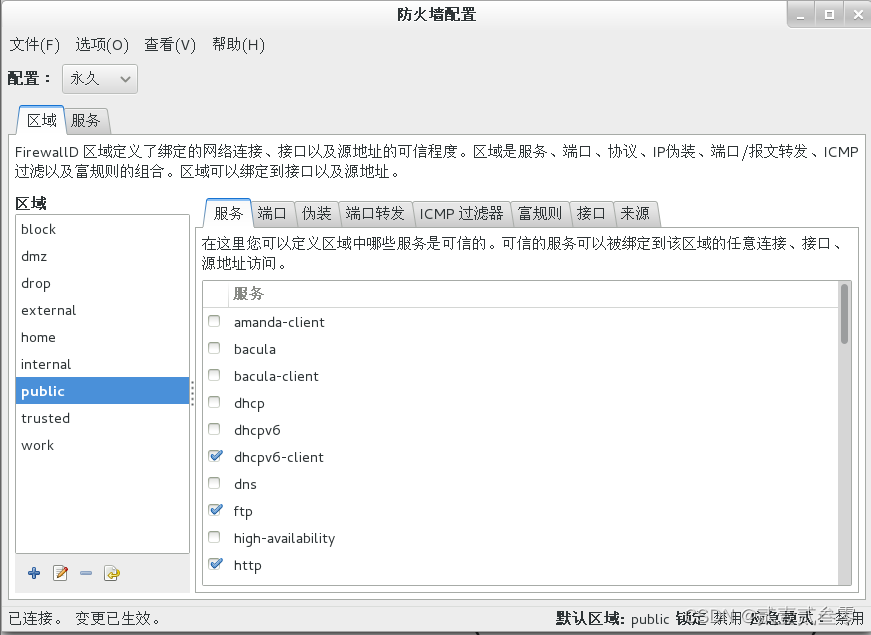
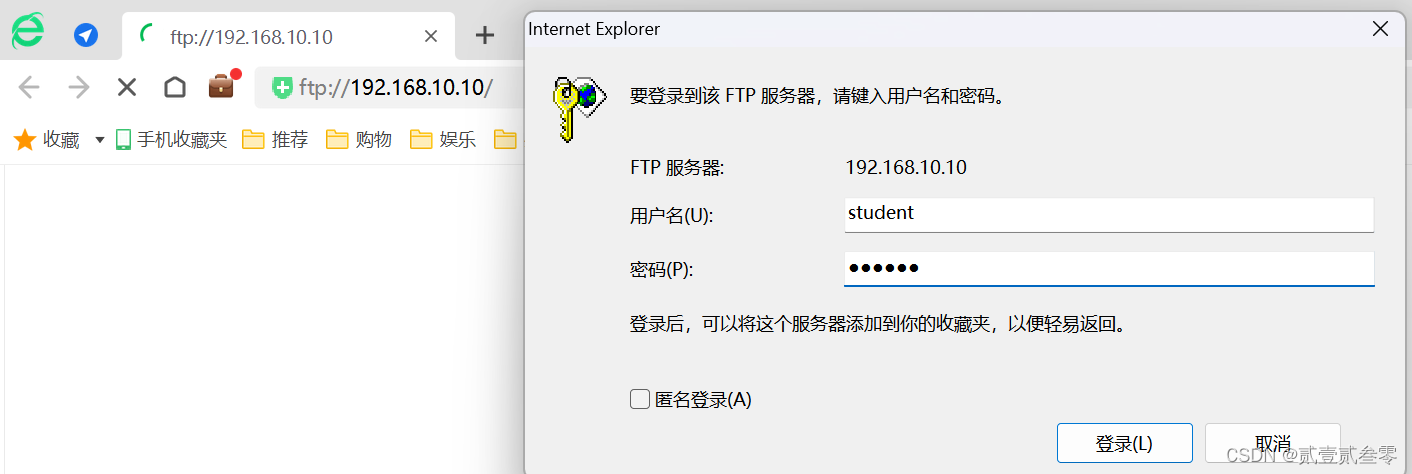
使用浏览器访问ftp站点。
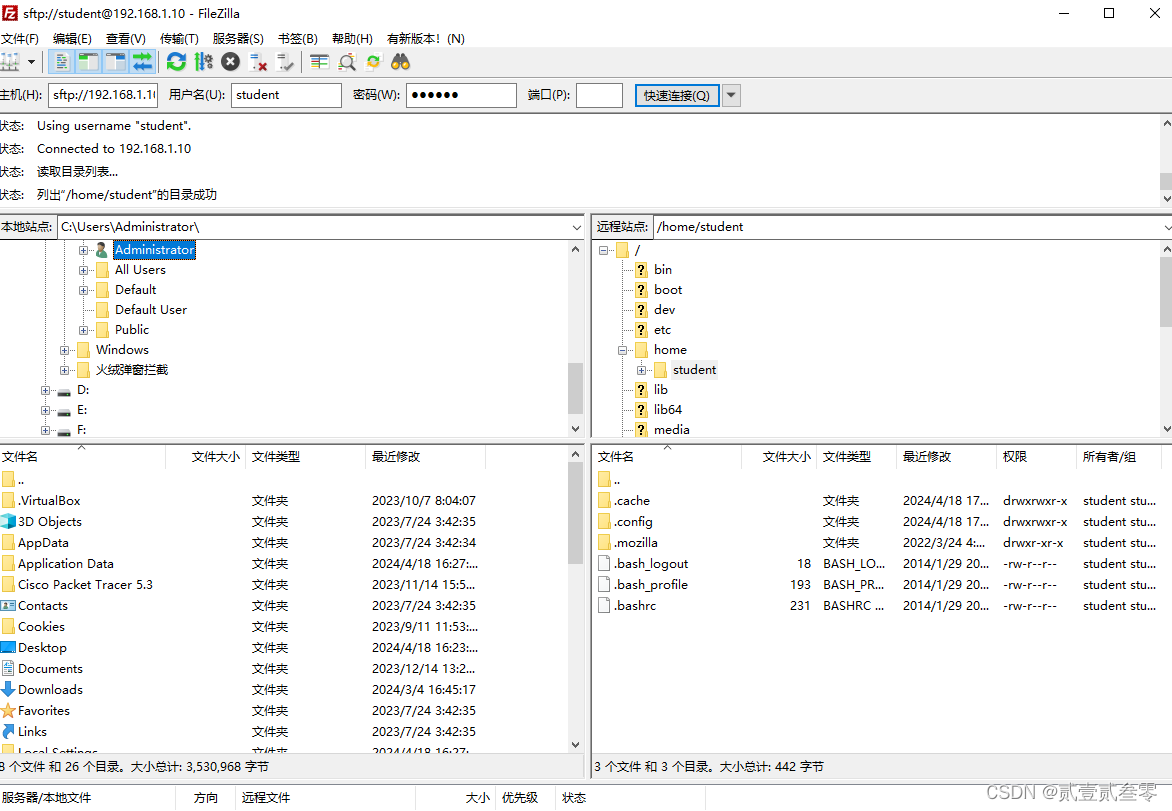
也可使用物理机上预装的ftp服务连接ftp站点,使用普通用户student账号密码登录,可见登录成功。但没有写入权限。这是由于安全策略SELinux域策略的原因,设置SELinux域策略。
[root@localhost student]# getsebool -a | grep ftp
ftp_home_dir --> off
ftpd_anon_write --> off
ftpd_connect_all_unreserved --> off
ftpd_connect_db --> off
ftpd_full_access --> off
ftpd_use_cifs --> off
ftpd_use_fusefs --> off
ftpd_use_nfs --> off
ftpd_use_passive_mode --> off
httpd_can_connect_ftp --> off
httpd_enable_ftp_server --> off
sftpd_anon_write --> off
sftpd_enable_homedirs --> off
sftpd_full_access --> off
sftpd_write_ssh_home --> off
tftp_anon_write --> off
tftp_home_dir --> off
[root@localhost student]# setsebool -P ftpd_full_access=on
[root@localhost 桌面]# setsebool -P ftpd_connect_all_unreserved 1
[root@localhost 桌面]#

创建目录成功。到这里一个简单的web及ftp站点就搭建好了,但是我们还需要对他进行一系列的配置及安全设置才能符合我们的使用场景。

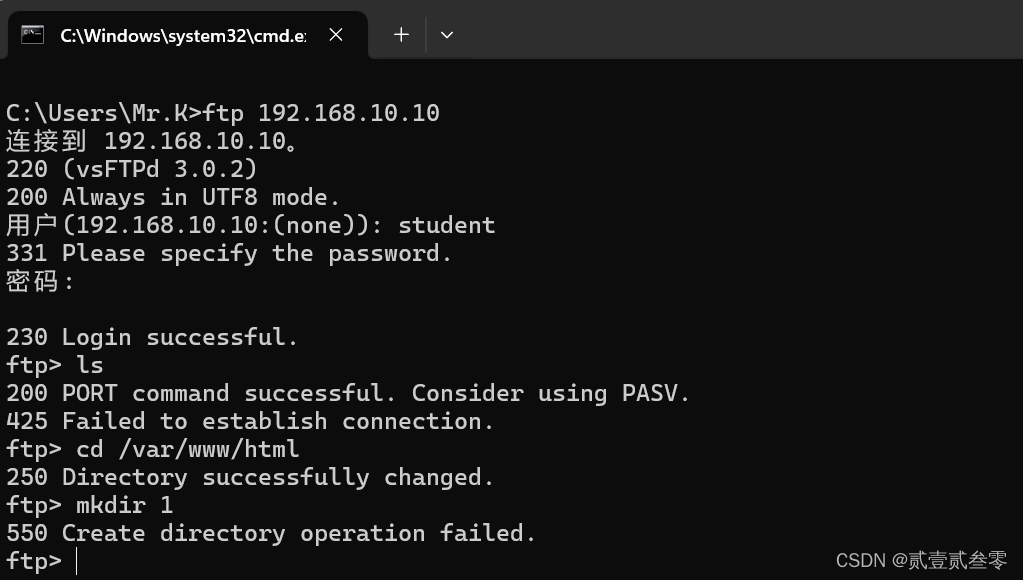
在物理机CMD工作目录c:\Users\Mr.K里创建一个网页文件,模拟学生使用ftp服务远程更新web主页。
打开主配置文件,出于安全考虑,首先我们需要关闭匿名访问模式。另一方面由于系统用户默认访问到的是自己的主目录,但是却可以用cd命令切换到服务器端任何具备访问权限的目录,比如切换到/目录。这会带来很大的安全风险,所以一般都需要将系统用户禁锢于其主目录中,禁止随意切换。在vsftpd.conf文件中增加一行“chroot_local_user=YES”;但由于我们ftp服务主要是用于更新网页,若将系统用户禁锢于其主目录中,用户将无法访问网页存放目录。故我们可搭配local_root=/var/www/html 参数,该参数将设置所有本地用户的根目录为/var/www/html。当本地用户登录后,会自动进入该目录。
注:在vsftpd2.3.5版本更新之后增强了安全检查,将用户限定在了主目录下,该用户的主目录就不能再具有写权限了!若有写权限会报该错误。
500 OOPS: vsftpd: refusing to run with writable root inside chroot()
要修复这个错误,可以通过取消主目录的写权限,或者增加该语句。
allow_writeable_chroot=YES
[root@localhost home]# vim /etc/vsftpd/vsftpd.conf
[root@localhost home]# grep “#” -v /etc/vsftpd/vsftpd.conf
anonymous_enable=NO //不允许匿名用户登录
local_enable=YES //允许本地用户登录
write_enable=YES
local_umask=022
dirmessage_enable=YES
xferlog_enable=YES
connect_from_port_20=YES
xferlog_std_format=YES
chroot_local_user=YES //是否将用户权限禁锢在FTP目录,以确保安全
local_root=/var/www/html //设置所有本地用户的根目录。当本地用户登录后,会自动进入该目录。
allow_writeable_chroot=YES
listen=NO
listen_ipv6=YES
pam_service_name=vsftpd
userlist_enable=YES
tcp_wrappers=YES
[root@localhost home]# systemctl restart vsftpd.service
设置完成后,重启vsftpd服务,重新使用student用户远程上传网页,提示上传成功,但无法创建文件。这是由于未对/var/www/html目录进行权限设置。

[root@localhost home]# ll -d /var/www/html/
drwxr-xr-x. 2 root root 23 3月 15 12:14 /var/www/html/
[root@localhost home]# chmod 775 /var/www/html/
[root@localhost home]# chown :student /var/www/html/
[root@localhost home]# ll -d /var/www/html/
drwxrwxr-x. 2 root student 23 3月 15 12:14 /var/www/html/
设置/var/www/html目录所有者为管理员root,所属组为student组,数字权限为775,这样设置的好处是,仅有student组中的用户远程连接具有查看修改权限,其他用户远程连接仅有查看权限而没有修改权限。
[root@localhost html]# useradd user1
[root@localhost html]# echo redhat | passwd --stdin user1
更改用户 user1 的密码 。
passwd:所有的身份验证令牌已经成功更新。
创建一个用户user1,设置密码,作为对照实验。
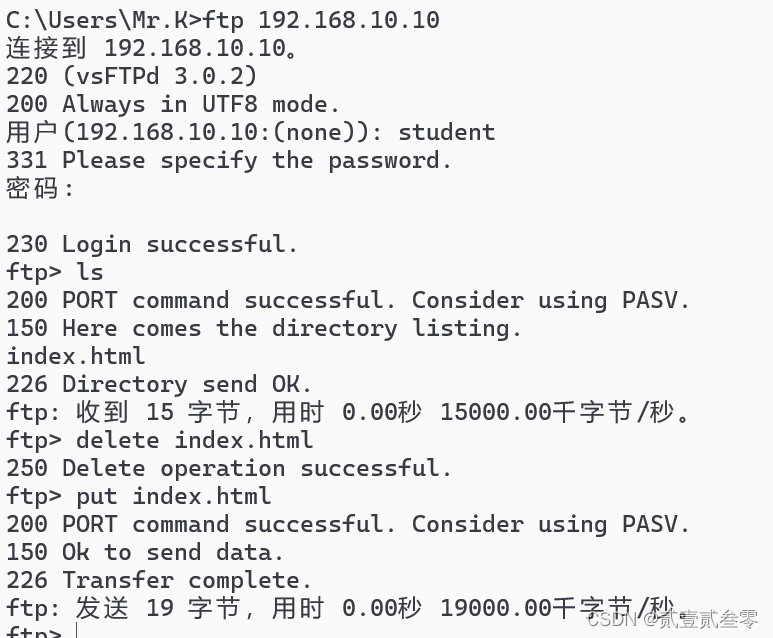
成功使用student用户远程登录上传新网页并删除原网页。
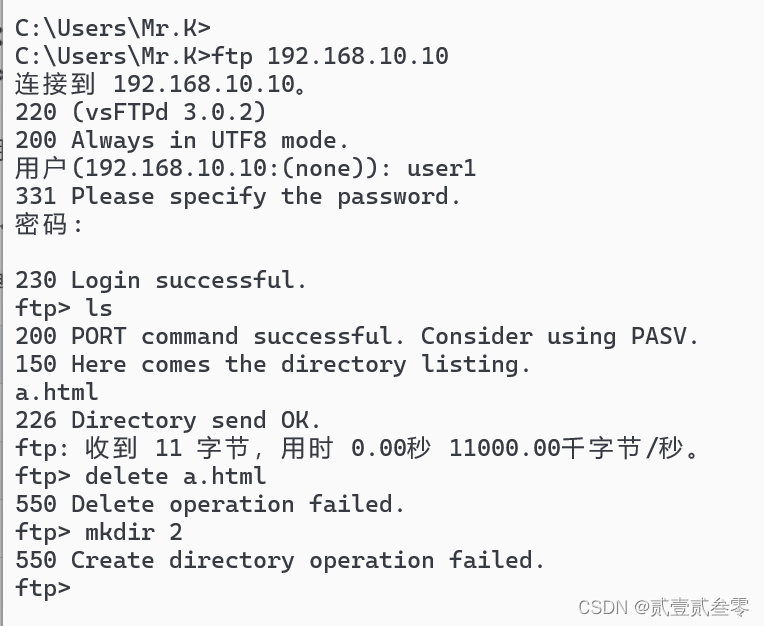
user1用户可以远程连接查看目录,但没有修改权限
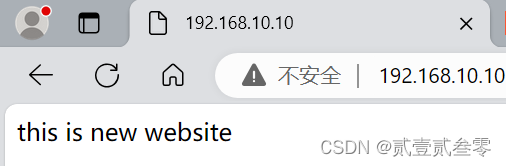
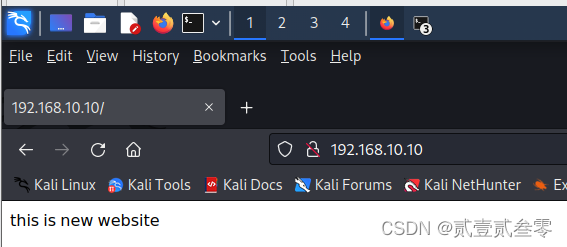
使用物理机浏览器成功访问到新网页。
6、FTP文件加密传输配置SSL
实验准备
虚拟机:redhat 7 liunx
物理机:window 11
软件:FileZilla
首先,我们需要下载安装openssl。
[root@localhost /]# yum install -y openssl-devel.x86_64
[root@localhost /]# openssl req -new -x509 -nodes -out vsftpd.pem -keyout vsftpd.pem -days 7
Generating a 2048 bit RSA private key
...........+++
...................................................................................................+++
writing new private key to 'vsftpd.pem'
-----
You are about to be asked to enter information that will be incorporated
into your certificate request.
What you are about to enter is what is called a Distinguished Name or a DN.
There are quite a few fields but you can leave some blank
For some fields there will be a default value,
If you enter '.', the field will be left blank.
-----
Country Name (2 letter code) [XX]:CN
State or Province Name (full name) []:HN
Locality Name (eg, city) [Default City]:CS
Organization Name (eg, company) [Default Company Ltd]:SW
Organizational Unit Name (eg, section) []:XX
Common Name (eg, your name or your server's hostname) []:XX
Email Address []:123@163.com
在该命令中,req表示生成一个证书,-new是第一次执行该命令需要携带的参数,-out指定了证书的文件名称,-keyout指定证书密钥的文件,-days表示证书的有效期。
在执行上述命令后,进入交互式页面,需要输入证书的地点、组织等信息
上述命令执行完毕后,会在当前目录下生成一个vsftpd.pem文件
[root@localhost /]# ls
bin   dev  home  lib64  mnt  proc  run   srv  tmp  var
boot  etc  lib   media  opt  root  sbin  sys  usr  vsftpd.pem
[root@localhost /]# mkdir -p /etc/vsftpd/.ssl
[root@localhost /]# mv vsftpd.pem /etc/vsftpd/.ssl/
[root@localhost /]# chmod 400 /etc/vsftpd/.ssl/
生成证书后,为证书文件在/etc/vsftpd下单独创建一个隐藏目录.ssl,将证书目录下,为了保证安全性,把证书文件权限设置成400
[root@localhost /]# vim /etc/vsftpd/vsftpd.conf
ssl_enable=YES
force_local_data_ssl=YES
force_local_logins_ssl=YES
ssl_tlsv1=TRUE
ssl_sslv2=FALSE
ssl_sslv3=FALSE
require_ssl_reuse=NO
ssl_ciphers=HIGH
rsa_cert_file=/etc/vsftpd/.ssl/vsftpd.pem
rsa_private_key_file=/etc/vsftpd/.ssl/vsftpd.pem
修改vsftpd的配置文件,使其支持证书,并配置加密功能
ssl_enable表示开启ssl证书功能,
force_local_data_ssl和force_local_login_ssl表示在登录和数据传输时采用证书加密。
第四行至第六行表示ssl证书的版本,一是ssl的版本一名字是tsl,版本二和版本三名字是ssl;二是这里写的不是YES和NO,而是TRUE和FALSE。
第七行require_ssl_reuse表示不重用SSL会话
第八行ssl_cipthers表示用于加密ssl连接
第九行和第十行表示ssl的证书和密钥文件存放位置。
[root@localhost /]# systemctl restart vsftpd.service
[root@localhost /]# setenforce 0
重启服务,设置seliunx。
在windows 11上安装FileZilla.连接服务器。

抓包显示连接成功,但嗅探不到账号密码了。

7、web服务器的访问控制
在网络中,为了保护网络资源的安全,一般是通过路由设备或者防火墙建立基于IP和端口的访问控制。在操作系统中,对文件的访问也要访问控制。
在Web应用中,根据访问客体的不同,常见的访问控制可以分为“基于URL的访问控制”、“基于方法(method)的访问控制”和“基于数据的访问控制”。
Apache可以基于源主机名、源IP地址或源主机上的浏览器特征等信息对网站上的资源进行访问控制。它通过Allow指令允许某个主机访问服务器上的网站资源,通过Deny指令实现禁止访问。在允许或禁止访问网站资源时,还会用到Order指令,这个指令用来定义Allow或Deny指令起作用的顺序,其匹配原则是按照顺序进行匹配,若匹配成功则执行后面的默认指令。比如“Order Allow, Deny”表示先将源主机与允许规则进行匹配,若匹配成功则允许访问请求,反之则拒绝访问请求。
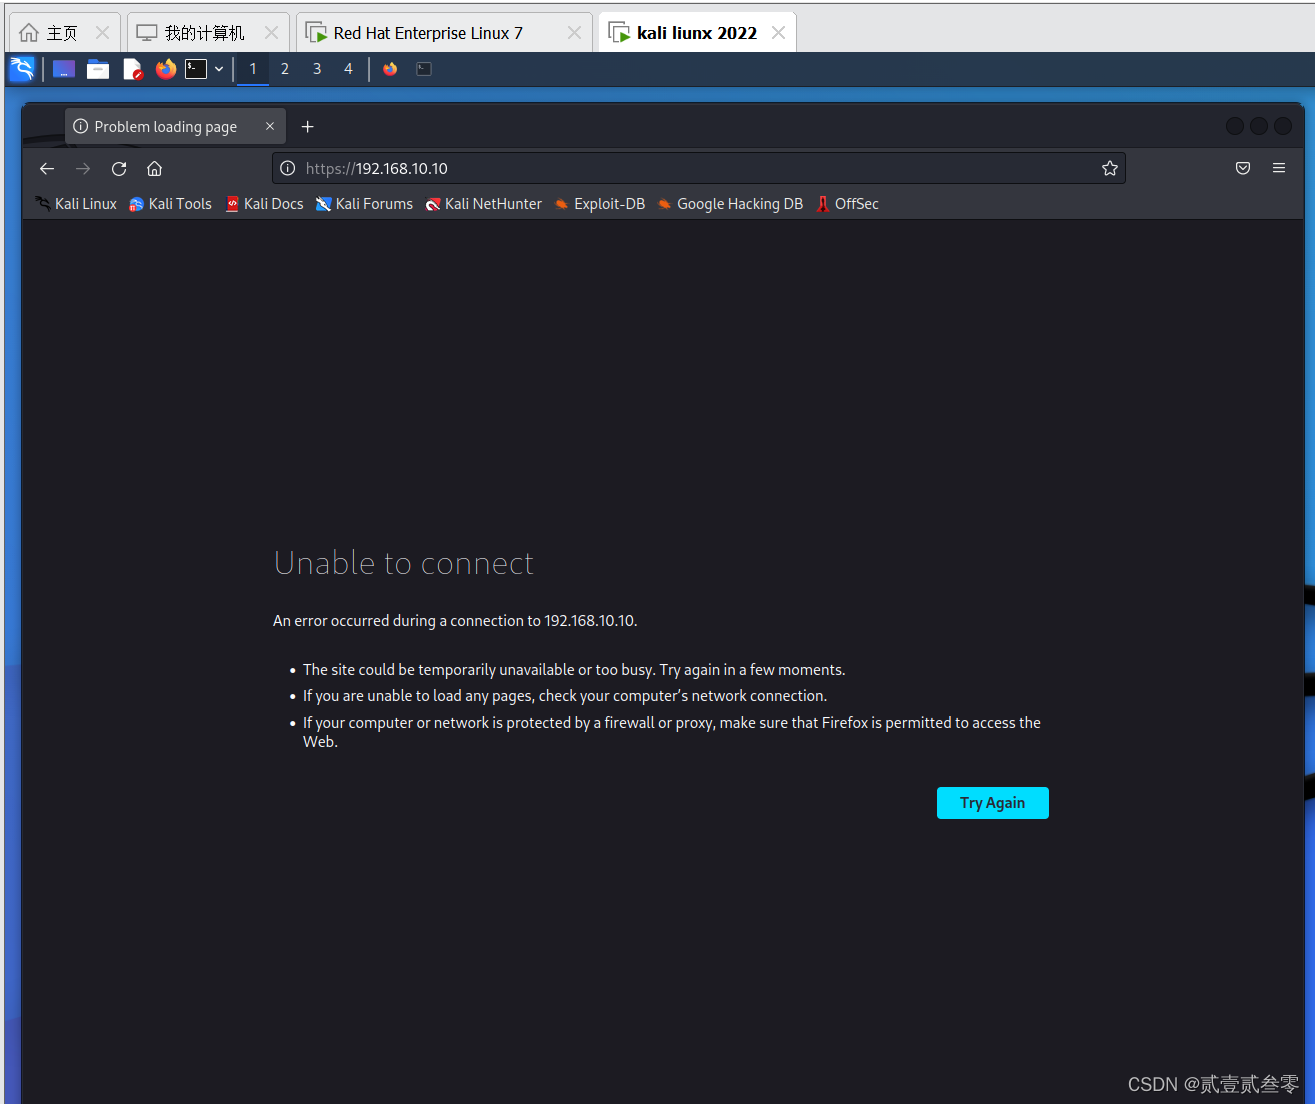
下面我们只允许IP地址为192.168.10.100的主机访问网站资源,在httpd服务配置文件的第156行后面添加下述规则。这样在重启httpd服务程序后再用本机(即服务器,其IP地址为192.168.10.10)来访问网站的首页面时就会提示访问被拒绝了,如图10-21所示
[root@localhost html]# vim /etc/httpd/conf/httpd.conf

[root@localhost html]# systemctl restart httpd.service
重启服务后,使用物理机无法访问网页内容,只有IP地址为192.168.10.100的KALI linux主机可以访问到网页内容。


 636
636


 被折叠的 条评论
为什么被折叠?
被折叠的 条评论
为什么被折叠?
 到【灌水乐园】发言


