目录
为什么使用Spring Cache
缓存有诸多的好处,于是大家就摩拳擦掌准备给自己的应用加上缓存的功能。但是网上一搜却发现缓存的框架太多了,各有各的优势,比如Redis、Memcached、Guava、Caffeine等等。
如果我们的程序想要使用缓存,就要与这些框架耦合。聪明的架构师已经在利用接口来降低耦合了,利用面向对象的抽象和多态的特性,做到业务代码与具体的框架分离。
但我们仍然需要显式地在代码中去调用与缓存有关的接口和方法,在合适的时候插入数据到缓存里,在合适的时候从缓存中读取数据。
想一想AOP的适用场景,这不就是天生就应该AOP去做的吗?
是的,Spring Cache就是一个这个框架。它利用了AOP,实现了基于注解的缓存功能,并且进行了合理的抽象,业务代码不用关心底层是使用了什么缓存框架,只需要简单地加一个注解,就能实现缓存功能了。而且Spring Cache也提供了很多默认的配置,用户可以3秒钟就使用上一个很不错的缓存功能。
如何使用Spring Cache
上面的3秒钟,绝对不夸张。使用SpringCache分为很简单的三步:加依赖,开启缓存,加缓存注解。
1 加依赖
        <dependency>
            <groupId>org.springframework.boot</groupId>
            <artifactId>spring-boot-starter-cache</artifactId>
        </dependency>
        <dependency>
            <groupId>org.springframework.boot</groupId>
            <artifactId>spring-boot-starter-data-redis</artifactId>
        </dependency>
        <!--json依赖-->
        <dependency>
            <groupId>com.alibaba</groupId>
            <artifactId>fastjson</artifactId>
            <version>1.2.76</version>
        </dependency>
2 开启缓存
在启动类加上@EnableCaching注解即可开启使用缓存。
@Slf4j
@SpringBootApplication
@EnableCaching
public class WaiMaiApplication {
    public static void main(String[] args) {
        SpringApplication.run(WaiMaiApplication.class,args);
        log.info("项目启动成功!123");
    }
}
3 加缓存注解
spring boot cache 提供了一些注解方便做cache应用。
(1)@CacheConfig:主要用于配置该类中会用到的一些共用的缓存配置
(2)@Cacheable:主要方法返回值加入缓存。同时在查询时,会先从缓存中取,若不存在才再发起对数据库的访问。
(3)@CachePut:配置于函数上,能够根据参数定义条件进行缓存,与@Cacheable不同的是,每次回真实调用函数,所以主要用于数据新增和修改操作上。
(4)@CacheEvict:配置于函数上,通常用在删除方法上,用来从缓存中移除对应数据
(5)@Caching:配置于函数上,组合多个Cache注解使用。
例子:
    /**
     * 根据条件查询套餐数据 在查询到数据的同时向redis添加缓存
     * @param setmeal
     * @return
     */
    @GetMapping("/list")
    @Cacheable(cacheNames= "setmealCache",key = "#setmeal.categoryId+'_'+#setmeal.status" )
    public R<List<Setmeal>> list(Setmeal setmeal){
        LambdaQueryWrapper<Setmeal> queryWrapper=new LambdaQueryWrapper<>();
        queryWrapper.eq(setmeal.getCategoryId()!=null,Setmeal::getCategoryId,setmeal.getCategoryId())
                    .eq(setmeal.getStatus()!=null,Setmeal::getStatus,setmeal.getStatus())
                    .orderByDesc(Setmeal::getUpdateTime);
        List<Setmeal> setmealList = setmealService.list(queryWrapper);

        return R.success(setmealList);
    }
   /**
     * 删除套餐 更改数据库数据后同时删除缓存
     * @param ids
     * @return
     */
    @DeleteMapping
    @CacheEvict(value = "setmealCache",allEntries = true)
    public R<String> delete(Long[] ids){
        log.info("ids:{}",ids);
        setmealService.removeWithDish(ids);
        return R.success("套餐数据删除成功!");
    }
序列化以及过期时间等问题
在设置缓存注解后,添加到Redis的缓存数据是用StringRedisSerializer和JdkSerializationRedisSerialize为序列话策略,JdkSerializationRedisSerialize非常好,但是其序列化的结果是一堆子节码,这给我们阅读带来了麻烦。
解决方案:自定义序列化方式
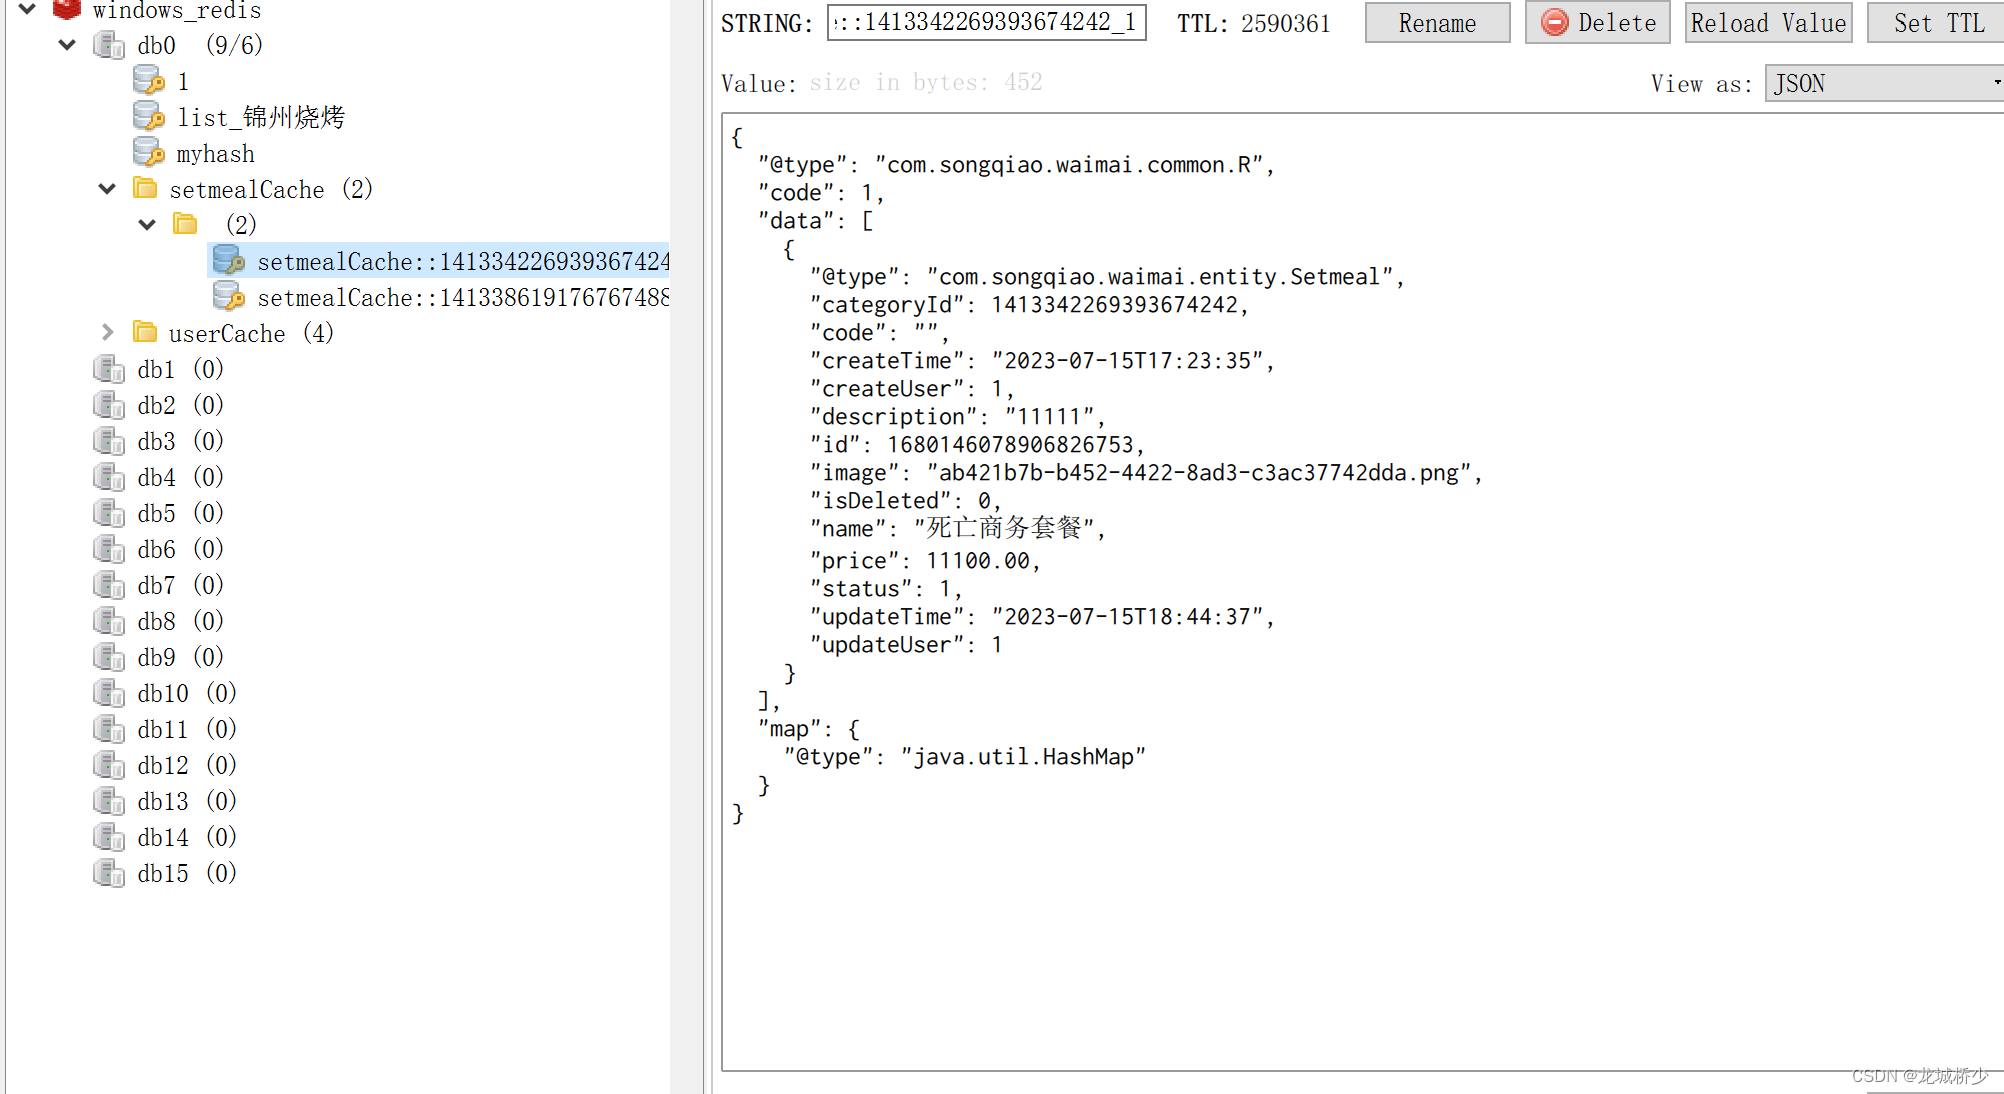
我们这里自定义了FastJsonRedisSerializer 序列化对象后缓存到redis,可以更 方便的观察缓存数据。
1.自定义序列化方式并设置白名单
package com.songqiao.waimai.config;

import com.alibaba.fastjson.JSON;
import com.alibaba.fastjson.parser.ParserConfig;
import com.alibaba.fastjson.serializer.SerializerFeature;
import org.springframework.data.redis.serializer.RedisSerializer;
import org.springframework.data.redis.serializer.SerializationException;

import java.nio.charset.Charset;

/**
 * 说明:自定义redis序列化方式
 *
 * @author Songqiao
 * @version V1.0
 * @since 2023.07.24
 */
public class FastJsonRedisSerializer<T> implements RedisSerializer<T> {

    public static final Charset DEFAULT_CHARSET = Charset.forName("UTF-8");

    private Class<T> clazz;
    //添加白名单 防止反序列化错误 反序列化报错 com.alibaba.fastjson.JSONException: autoType is not support
    static {
        ParserConfig.getGlobalInstance().addAccept("com.songqiao.waimai");
    }

    public FastJsonRedisSerializer(Class<T> clazz) {
        super();
        this.clazz = clazz;
    }

    @Override
    public byte[] serialize(T t) throws SerializationException {
        if (t == null) {
            return new byte[0];
        }
        return JSON.toJSONString(t, SerializerFeature.WriteClassName).getBytes(DEFAULT_CHARSET);
    }

    @Override
    public T deserialize(byte[] bytes) throws SerializationException {
        if (bytes == null || bytes.length <= 0) {
            return null;
        }
        String str = new String(bytes, DEFAULT_CHARSET);
        return JSON.parseObject(str, clazz);
    }
}
2.配置并设置缓存的过期时间
package com.songqiao.waimai.config;

import org.springframework.cache.annotation.CachingConfigurerSupport;
import org.springframework.cache.annotation.EnableCaching;
import org.springframework.context.annotation.Bean;
import org.springframework.context.annotation.Configuration;
import org.springframework.data.redis.cache.RedisCacheConfiguration;
import org.springframework.data.redis.serializer.RedisSerializationContext;

import java.time.Duration;

/**
 *
 * @author Songqiao
 * @version V1.0
 * @since 2023.07.24
 */
@Configuration
@EnableCaching
public class MyCacheConfig extends CachingConfigurerSupport {
    /**
     *  设置 redis 数据默认过期时间
     *  设置@cacheable 序列化方式
     * @return
     */
    @Bean
    public RedisCacheConfiguration redisCacheConfiguration(){
        FastJsonRedisSerializer<Object> fastJsonRedisSerializer = new FastJsonRedisSerializer<>(Object.class);
        RedisCacheConfiguration configuration = RedisCacheConfiguration.defaultCacheConfig();

        configuration = configuration.serializeValuesWith(RedisSerializationContext.SerializationPair.fromSerializer(fastJsonRedisSerializer)).entryTtl(Duration.ofDays(30));
        return configuration;
    }
}
注解方式实现缓存、以及序列化等相关问题已解决!


 421
421


 被折叠的 条评论
为什么被折叠?


