


1、首先导入对应的4个配置插件
npm install webpack@5.0 --save-dev

npm install webpackbar -D

npm i terser-webpack-plugin@5.0.2 -D

npm i compression-webpack-plugin@5.0.1 -D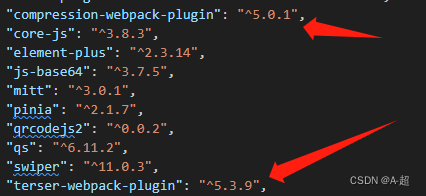
![]()
2、在vue.config.js的配置
const { defineConfig } = require("@vue/cli-service");
var path = require("path");
// var webpack = require('webpack')
// 压缩
const WebpackBar = require("webpackbar");
const TerserPlugin = require("terser-webpack-plugin");
// 压缩
const CompressionPlugin = require("compression-webpack-plugin");
const productionGzipExtensions = /\.(js|css|json|txt|html|ico|svg)(\?.*)?$/i;

function resolve(dir) {
  return path.join(__dirname, dir);
}
const name = "title"; //项目标题名字
module.exports = defineConfig({
  transpileDependencies: true,
  lintOnSave: false,
  publicPath: "./",
  outputDir: "dist",
  assetsDir: "assets",
  productionSourceMap: false,
  devServer: {
    host: "localhost",
    port: 3000, // 启动端口号
    proxy: {
        '/api': { // 请求接口中要替换的标识
            target: 'http://192.168.8.167:3000', // 代理地址
            ChangeOrigin: true, // 是否允许跨域
            secure: true,
            pathRewrite: {
                '^/api': '' // 这里理解成用‘/api’代替target里面的地址,后面组件中我们掉接口时直接用api代替 比如我要调用'http://40.00.100.100:3002/user/add',直接写‘/api/user/add’即可
            }
        }
    }
  },

  // 设置css的主入口文件
  css: {
    // css预设器配置项
    loaderOptions: {
      scss: {
        additionalData: `@import "./src/styles/style.scss";`, //主入口css文件路径
      },
    },
  },
  // 配置别名
  chainWebpack: (config) => {
    config.resolve.alias
      .set("@", resolve("src"))
      .set("@com", resolve("src/components"))
      .set("@ass", resolve("src/assets"));
    if (process.env.NODE_ENV === "production") {
      config.plugin("compressionPlugin").use(
        new CompressionPlugin({
          filename: "[path][base].gz",
          algorithm: "gzip", // 使用gzip压缩
          test: productionGzipExtensions, // 匹配文件名
          threshold: 10240, // 对超过10k的数据压缩
          minRatio: 0.8, // 压缩率小于0.8才会压缩
          deleteOriginalAssets: false, // 是否删除未压缩的源文件,谨慎设置,如果希望提供非gzip的资源,可不设置或者设置为false(比如删除打包后的gz后还可以加载到原始资源文件)
        })
      );
    }
    config.optimization.splitChunks({
      chunks: "all",
      cacheGroups: {
        libs: {
          name: "chunk-libs",
          test: /[\\/]node_modules[\\/]/,
          priority: 10,
          chunks: "initial", // only package third parties that are initially dependent
        },
        elementUI: {
          name: "chunk-elementUI", // split elementUI into a single package
          priority: 20, // the weight needs to be larger than libs and app or it will be packaged into libs or app
          test: /[\\/]node_modules[\\/]_?element-ui(.*)/, // in order to adapt to cnpm
        },
        commons: {
          name: "chunk-commons",
          test: resolve("src/components"), // can customize your rules
          minChunks: 3, //  minimum common number
          priority: 5,
          reuseExistingChunk: true,
        },
      },
    });
    // set svg-sprite-loader
    config.module.rule("svg").exclude.add(resolve("src/assets/icons")).end();
    config.module
      .rule("icons")
      .test(/\.svg$/)
      .include.add(resolve("src/assets/icons"))
      .end()
      .use("svg-sprite-loader")
      .loader("svg-sprite-loader")
      .options({ symbolId: "icon-[name]" })
      .end();
  },
  configureWebpack: () => {
    const config = {
      name: name, // 可以在 index.html 中被访问,用来注入页面标题
    };
    if (process.env.NODE_ENV === "production") {
      (config.plugins = [
        new WebpackBar({
          name: name,
        }),
        //   ComponentsPlugin({er()],
        //   }),
        //     resolvers: [VantResolv
      ]),
        // 生产环境清除 console.log
        (config.optimization = {
          minimizer: [
            new TerserPlugin({
              terserOptions: {
                mangle: true,
                compress: {
                  warnings: false,
                  drop_console: false,
                  drop_debugger: false,
                  pure_funcs: ["console.log"], // 清除 console.log
                },
                output: {
                  comments: false, // 删除注释
                },
              },
            }),
          ],
        });
    }
    return config;
  },
});
3、去除console上面不生效,就加多下面这个
安装babel-plugin-transform-remove-console 项目打包去除console
npm install babel-plugin-transform-remove-console --save-dev
在babel.config.js文件下配置

// 项目需要用到的babel插件 去除console
const allPlugins = [];
if (process.env.NODE_ENV === "production") {
  allPlugins.push("transform-remove-console");
}

module.exports = {
  presets: ["@vue/cli-plugin-babel/preset"],
  "plugins": [
    // 插件数组
    ...allPlugins,
  ],
};
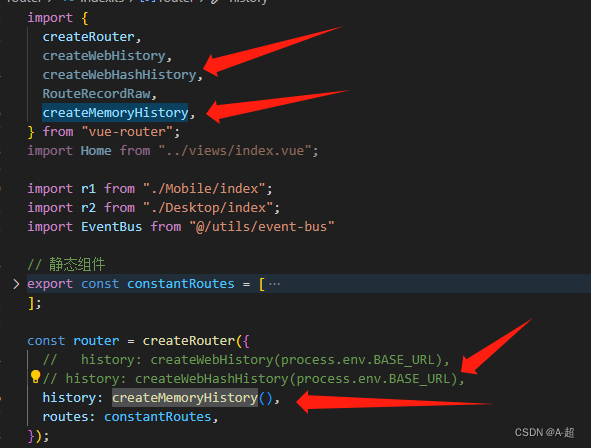
4、最后需要在router文件index把路由模式改成createWebHashHistory 或者 createMemoryHistory
最后运行npm run build就可以打包配置了


 1306
1306


 被折叠的 条评论
为什么被折叠?
被折叠的 条评论
为什么被折叠?
 到【灌水乐园】发言


