


安卓开发之图片分享应用4:发布图片功能的实现
一、效果演示
结合前面的登录注册功能,以及底部导航功能,实现点击底部导航的发布按钮之后,进入该功能,可以对图片进行上传,预览,编辑。
二、下载第三方开源九宫格图片展示器库(带编辑功能)
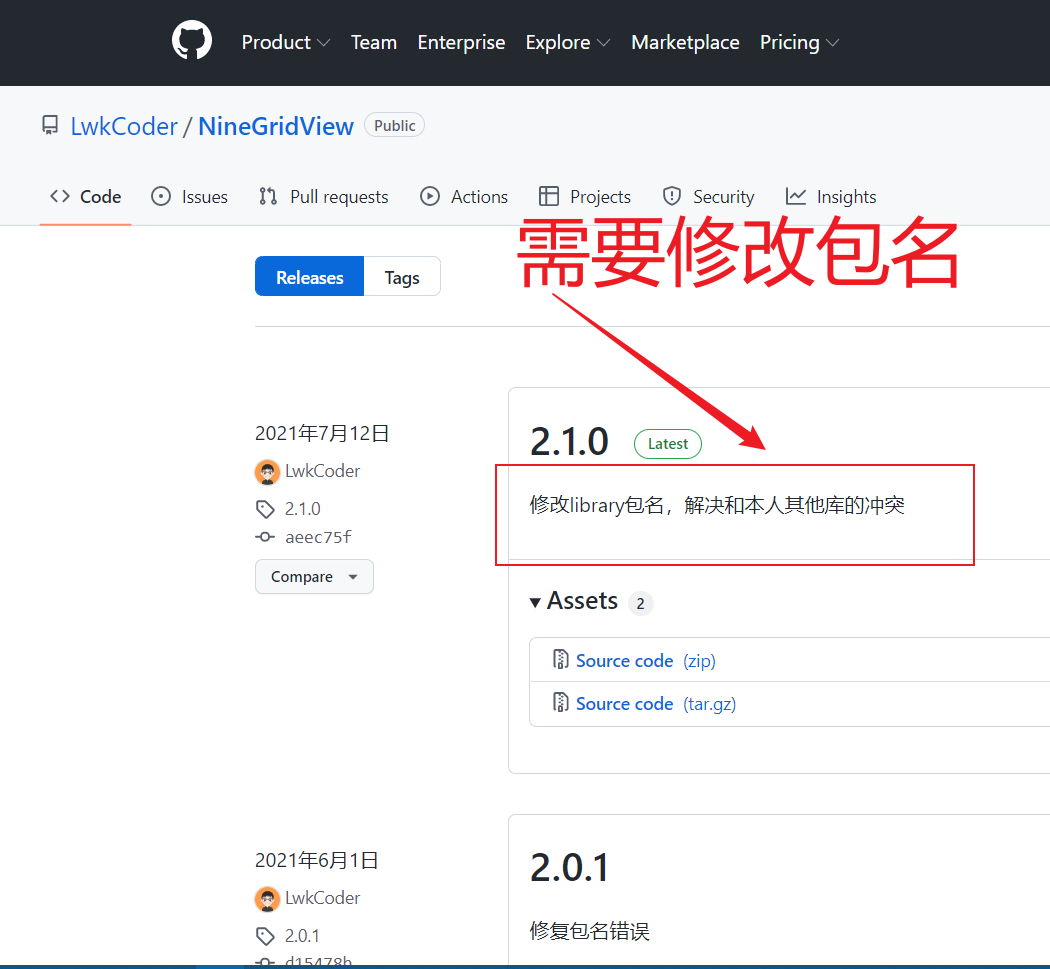
1. Github网址
经过几天的寻找,终于发现了一个对我本人来说感觉不错的九宫格图片展示器库。
Github网址为:https://github.com/LwkCoder/NineGridView
2. 将该库克隆(或者下载)到本地
①使用Git克隆到本地
使用Git克隆的话可以使用下方命令clone(克隆)到本地:
git clone https://github.com/LwkCoder/NineGridView.git
报错:OpenSSL SSL_read: Connection was reset, errno 10054
当然因为是Github,所以网络可能不好,克隆会失败,所以可以多试几次

②使用下载方式的话直接下,下载结束后解压即可。
三、将下载好的项目(九宫格图片库)作为library导入到我们的项目中使用
1. 修改整个项目的公共文件
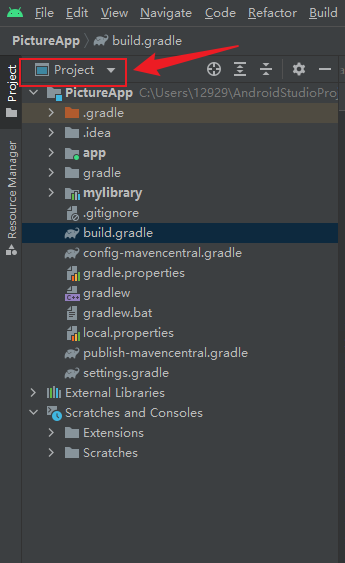
可以同时打开两个项目,我们先将项目的结构设为Project模式
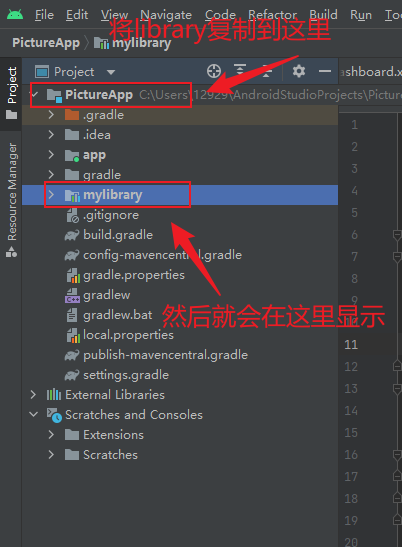
然后直接将九宫格图片库的library文件夹(依赖)复制到我们的项目PictureAPP中,因为我将名称改为mylibrary,所以这里显示的是mylibrary
我们复制进来的library依赖的文件夹图标与正常的依赖图片不一样,正常的依赖图标是这样子的:

然而我们显示的图标是这样子的:

说明我们的依赖还没有添加成功,我们先将缺少的文件复制到我们的项目中:
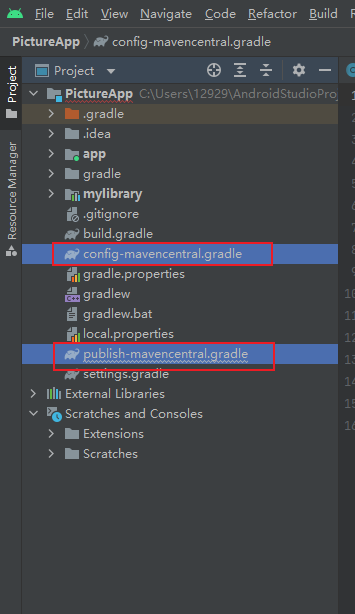
报错没关系,先不动,我们打开项目的build.gradle,注意是项目的,而不是app里面的
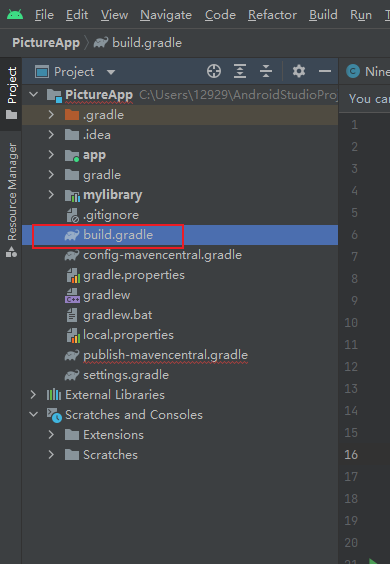
build.gradle内容如下
// Top-level build file where you can add configuration options common to all sub-projects/modules.

apply from: "config-mavencentral.gradle"

buildscript {
    repositories {
        mavenCentral()
        google()
        maven { url "https://maven.aliyun.com/repository/google"}
        maven { url "https://maven.aliyun.com/repository/jcenter"}
    }
    dependencies {
        classpath 'com.android.tools.build:gradle:4.2.0'

        // NOTE: Do not place your application dependencies here; they belong
        // in the individual module build.gradle files
    }
}

task clean(type: Delete) {
    delete rootProject.buildDir
}
然后往gradle.properties里面添加下面内容
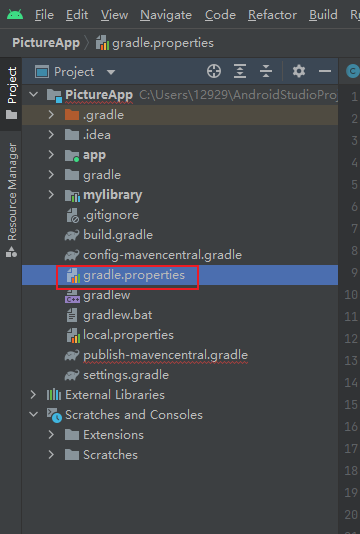
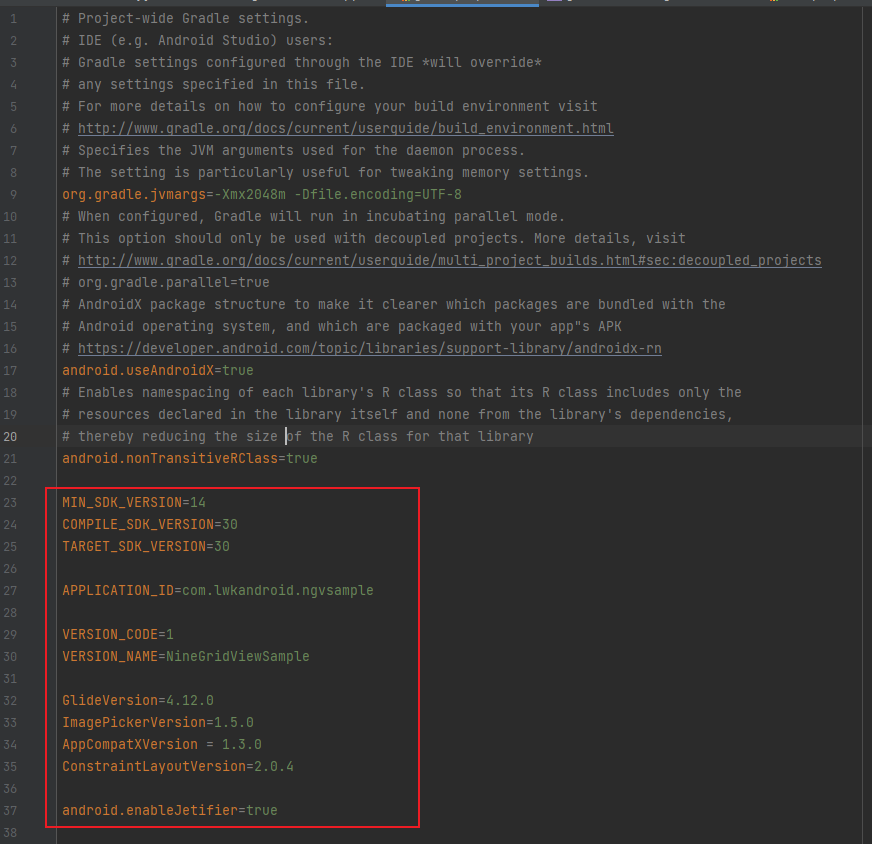
gradle.properties里添加的内容如下
MIN_SDK_VERSION=14
COMPILE_SDK_VERSION=30
TARGET_SDK_VERSION=30

APPLICATION_ID=com.lwkandroid.ngvsample

VERSION_CODE=1
VERSION_NAME=NineGridViewSample

GlideVersion=4.12.0
ImagePickerVersion=1.5.0
AppCompatXVersion = 1.3.0
ConstraintLayoutVersion=2.0.4

android.enableJetifier=true
修改settings.gradle
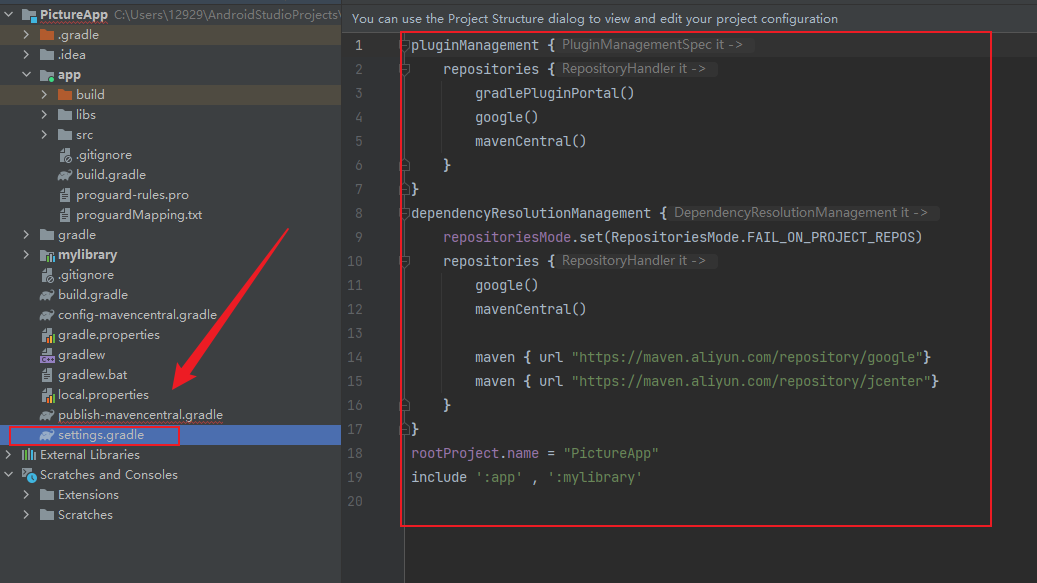
完整代码如下
pluginManagement {
    repositories {
        gradlePluginPortal()
        google()
        mavenCentral()
    }
}
dependencyResolutionManagement {
    repositoriesMode.set(RepositoriesMode.FAIL_ON_PROJECT_REPOS)
    repositories {
        google()
        mavenCentral()

        maven { url "https://maven.aliyun.com/repository/google"}
        maven { url "https://maven.aliyun.com/repository/jcenter"}
    }
}
rootProject.name = "PictureApp"
include ':app' , ':mylibrary'
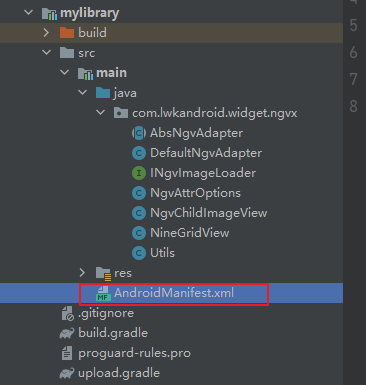
2. 修改library
我们将library打开,这里我们·先修改一下包名,因为会存在包名冲突问题
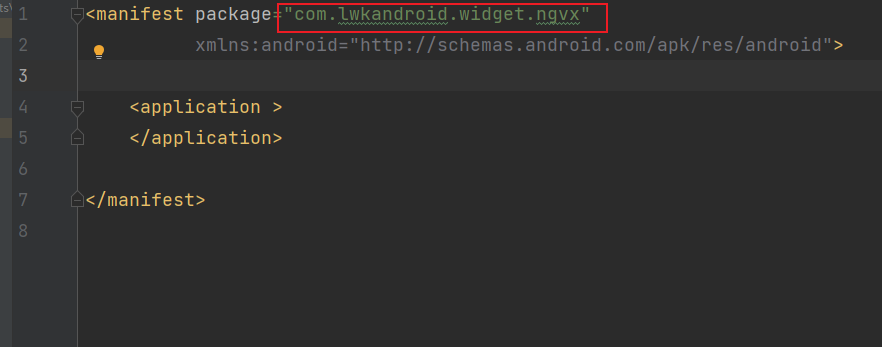
打开library后,点击AndroidManifest.xml文件
可以先跳过修改包名这一步,等后面显示包名冲突再回来改,不然可能会出现其他问题。
修改一下包名即可,我只是在原来的包名后面加了个x,改成其他也可以
最后一步,修改一下library里面的build.gradle,那么library就修改完成了
build.gradle:
apply plugin: 'com.android.library'
apply from: "${rootProject.projectDir}/publish-mavencentral.gradle"

android {
    compileSdkVersion COMPILE_SDK_VERSION as int

    defaultConfig {
        minSdkVersion MIN_SDK_VERSION as int
        targetSdkVersion TARGET_SDK_VERSION as int
    }

    compileOptions {
        sourceCompatibility JavaVersion.VERSION_1_8
        targetCompatibility JavaVersion.VERSION_1_8
    }
}

dependencies {
    implementation fileTree(dir: 'libs', include: ['*.jar'])
    implementation "androidx.appcompat:appcompat:1.3.0"
}

allprojects {
    tasks.withType(Javadoc) {//兼容中文字符
        options {
            encoding "UTF-8"
            charSet 'UTF-8'
            links "http://docs.oracle.com/javase/7/docs/api"
        }
    }
}
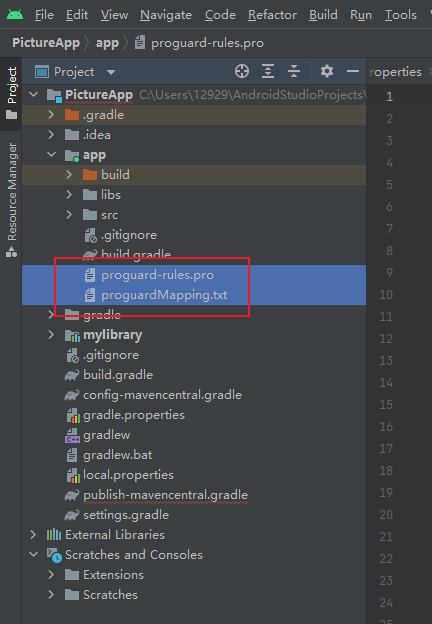
3. 修改app文件
先将九宫格图片库里面的这两个文件复制到app文件夹里,有一个是原来就存在的,直接覆盖(overWrite)
修改app的build.gradle添加依赖
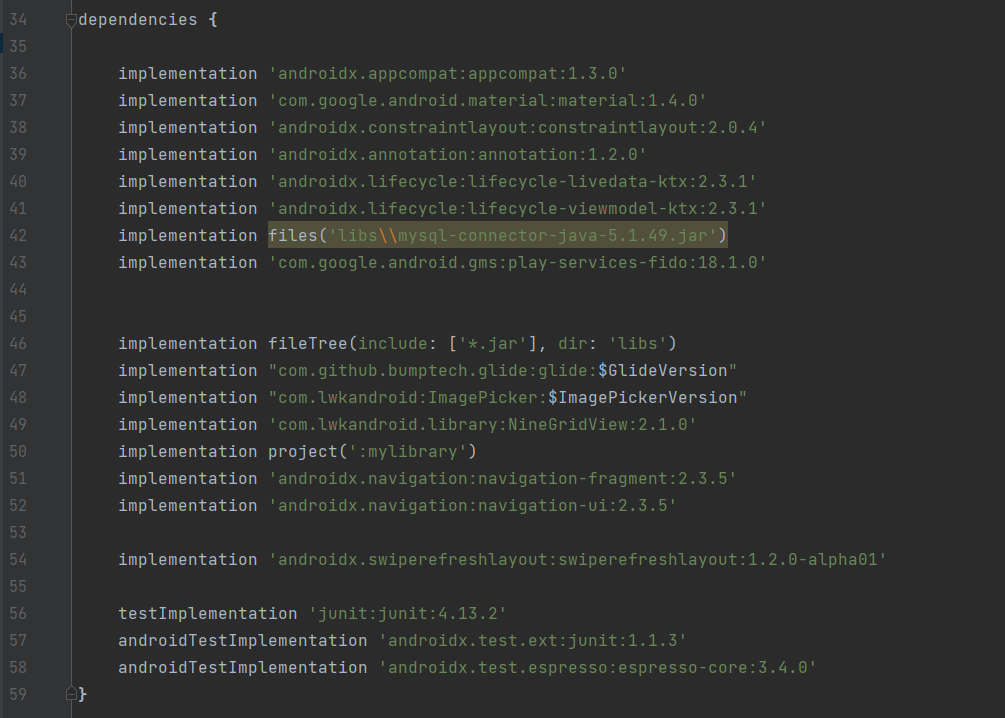
完整代码如下
plugins {
    id 'com.android.application'
}


android {
    compileSdk 32

    defaultConfig {
        applicationId "com.example.pictureapp"
        minSdk 28
        targetSdk 32
        versionCode 1
        versionName "1.0"

        testInstrumentationRunner "androidx.test.runner.AndroidJUnitRunner"
    }

    buildTypes {
        release {
            minifyEnabled false
            proguardFiles getDefaultProguardFile('proguard-android-optimize.txt'), 'proguard-rules.pro'
        }
    }
    compileOptions {
        sourceCompatibility JavaVersion.VERSION_1_8
        targetCompatibility JavaVersion.VERSION_1_8
    }
    buildFeatures {
        viewBinding true
    }
}

dependencies {

    implementation 'androidx.appcompat:appcompat:1.3.0'
    implementation 'com.google.android.material:material:1.4.0'
    implementation 'androidx.constraintlayout:constraintlayout:2.0.4'
    implementation 'androidx.annotation:annotation:1.2.0'
    implementation 'androidx.lifecycle:lifecycle-livedata-ktx:2.3.1'
    implementation 'androidx.lifecycle:lifecycle-viewmodel-ktx:2.3.1'
    implementation files('libs\\mysql-connector-java-5.1.49.jar')
    implementation 'com.google.android.gms:play-services-fido:18.1.0'


    implementation fileTree(include: ['*.jar'], dir: 'libs')
    implementation "com.github.bumptech.glide:glide:$GlideVersion"
    implementation "com.lwkandroid:ImagePicker:$ImagePickerVersion"
    implementation 'com.lwkandroid.library:NineGridView:2.1.0'
    implementation project(':mylibrary')
    implementation 'androidx.navigation:navigation-fragment:2.3.5'
    implementation 'androidx.navigation:navigation-ui:2.3.5'

    implementation 'androidx.swiperefreshlayout:swiperefreshlayout:1.2.0-alpha01'

    testImplementation 'junit:junit:4.13.2'
    androidTestImplementation 'androidx.test.ext:junit:1.1.3'
    androidTestImplementation 'androidx.test.espresso:espresso-core:3.4.0'
}
4. 最后点击Sync下载依赖即可
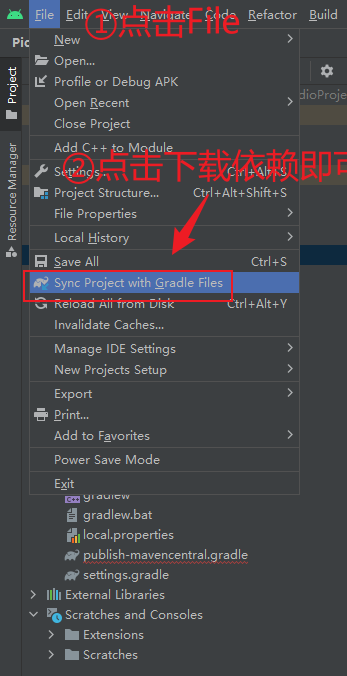
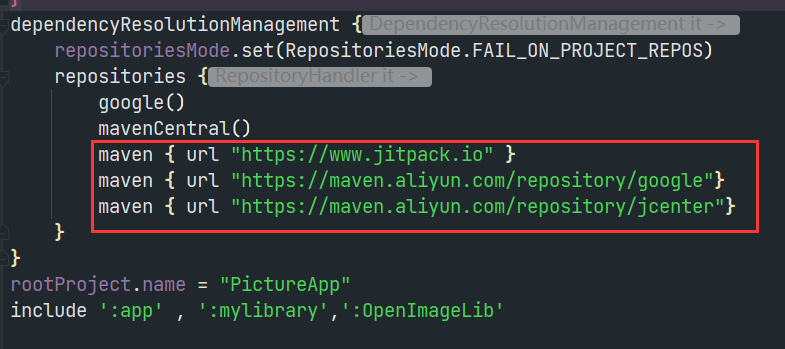
如果Sync失败或者发现代码中有某个库没导入成功爆红的话,可能是你依赖没下载完全,因为google maven 库不全,需要添加下面代码:
maven { url "https://www.jitpack.io" }
maven { url "https://maven.aliyun.com/repository/google"}
maven { url "https://maven.aliyun.com/repository/jcenter"}
添加位置:我的这个版本是在setting.gradle里面添加。老一点的版本是在bulid.gradle里面添加。
四、实现发布图片功能
点击底部导航中间的那个按钮,进入到发布图片功能,那么我们就需要修改该按钮的布局
1. 布局文件
该布局里面的NineGridView就是用到了我们导入的九宫格图片库
fragment_dashboard.xml:
<?xml version="1.0" encoding="utf-8"?>
<androidx.constraintlayout.widget.ConstraintLayout xmlns:android="http://schemas.android.com/apk/res/android"
    xmlns:app="http://schemas.android.com/apk/res-auto"
    xmlns:tools="http://schemas.android.com/tools"
    android:layout_width="match_parent"
    android:layout_height="match_parent"
    tools:context=".ui.dashboard.DashboardFragment">

    <ScrollView
        android:layout_width="match_parent"
        android:layout_height="match_parent"
        android:id="@+id/activity_main">

        <RelativeLayout
            android:id="@+id/send_page"
            android:layout_width="match_parent"
            android:layout_height="wrap_content"
            android:padding="8dp">

            <EditText
                android:id="@+id/write_content"
                android:layout_width="match_parent"
                android:layout_height="128dp"
                android:hint="输入的内容..."
                android:layout_alignParentStart="true"
                android:layout_alignParentTop="true"
                android:layout_marginTop="16dp"
                android:layout_marginBottom="16dp" />

            <CheckBox
                android:id="@+id/ck_main_is_edit_mode"
                android:layout_width="wrap_content"
                android:layout_height="wrap_content"
                android:layout_below="@id/write_content"
                android:layout_marginTop="16dp"
                android:layout_marginBottom="16dp"
                android:checked="true"
                android:text="添加图片" />

            <com.lwkandroid.widget.ngvx.NineGridView
                android:id="@+id/ninegridview"
                android:layout_width="wrap_content"
                android:layout_height="wrap_content"
                android:layout_below="@+id/ck_main_is_edit_mode"
                android:layout_alignParentStart="true"
                android:layout_alignParentLeft="true"
                android:layout_marginBottom="72dp"
                app:enable_edit_mode="true" />

        </RelativeLayout>

    </ScrollView>

    <Button
        android:id="@+id/send_button"
        android:layout_width="match_parent"
        android:layout_height="wrap_content"
        app:layout_constraintLeft_toLeftOf="parent"
        app:layout_constraintRight_toRightOf="parent"
        app:layout_constraintBottom_toBottomOf="parent"
        android:text="提交"
        android:textSize="24dp"
        />


</androidx.constraintlayout.widget.ConstraintLayout>
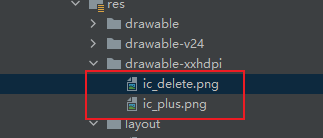
2. 图片资源
我们需要添加编辑图片时删除图片的图标,以及添加图片时的图标

将九宫格图片项目下方的这两个图片资源复制到我们项目的drawable中
3. 编写代码
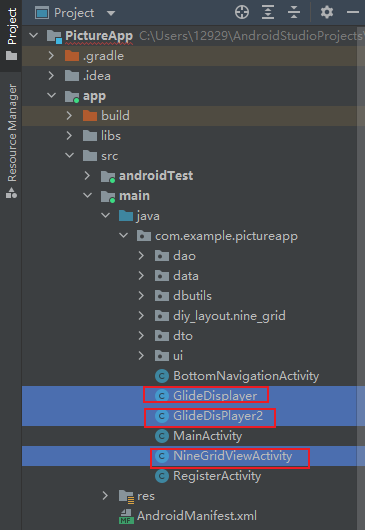
我们先将九宫格图片库里的app里面的GlideDisPlayer和GlideDisPlayer2复制到我们的项目中。
GlideDisPlayer和GlideDisPlayer2都是图片加载器,但是它们加载的类型不同,GlideDisPlayer加载他自己定义的ImageBean类,而GlideDisPlayer2加载的是图片地址为String类型的图片
并在我们的项目新建一个Activity,命名为NineGridViewActivity
NineGridViewActivity:
public class NineGridViewActivity extends AppCompatActivity implements CompoundButton.OnCheckedChangeListener
{
    private NineGridView mNineGridView;
    private DefaultNgvAdapter<ImageBean> mAdapter;
    private final int REQUEST_CODE_PICKER = 100;

    @Override
    protected void onCreate(Bundle savedInstanceState)
    {
        super.onCreate(savedInstanceState);
        setContentView(R.layout.fragment_dashboard);

        //这里在Activity的onCreat()方法里写, 返回主页
        ActionBar actionBar = getSupportActionBar();
        actionBar.setHomeButtonEnabled(true);
        actionBar.setDisplayHomeAsUpEnabled(true);  //添加返回的图标

		//编辑图片模式选择
        CheckBox checkBox = findViewById(R.id.ck_main_is_edit_mode);
        checkBox.setOnCheckedChangeListener(this);

        mNineGridView = findViewById(R.id.ninegridview);

        //设置图片分割间距,默认8dp,默认对应attr属性中divider_line_size
        mNineGridView.setDividerLineSize(TypedValue.COMPLEX_UNIT_DIP, 2);
        //设置是否开启编辑模式,默认false,对应attr属性中enable_edit_mode
        mNineGridView.setEnableEditMode(true);
        //设置水平方向上有多少列,默认3,对应attr属性中horizontal_child_count
        mNineGridView.setHorizontalChildCount(3);
        //设置非编辑模式下,只有一张图片时的尺寸,默认都为0,当宽高都非0才生效,且不会超过NineGridView内部可用总宽度,对应attr属性中single_image_width、single_image_height
        mNineGridView.setSingleImageSize(TypedValue.COMPLEX_UNIT_DIP, 150, 200);
        //NineGridView的数据适配器,构造方法中必须设置最大数据容量和图片加载器
        mAdapter = new DefaultNgvAdapter<>(9, new GlideDisplayer());

        //设置点击事件
        mAdapter.setOnChildClickListener(new DefaultNgvAdapter.OnChildClickedListener<ImageBean>()
        {
            @Override
            public void onPlusImageClicked(ImageView plusImageView, int dValueToLimited)
            {
                //编辑模式下,图片展示数量尚未达到最大数量时,会显示一个“+”号,点击后回调这里
                new ImagePicker()
                        .pickType(ImagePickType.MULTI)
                        .maxNum(dValueToLimited)
                        .start(NineGridViewActivity.this, REQUEST_CODE_PICKER);
            }

            @Override
            public void onContentImageClicked(int position, ImageBean data, NgvChildImageView childImageView)
            {
                Toast.makeText(NineGridViewActivity.this, "点击position=" + position + "\n" + data.toString(), Toast.LENGTH_SHORT).show();
            }

            @Override
            public void onImageDeleted(int position, ImageBean data)
            {
                Toast.makeText(NineGridViewActivity.this, "删除position=" + position + "\n" + data.toString(), Toast.LENGTH_SHORT).show();
            }
        });
        //关联适配器
        mNineGridView.setAdapter(mAdapter);
    }

    /**
     * 返回按钮
     * @param item
     * @return
     */
    @Override
    public boolean onOptionsItemSelected(MenuItem item) {
        switch (item.getItemId()) {
            case android.R.id.home:
                this.finish();
                return true;
        }
        return super.onOptionsItemSelected(item);
    }


    @Override
    public void onCheckedChanged(CompoundButton compoundButton, boolean b)
    {
        mNineGridView.setEnableEditMode(b);
    }

    @Override
    protected void onActivityResult(int requestCode, int resultCode, Intent data)
    {
        super.onActivityResult(requestCode, resultCode, data);
        if (requestCode == REQUEST_CODE_PICKER && resultCode == RESULT_OK && data != null)
        {
            List<ImageBean> list = data.getParcelableArrayListExtra(ImagePicker.INTENT_RESULT_DATA);
            System.out.println("-------"+list);
            mAdapter.addDataList(list);
        }
    }
}
修改底部导航中间按钮dashboard的Fragment布局,该文件在ui的dashboard文件夹里
DashboardFragment:
public class DashboardFragment extends Fragment {

    private FragmentDashboardBinding binding;

    public View onCreateView(@NonNull LayoutInflater inflater,
                             ViewGroup container, Bundle savedInstanceState) {
        DashboardViewModel dashboardViewModel =
                new ViewModelProvider(this).get(DashboardViewModel.class);

        binding = FragmentDashboardBinding.inflate(inflater, container, false);
        View root = binding.getRoot();

// 我们不需要TextView,所以注释掉,也可以删掉
//        final TextView textView = binding.textDashboard;
//        dashboardViewModel.getText().observe(getViewLifecycleOwner(), textView::setText);
        return root;
    }

    @Override
    public void onDestroyView() {
        super.onDestroyView();
        binding = null;
    }
}
4. 最后一步,点击底部导航时跳转到发布图片功能页
只需要在MainActivity里面的OnCreate方法里面设置相应的监听器即可,如下方代码所示:
//这里可true是一个消费过程,同样可以使用break,外部返回true也可以
        navView.setOnItemSelectedListener(new NavigationBarView.OnItemSelectedListener() {
            @Override
            public boolean onNavigationItemSelected(@NonNull MenuItem item) {
                switch (item.getItemId()) {
                    case R.id.navigation_home:

                        return true;
                    case R.id.navigation_dashboard:
                    	//跳转到发布功能页
                        Intent intent = new Intent(MainActivity.this, NineGridViewActivity.class);
                        startActivity(intent);
                        return true;
                    case R.id.navigation_notifications:
                        return true;
                }
                return false;
            }
        });
最后大功告成,启动App即可,谢谢大家的观看。


 3979
3979


 被折叠的 条评论
为什么被折叠?
被折叠的 条评论
为什么被折叠?
 到【灌水乐园】发言


