


目录
1. 前言
emmm… 小孩没娘说来话长,由于开发限制,M芯的ARM架构属实有点恶心,我把我用了不到一年的macbook 14 pro给卖掉了,换成了ThinkBook 14+。
但是又有点换年macOS系统,所以…
2. 下载所需文件
- 官方正版VMware下载(17 pro):https://pan.quark.cn/s/b3e13befc19f
- 下载系统镜像:https://pan.quark.cn/s/23bc07b9646d
- macOS-VMware补丁文件(提取码:qwdn): https://pan.baidu.com/s/1nhMixza7SBaJGjCp0J5Cmw?pwd=qwdn
一共三个文件:(缺一不可)
- VMware安装包
- macOS镜像文件
- macOS-VMware补丁文件
3. 安装VMware
请先移步此教程安装VMware再继续:
VMware的安装教程看我这篇文章:https://blog.csdn.net/weixin_52799373/article/details/139041173
VMware的安装教程看我这篇文章:https://blog.csdn.net/weixin_52799373/article/details/139041173
VMware的安装教程看我这篇文章:https://blog.csdn.net/weixin_52799373/article/details/139041173
4. 安装macOS-VMware补丁文件
4.1 解压macOS-VMware补丁文件
解压 unlocker424.zip

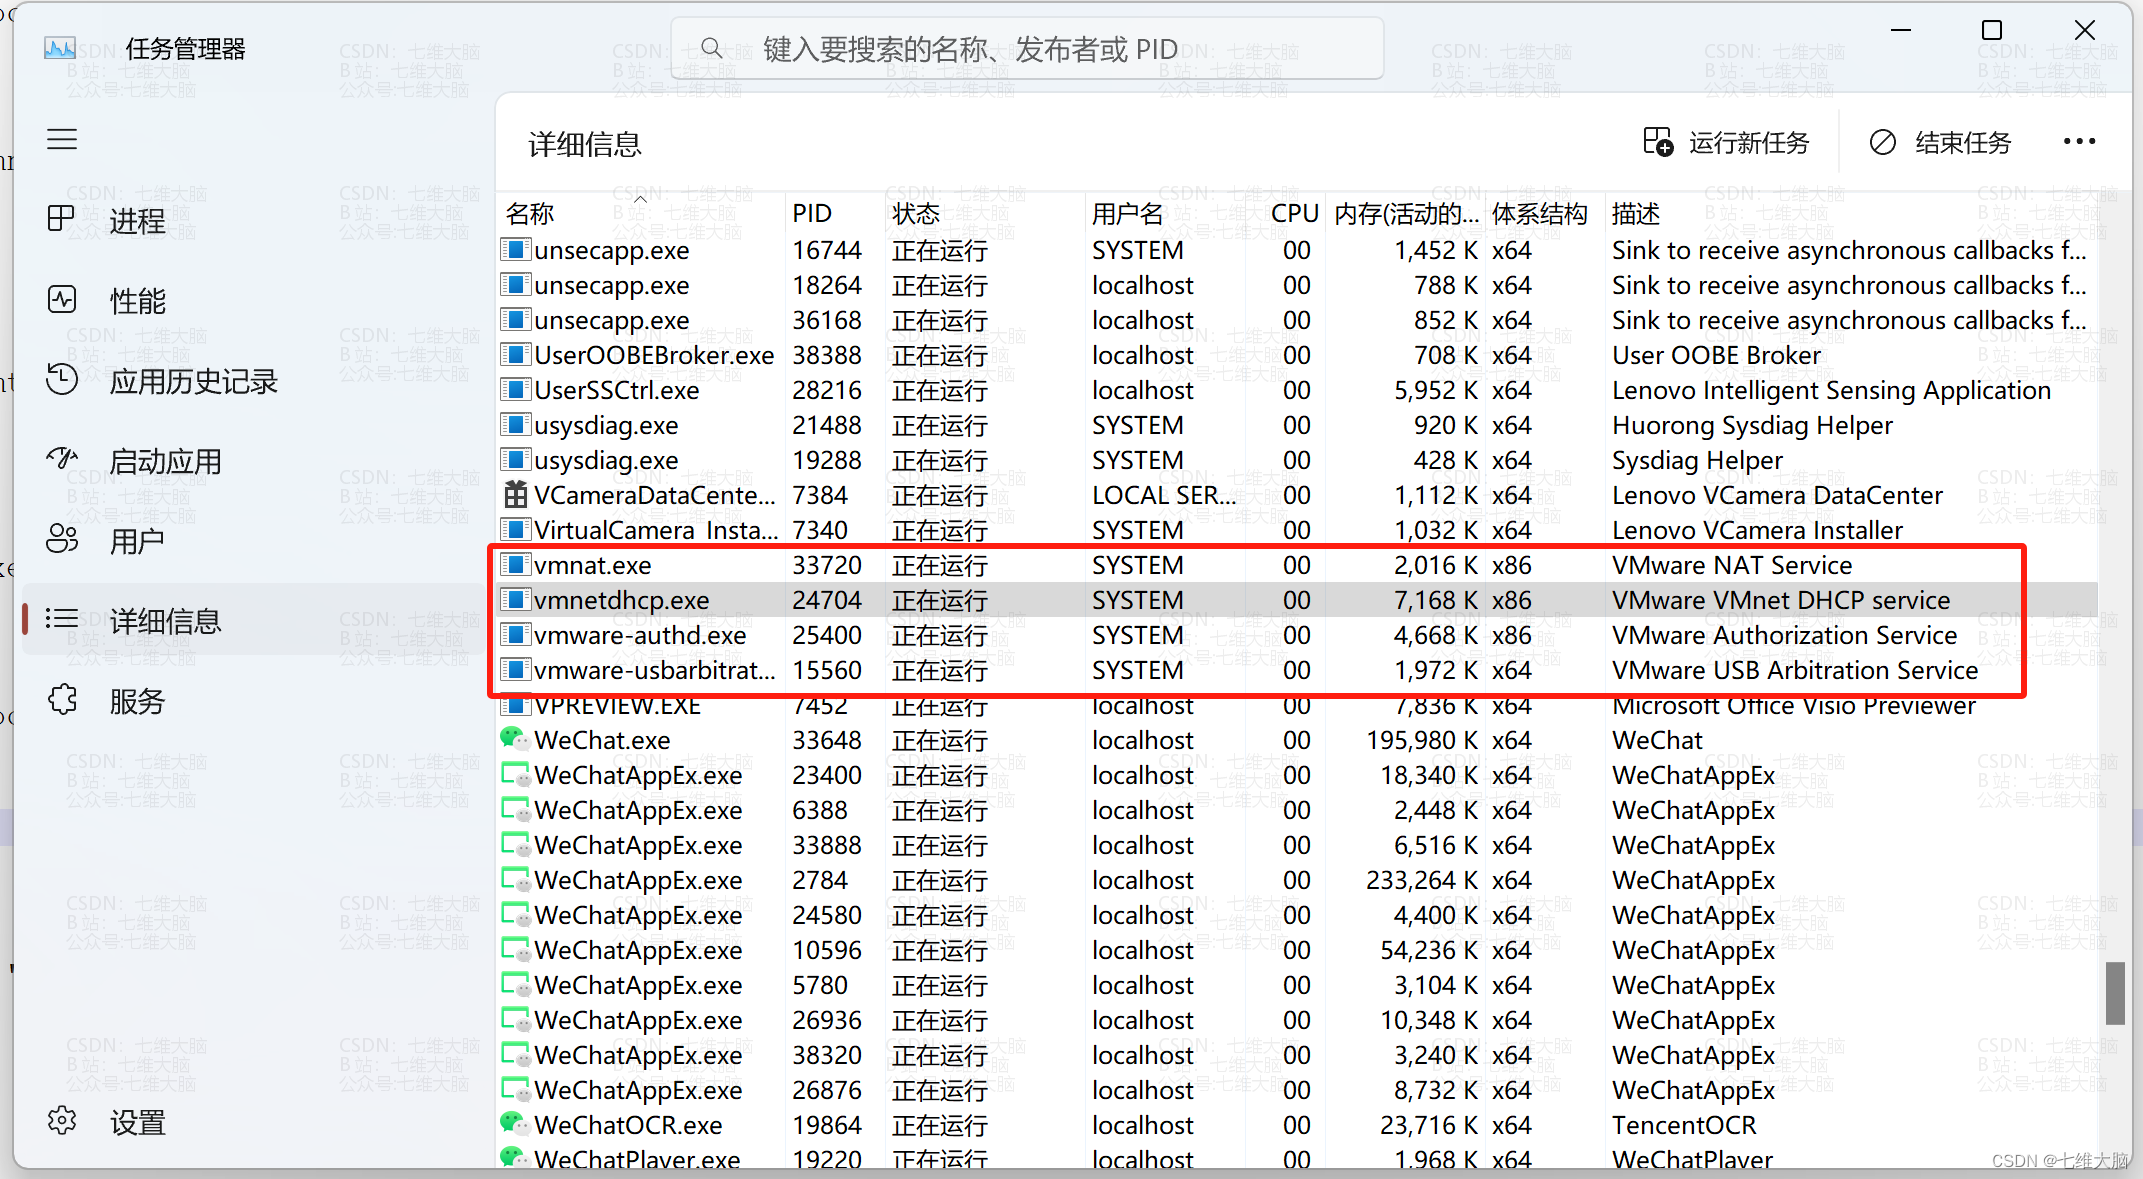
4.2 结束VMware相关进程
在任务栏上 右键——任务管理器——详细信息,找到VMware相关的进程全部结束掉。


4.3 运行补丁包
找到补丁包解压目录后进入windows目录,双击运行unlock.exe

如果提示如下弹出:

点击 更多信息 :

仍要运行:

然后点击 是 ,就会显示如下弹窗,按下回车即可


5. 安装macOS
5.1 新建虚拟机
直接点击 创建新的虚拟机,或者在左侧 库 栏内右键 新建虚拟机,或者点击左上角 文件 — 新建虚拟机 :

选择 自定义(高级)(C) 后,点击 下一步:

继续点击 下一步:

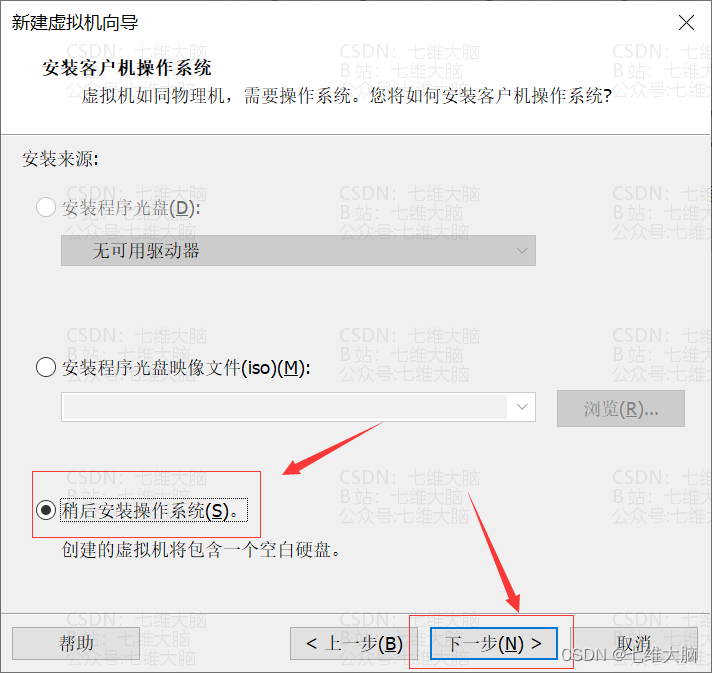
选择 稍后安装操作系统(S)。 后,点击 下一步:
现在我们就相当于买电脑,先把电脑配置整好。什么Cpu啊内存条啊硬盘啊什么乱七八糟的,先不着急装系统。
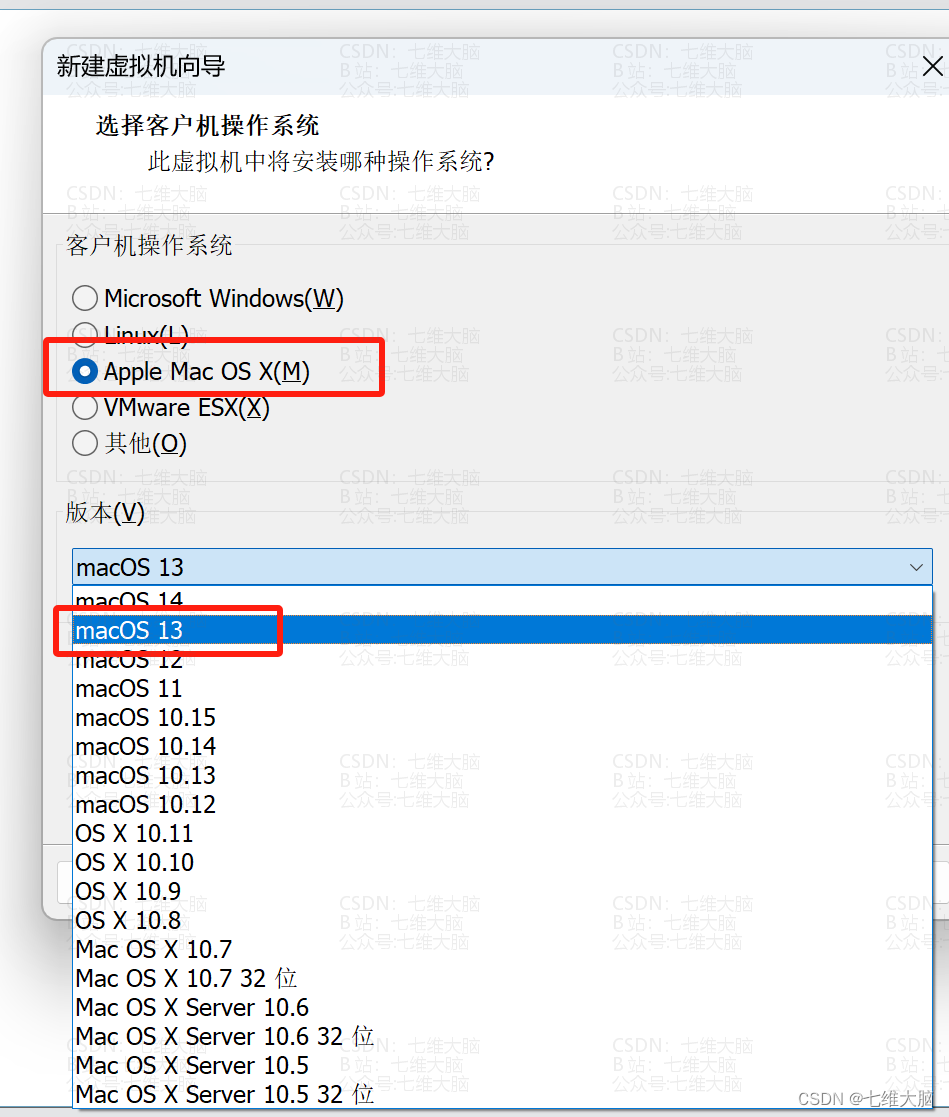
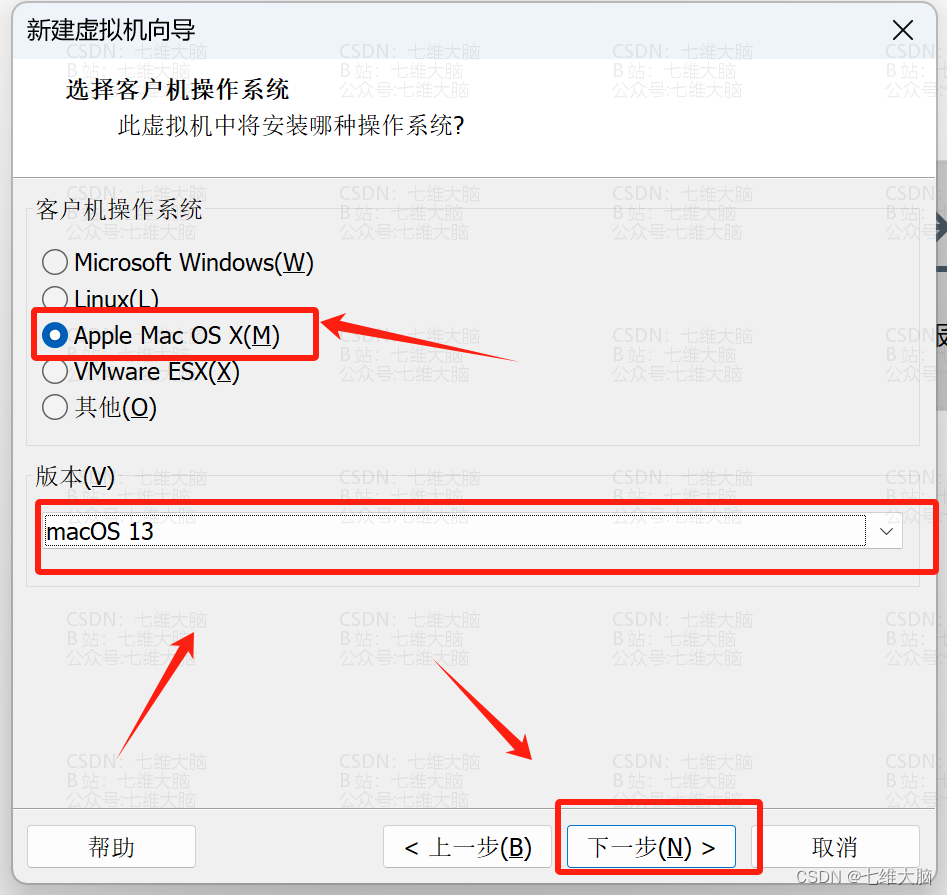
选择 Apple Mac Os X(M) 后,在下方 版本(V) 中选择我们安装系统版本:
(不在第四步骤安装补丁不显示这个选项哈)
该选择的选择好以后,点击 下一步 :
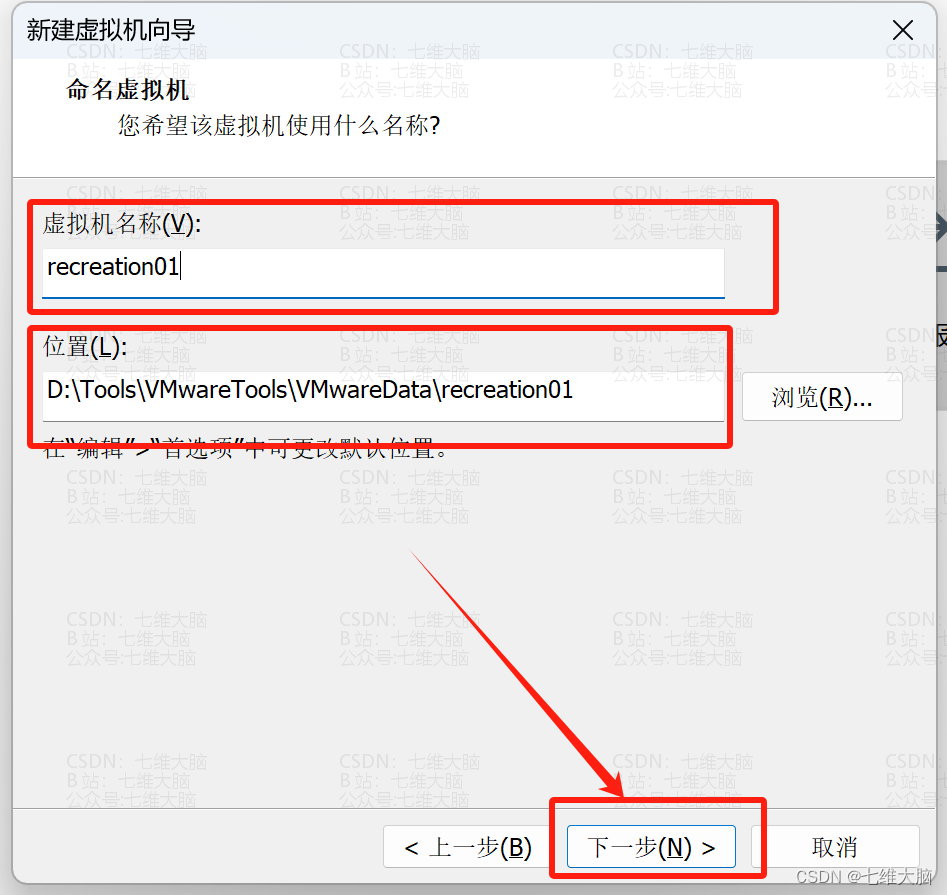
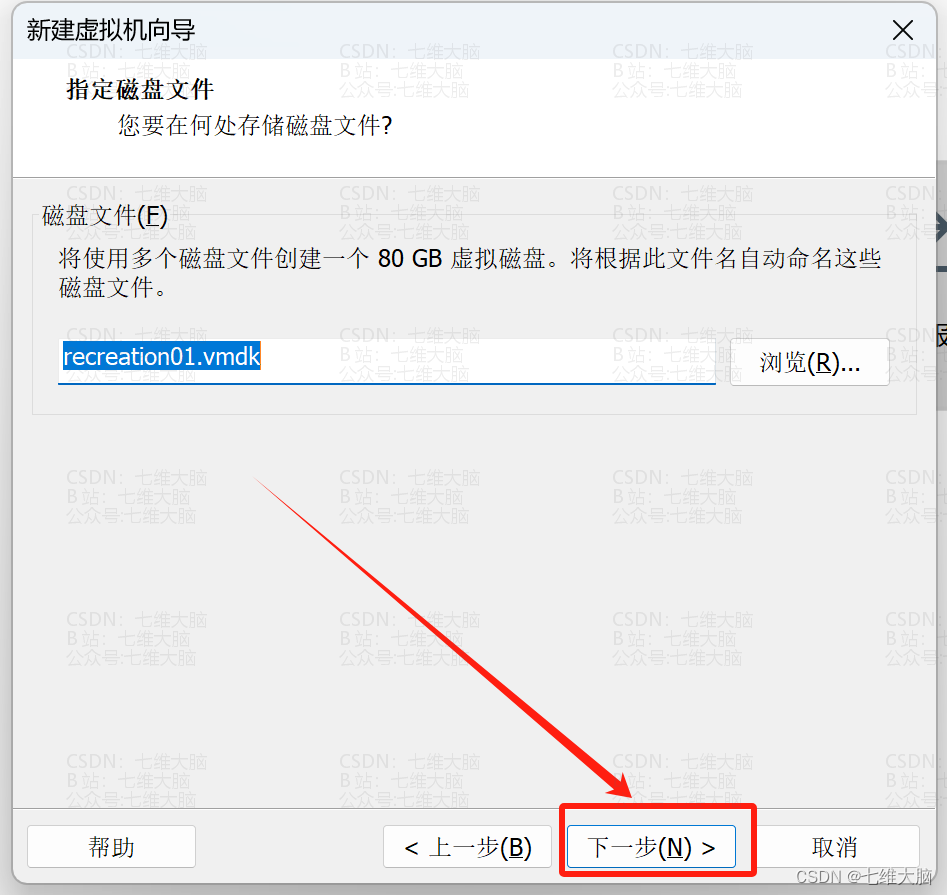
这里是要我们给虚拟机起个名字,你可以根据自己的实际需求起名,比如 recreation01 ,意为娱乐第01个虚拟机。
下面的 位置(L): 如果你没有按照 步骤3.3 修改默认位置,那你肯定是C盘,不建议大家放到C盘,会让C盘越来越臃肿!如果你显示的位置是在C盘,请回去看 步骤3.3 。
名字起好,位置选好,就可以点击 下一步 了:
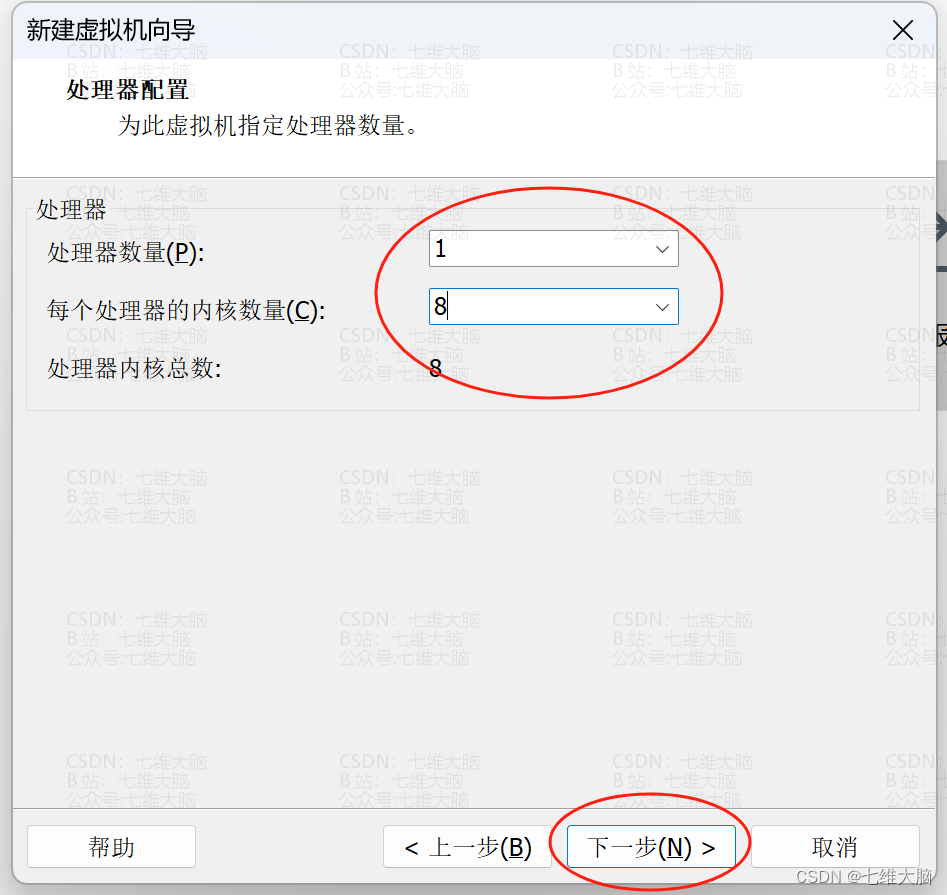
选处理器数量和内核数量建议根据自身处理器情况来。首先我们在 底部任务栏 右键选择 任务管理器:(Win10、Win11一样)
然后选择 性能 — CPU,就可以看到物理核心数和逻辑核心数了。

根据自己的需要选择核心数,但是切记不能等于或超过物理机的 实际核心数!!!
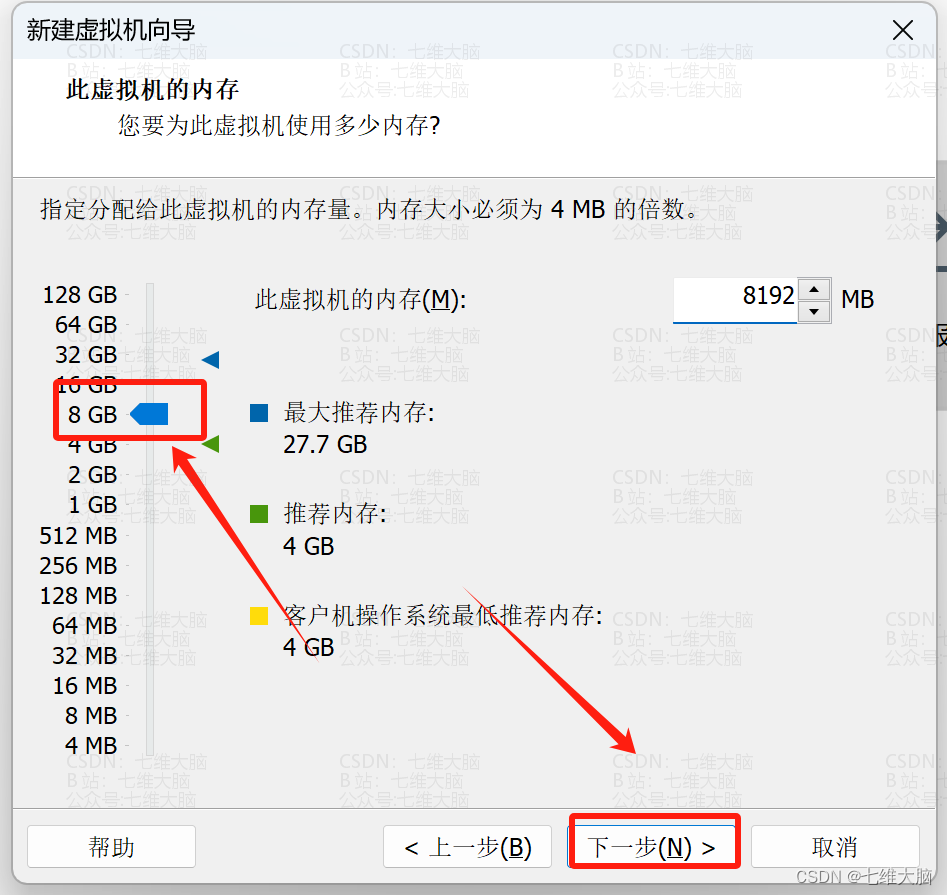
内存也是根据大家自身情况选择,物理机内存大小从 任务管理器 — 性能 — 内存 中查看,我是32GB内存我这里就选个8GB了(不能等于或超过物理机):
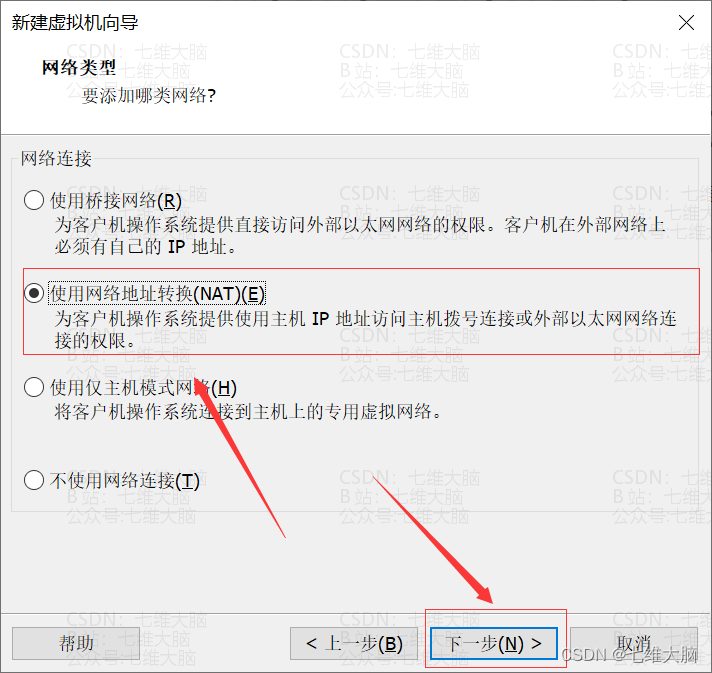
选择 使用网络地址转换(NAT)(E) 后,点击 下一步:
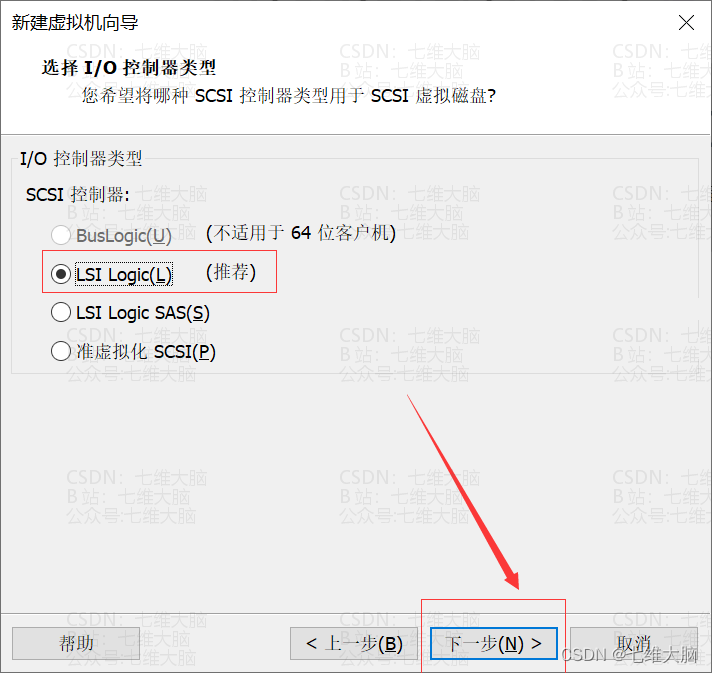
默认推荐,点击 下一步:
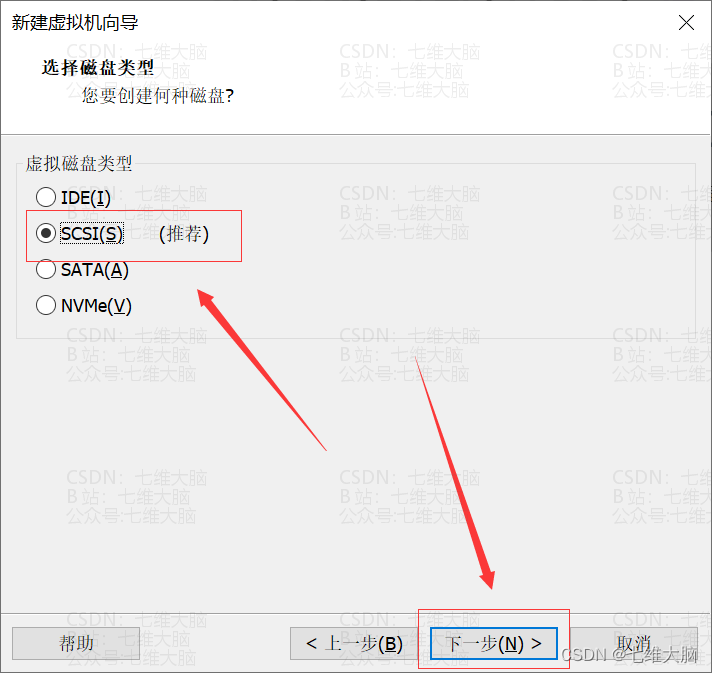
默认推荐,点击 下一步:
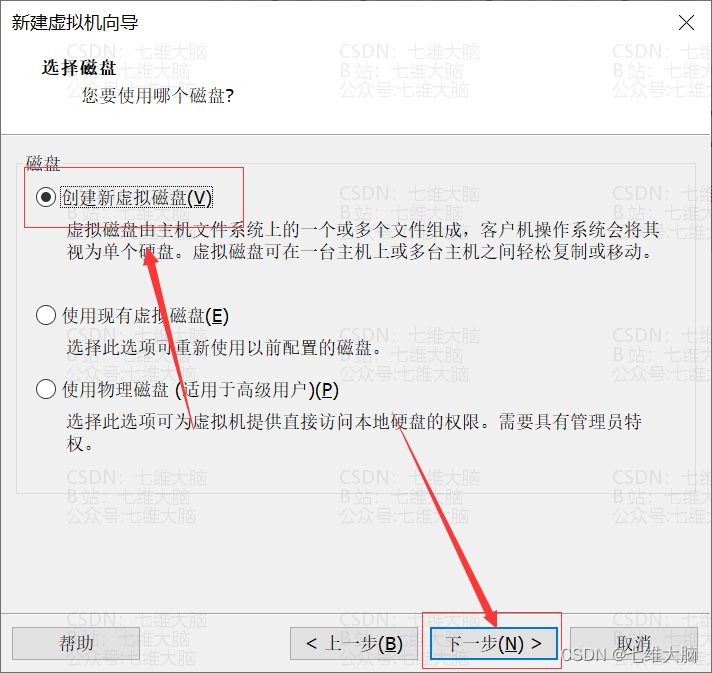
默认第一个,点击 下一步:
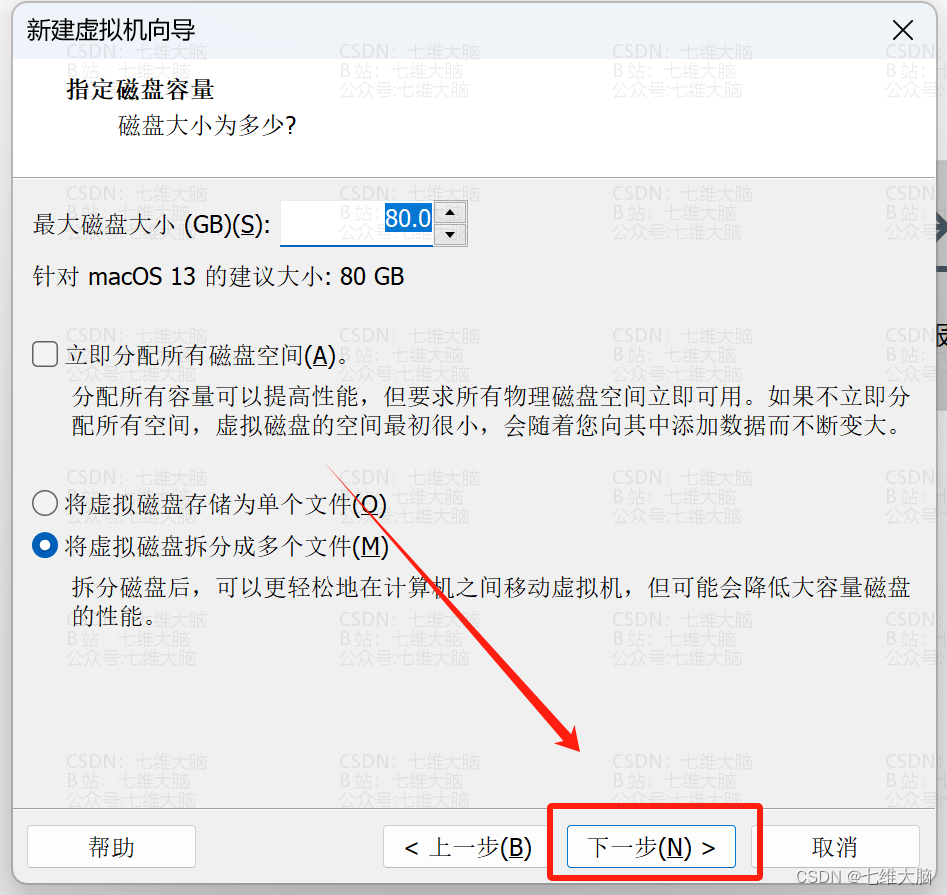
最大磁盘默认就行了,学习测试使用完全够用,最后点击 下一步:
(注意:不是说给了多少GB磁盘大小就少了多少GB,而是最大磁盘大小,用多少少多少)
直接点击 下一步:
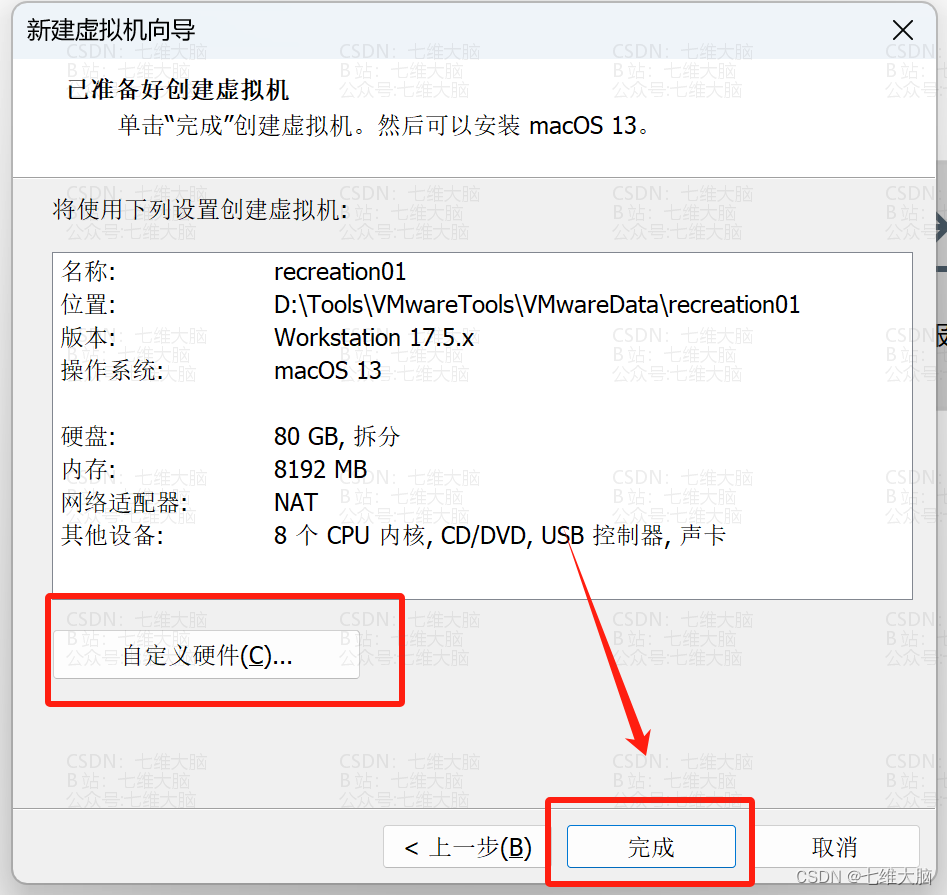
到这里虚拟机就创建好了,相当于我们把电脑配好了,一会该去装系统了,如果你觉得不满意,还可以点击 自定义硬件(C) 去修改,满意可以直接点完成:
5.2 修改虚拟机配置
找到我们刚刚创建的虚拟机保存位置,然后找到后缀名位 .vmx 的文件:

右键用记事本编辑或其他文本编辑工具打开:
在最后面加入:smc.version = "0"

5.3 安装操作系统
5.3.1 选择 ISO 映像文件
在左侧双击我们刚刚创建的虚拟机,然后在右侧点击 编辑虚拟机设置:

在 硬件 这栏,点击 CD/DVD (IDE),然后选择 使用 ISO 映像文件(M):

点击 浏览 按钮,选择我们下载的系统镜像:
(这里选择的是步骤2 中下载的系统镜像)

最后点击 确定:

5.3.2 开启虚拟机
在左侧双击我们刚刚创建的虚拟机,然后在右侧点击 开启此虚拟机:

等待进度条完成:

5.2.3 选择语言

5.2.4 磁盘工具设置

选择VMware Virtual SATA Hard Drive Media,然后点击上方的 抹掉:

起个名字,比如:macOS hard disk,然后点 抹掉 :

抹掉完成后,点击完成:

最后叉掉这个磁盘工具界面:

5.2.5 安装 macOS


最后等待完成:

中会出现这个白苹果界面,不用担心,耐心的等待即可。
会出现多次,第一次下方会显示时间,后面的只有进度条。

完成后会出现选择国家地区的界面:

5.2.6 完成配置进入系统
翻到最后选择 中国大陆,然后点击 继续:


设置账户名、密码等,然后点 继续:


这样就进入系统了:

看一下信息:

5.2.7 联网
先关机:

搜索 服务,点击 打开:

找到 VMware DHCP Services,点击启动:

找到 VMware NAT Services ,点击启动:

回到VMware,重新开启虚拟机,进入系统验证是否联网:
网络已连接

然后百度也可以打开了。
5.2.8 解决系统窗口过小的问题
桌面上有一个光盘一样的东西,叫做 Install macOS Ventura,在这个东西上面右键,选择 推出“Install macOS Ventura”:

首先确保系统已经联网,然后在VMware软件上方点击 虚拟机,然后点击 安装 VMware Tools(T)...

在弹出的小窗口中,双击 安装 VMware Tools:


输入密码,然后点击 安装软件:


重启完成后,就基于VMware全屏了:

大功告成!!!

6. 问题汇总
6.1 无限重启
一直重启,显示这个界面。
找到该虚机的vmx,在里面添加 smc.version = "0"

6.2 AMD处理器无法正常启动看这个
找到该虚机的vmx,在里面添加
smc.version = "0"

cpuid.0.eax = "0000:0000:0000:0000:0000:0000:0000:1011"

cpuid.0.ebx = "0111:0101:0110:1110:0110:0101:0100:0111"

cpuid.0.ecx = "0110:1100:0110:0101:0111:0100:0110:1110"

cpuid.0.edx = "0100:1001:0110:0101:0110:1110:0110:1001"

cpuid.1.eax = "0000:0000:0000:0001:0000:0110:0111:0001"

cpuid.1.ebx = "0000:0010:0000:0001:0000:1000:0000:0000"

cpuid.1.ecx = "1000:0010:1001:1000:0010:0010:0000:0011"

cpuid.1.edx = "0000:0111:1000:1011:1111:1011:1111:1111"

smbios.reflectHost = "TRUE"

hw.model = "MacBookPro14,3"

board-id = "Mac-551B86E5744E2388"

keyboard.vusb.enable = "TRUE"

mouse.vusb.enable = "TRUE"
7. 🤑鼓励一下
如果帮到您请您在文章下方点击 打赏
按钮,打赏支持一下吧😄
8. 求关注
看在这么详细份上,点击文章下方的微信公众号按钮点个关注吧!


 1万+
1万+

 被折叠的 条评论
为什么被折叠?
被折叠的 条评论
为什么被折叠?
 到【灌水乐园】发言


