


第一步 注册腾讯地图api
1. 到腾讯地图api注册一下
https://lbs.qq.com/dev/console/application/mine
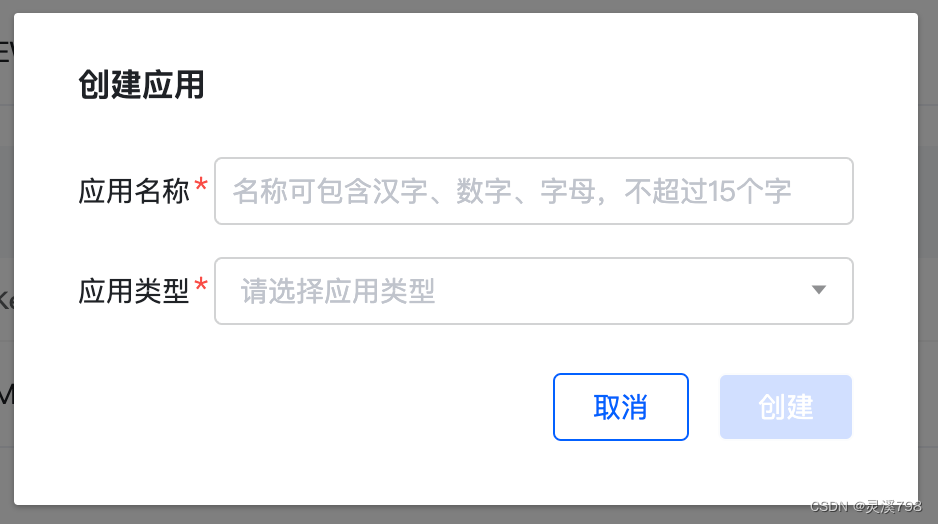
2. 创建你自己的应用

添加一下key
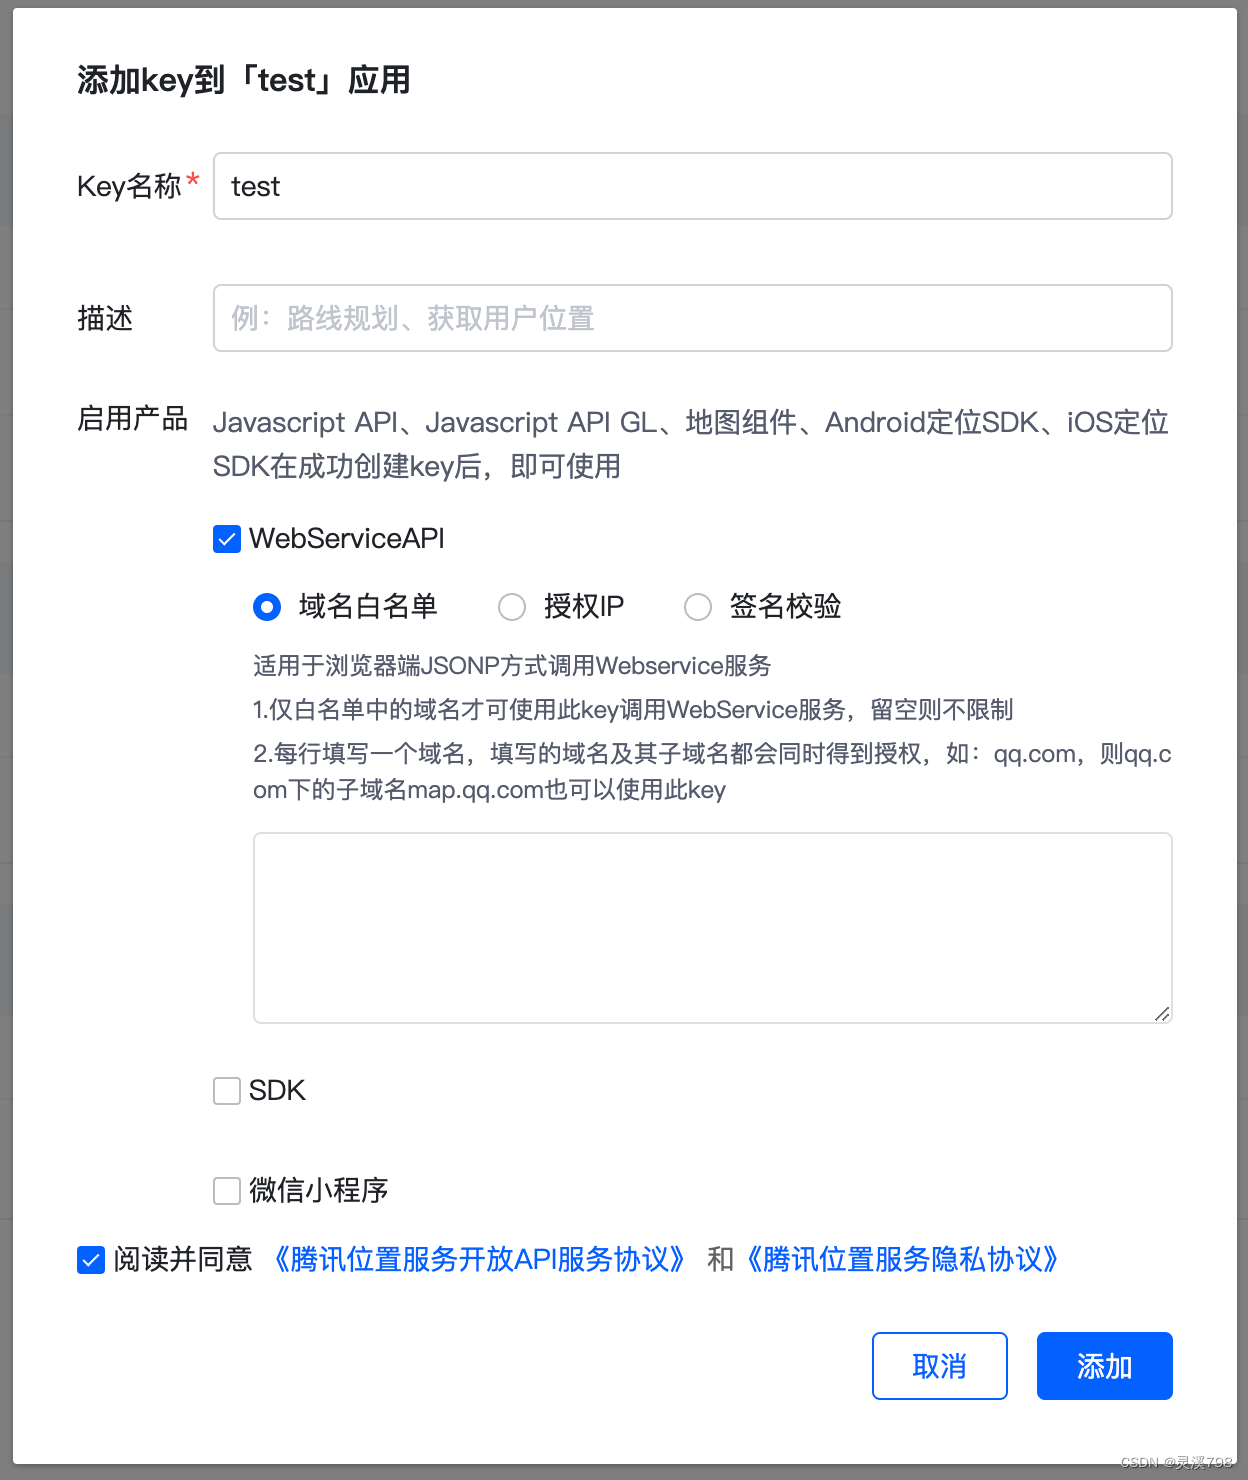
添加之后就有key了

添加之后还需要分配额度才能使用,到账户额度去给这个key配额
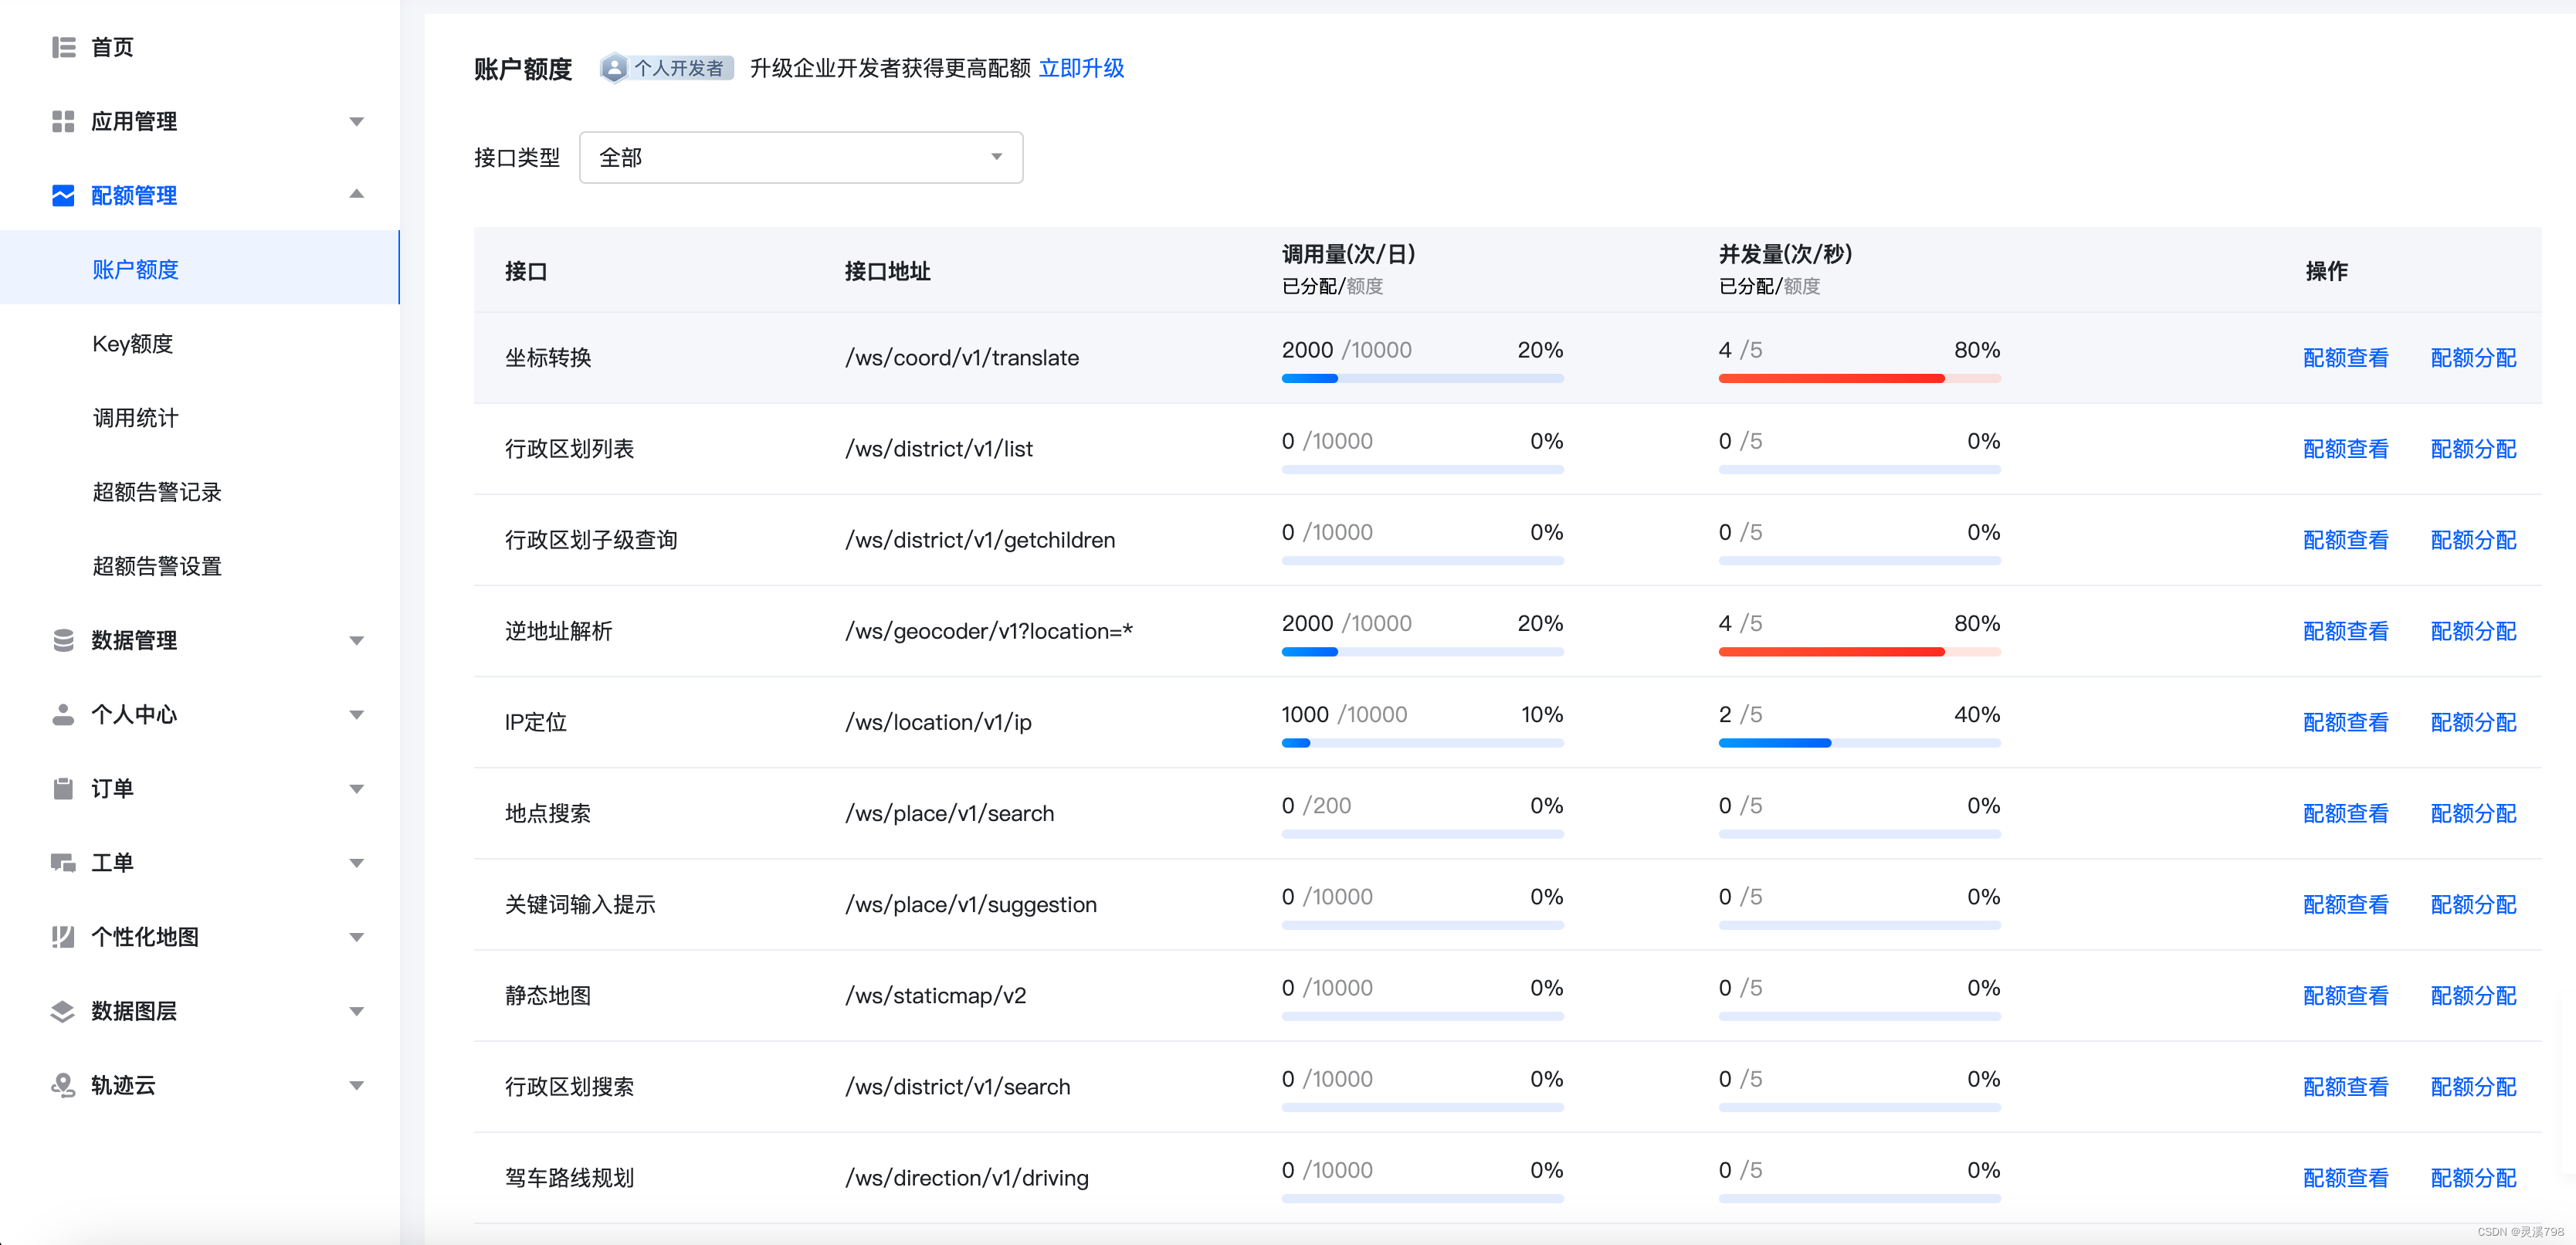
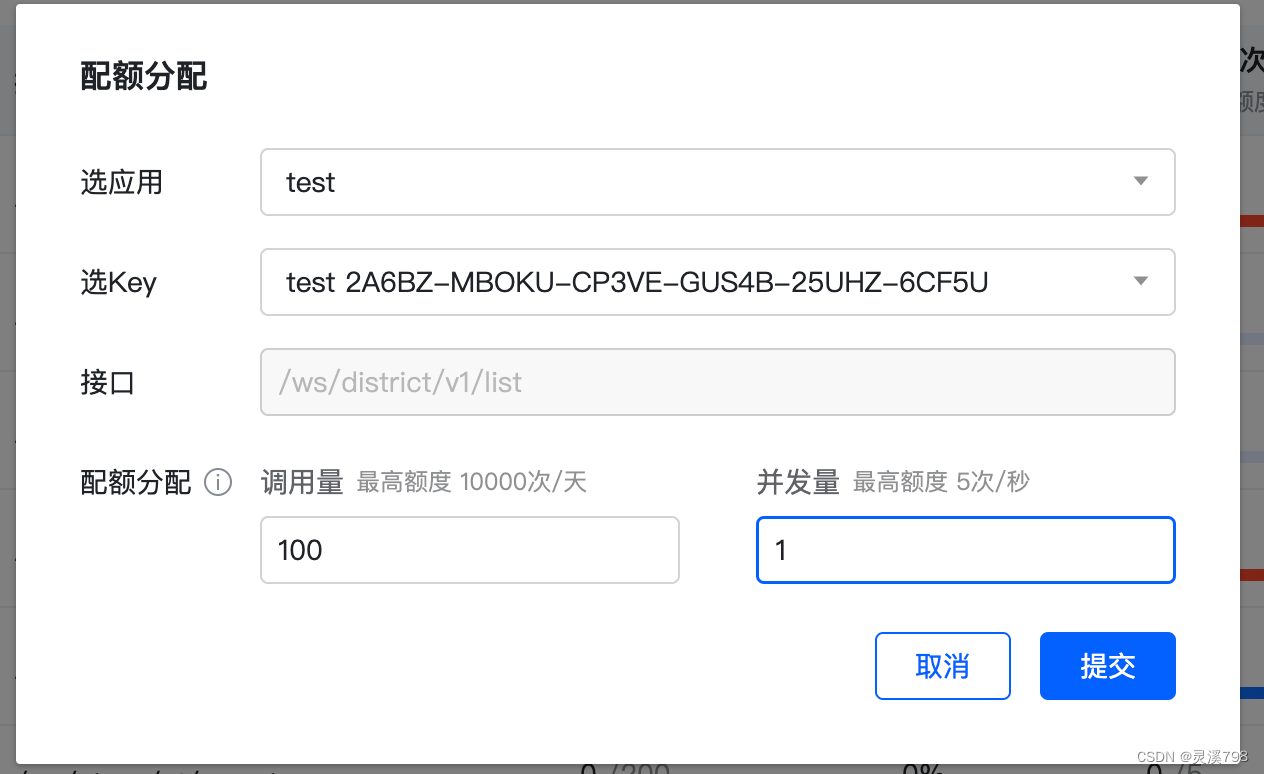
这样分配额度
然后到应用里面详情就能看到刚刚分配的额度了
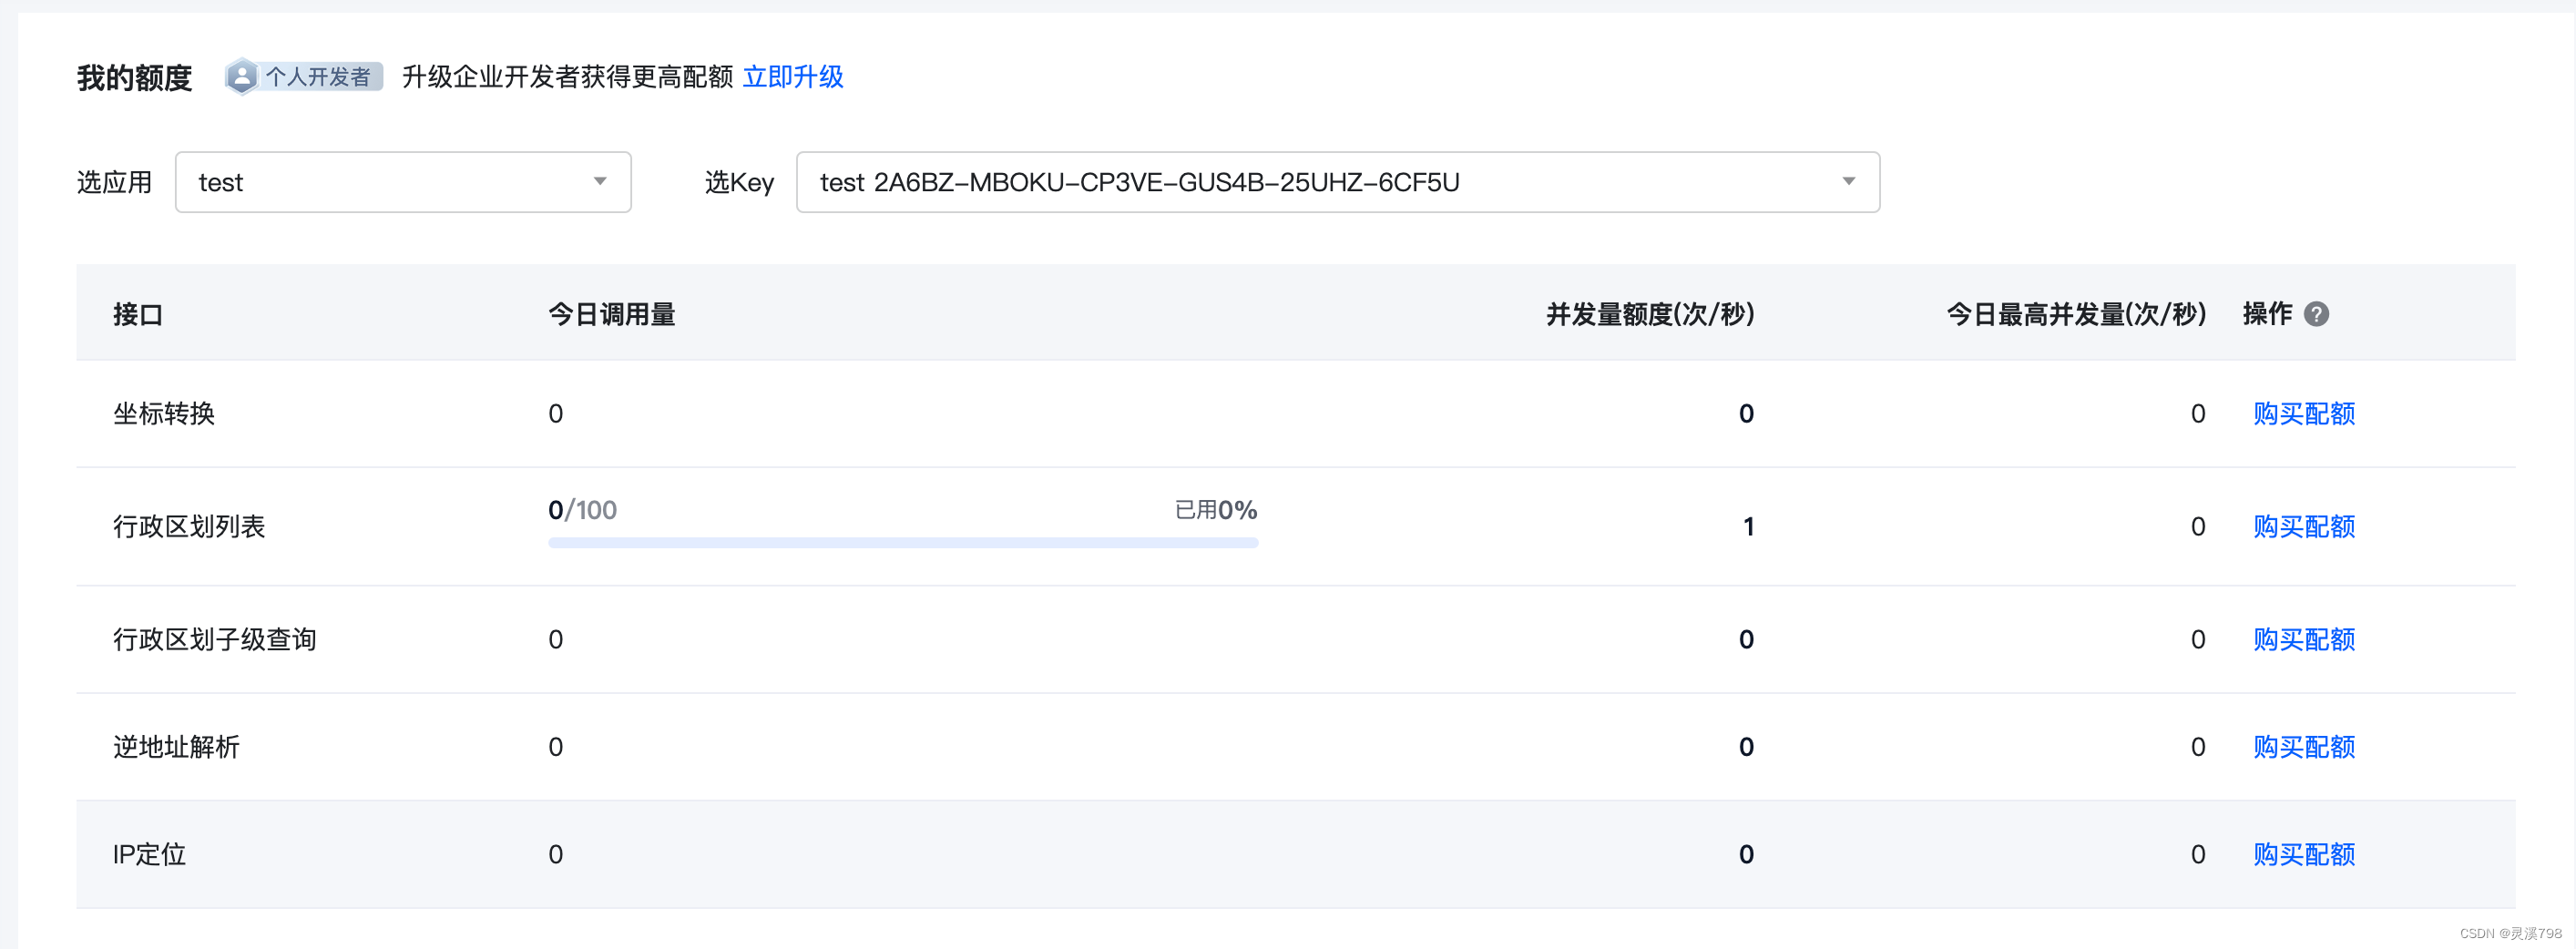
这样就能调用接口请求了
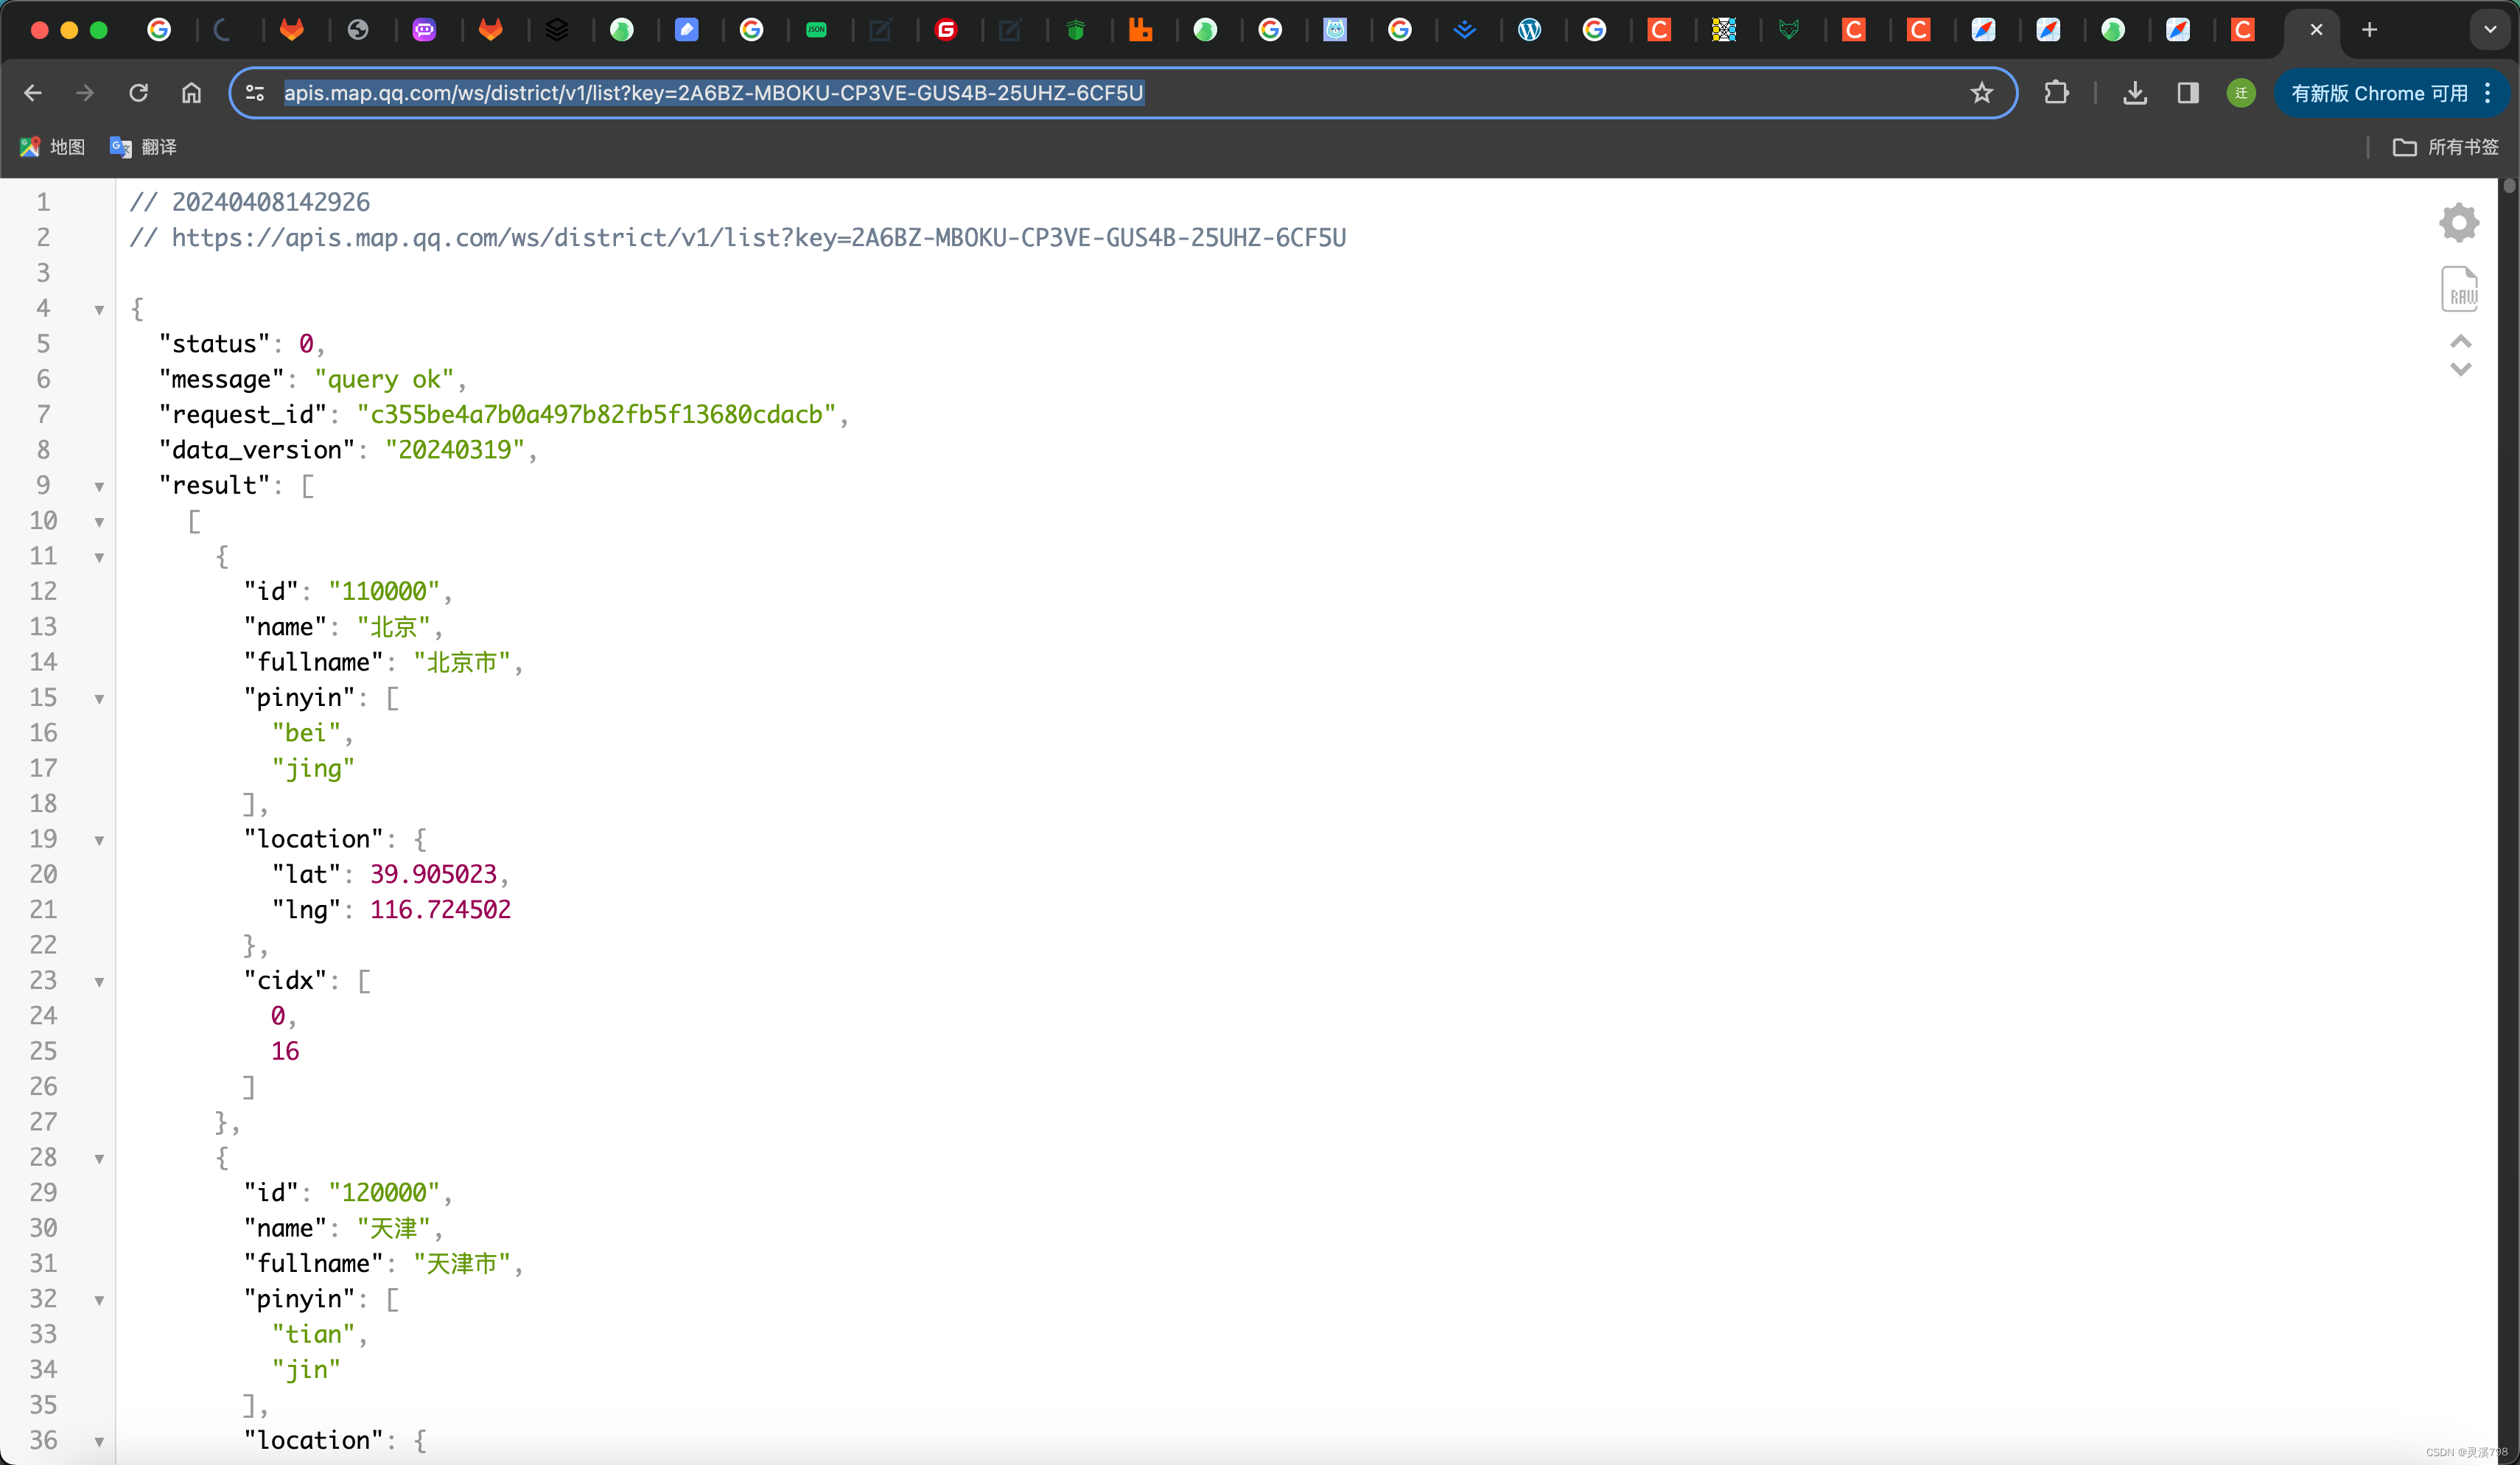
腾讯地图接口文档:https://lbs.qq.com/service/webService/webServiceGuide/search/webServiceDistrict
第二步:集成SpringBoot
1. 需要用到的依赖
<dependency>
  <groupId>com.google.code.gson</groupId>
  <artifactId>gson</artifactId>
  <version>2.9.1</version>
</dependency>
2. 代码片段
public class TencentMapUtils {
    private static final String KEY = "2A6BZ-MBOKU-CP3VE-GUS4B-25UHZ-6CF5U";
 	// 省市区列表url
    private static final String LIST_URL = "https://apis.map.qq.com/ws/district/v1/list";
    //关键词获取行政区域
    private static final String KEYWORD_URL = "https://apis.map.qq.com/ws/district/v1/search";

    /**
     * 获取地址列表
     *
     * @return 省市区地址
     */
    private static List<List<Address>> getList() {
        Gson gson = new Gson();
        String addressData = fetchDataFromAPI(LIST_URL + "?key=" + KEY);
        JsonObject jsonObject = new Gson().fromJson(addressData, JsonObject.class);
        JsonArray jsonArray = jsonObject.getAsJsonArray("result");
        for (JsonElement jsonElement : jsonArray) {
            List<Address> addressList = gson.fromJson(jsonElement, new TypeToken<List<Address>>() {
            }.getType());
            list.add(addressList);
        }
        return list;
    }

    public static List<Address> searchByKeyword(String keyword) {
//        https://apis.map.qq.com/ws/district/v1/search?&keyword=香格里拉&key=[你的key]
        String addressData = fetchDataFromAPI(KEYWORD_URL + "?keyword=" + keyword + "&key=" + KEY);
        return mapDataHandler(addressData);
    }

	/**
     * 地图json字符串转list
     *
     * @param addressData
     * @return
     */
    private static List<Address> mapDataHandler(String addressData) {
        if (StringUtils.isBlank(addressData)) {
            return null;
        }
        List<Address> addressList = null;
        JsonObject jsonObject = new Gson().fromJson(addressData, JsonObject.class);
        JsonArray jsonArray = jsonObject.getAsJsonArray("result");
        if (jsonArray != null && !jsonArray.isJsonNull()) {
            addressList = gson.fromJson(jsonArray.get(0), new TypeToken<List<Address>>() {
            }.getType());
        } else {
            return null;
        }
        return addressList;
    }

	private static String fetchDataFromAPI(String apiUrl) {
        StringBuilder response = new StringBuilder();
        try {
            URL url = new URL(apiUrl);
            HttpURLConnection conn = (HttpURLConnection) url.openConnection();
            conn.setRequestMethod("GET");
            conn.setRequestProperty("Content-Type", "application/json");

            BufferedReader reader = new BufferedReader(new InputStreamReader(conn.getInputStream()));
            String line;
            while ((line = reader.readLine()) != null) {
                response.append(line);
            }
            reader.close();
        } catch (Exception e) {
            e.printStackTrace();
        }
        return response.toString();
    }
 }
根据自己的接收数据创建实体类
@Data
public class Address {


    private Integer id;
    private String name;
    private String fullname;
    private String[] pinyin;
    private Location location;
    private Integer[] cidx;
    private List<Address> childs;
    @Data
    public class Location {
        private String lat;
        private String lng;
    }
}


 1万+
1万+

 被折叠的 条评论
为什么被折叠?
被折叠的 条评论
为什么被折叠?
 到【灌水乐园】发言


