


①引入依赖
- 创建 Maven 项目
- 在pom.xml里面引入servlet的依赖
 <dependencies>
    <!--   https://mvnrepository.com/artifact/javax.servlet/javax.servlet-api -->
    <dependency>
        <groupId>javax.servlet</groupId>
        <artifactId>javax.servlet-api</artifactId>
        <version>3.1.0</version>
        <scope>provided</scope>
    </dependency>

<dependency>
    <groupId>com.fasterxml.jackson.core</groupId>
    <artifactId>jackson-databind</artifactId>
    <version>2.13.4</version>
</dependency>


</dependencies>

<packaging>war</packaging>
<build>
    <finalName>hello-servlt</finalName>
</build>
②创建目录

main目录→创建webapp目录→创建WEB-INF目录→创建web.xml文件
- 在web.xml文件中复制
<!DOCTYPE web-app PUBLIC
        "-//Sun Microsystems, Inc.//DTD Web Application 2.3//EN"
        "http://java.sun.com/dtd/web-app_2_3.dtd" >
<web-app>
     <display-name>Archetype Created Web Application</display-name>
</web-app>
- 在webapp中创建ju.js文件
③编写前端代码,并复制到webapp目录下
这是前端表白墙的代码
<!DOCTYPE html>
<html lang="en">
<head>
<meta charset="UTF-8">
<meta http-equiv="X-UA-Compatible" content="IE=edge">
<meta name="viewport" content="width=device-width, initial-scale=1.0">
<title>Document</title>
</head>
<style>
*{
margin: 0px;
padding: 0px;
box-sizing: border-box;
}
.container{
width: 800px;
margin: 0 auto;
}
h1{
text-align: center;
}
.a{
display: flex;
justify-content: center;
margin: 10px 0;
}
span{
width: 50px;
height: 40px;
line-height: 37px;
margin-right: 10px;
}
input{
width: 200px;
height: 40px;
border-radius: 10px;
}
button{
width: 200px;
background-color: orange;
color: white;
height: 40px;
border: none;
border-radius: 10px;
}
button:active{
background-color: grey;
}
</style>
<body>
<div class="container">
<h1>
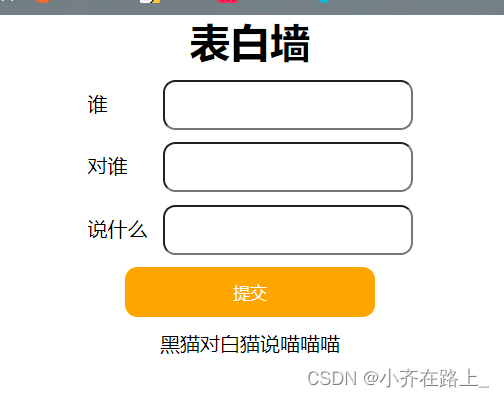
表白墙
</h1>
<div class="a">
<span>谁</span><input id="q" type="text">
</div>
<div class="a">
<span> 对谁</span><input id="w" type="text">
</div>
<div class="a">
<span>说什么</span><input id="e" type="text">
</div>
<div class="a">
<button>提交</button>
</div>
</div>
<script src="ju.js"></script>
<script>
let q = document.querySelector('#q');
let w = document.querySelector('#w');
let e = document.querySelector('#e');
let button = document.querySelector('button');
let contain = document.querySelector('.container');
button.onclick = function(){
let yi = q.value;
let er = w.value;
let san = e.value;
let div = document.createElement('div');
div.className = 'a';
div.innerHTML = yi + '对' + er + '说' + san;
contain.appendChild(div);
q.value ='';
w.value='';
e.value='';
let messagejson = {
from: yi,
to: er,
message:san
};
$.ajax({
type:'post',
url:'aaqwe',
data:JSON.stringify(messagejson),
contentType:'application/json;charset=utf8',
success:function(){
alert("提交成功!");
}
});
}
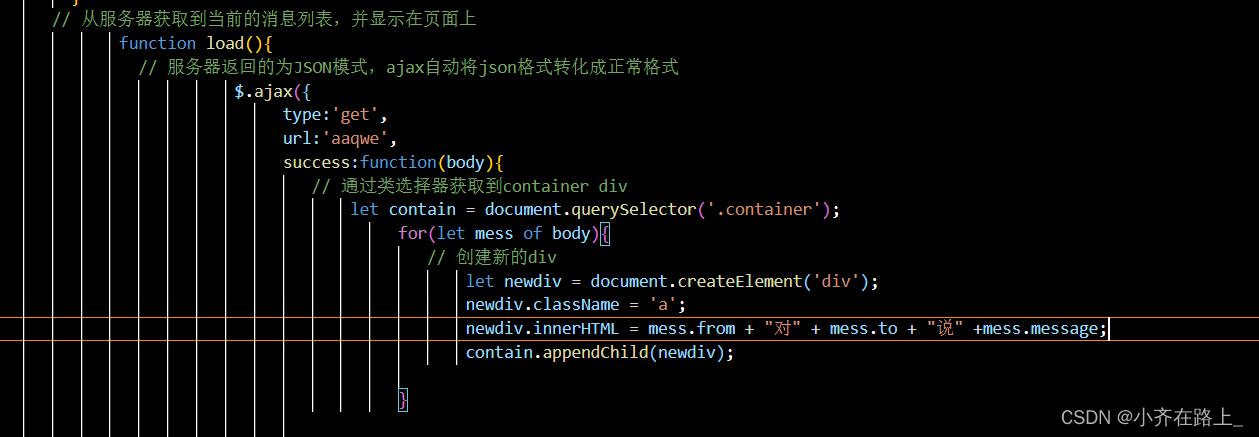
function load(){
$.ajax({
type:'get',
url:'aaqwe',
success:function(body){
let contain = document.querySelector('.container');
for(let mess of body){
let newdiv = document.createElement('div');
newdiv.className = 'a';
newdiv.innerHTML = mess.from + "对" + mess.to + "说" +mess.message;
contain.appendChild(newdiv);
}
}
});
}
load();
</script>
</body>
</html>
前后端代码解析
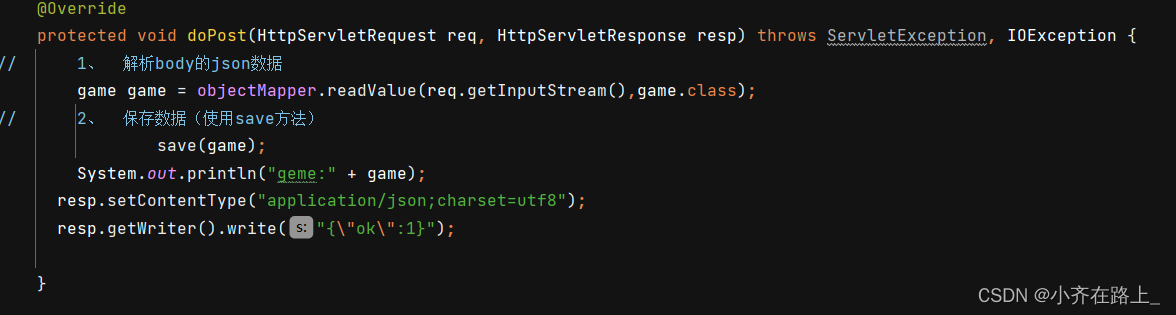
通过post向服务器发送请求

实现让客户端提交到服务器(前端→后端)

实现让客户端从服务器拿到数据
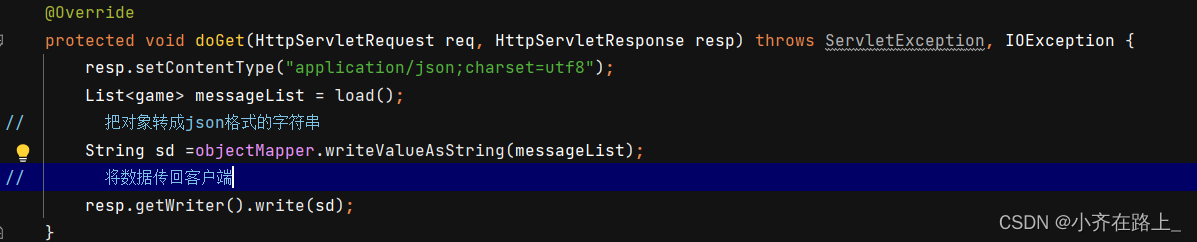
从服务器获取到当前的消息列表,并显示在页面上
④进行数据库的连接操作
由于数据存在内存中,页面刷新关闭重启数据就会消失,所以让服务器将数据存在数据库mysql中,让数据不会轻易丢失
- 引入mysql的依赖–mysql的驱动包
 <!-- https://mvnrepository.com/artifact/mysql/mysql-connector-java -->
        <dependency>
            <groupId>mysql</groupId>
            <artifactId>mysql-connector-java</artifactId>
            <version>5.1.49</version>
        </dependency>
    </dependencies>
2.进行建库建表操作(创建一个sql文件)
create database messageWall;

use messageWall;

drop table if exists messageWall;

 create table messageWall(
 `from` varchar(110),
 `to`  varchar(100),
 message varchar(100)
 );
3.调整后端代码
a>和数据库建立连接(创建一个DBUtil类)
b>封装数据库操作
import com.mysql.jdbc.Connection;
import com.mysql.jdbc.jdbc2.optional.MysqlDataSource;

import javax.sql.DataSource;
import java.sql.PreparedStatement;
import java.sql.ResultSet;
import java.sql.SQLException;

//通过这个类与数据库建立连接
//建立连接需要使用DataSource
public class DButil {
    private static DataSource dataSource = null;
//初始化DataSourse
    private static DataSource getDataSource(){
        if (dataSource == null){
            dataSource = new MysqlDataSource();
            ((MysqlDataSource)dataSource).setURL("jdbc:mysql://127.0.0.1:3306/MessageWall?characterEncoding=utf8&useSSl=false");
            ((MysqlDataSource)dataSource).setUser("root");
            ((MysqlDataSource)dataSource).setPassword("7777777");
        }
        return dataSource;
    }
//    建立连接
    public static Connection getConnection() throws SQLException {
        return (Connection) getDataSource().getConnection();

    }
//    关闭连接
    public static void close(Connection connection, PreparedStatement preparedStatement, ResultSet resultSet){
//        释放资源谁后创建谁先释放
        if (resultSet != null){
            try {
                resultSet.close();
            } catch (SQLException e) {
                e.printStackTrace();
            }
        }
        if (preparedStatement != null){
            try {
                preparedStatement.close();
            } catch (SQLException e) {
                e.printStackTrace();
            }
        }
        if (connection != null){
            try {
                connection.close();
            } catch (SQLException e) {
                e.printStackTrace();
            }
        }
    }
}
c>在java文件的dopost方法中加入save方法进行保存
d>创建save方法
//    把当前的消息存到数据库中
private void save(game game){
        Connection connection = null;
        PreparedStatement statement = null;
//        和数据库建立连接
    try {
       connection=DButil.getConnection();
//        构造SQL语句
        String sql = "insert into message values(?,?,?)";
//        “?”为占位符
        statement = connection.prepareStatement(sql);
        statement.setString(1,game.from);
        statement.setString(2,game.to);
        statement.setString(3,game.message);
//        执行Sql语句
        int ret = statement.executeUpdate();
    } catch (SQLException e) {
        e.printStackTrace();
    }finally {
//        关闭操作
        DButil.close(connection,statement,null);
    }

}
e>从数据库查询到记录
private List<game> load(){
Connection connection = null;
PreparedStatement statement = null;
ResultSet resultSet = null;
List<game> messageList = new ArrayList<>();
try {
// 1、建立连接
connection = DButil.getConnection();
// 2、构造sql
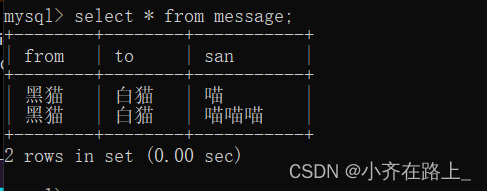
String sql = "select * from message";
statement = connection.prepareStatement(sql);
// 3、执行SQL
resultSet = statement.executeQuery();
// 4、遍历结果集
while (resultSet.next()){
game game = new game();
game.from = resultSet.getString("from");
game.to = resultSet.getString("to");
game.message = resultSet.getString("message");
messageList.add(game);
}
} catch (SQLException e) {
e.printStackTrace();
}finally {
// 5、释放资源
DButil.close(connection,statement,resultSet);
}
return messageList;
}
⑤效果图


 875
875


 被折叠的 条评论
为什么被折叠?
被折叠的 条评论
为什么被折叠?
 到【灌水乐园】发言


