


前面我写过一篇springboot文件上传下载到数据库中的文章,这篇主要是将文件上传到指定电脑目录中,并且将其简单化,代码简介,很容易就可以看懂。
首先我们编写application.yml文件
Spring:
  thymeleaf:
    cache: false #关闭页面缓存
    encoding: UTF-8 #模块编码
    suffix: .html #返回页面的后缀
    mode: HTML5 #模板样式
    prefix: classpath:/templates/ #页面映射路径

  mvc:
    static-path-pattern: /static/**

  #上传文件使用

  servlet:
    multipart:
      #单个文件最大上传大小
      max-file-size: 10MB
      #每次请求上传文件大小最大值
      max-request-size: 30MB
#自定义参数,上传文件的位置
define:
  nginx:
    path: D:\uploadFile\
FileService接口,接着写业务层接口
public interface FileService {

    /**
     * 上传、保存文件
     *
     * @param file     文件
     * @param filePath 文件要保存的地址
     * @param fileName 文件名称
     * @throws Exception 异常
     */
    void saveFile(byte[] file, String filePath, String fileName) throws Exception;

    /**
     * 文件下载
     *
     * @param response 响应
     * @param filename 文件名
     * @param model    模型
     */
    void download(HttpServletResponse response, String filename, Model model);
}
FileServiceImpl类,业务层实现类
@Service
public class FileServiceImpl implements FileService {


    /**
     * 将上传的文件保存到本地
     *
     * @param file     文件
     * @param filePath 文件路径
     * @param fileName 文件名称
     * @throws Exception 异常
     */
    @Override
    public void saveFile(byte[] file, String filePath, String fileName) throws Exception {
        //根据targetFile文件地址信息创建文件夹
        File targetFile = new File(filePath);
        if (!targetFile.exists()){
            targetFile.mkdirs();
        }

        FileOutputStream out =  new FileOutputStream(filePath+fileName);
        //将文件内容写进file,并不是直接上传targetfile文件
        out.write(file);

        //关闭流信息
        out.flush();
        out.close();

    }


    private static final String UTF_8 = "UTF-8";

    @Value("${define.nginx.path}")
    private String nginxPath;
/**
     * 将文件下载到本地
     *
     * @param response 响应
     * @param filename 文件名
     * @param model    模型
     */

    @Override
    public void download(HttpServletResponse response, String filename, Model model) {
        response.setContentType("application/force-download");
        response.setCharacterEncoding(UTF_8);
        // 设置下载后的文件名以及header
        response.addHeader("Content-disposition", "attachment;fileName=" + URLEncoder.encode(filename));
        byte[] buff = new byte[1024];
        //创建缓冲输入流
        BufferedInputStream bis = null;
        OutputStream outputStream = null;

        try {
            outputStream = response.getOutputStream();

            //这个路径为待下载文件的路径
            bis = new BufferedInputStream(new FileInputStream(new File(nginxPath + filename )));
            int read = bis.read(buff);

            //通过while循环写入到指定了的文件夹中
            while (read != -1) {
                outputStream.write(buff, 0, buff.length);
                outputStream.flush();
                read = bis.read(buff);
            }
        } catch ( IOException e ) {
            e.printStackTrace();
            //出现异常返回给页面失败的信息
            System.out.println("--------------------------------");
            model.addAttribute("result","下载失败");
        } finally {
            if (bis != null) {
                try {
                    bis.close();
                } catch (IOException e) {
                    e.printStackTrace();
                }
            }
            if (outputStream != null) {
                try {
                    outputStream.close();
                } catch (IOException e) {
                    e.printStackTrace();
                }
            }
        }
    }
}
UploadController类,controller层,这里我们注意文件上传下载只能用post,不能用其他的.
@Api(tags = "文件上传下载")
@Controller
@RequestMapping("/upload")
public class UploadController {
@Autowired
public FileService fileService;
@Value("${define.nginx.path}")
private String nginxPath;
@ApiOperation("/单文件上传")
@PostMapping("/uploadFile")
@ResponseBody
public String singleFileUpload(@RequestParam("file") MultipartFile file) throws Exception {
fileService.saveFile(file.getBytes(), nginxPath, file.getOriginalFilename());
return "upload success";
}
/**
* 多文件上传
*注意:我们需要请求头信息是:contentType:multipart/form-data
* 但是swagger只能提供contentType:application/json
* 所以swagger无法测试该方法
* @param files 文件
* @return {@link String}
* @throws Exception 异常
*/
@ApiOperation("/批量文件上传")
@PostMapping(value = "/uploadFiles")
@ResponseBody
public String multiFileUpload(@RequestParam("file") MultipartFile[] files) throws Exception {
for(int i = 0;i < files.length;i++){
fileService.saveFile(files[i].getBytes(), nginxPath, files[i].getOriginalFilename());
}
return "upload success";
}
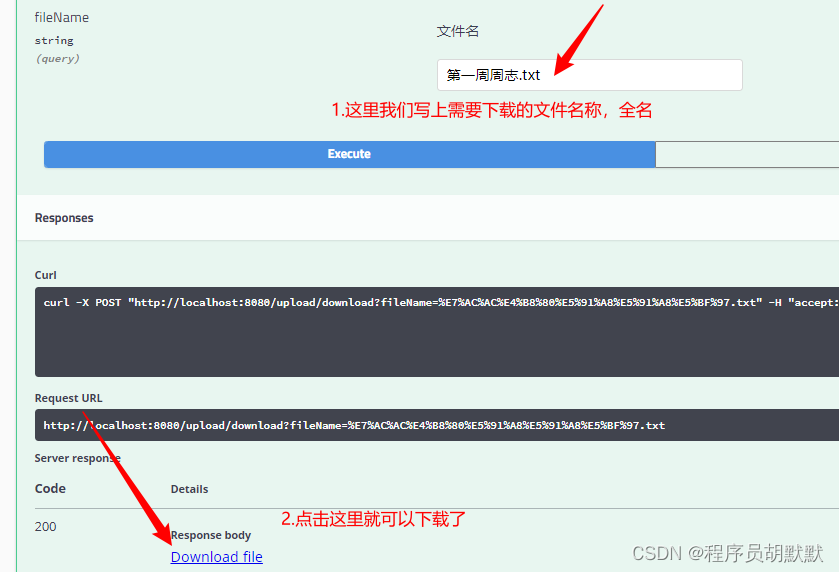
@ApiOperation("文件下载")
@PostMapping("/download")
@ApiImplicitParams({
@ApiImplicitParam(value = "文件名",name = "fileName",dataType = "string")
})
public void testDownload(HttpServletResponse response, String fileName , Model model) {
fileService.download(response,fileName,model);
//成功后返回成功信息
model.addAttribute("result","下载成功");
}
}这里我们在编写一个controller,主要是为了一会测试看的时候方便
@Controller
@RequestMapping("/hello")
public class HelloController {

    @RequestMapping("/load")
    public String hello(){
        return "upload";
    }
}
所有的我们都编写完毕,代码已经最简单化了,接下来我们测试,我这边采用swagger文档测试。
单文件上传测试:200代表成功
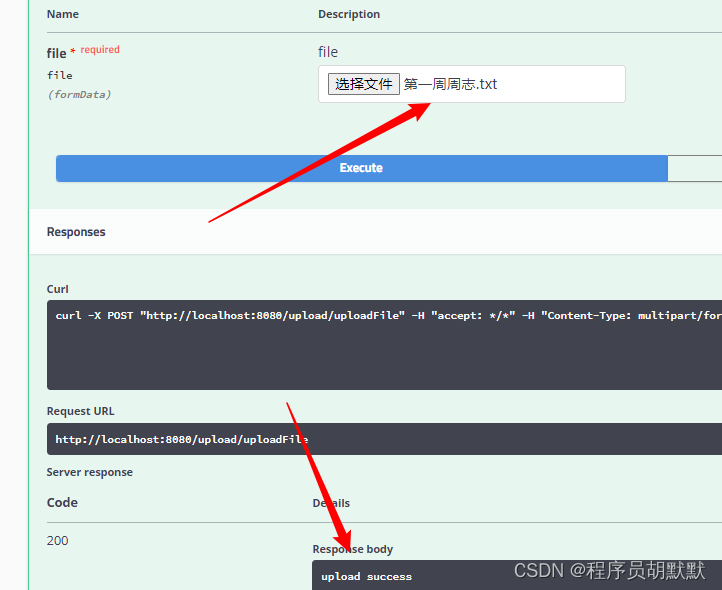
看一下文件夹,如果没有的话,会自动创建

批量文件上传:
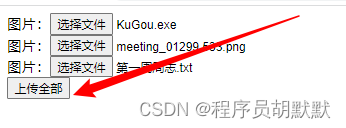
附带一个这个前端页面吧,这个多文件上传是不能使用swagger的,我们需要请求头信息是:contentType:multipart/form-data,但是swagger只能提供contentType:application/json,所以swagger无法测试该方法
<body>

<!--批量文件上传-->
<form enctype="multipart/form-data" method="post" action="http://localhost:8080/upload/uploadFiles">
  图片:<input type="file" name="file"/><br>
  图片:<input type="file" name="file"/><br>
  图片:<input type="file" name="file"/><br>
  <input type="submit" value="上传全部"/>
</form>

</body>
文件下载:


 4748
4748


 被折叠的 条评论
为什么被折叠?
被折叠的 条评论
为什么被折叠?
 到【灌水乐园】发言


