


一、什么是WebService
WebService是部署在Web上的,可访问的应用程序。主要是对外提供业务接口(业务功能)。
日常生活中的WebService:比如:天气预告、查询手机归属地。
二、WebService的组成
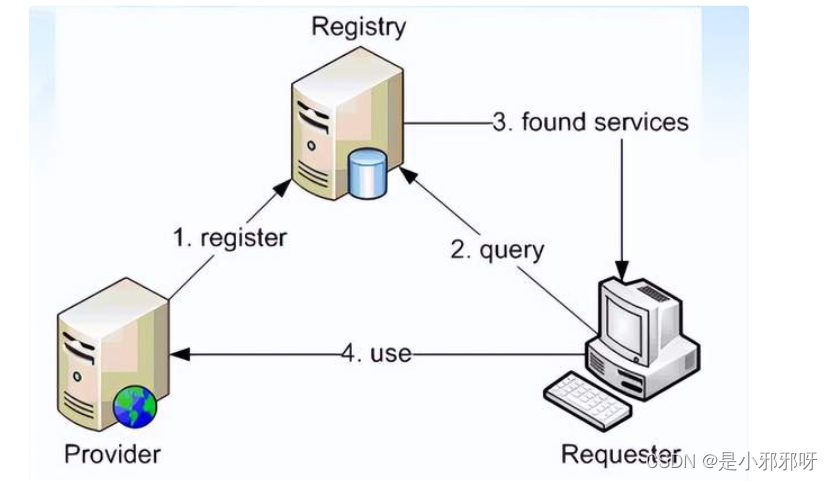
WebService工作图
说明:
- 注册方:表示服务都要在注册服务器中进行注册,比如:服务的地址、接口、接口的方法等;
- 服务提供者:服务的实现方;
- 服务消费者:服务的调用方(客户端),广义来讲:Web应用,APP、组件等等。
三、WebService技术标准
- xml技术,web服务具体平台无关性、语言无关系;
- soap协议, Simple Object Access简单对象访问协议;
- wsdl web服务的描述语言(xml文档),用于描述web服务
Dubbo
四、Restful服务(重点)
- json数据格式的交互
- http协议
- 无需wsdl
Springcloud+Springboot
五、开发传统WebService
Apache CXF=Celtix+Xfire,开始叫Apache CeltiXfire,后来更名为Apache CXF了,以下简称为CXF。Apache CXF。Apache CXF是一个开源的Web Services框架,CXF帮助您构建和开发 web Service,它支持多种协议,比如:SOAP1.1,1.2XML/HTTP、RESTful或者CORBA。
CXF是基于SOA总线结构,依靠Spring完成模块的集成,实现SOA方式。
六、开发WebService的步骤:
服务端
![]()
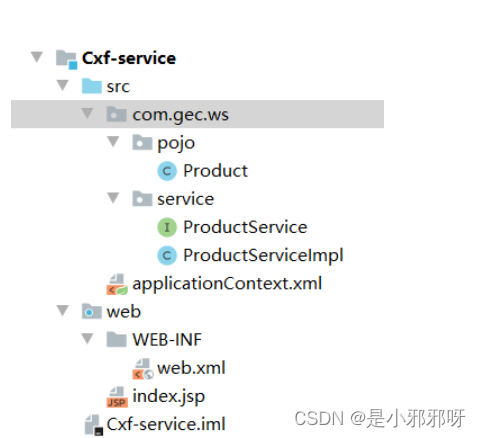
服务端架构图
①创建服务端Web项目,导入CXF的类库。
![]()
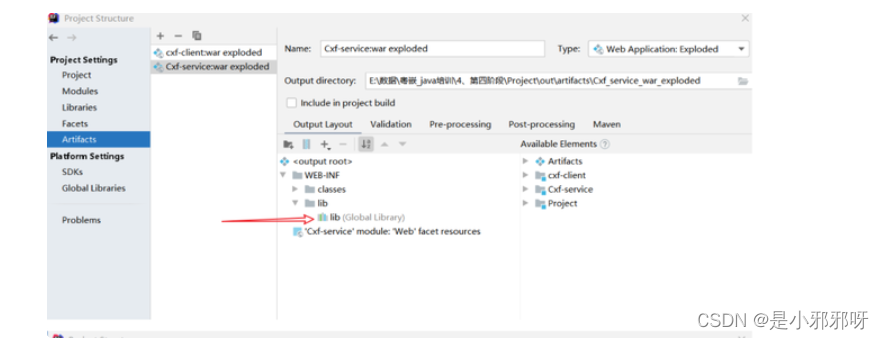
导入CXF类库
![]()

导入CXF类库
②配置web.xml文件
<?xml version="1.0" encoding="UTF-8"?>
<web-app xmlns="http://xmlns.jcp.org/xml/ns/javaee"
         xmlns:xsi="http://www.w3.org/2001/XMLSchema-instance"
         xsi:schemaLocation="http://xmlns.jcp.org/xml/ns/javaee http://xmlns.jcp.org/xml/ns/javaee/web-app_4_0.xsd"
         version="4.0">

    <!-- CXF 中央控制器 -->
    <servlet>
        <servlet-name>cxfServlet</servlet-name>
        <servlet-class>org.apache.cxf.transport.servlet.CXFServlet</servlet-class>
        <load-on-startup>1</load-on-startup>
    </servlet>
    <servlet-mapping>
        <servlet-name>cxfServlet</servlet-name>
        <url-pattern>/services/*</url-pattern>
    </servlet-mapping>

    <context-param>
        <param-name>contextConfigLocation</param-name>
        <param-value>classpath:applicationContext.xml</param-value>
    </context-param>
    <listener>
        <listener-class>
            org.springframework.web.context.ContextLoaderListener
        </listener-class>
    </listener>

</web-app>
③创建实体类
package com.gec.ws.pojo;

import java.io.Serializable;

public class Product implements Serializable {
    private Integer id;
    private String name;
    private Double price;
    private String address;


    public Product() {
    }

    public Product(Integer id, String name, Double price, String address) {
        this.id = id;
        this.name = name;
        this.price = price;
        this.address = address;
    }

    public Integer getId() {
        return id;
    }

    public void setId(Integer id) {
        this.id = id;
    }

    public String getName() {
        return name;
    }

    public void setName(String name) {
        this.name = name;
    }

    public Double getPrice() {
        return price;
    }

    public void setPrice(Double price) {
        this.price = price;
    }

    public String getAddress() {
        return address;
    }

    public void setAddress(String address) {
        this.address = address;
    }
}
④创建ProductService接口
package com.gec.ws.service;

import com.gec.ws.pojo.Product;

import javax.jws.WebService;
import java.util.List;

@WebService //当前是一个可发布的web接口
public interface ProductService {
    public List<Product> findAllProducts();
}
⑤创建ProductServiceImpl实现类
package com.gec.ws.service;

import com.gec.ws.pojo.Product;
import com.gec.ws.service.ProductService;

import java.util.ArrayList;
import java.util.List;

public class ProductServiceImpl implements ProductService {
    @Override
    public List<Product> findAllProducts() {
        List<Product> list=new ArrayList<>();
        for (int i=1;i<11;i++){
            list.add(new Product(i,"红米手机"+i,7000D,"广州"));
        }
        return list;
    }
}
⑥创建applicationContext.xml配置文件
<?xml version="1.0" encoding="UTF-8"?>
<beans xmlns:xsi="http://www.w3.org/2001/XMLSchema-instance"
    xmlns:jaxws="http://cxf.apache.org/jaxws"
    xsi:schemaLocation="http://www.springframework.org/schema/beans
    http://www.springframework.org/schema/beans/spring-beans-2.5.xsd
    http://cxf.apache.org/jaxws http://cxf.apache.org/schemas/jaxws.xsd"
    xmlns="http://www.springframework.org/schema/beans">

	<!-- 发布应用程序接口 -->
	<jaxws:endpoint id="productServiceImpl"
	                implementor="com.gec.ws.service.ProductServiceImpl"
	                address="/productService"></jaxws:endpoint>

</beans>
⑦配置tomcat
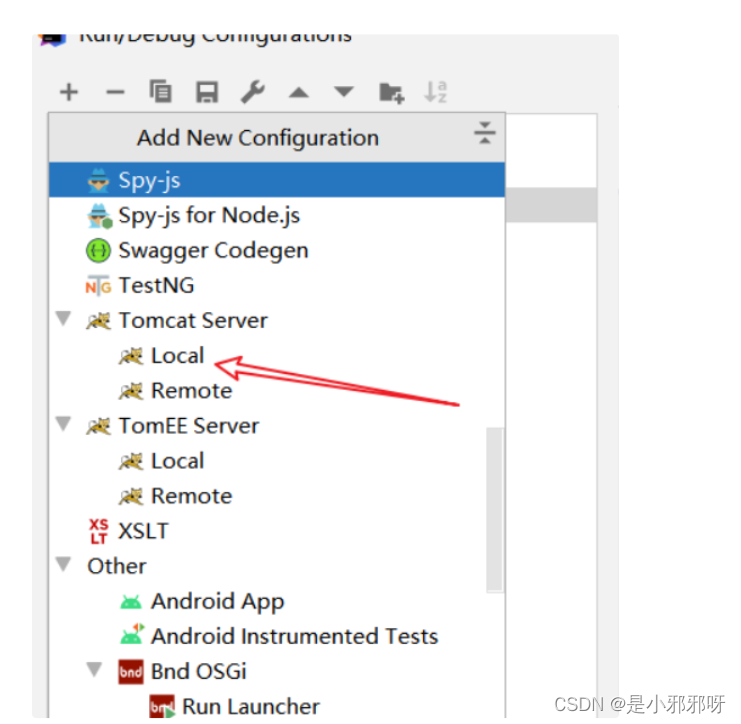
添加Tomcat Serve下的Local
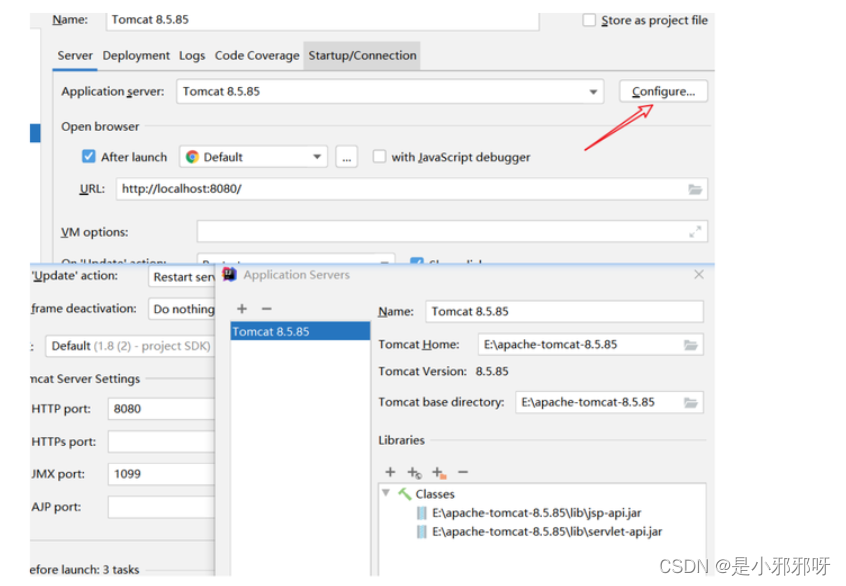
选择下载好后的Tomcat路径
⑧运行
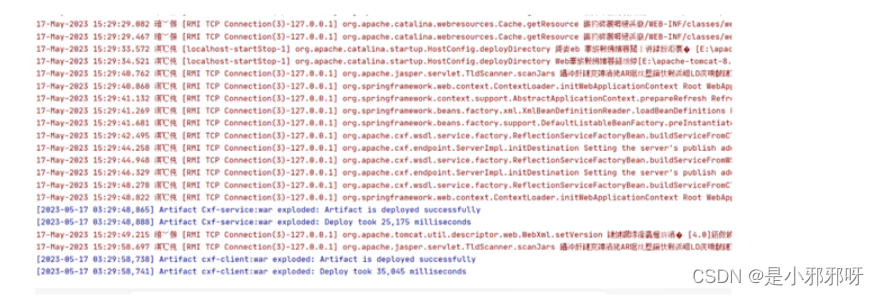
运行结果

在跳转的页面输出url映射
点击{http://service.ws.gec.com/}ProductServiceImplService后跳转的页面
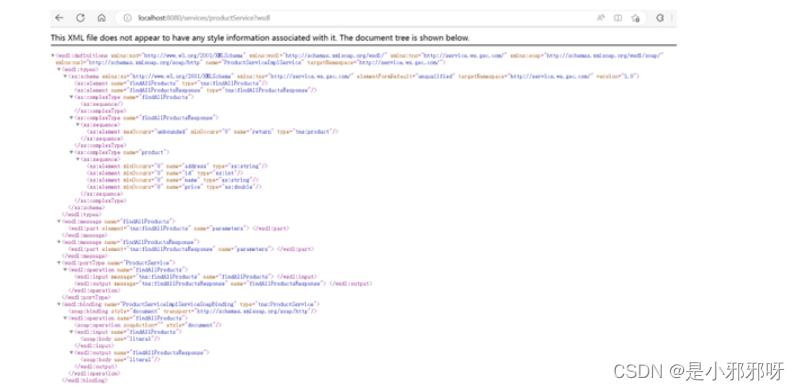
点击链接跳转后的页面
客户端
![]()
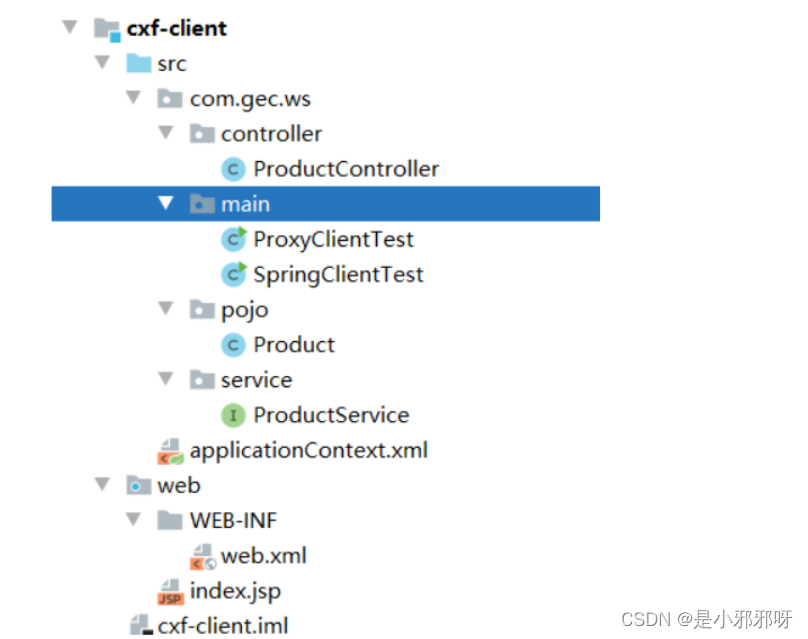 客户端整体架构
①创建客户端web项目,导入CXF的类库。
②把服务端的实体类和接口与包一起拷贝过来
Product类
package com.gec.ws.pojo;

import java.io.Serializable;

public class Product implements Serializable {
    private Integer id;
    private String name;
    private Double price;
    private String address;


    public Product() {
    }

    public Product(Integer id, String name, Double price, String address) {
        this.id = id;
        this.name = name;
        this.price = price;
        this.address = address;
    }

    public Integer getId() {
        return id;
    }

    public void setId(Integer id) {
        this.id = id;
    }

    public String getName() {
        return name;
    }

    public void setName(String name) {
        this.name = name;
    }

    public Double getPrice() {
        return price;
    }

    public void setPrice(Double price) {
        this.price = price;
    }

    public String getAddress() {
        return address;
    }

    public void setAddress(String address) {
        this.address = address;
    }
}
ProductService接口
package com.gec.ws.service;

import com.gec.ws.pojo.Product;

import javax.jws.WebService;
import java.util.List;

@WebService //当前是一个可发布的web接口
public interface ProductService {
    public List<Product> findAllProducts();
}
③创建com.gec.ws.main包
④以Spring的方式创建远程方法调用的客户端(代理)
package com.gec.ws.main;

import com.gec.ws.pojo.Product;
import com.gec.ws.service.ProductService;
import org.springframework.context.ApplicationContext;
import org.springframework.context.support.ClassPathXmlApplicationContext;

import java.util.List;

//怎样区分远程方法调用(边界),以JVM为标准
public class SpringClientTest {
    public static void main(String[] args) {
        ApplicationContext context=new ClassPathXmlApplicationContext("applicationContext.xml");

        //远程方法调用的代理接口实例
        ProductService productService= (ProductService) context.getBean("productService");
        List<Product> list=productService.findAllProducts();
        for (Product product : list) {
            System.out.println(product.getId()+", "+product.getName()+", "+product.getPrice()+", "+product.getAddress());
        }
    }
}
⑤以代理的方式创建远程方法
package com.gec.ws.main;

import com.gec.ws.pojo.Product;
import com.gec.ws.service.ProductService;
import org.apache.cxf.jaxws.JaxWsProxyFactoryBean;

import java.util.List;

public class ProxyClientTest {
    public static void main(String[] args) {
        JaxWsProxyFactoryBean factory=new JaxWsProxyFactoryBean();
        factory.setServiceClass(ProductService.class);
        factory.setAddress("http://localhost:8088/services/productService");

        ProductService productService= (ProductService) factory.create();
        List<Product> list=productService.findAllProducts();
        for (Product product : list) {
            System.out.println(product.getId()+", "+product.getName()+", "+product.getPrice()+", "+product.getAddress());
        }
    }

}
⑥运行以Spring方式创建的远程方法
![]()
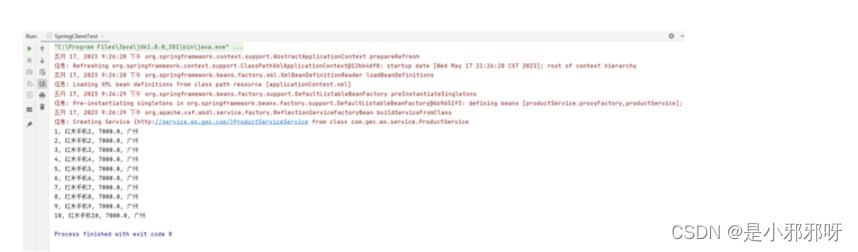 Spring方式创建远程方法运行结果
⑦运行以代理方式创建的远程方法
![]()
 代理方式创建远程方法运行结果
⑧没用到WebService之前调用远程方法的写法
package com.gec.ws.controller;

import com.gec.ws.service.ProductService;
import org.springframework.beans.factory.annotation.Autowired;
import org.springframework.stereotype.Controller;

@Controller
public class ProductController {
    @Autowired
    private ProductService productService;  //远程方法调用webservice
}


 2051
2051


 被折叠的 条评论
为什么被折叠?
被折叠的 条评论
为什么被折叠?
 到【灌水乐园】发言


