


前提
使用 Docker 搭建本地 Jenkins 或者 线上服务
注册Gitee账号,并创建一个项目,这里我的项目名是 ui-automation-platform(下面简称UI自动化平台)
Jenkins 集成 Gitee 拉取仓库代码到本地
1、Jenkins内安装Gitee插件
注意:Gitee 相关插件支持 Jenkins 版本 2.3.6以上版本

2、添加凭证
Jenkins首页-设置----Manage Credentials-----全局凭据


类型:username with passwor
用户/密码:Gitee账号密码
3、复制 Gitee 仓库地址

4、Jenkins内创建/配置项目

项目->源码管理
1.选择 Git,配置git

Repository URL填写:指定git存储库的URL或路径(图3复制的)
Credentials填写:选择 gitee 全局凭据(图2创建的,连接项目的时候需要用它做校验))
高级 Name填写:origin(源名)
高级 Refspec填写:+refs/heads/*:refs/remotes/origin/* +refs/pull/*/MERGE:refs/pull/*/MERGE (通配符)
点击 应用后保存
5、立即构建

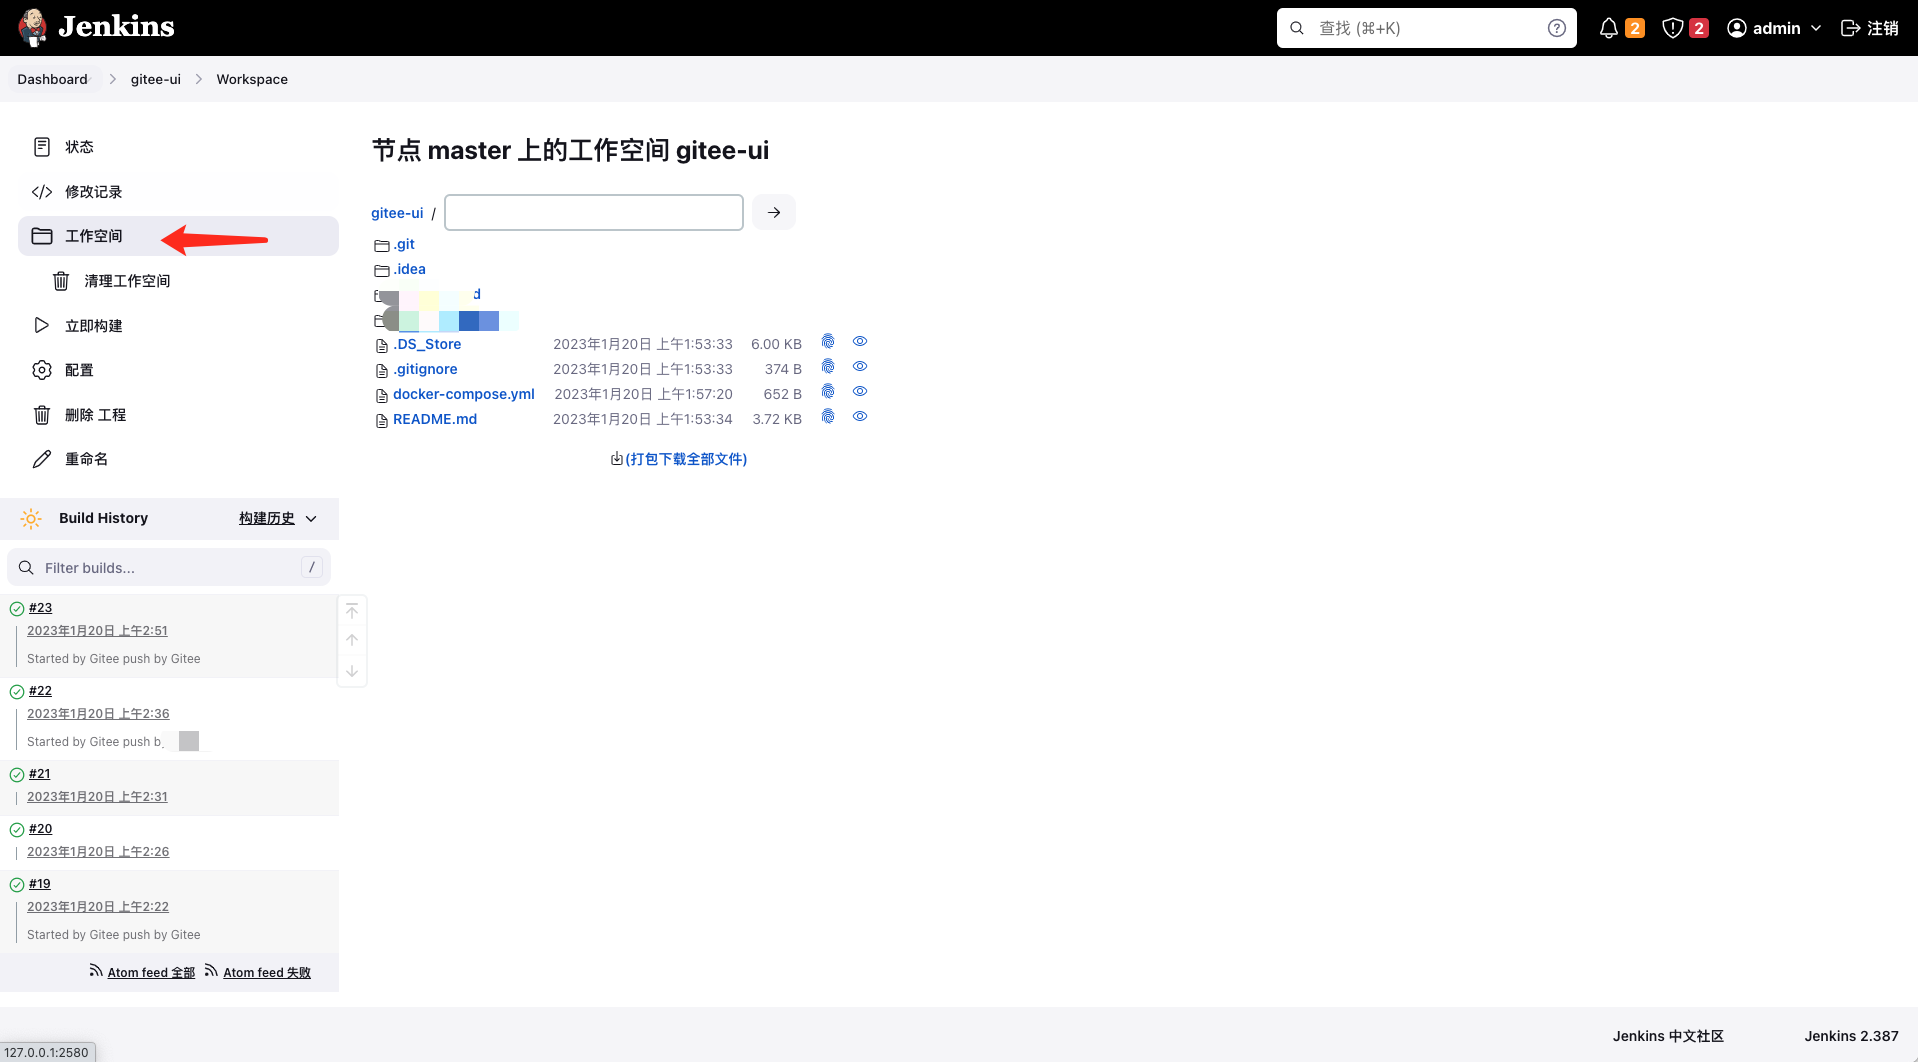
6、构建成功,查看工作空间是否存在代码
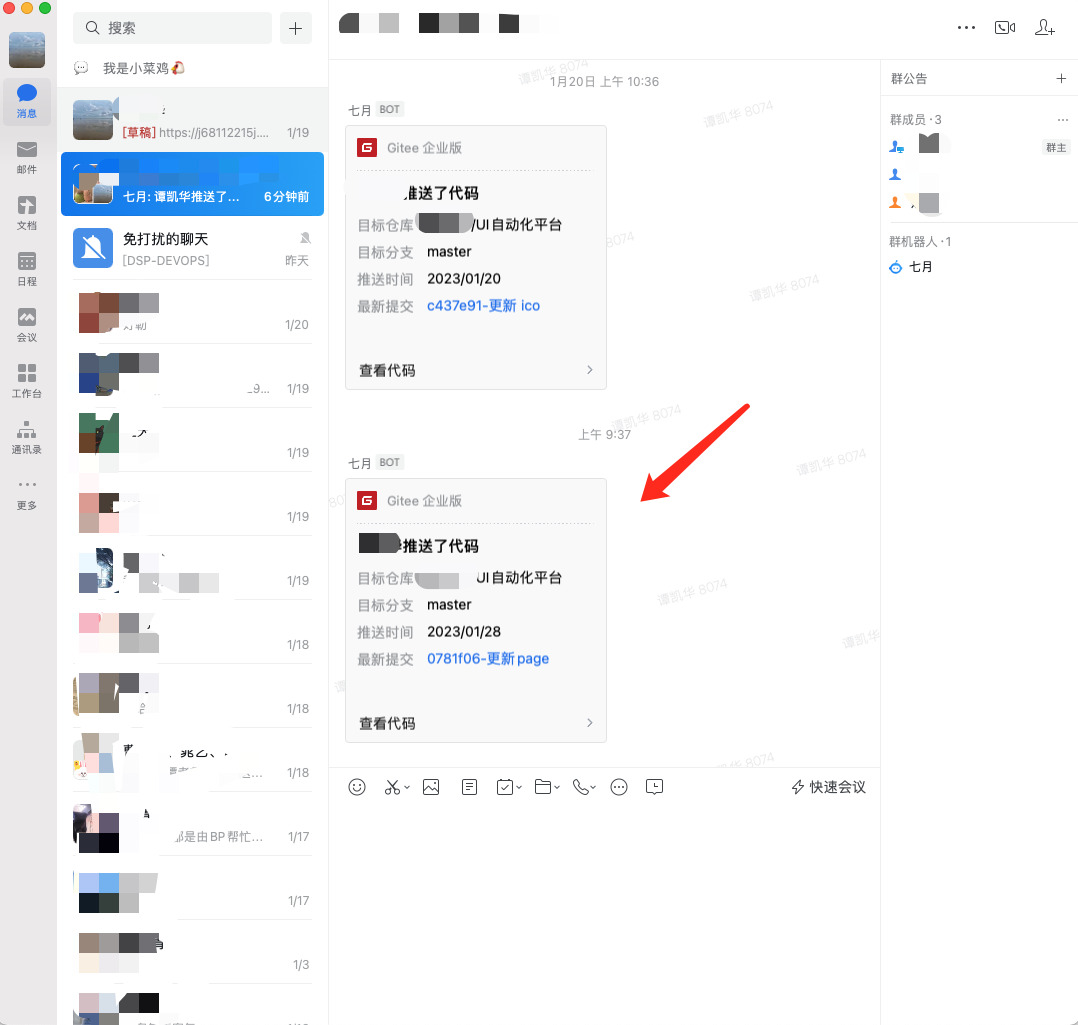
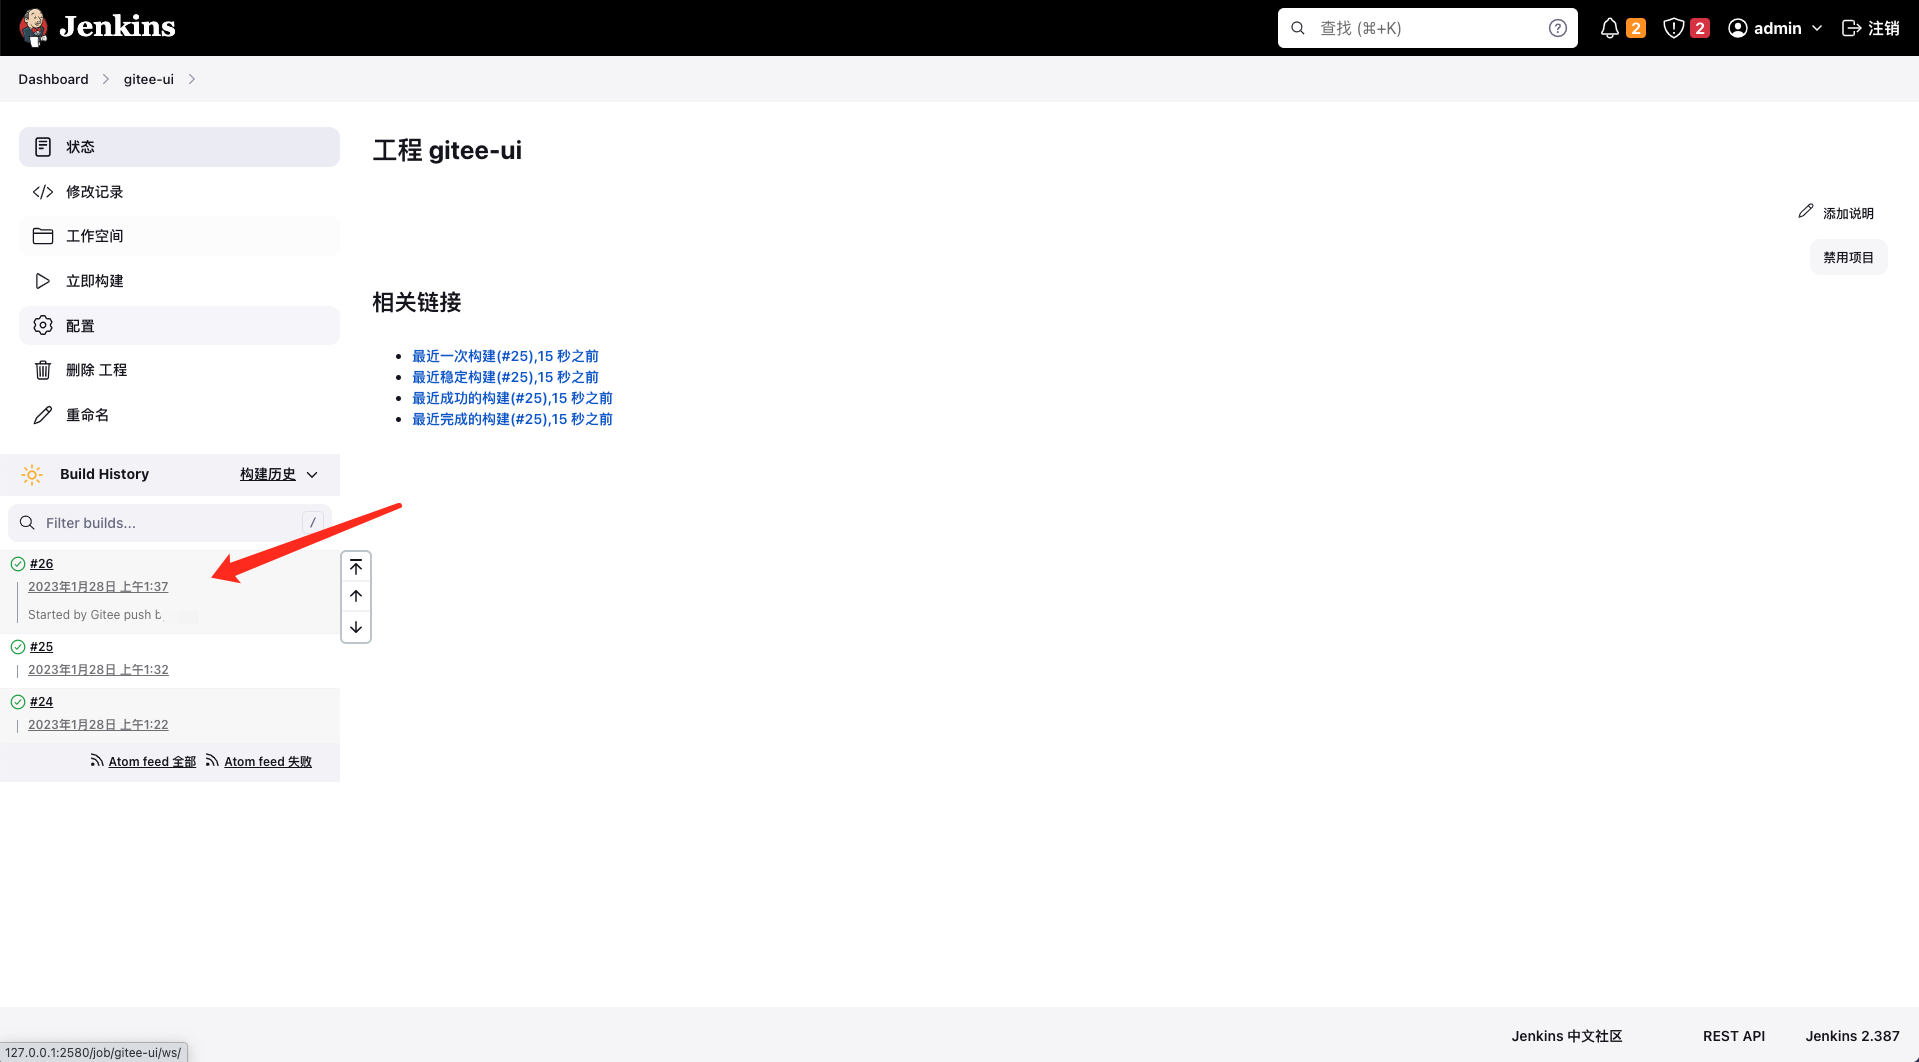
推送代码后 Jenkins自动构建,企业微信推送构建信息。
1、Gitee 配置
首页->系统配置->Configure System
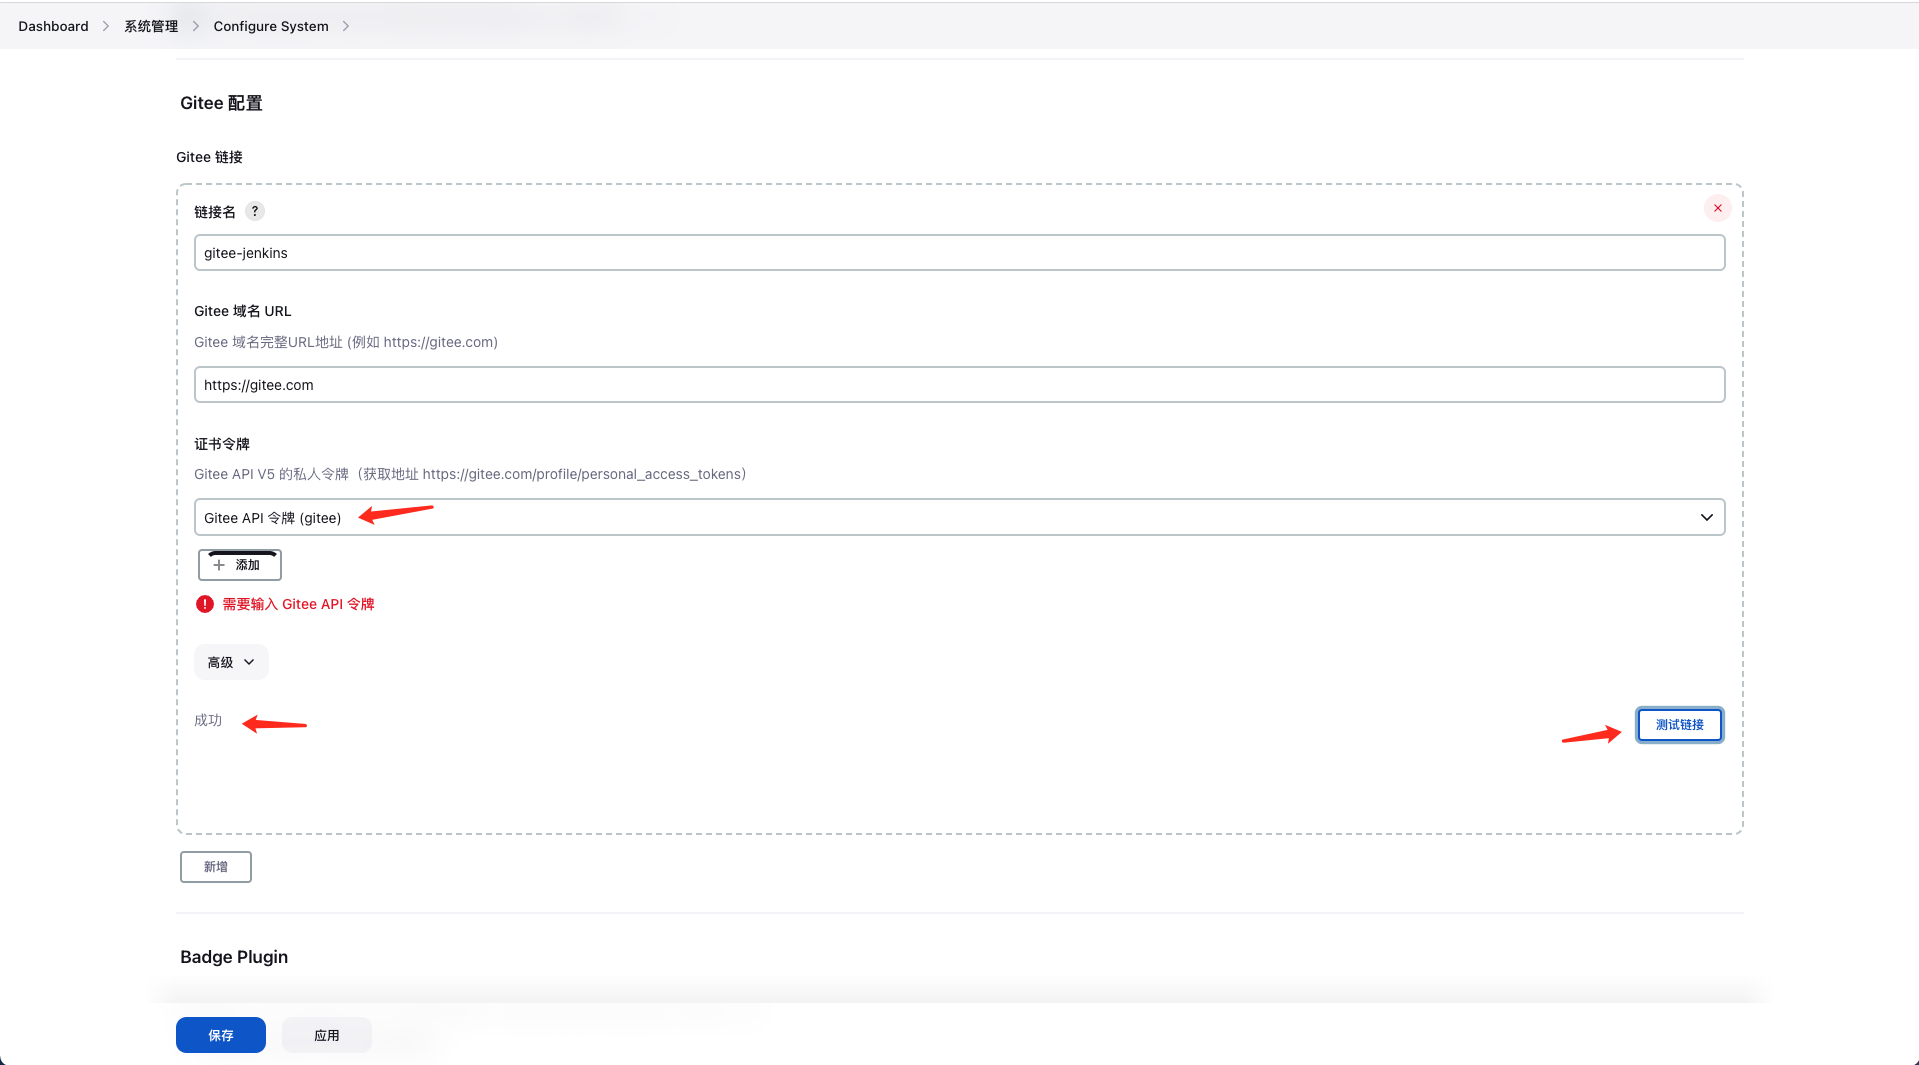
1.添加 Gitee配置

链接名:随意写
Gitee 域名 URL 填写:https://gitee.com
2.添加 Gitee 凭据

Domlan 选择:全局凭据
类型选择:Gitee API 令牌
Gitee APIV5 私人令牌:https://gitee.com/profile/personal_access_tokens
3.Gitee APIV5私人令牌获取步骤:
获取Gitee 私人令牌
登录Gitee后,点击头像,然后点击【设置】点击【私人令牌】,然后点击【生成新的令牌】

填写【私人令牌描述】,点击【提交】

输入【密码】后,生成 私人令牌

复制 私人令牌密码 填入到【Gitee API V5 的私人令牌】内

Gitee 私人令牌配置完成
点击 测试链接 返回 【成功】
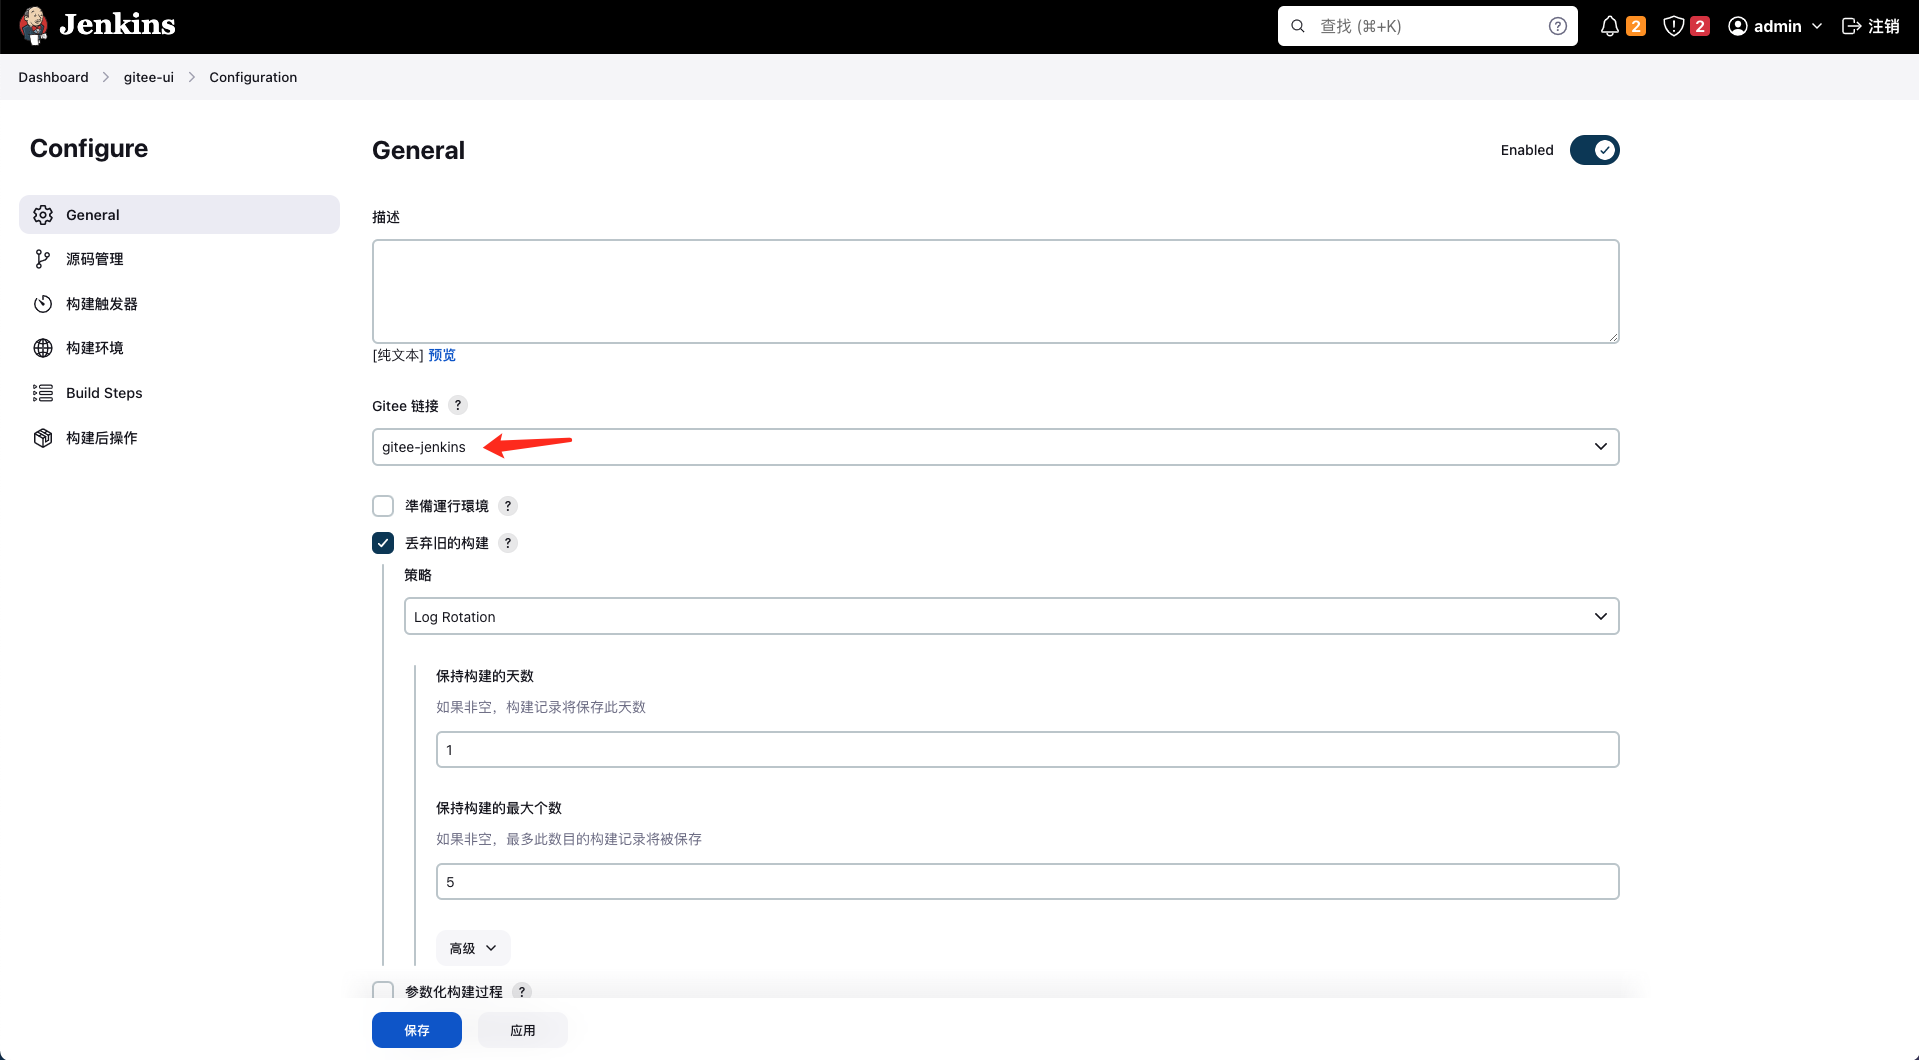
2、配置 gitee-ui 项目
1.General
配置 Gitee 链接
2.构建触发器
勾选 Gitee webhook 触发构建

生成 Gitee WebHook 密码

3.构建后操作
选择 将构建状态评论到 Gitee Pull Request 中
点击【高级】

再次选择 当构建成功自动合并 Gitee 的 Pull Request

点击 【应用】后,点击【保存】
4.Gitee内配置Webhook
进入仓库内->点击【管理】->选择【WebHooks】
添加【WebHook】
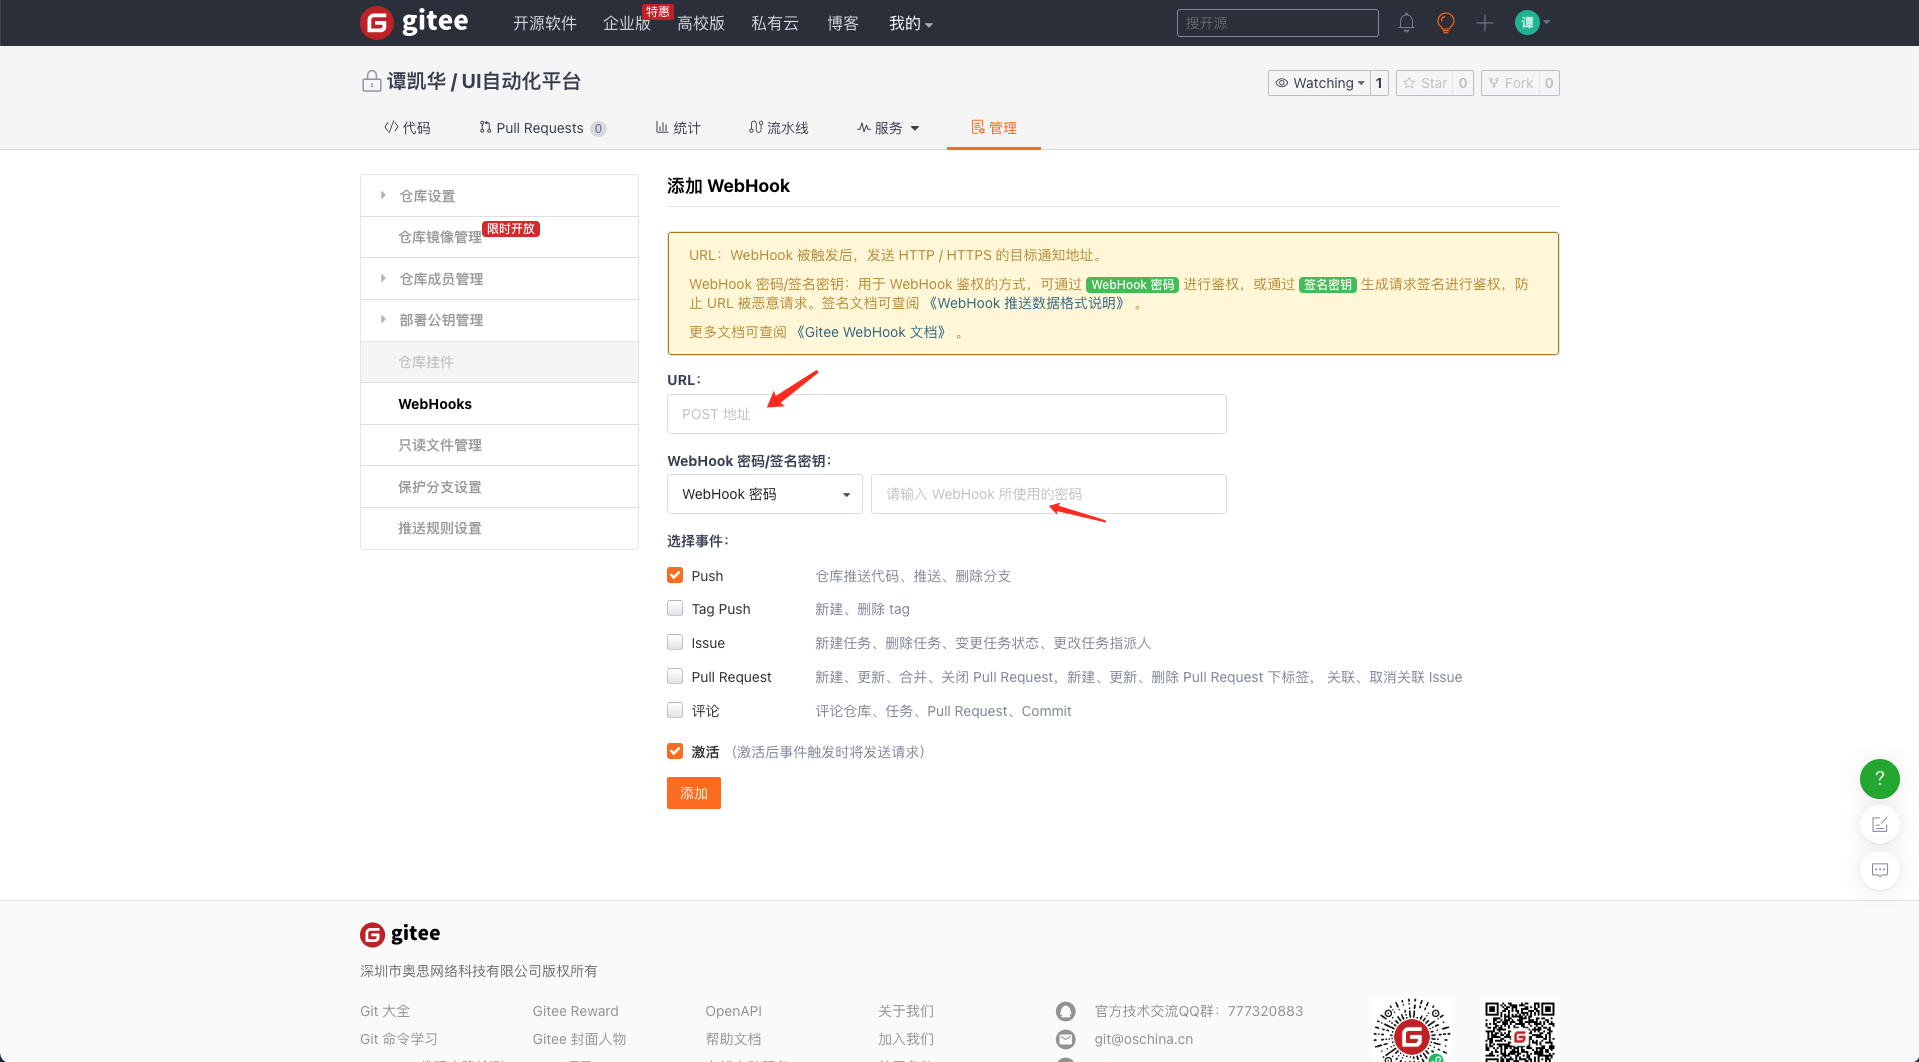
添加 webhook:
url: 粘贴 url
webhook密码:粘贴生成的密码
测试【webhook】

查看更多请求历史以及状态

注意:添加webhook url内只能添加可以外部访问的jenkins url,否则测试webhook时 会返回 请求超时。
本地jenkins url 如何访问呢!可以使用 花生壳 软件实现对外开放~
5.立即构建

3、本地推送代码,jenkins自动构建

1.企业微信推送构建信息
2.Jenkins自动构建
至此 Jenkins集成Gitee 讲解完成


 1805
1805


 被折叠的 条评论
为什么被折叠?
被折叠的 条评论
为什么被折叠?
 到【灌水乐园】发言


