


原生的Swagger页面太难看了。所以选择自定义的页面。
代码地址:
列举了所有场景下的demo示例
https://gitee.com/xiaoym/swagger-bootstrap-ui-demo?_from=gitee_searchknife4j代码地址:
https://gitee.com/xiaoym/knife4j/tree/v2knife4j是swagger的增强ui工具作者萧明。感谢大大开源了一个很好的工具。有兴趣的开源可以一下怎么实现的。
版本的区别如下:

官方文档:https://doc.xiaominfo.com/knife4j/documentation/
Pom.xml
<!-- SpringBoot整合springfox-swagger3 -->
       <dependency>
           <groupId>io.springfox</groupId>
           <artifactId>springfox-boot-starter</artifactId>
           <version>3.0.0</version>
       </dependency>
<!--可以只引入该包,这个包包含了所有依赖,暴露/doc.html页面-->
<dependency>
    <groupId>com.github.xiaoymin</groupId>
    <artifactId>knife4j-spring-boot-starter</artifactId>
    <version>2.0.1</version>
</dependency>
<!--可选,引入后,原/swagger-ui.html提供的页面仍可正常使用-->
<dependency>
    <groupId>io.springfox</groupId>
    <artifactId>springfox-swagger-ui</artifactId>
    <version>2.9.2</version>
</dependency>
<!--生产配置元数据-->
      <dependency>
          <groupId>org.springframework.boot</groupId>
          <artifactId>spring-boot-configuration-processor</artifactId>
          <optional>true</optional>
      </dependency>
或者
   <!--knife4j组件用来自定义swagger页面-->
  <dependency>
          <groupId>com.github.xiaoymin</groupId>
          <artifactId>knife4j-spring-boot-starter</artifactId>
          <version>3.0.3</version>
      </dependency>
<!--生产配置元数据-->
      <dependency>
          <groupId>org.springframework.boot</groupId>
          <artifactId>spring-boot-configuration-processor</artifactId>
          <optional>true</optional>
      </dependency>
Swagger配置
使用并编写Swagger属性类
这样可以通过配置文件对Swagger进行配置,简单省事,不用改代码
import lombok.Data;
import lombok.NoArgsConstructor;
import org.springframework.boot.context.properties.ConfigurationProperties;
import org.springframework.context.annotation.Configuration;
import org.springframework.stereotype.Component;

import java.util.ArrayList;
import java.util.List;

/**
 * @description: 映射配置文件Swagger基本属性

 */
@Data
@Configuration
@Component
@ConfigurationProperties("swagger")
public class SwaggerProperties {
    /**
     * 标题
     */
    private String title;

    /**
     * 文档描述
     */
    private String description;

    /**
     * 项目路径
     */
    private String termsOfServiceUrl;

    /**
     * 作者
     */
    private String authorName;

    /**
     * 邮箱
     */
    private String authorEmail;

    /**
     * 作者主页
     */
    private String authorUrl;

    /**
     * 版本
     */
    private String version;


    /**
     * 是否开启swagger
     */
    private Boolean enabled;

    /**
     * swagger会解析的包路径
     **/
    private String basePackage = "";

    /**
     * swagger会解析的url规则
     **/
    private List<String> basePath = new ArrayList<>();

    /**
     * 在basePath基础上需要排除的url规则
     **/
    private List<String> excludePath = new ArrayList<>();

    /**
     * 需要排除的服务
     */
    private List<String> ignoreProviders = new ArrayList<>();


    /**
     * 许可证
     **/
    private String license = "";

    /**
     * 许可证URL
     **/
    private String licenseUrl = "";


    /**
     * host信息
     **/
    private String host = "";

    /**
     * 联系人信息
     */
    private Contact contact = new Contact();

    /**
     * 全局统一鉴权配置
     **/
    private Authorization authorization = new Authorization();

    @Data
    @NoArgsConstructor
    public static class Contact {

        /**
         * 联系人
         **/
        private String name = "";

        /**
         * 联系人url
         **/
        private String url = "";

        /**
         * 联系人email
         **/
        private String email = "";

    }

    @Data
    @NoArgsConstructor
    public static class Authorization {

        /**
         * 鉴权策略ID,需要和SecurityReferences ID保持一致
         */
        private String name = "";

        /**
         * 需要开启鉴权URL的正则
         */
        private String authRegex = "^.*$";

        /**
         * 鉴权作用域列表
         */
        private List<AuthorizationScope> authorizationScopeList = new ArrayList<>();

        private List<String> tokenUrlList = new ArrayList<>();

    }

    @Data
    @NoArgsConstructor
    public static class AuthorizationScope {

        /**
         * 作用域名称
         */
        private String scope = "";

        /**
         * 作用域描述
         */
        private String description = "";

    }
}
自定义配置文件
import com.github.xiaoymin.knife4j.spring.annotations.EnableKnife4j;
import com.yongyuankuaile.power.swagger.properties.SwaggerProperties;
import lombok.extern.slf4j.Slf4j;
import org.springframework.beans.factory.annotation.Autowired;
import org.springframework.boot.autoconfigure.EnableAutoConfiguration;
import org.springframework.context.annotation.Bean;
import org.springframework.context.annotation.Configuration;
import org.springframework.context.annotation.Import;
import springfox.bean.validators.configuration.BeanValidatorPluginsConfiguration;
import springfox.documentation.builders.ApiInfoBuilder;
import springfox.documentation.builders.PathSelectors;
import springfox.documentation.builders.RequestHandlerSelectors;
import springfox.documentation.builders.RequestParameterBuilder;
import springfox.documentation.oas.annotations.EnableOpenApi;
import springfox.documentation.schema.ScalarType;
import springfox.documentation.service.*;
import springfox.documentation.spi.DocumentationType;
import springfox.documentation.spi.service.contexts.SecurityContext;
import springfox.documentation.spring.web.plugins.ApiSelectorBuilder;
import springfox.documentation.spring.web.plugins.Docket;

import java.util.ArrayList;
import java.util.Arrays;
import java.util.Collections;
import java.util.List;
import java.util.function.Predicate;

@Slf4j
@Configuration
@EnableAutoConfiguration
@EnableKnife4j
@EnableOpenApi
@Import(BeanValidatorPluginsConfiguration.class)
public class SwaggerAutoConfig {

    //默认的排除路径,排除Spring Boot默认的错误处理路径和端点(在解析的url规则之上)  /*/error,由于服务通常加前缀,所以前面/*忽略前缀
    private static final List<String> DEFAULT_EXCLUDE_PATH = Arrays.asList("/error","/actuator/**","/*/error");

    //swagger会解析的url规则
    private static final String BASE_PATH = "/**";

    @Autowired
    private SwaggerProperties swaggerProperties;

    @Bean
    public Docket createRestApi() {
        // base-path处理
        if (swaggerProperties.getBasePath().isEmpty()) {
            swaggerProperties.getBasePath().add(BASE_PATH);
        }
        // exclude-path处理
        if (swaggerProperties.getExcludePath().isEmpty()) {
            swaggerProperties.getExcludePath().addAll(DEFAULT_EXCLUDE_PATH);
        }
        //需要排除的url
        List<Predicate<String>> excludePath = new ArrayList<>();
        swaggerProperties.getExcludePath().forEach(path -> excludePath.add(PathSelectors.ant(path)));
        // 版本请求头处理
        List<RequestParameter> pars = new ArrayList<>();
        RequestParameterBuilder versionPar = new RequestParameterBuilder().description("灰度路由版本信息")
                .in(ParameterType.HEADER).name("VERSION").required(false)
                .query(param -> param.model(model -> model.scalarModel(ScalarType.STRING)));
        pars.add(versionPar.build());
        // 配置分组名

        ApiSelectorBuilder builder = new Docket(DocumentationType.OAS_30)
                .groupName("整体")
                .host(swaggerProperties.getHost())
                .apiInfo(apiInfo()).globalRequestParameters(pars)
                .select()
                .apis(RequestHandlerSelectors.basePackage(swaggerProperties.getBasePackage()));
        swaggerProperties.getBasePath().forEach(p -> builder.paths(PathSelectors.ant(p)));
        swaggerProperties.getExcludePath().forEach(p -> builder.paths(PathSelectors.ant(p).negate()));
        return builder.build().securitySchemes(Collections.singletonList(securitySchema()))
                .securityContexts(Collections.singletonList(securityContext())).pathMapping("/");
    }

    @Bean
    public Docket createRestApi1() {
        // base-path处理
        if (swaggerProperties.getBasePath().isEmpty()) {
            swaggerProperties.getBasePath().add(BASE_PATH);
        }
        // exclude-path处理
        if (swaggerProperties.getExcludePath().isEmpty()) {
            swaggerProperties.getExcludePath().addAll(DEFAULT_EXCLUDE_PATH);
        }
        //需要排除的url
        List<Predicate<String>> excludePath = new ArrayList<>();
        swaggerProperties.getExcludePath().forEach(path -> excludePath.add(PathSelectors.ant(path)));
        // 版本请求头处理
        List<RequestParameter> pars = new ArrayList<>();
        RequestParameterBuilder versionPar = new RequestParameterBuilder().description("灰度路由版本信息")
                .in(ParameterType.HEADER).name("VERSION").required(false)
                .query(param -> param.model(model -> model.scalarModel(ScalarType.STRING)));
        pars.add(versionPar.build());
        // 配置分组名

        ApiSelectorBuilder builder = new Docket(DocumentationType.OAS_30)
                .groupName("用户模块")
                .host(swaggerProperties.getHost())
                .apiInfo(apiInfo()).globalRequestParameters(pars)
                .select()
                .apis(RequestHandlerSelectors.basePackage(swaggerProperties.getBasePackage()));
        swaggerProperties.getBasePath().forEach(p -> builder.paths(PathSelectors.ant(p)));
        swaggerProperties.getExcludePath().forEach(p -> builder.paths(PathSelectors.ant(p).negate()));
        return builder.build().securitySchemes(Collections.singletonList(securitySchema()))
                .securityContexts(Collections.singletonList(securityContext())).pathMapping("/");
    }
    /**
     * 配置默认的全局鉴权策略的开关,通过正则表达式进行匹配;默认匹配所有URL
     * @return
     */
    private SecurityContext securityContext() {
        return SecurityContext.builder().securityReferences(defaultAuth()).build();
    }

    /**
     * 默认的全局鉴权策略
     * @return
     */
    private List<SecurityReference> defaultAuth() {
        ArrayList<AuthorizationScope> authorizationScopeList = new ArrayList<>();
        swaggerProperties.getAuthorization().getAuthorizationScopeList()
                .forEach(authorizationScope -> authorizationScopeList.add(
                        new AuthorizationScope(authorizationScope.getScope(), authorizationScope.getDescription())));
        AuthorizationScope[] authorizationScopes = new AuthorizationScope[authorizationScopeList.size()];
        return Collections
                .singletonList(SecurityReference.builder().reference(swaggerProperties.getAuthorization().getName())
                        .scopes(authorizationScopeList.toArray(authorizationScopes)).build());
    }


    private OAuth securitySchema() {
        ArrayList<AuthorizationScope> authorizationScopeList = new ArrayList<>();
        swaggerProperties.getAuthorization().getAuthorizationScopeList()
                .forEach(authorizationScope -> authorizationScopeList.add(
                        new AuthorizationScope(authorizationScope.getScope(), authorizationScope.getDescription())));
        ArrayList<GrantType> grantTypes = new ArrayList<>();
        swaggerProperties.getAuthorization().getTokenUrlList()
                .forEach(tokenUrl -> grantTypes.add(new ResourceOwnerPasswordCredentialsGrant(tokenUrl)));
        return new OAuth(swaggerProperties.getAuthorization().getName(), authorizationScopeList, grantTypes);
    }


    private ApiInfo apiInfo() {
        return new ApiInfoBuilder()
                .title(swaggerProperties.getTitle())
                .description(swaggerProperties.getDescription())
                .version(swaggerProperties.getVersion())
                .license(swaggerProperties.getLicense())
                .licenseUrl(swaggerProperties.getLicenseUrl())
                .termsOfServiceUrl(swaggerProperties.getTermsOfServiceUrl())
                .contact(new Contact(
                        swaggerProperties.getContact().getName(),
                        swaggerProperties.getContact().getUrl(),
                        swaggerProperties.getContact().getEmail()
                ))
                .build();
    }

}
如果要增加分组,多配置几个@Bean的内容:修改分组名以及扫描包的地址。
可以参考下面
/**
 * @author hanyulin
 * @apiNote 轻量级的Swagger生成Api文档
 * @date 2021/10/28 11:15
 */
@Configuration
@EnableSwagger2WebMvc //该注解是Springfox-swagger框架提供的使用Swagger注解,该注解必须加
@EnableKnife4j   //该注解是knife4j提供的增强注解,Ui提供了例如动态参数、参数过滤、接口排序等增强功能,如果你想使用这些增强功能就必须加该注解,否则可以不用加
public class SwaggerConfig {


    /**
     *  api的主页显示信息
     */
    private static ApiInfo apiInfo;

    static {
        apiInfo = new ApiInfoBuilder()
                .title("企业用户API接口")
                .description("API接口文档")
                .termsOfServiceUrl("http://www.hyl.com")
                .contact(new Contact("helen", "http://www.helen.com", "helen@qq.com"))
                .version("1.0")
                .build();
    }

    @Bean
    public Docket api() {
        return new Docket(DocumentationType.SWAGGER_2)
                // 配置分组名
                .groupName("api")
                .apiInfo(apiInfo)
                .select()
                // 设置扫描包的地址 : com.hanliy.controller
                .apis(RequestHandlerSelectors.basePackage("com.hanliy.controller"))
                // 设置路径筛选 只扫描com.hanliy.controller/test/下面的包
                // .paths(PathSelectors.ant("/test/**"))
                // com.hanliy.controller下的任何接口信息
                 .paths(PathSelectors.any())
                .build();
    }

    // 如果要新增一个分组:api2
    @Bean
    public Docket api() {
        return new Docket(DocumentationType.SWAGGER_2)
                // 配置分组名
                .groupName("api2")
                .apiInfo(apiInfo)
                .select()
                // 设置扫描包的地址 : com.hanliy.controller2
                .apis(RequestHandlerSelectors.basePackage("com.hanliy.controller2"))
                .paths(PathSelectors.any())
                .build();
    }

}
启动类
import com.github.xiaoymin.knife4j.spring.annotations.EnableKnife4j;
import org.springframework.boot.SpringApplication;
import org.springframework.boot.autoconfigure.SpringBootApplication;
import springfox.documentation.oas.annotations.EnableOpenApi;

@SpringBootApplication
//swagger3
@EnableOpenApi
//fnief4j
@EnableKnife4j
//swagger2
//@EnableSwagger2
public class SwaggerDemoApplication {

    public static void main(String[] args) {
        SpringApplication.run(SwaggerDemoApplication.class, args);
    }

}
使用配置文件
swagger:
  #标题
  title: "Swagger使用示例"
  #文档描述
  description: "Swagger使用示例"
  #版本
  version: 1.0
  #许可证
  license: "www"
  #许可证URL
  licenseUrl: http://com.yongyuankuaile.power
  #作者
  authorName: zyy
  #邮箱
  authorEmail: zyy@163.com
  #作者主页
  authorUrl: http://com.yongyuankuaile.power
  #地址
  terms-of-service-url: http://com.yongyuankuaile.power
  #swagger会解析的包路径
  basePackage: com.yongyuankuaile.power
  #联系人信息
  contact:
    #姓名
    name: zyy
    #邮箱
    email: zyy@163.com
    #地址
    url: http://yongyuankuaile.com
  #全局统一鉴权配置
  authorization:
    #联系人
    name: OAuth
    #需要开启鉴权URL的正则
    auth-regex: ^.*$
    #鉴权作用域列表
    authorization-scope-list:
      #作用域名称
      - scope: server
        #作用域描述
        description: server all
        #token
    token-url-list:
      - http://${ GATEWAY_HOST:localhost }:${ GATEWAY-PORT:5000 }/auth/oauth/token
# knife开源的swagger ui配置
knife4j:
  # 开启增强配置
  enable: true
  #是否是生产环境,如果是生产环境会默认关闭swagger
  production: false
  #开启Swagger的Basic认证功能,默认是false
  basic:
    enable: true
    # Basic认证用户名
    username: test
    # Basic认证密码
    password: test
Swagger原生注解
1. 注解说明
Swagger的使用注解有很多,这里我们只讲最常用的注解,以及这些注解中最常用的属性。
@Api(tags = {“用户操作”})
加在controller类上
tags表示该类的标签,在页面会独立显示一个菜单

@ApiOperation(value = “保存用户”, notes = “保存时,ID由数据库生成,无需填写,有则忽略”, tags = “保存”)
加在相应的请求处理方法上
value表示该方法的说明
notes相当于对该方法的详细说明,也就是更加完整的描述
tags 表示标签,,在页面会独立显示一个菜单

@ApiImplicitParam(name = “id”, value = “用户ID”, defaultValue = “1”)
方法只有一个基本类型参数时加在方法上。方法有多个参数时加在@ApiImplicitParams内
name 参数中属性的名字
value 对这个属性的描述
defaultValue 默认值,这个还是有必要填写的,在页面进行请求时,会自动填充

@ApiImplicitParams(value = {})
用在请求方法上
这个注解必须和@ApiImplicitParam配合使用
当请求方法中的请求参数很多的时候,例如saveUser(String username, Integer age, Date birthday, String phone)

@ApiParam(value = “当前页”, defaultValue = “1”)
加在请求方法的普通参数上
value的值是对该参数的说明
与@ApiImplicitParam使用的效果等同,根据个人喜好进行使用

@ApiModel(value = “用户信息”)
加在请求方法的对象类上
value 对该对象参数的描述
例如有一个请求方法save(UserDTO userDTO), 则需要加在UserDTO这个类上面(可以参照下面的示例)

@ApiModelProperty(value = “用户ID”, example = “1”)
加在请求方法的参数对象的属性上
value 对该属性的描述
example 属性的示例值,在页面会自动填充该值


@ApiIgnore:注解类、参数、方法,注解后将不在Swagger UI中显示
使用示例
@Api(tags = {"用户操作"})
@RestController
@RequestMapping(value = "/user")
public class UserController {

    @PostMapping
    @ApiOperation(value = "保存用户", notes = "保存时,ID由数据库生成,无需填写,有则忽略", tags = "保存")
    public ApiResult save(@RequestBody UserDTO userDTO) {
        return ApiResult.success();
    }

    @DeleteMapping("/{id}")
    @ApiOperation(value = "删除用户", notes = "删除后无法恢复", tags = "删除")
    @ApiImplicitParam(name = "id", value = "用户ID", defaultValue = "1")
    public ApiResult remove(@PathVariable Long id) {
        return ApiResult.success();
    }

    @PutMapping
    @ApiOperation(value = "更新用户", notes = "id必填,其它属性存在则更新,否则忽略", tags = "更新")
    public ApiResult update(@RequestBody UserDTO userDTO) {
        return ApiResult.success();
    }

    @GetMapping("/{id}")
    @ApiOperation(value = "查找用户", notes = "根据id查找单个用户", tags = "查找")
    public ApiResult find(@PathVariable @ApiParam(value = "用户ID", defaultValue = "2") Long id) {
        return ApiResult.success();
    }

    @GetMapping("/list")
    @ApiOperation(value = "查找用户列表", notes = "根据id查找单个用户", tags = "查找")
    public ApiResult list(@RequestParam @ApiParam(value = "当前页", defaultValue = "1") Integer pageNum,
                          @RequestParam @ApiParam(value = "页大小", defaultValue = "10") Integer pageSize) {
        return ApiResult.success();
    }

}


@Data
@ApiModel(value = "用户实体")
public class UserDTO {

    @ApiModelProperty(value = "用户ID", example = "1", required = false)
    private Long id;

    @ApiModelProperty(value = "用户名", example = "rose", required = true)
    private String username;

    @ApiModelProperty(value = "用户密码", example = "123456", required = true)
    private String password;

    @ApiModelProperty(value = "用户年龄", example = "18", allowableValues = "range[1, 150]", required = false)
    private Integer age;

    @ApiModelProperty(value = "用户性别", example = "MAN", required = true)
    private GenderEnum gender;

}
文档显示的权限控制
6.1 方法一:@Value
在dev环境下开启在线文档。修改配置类:
@Configuration
@EnableSwagger2WebMvc
@EnableKnife4j
public class SwaggerConfig {
    /**
     * swagger激活环境
     */
    @Value(value = "${swagger.enable}")
    public boolean enable;

    @Bean
    public Docket api() {
                // 相同代码 在末尾加上 .enable(enable)
                .build()
                .enable(enable);
    }
application-dev.yml文件。
swagger:
  enable: true
只有在激活dev环境时,才能够扫描到 enable 的值,在线文档.enable(enable)才能够生效。
6.2 方法二:@Profile
@Profile:加载指定配置文件时才起作用。只有当Profile指定的配置被激活的时候,才会将Profile中所对应的Bean注册到Spring容器中。
开发环境develop : dev
测试环境test : test
生产环境prod : prod
@Configuration
@EnableSwagger2WebMvc
@EnableKnife4j
@Profile("dev","test")
public class SwaggerConfig {
    //  省略
}
只有项目加载dev、test 的时候以上代码才会起作用
@profile里的值对应的是主配置文件application.yml中spring.profiles.active的值。
spring:
  profiles:
    active: @profiles.active@
通过在pom.xml中配置多个profile实现。
扩展功能之认证与生产环境配置
默认这些页面是任何人都可以访问的,这样还是不太安全的,而且很多时候生产环境我们并不需要该文档,所以knife4j对认证和生产进行了可选配置,核心配置如下
如果knife4j.production为true则会关闭Swagger页面。
如果配置了basic.eable为true,则访问/doc.html会需要进行basic认证
knife4j:
  # 是否是生产环境,如果是生产环境会默认关闭swagger
  production: false
  # 配置认证功能
  basic:
    # 是否开启认证
    enable: true
    # 用户名
    username: admin
    # 密码
    password: 123456
引入配置 application.yaml
knife4j:
  enable: true # 开启增强模式
  documents: # 文档配置,可配置多个分组
    - group: doc-knife4j-1.0.0
      name: knife4j 学习文档
      locations: classpath:markdown/knife4j/*
修改配置类 SwaggerConfig
注入 Bean 对象 OpenApiExtensionResolver
Knife4j 提供的扩展类,在构建 Docket 对象后可开启增强模式扩展插件,比如本示例中的自定义文档。
private final OpenApiExtensionResolver openApiExtensionResolver;

@Autowired
public SwaggerConfiguration(OpenApiExtensionResolver openApiExtensionResolver) {
    this.openApiExtensionResolver = openApiExtensionResolver;
}
2、在 Docket 对象构建后,通过调用 Docket 对象的 extensions 方法进行插件赋值
插件赋值需要调用 OpenApiExtensionResolver 提供的 buildExtensions 方法,该方法需要一个逻辑分组名称,就是开发者在 yaml 配置文件中配置的 group 名称
@Bean
public Docket api() {
    //return new Docket(DocumentationType.SWAGGER_2)
    return new Docket(DocumentationType.OAS_30)
        .apiInfo(apiInfo())
        .select()
        // ...
        .build()
        // 构建扩展插件-自定义文档 group
        .extensions(openApiExtensionResolver.buildExtensions("doc-knife4j-1.0.0"))
        .groupName("Typos Admin接口文档V1.0");
}
注意:extensions 里传递的参数是 yaml 配置文件中指定的 group
3. 完整配置类
参考我的代码:https://gitee.com/tyros/typos-platform
/**
 * Swagger 配置类
 *
 * @author zhangshuaiyin
 * @date 2021/5/31 21:58
 */
@Configuration
// @EnableSwagger2WebMvc // 2.x 版本使用这个注解
@EnableSwagger2 // 3.x 版本使用这个注解
public class SwaggerConfig {

    private final OpenApiExtensionResolver openApiExtensionResolver;

    /**
     * 通过该扩展给增强模式插件赋值,如自定义文档等
     *
     * @param openApiExtensionResolver Knife4j 扩展类
     */
    @Autowired
    public SwaggerConfig(OpenApiExtensionResolver openApiExtensionResolver) {
        this.openApiExtensionResolver = openApiExtensionResolver;
    }

    /**
     * 创建 typos-admin API 应用
     * apiInfo() 增加API相关信息
     * 通过select()函数返回一个ApiSelectorBuilder实例,用来控制哪些接口暴露给Swagger来展现,
     * 本例采用指定扫描的包路径来定义指定要建立API的目录。
     *
     * @return Docket
     */
    @Bean
    public Docket adminApi() {
           // return new Docket(DocumentationType.SWAGGER_2)
        return new Docket(DocumentationType.OAS_30)
                .apiInfo(adminApiInfo())
                .select()
                // 标注@Api等注解的接口代码路径
                .apis(RequestHandlerSelectors.basePackage("com.typos.admin.controller"))
                .paths(PathSelectors.any())
                .build()
                // 构建扩展插件-自定义文档 group
                .extensions(openApiExtensionResolver.buildExtensions("doc-knife4j-1.0.0"))
                .groupName("Typos Admin接口文档V1.0");
    }


    /**
     * 创建 typos-admin API的基本信息(这些基本信息会展现在文档页面中)
     * 访问地址:http://项目实际地址/doc.html
     *
     * @return ApiInfo
     */
    private ApiInfo adminApiInfo() {
        return new ApiInfoBuilder()
                .title("Typos API")
                .description("Typos 后台管理接口文档")
                //服务条款网址
                .termsOfServiceUrl("https://www.yuque.com/zhangshuaiyin")
                .version("1.0")
                .contact(new Contact("typos", "http://127.0.0.1/", "594983498@qq.com"))
                .build();
    }
}
knife4j 2.0.7 自定义响应状态列表
knife4j 2.0.7 对应 Swagger 版本中响应状态类为 ResponseMessage,其中响应码 code 类型为 int,响应信息为 message。
@Bean
public Docket api() {
    //添加全局响应状态码
    List<ResponseMessage> responseMessageList = new ArrayList<>();
    Arrays.stream(BaseMessage.values()).forEach(errorEnums -> {
        responseMessageList.add(
            new ResponseMessageBuilder().code(Integer.parseInt(errorEnums.getCode())).message(errorEnums.getMessage()).responseModel(
                new ModelRef(errorEnums.getMessage())).build()
        );
    });

    return new Docket(DocumentationType.SWAGGER_2)
        // 添加全局响应状态码
        .globalResponseMessage(RequestMethod.GET, responseMessageList)
        .globalResponseMessage(RequestMethod.PUT, responseMessageList)
        .globalResponseMessage(RequestMethod.POST, responseMessageList)
        .globalResponseMessage(RequestMethod.DELETE, responseMessageList)
        .apiInfo(apiInfo())
        .select()
        //标注@Api等注解的接口代码路径
        .apis(RequestHandlerSelectors.basePackage("com.typos.admin.controller"))
        .paths(PathSelectors.any())
        .build()
        .extensions(openApiExtensionResolver.buildExtensions("1.0"))
        .groupName("Typos Admin接口文档V1.0");
}
knife4j 3.0.3 自定义响应状态列表
knife4j 3.0.3 对应 Swagger 版本中响应状态类为 Response,状态码 code 为 String,响应信息为 description。
@Bean
public Docket adminApi() {
    // 添加全局响应状态码
    List<Response> responseMessageList = new ArrayList<>();

    // 根据 BaseMessage 获取自定义响应码
    Arrays.stream(BaseMessage.values()).forEach(
        errorEnums -> responseMessageList.add(new ResponseBuilder()
                                              .code(errorEnums.getCode())
                                              .description(errorEnums.getMessage())
                                              .build()));

    return new Docket(DocumentationType.SWAGGER_2)
        // 添加全局响应状态码,可根据不同系统定义不同的响应码信息
        .globalResponses(HttpMethod.GET, responseMessageList)
        .globalResponses(HttpMethod.PUT, responseMessageList)
        .globalResponses(HttpMethod.POST, responseMessageList)
        .globalResponses(HttpMethod.DELETE, responseMessageList)
        .apiInfo(adminApiInfo())
        .select()
        // 标注@Api等注解的接口代码路径
        .apis(RequestHandlerSelectors.basePackage("com.typos.admin.controller"))
        .paths(PathSelectors.any())
        .build()
        // 构建扩展插件-自定义文档 group
        .extensions(openApiExtensionResolver.buildExtensions("doc-knife4j-1.0.0"))
        .groupName("Typos Admin接口文档V1.0");
}
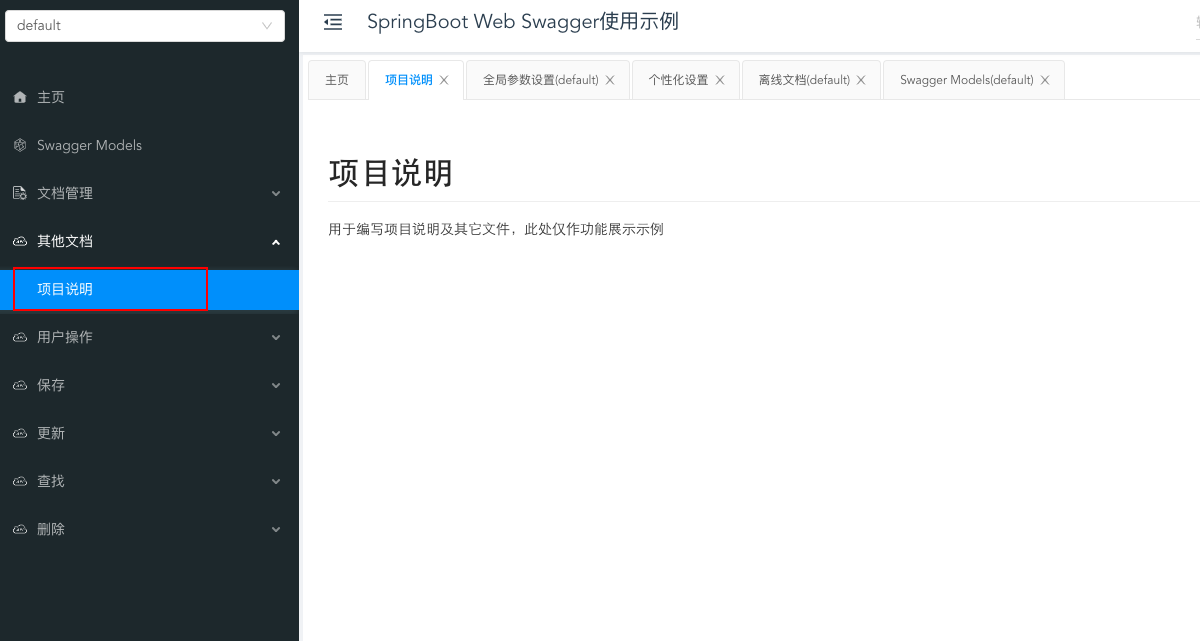
编写md文件
在项目的resources目录下建立markdown,放入编写好的md文件即可。
打开配置
随后在页面中勾选文档管理->个性化设置->启用Knife4j提供的增强功能,刷新页面即可看到,如下示例
代码
Controller
import com.example.demo.business.user.request.UserAddRequest;
import com.example.demo.business.user.request.UserEditRequest;
import com.example.demo.business.user.request.UserQueryRequest;
import com.example.demo.business.user.vo.UserVO;
import io.swagger.annotations.Api;
import io.swagger.annotations.ApiOperation;
import org.springframework.beans.BeanUtils;
import org.springframework.web.bind.annotation.*;

import javax.validation.Valid;
import java.time.LocalDateTime;
import java.util.ArrayList;
import java.util.List;

@ApiSupport(author = "yy")
@Api(tags = "用户")
@RestController
@RequestMapping("/user")
public class UserController {

    @ApiOperation("添加")
    @PostMapping("/add")
    @ApiOperationSupport(ignoreParameters = {"user.id", "user.age"})//如果是以@RequestBody形式接收参数,那么ignoreParameters中填写参数名.要忽略的属性名即可
    public UserVO add(@RequestBody @Valid UserAddRequest userAddRequest) {
        // 将数据写到数据库
        UserVO userVO = new UserVO();
        BeanUtils.copyProperties(userAddRequest, userVO);
        userVO.setId(1L);
        userVO.setCreateTime(LocalDateTime.now());
        userVO.setUpdateTime(LocalDateTime.now());
        return userVO;
    }

    @ApiOperation("修改")
    @PostMapping("/edit")
    @ApiOperationSupport(ignoreParameters = "id") // 忽略掉User中的id属性,不显示在文档中
    public UserVO edit(@RequestBody @Valid UserEditRequest userEditRequest) {
        // 修改数据库的数据
        UserVO userVO = new UserVO();
        BeanUtils.copyProperties(userEditRequest, userVO);
        userVO.setUpdateTime(LocalDateTime.now());
        return userVO;
    }

    @ApiOperation("查找")
    @GetMapping("/find")
    public List<UserVO> find(UserQueryRequest userQueryRequest) {
        return new ArrayList<>();
    }

    @ApiOperation("删除")
    @PostMapping("/delete")
    public void delete(Long id) {
        // 将数据库数据删除
    }
}
ntity
说明
本处我将增删改查都单独写一个实体类。
当然,也可以将增删改的参数都写到一个实体里边,通过@Null,@NotNull以及它们的groups属性来指定属于哪个分组。这样写在运行时不会有问题,但在Knife4j页面显示时会不正常,原因是:Swagger没有很好地处理好这种情况。
package com.example.demo.business.user.request;

import io.swagger.annotations.ApiModel;
import io.swagger.annotations.ApiModelProperty;
import lombok.Data;

import javax.validation.constraints.NotBlank;
import javax.validation.constraints.NotNull;

@Data
@ApiModel("修改用户")
public class UserEditRequest {
    @ApiModelProperty(value = "用户ID", required = true)
    @NotNull(message = "用户ID不能为空")
    private Long id;

    @ApiModelProperty(value = "用户名", required = true)
    @NotBlank(message = "用户名不能为空")
    private String userName;

    @ApiModelProperty("昵称")
    private String nickName;

    @ApiModelProperty("邮箱")
    private String email;
}
VO
package com.example.demo.business.user.vo;

import com.fasterxml.jackson.annotation.JsonFormat;
import io.swagger.annotations.ApiModel;
import io.swagger.annotations.ApiModelProperty;
import lombok.Data;

import java.time.LocalDateTime;

@Data
@ApiModel(value = "用户实体", description = "用户description")
public class UserVO {

    @ApiModelProperty("用户id")
    private Long id;

    @ApiModelProperty("用户名")
    private String userName;

    @ApiModelProperty("昵称")
    private String nickName;

    @ApiModelProperty("邮箱")
    private String email;

    @ApiModelProperty(value = "创建时间")
    @JsonFormat(pattern = "yyyy-MM-dd HH:mm:ss")
    private LocalDateTime createTime;

    @ApiModelProperty(value = "修改时间")
    @JsonFormat(pattern = "yyyy-MM-dd HH:mm:ss")
    private LocalDateTime updateTime;

    @ApiModelProperty("删除标记。0:未删除 其他:已删除")
    private Long deletedFlag;
}
访问地址:


 5729
5729

 被折叠的 条评论
为什么被折叠?
被折叠的 条评论
为什么被折叠?
 到【灌水乐园】发言


