


代码:
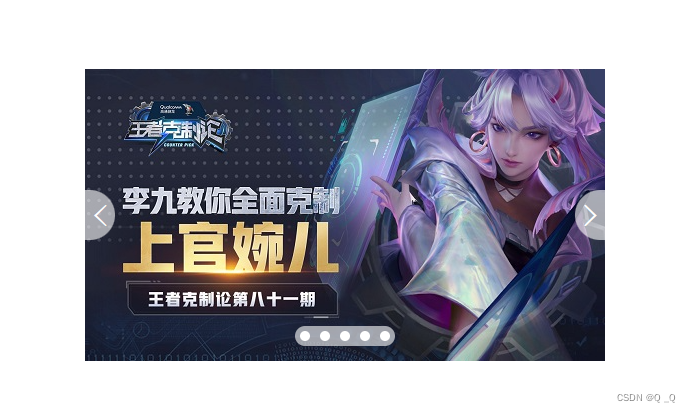
<!DOCTYPE html> <html lang="en"> <head> <meta charset="UTF-8" /> <meta http-equiv="X-UA-Compatible" content="IE=edge" /> <meta name="viewport" content="width=device-width, initial-scale=1.0" /> <title>Document</title> <style> /* CSS书写顺序: 1.改变元素显示模式的属性:display:block;float:position 2.和盒子相关的:width,height,border,padding,margin,background.. 3.和文本样式相关的:color,fz,fs,fw,ff,tac,td,lh... 4.css3新增的一些属性:bdrd,box-shadow,cursor... */ * { margin: 0; padding: 0; box-sizing: border-box; } li { /* lin */ list-style: none; } .box { /* 父相 por */ position: relative; width: 520px; height: 292px; background-color: skyblue; margin: 100px auto; } .prev, .next { /* 子绝 poa */ position: absolute; top: 50%; margin-top: -25px; width: 30px; height: 50px; /* 清除边框 */ border: 0; background-color: rgba(255, 255, 255, 0.6); font-size: 30px; font-family: 宋体; font-weight: 700; color: #fff; cursor: pointer; } .prev { left: 0; border-radius: 0 25px 25px 0; } .next { right: 0; border-radius: 25px 0 0 25px; } .box ul { position: absolute; bottom: 15px; left: 50%; margin-left: -50px; width: 100px; height: 20px; background-color: rgba(255, 255, 255, 0.6); border-radius: 10px; } .box li { float: left; width: 10px; height: 10px; background-color: #fff; margin: 5px; border-radius: 50%; /* cu */ cursor: pointer; } </style> </head> <body> <div class="box"> <img src="./images/sg.jpg" alt="" /> <!-- 两个按钮 --> <button class="prev"><</button> <button class="next">></button> <!-- 轮播图指示器 --> <ul> <li></li> <li></li> <li></li> <li></li> <li></li> </ul> </div> </body> </html>效果图:


04-01
 244
244
244
“相关推荐”对你有帮助么?
-

 非常没帮助
非常没帮助 -

 没帮助
没帮助 -

 一般
一般 -

 有帮助
有帮助 -

 非常有帮助
非常有帮助
提交

 被折叠的 条评论
为什么被折叠?
被折叠的 条评论
为什么被折叠?
 到【灌水乐园】发言


