


Activiti的使用主要分三步:
1,定义流程
按照bpmn规范定义一个流程,
模板文件
<?xml version="1.0" encoding="UTF-8"?>
<definitions xmlns="http://www.omg.org/spec/BPMN/20100524/MODEL" xmlns:xsi="http://www.w3.org/2001/XMLSchema-instance" xmlns:xsd="http://www.w3.org/2001/XMLSchema" xmlns:activiti="http://activiti.org/bpmn" xmlns:bpmndi="http://www.omg.org/spec/BPMN/20100524/DI" xmlns:omgdc="http://www.omg.org/spec/DD/20100524/DC" xmlns:omgdi="http://www.omg.org/spec/DD/20100524/DI" typeLanguage="http://www.w3.org/2001/XMLSchema" expressionLanguage="http://www.w3.org/1999/XPath" targetNamespace="http://www.activiti.org/test">
  <process id="myProcess" name="My process" isExecutable="true">
    <startEvent id="startevent1" name="Start"></startEvent>
    <userTask id="usertask1" name="创建请假单"></userTask>
    <sequenceFlow id="flow1" sourceRef="startevent1" targetRef="usertask1"></sequenceFlow>
    <userTask id="usertask2" name="部门经理审核"></userTask>
    <sequenceFlow id="flow2" sourceRef="usertask1" targetRef="usertask2"></sequenceFlow>
    <userTask id="usertask3" name="人事复核"></userTask>
    <sequenceFlow id="flow3" sourceRef="usertask2" targetRef="usertask3"></sequenceFlow>
    <endEvent id="endevent1" name="End"></endEvent>
    <sequenceFlow id="flow4" sourceRef="usertask3" targetRef="endevent1"></sequenceFlow>
  </process>
  <bpmndi:BPMNDiagram id="BPMNDiagram_myProcess">
    <bpmndi:BPMNPlane bpmnElement="myProcess" id="BPMNPlane_myProcess">
      <bpmndi:BPMNShape bpmnElement="startevent1" id="BPMNShape_startevent1">
        <omgdc:Bounds height="35.0" width="35.0" x="130.0" y="160.0"></omgdc:Bounds>
      </bpmndi:BPMNShape>
      <bpmndi:BPMNShape bpmnElement="usertask1" id="BPMNShape_usertask1">
        <omgdc:Bounds height="55.0" width="105.0" x="210.0" y="150.0"></omgdc:Bounds>
      </bpmndi:BPMNShape>
      <bpmndi:BPMNShape bpmnElement="usertask2" id="BPMNShape_usertask2">
        <omgdc:Bounds height="55.0" width="105.0" x="360.0" y="150.0"></omgdc:Bounds>
      </bpmndi:BPMNShape>
      <bpmndi:BPMNShape bpmnElement="usertask3" id="BPMNShape_usertask3">
        <omgdc:Bounds height="55.0" width="105.0" x="510.0" y="150.0"></omgdc:Bounds>
      </bpmndi:BPMNShape>
      <bpmndi:BPMNShape bpmnElement="endevent1" id="BPMNShape_endevent1">
        <omgdc:Bounds height="35.0" width="35.0" x="660.0" y="160.0"></omgdc:Bounds>
      </bpmndi:BPMNShape>
      <bpmndi:BPMNEdge bpmnElement="flow1" id="BPMNEdge_flow1">
        <omgdi:waypoint x="165.0" y="177.0"></omgdi:waypoint>
        <omgdi:waypoint x="210.0" y="177.0"></omgdi:waypoint>
      </bpmndi:BPMNEdge>
      <bpmndi:BPMNEdge bpmnElement="flow2" id="BPMNEdge_flow2">
        <omgdi:waypoint x="315.0" y="177.0"></omgdi:waypoint>
        <omgdi:waypoint x="360.0" y="177.0"></omgdi:waypoint>
      </bpmndi:BPMNEdge>
      <bpmndi:BPMNEdge bpmnElement="flow3" id="BPMNEdge_flow3">
        <omgdi:waypoint x="465.0" y="177.0"></omgdi:waypoint>
        <omgdi:waypoint x="510.0" y="177.0"></omgdi:waypoint>
      </bpmndi:BPMNEdge>
      <bpmndi:BPMNEdge bpmnElement="flow4" id="BPMNEdge_flow4">
        <omgdi:waypoint x="615.0" y="177.0"></omgdi:waypoint>
        <omgdi:waypoint x="660.0" y="177.0"></omgdi:waypoint>
      </bpmndi:BPMNEdge>
    </bpmndi:BPMNPlane>
  </bpmndi:BPMNDiagram>
</definitions>
BPMN规范中的流程符号
1, 事件Event
- 开始
- 中间
- 结束
2,活动Activity
- 用户任务
- 服务任务
- 任务子流程
一个活动可以是一个任务,还可以是一个当前流程的字处理流程,活动还可以指定不同的类型
3,网关GateWay
网关用来处理决策
- 排他网关
只有一条径会被选择,流程执行到该网关时,按照输出顺序逐个执行,当条件为true时,继续执行当前网关
如果有多条路径则会执行第一个值为true的线路,如果所有true,则会报异常
排他网关需要和条件顺序流结合使用,default属性指定默认顺序流,当所有条件都不满足时会走default指定的顺序流
- 并行网关
所有路径会被同时选择
拆分-----并行执行所有输出流,为每一条顺序六创建一个并行执行线路
合并----所有并行网关拆分并执行完成的线路均在此等候,直到所有的线路都执行完成才继续向下执行
- 包容网关
可以同时执行多条线路,也可以在网关设置条件
拆分----计算线路上的表达式,结果为true的,创建一个并行线路执行
合并----所有并行网关拆分并执行完成的线路均在此等候,直到所有的线路都执行完成才继续向下执行
-
综合网关
-
事件网关
用于捕捉事件设置的,允许多个输出流执行多个不同的中间捕获事件,当流程执行到事件网关后,流程处于等待状态,需要等到抛出事件才能将等待状态转换为活动状态.
创建流程文件
在idea中下载actiBPM插件,在插件库中可能找不到该插件
actiBPMN插件下载
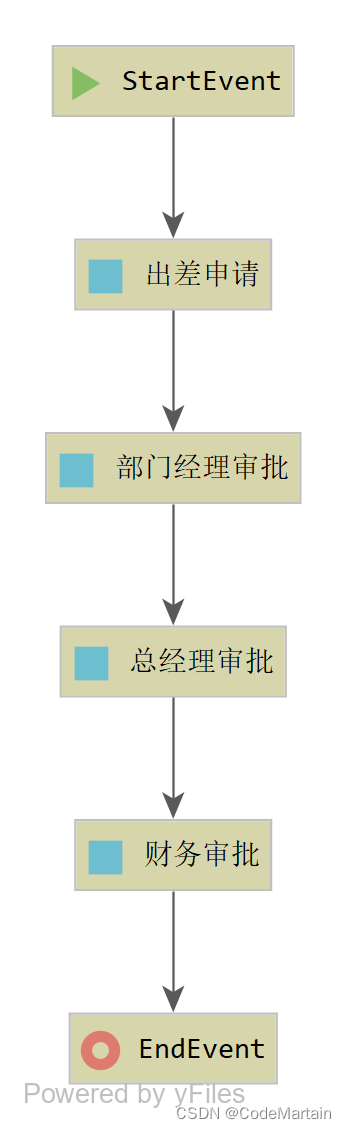
在resource文件夹下创建一个流程文件 **.bmpn文件,然后使用插件绘制业务流程
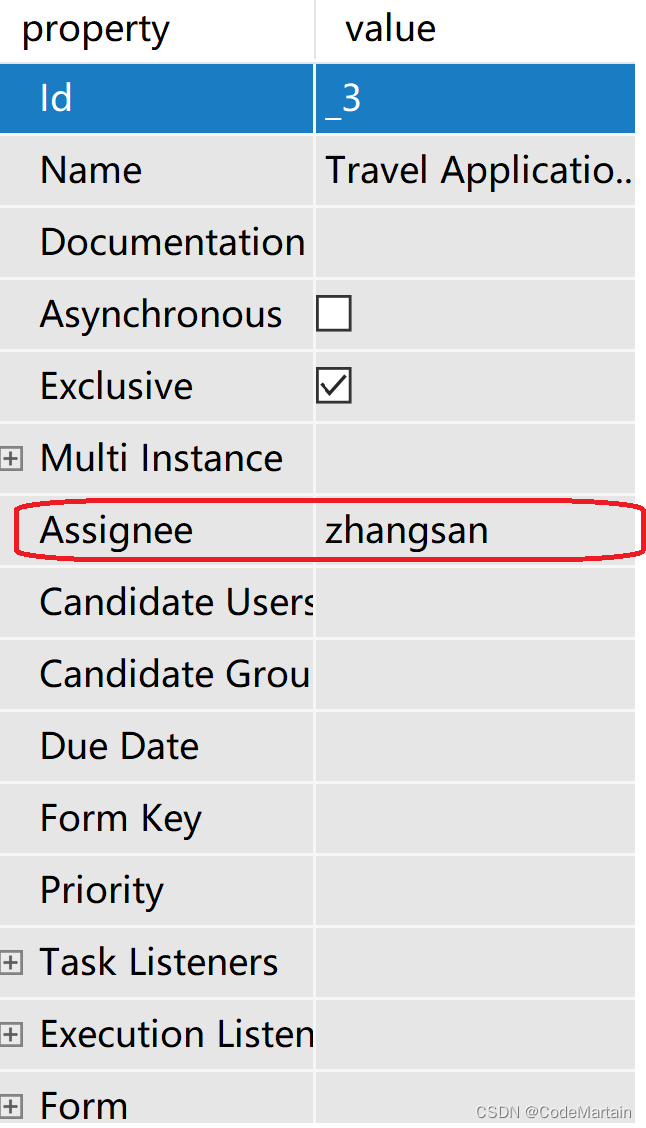
在流程中添加每个流程相关的人(申请人,审批人…)
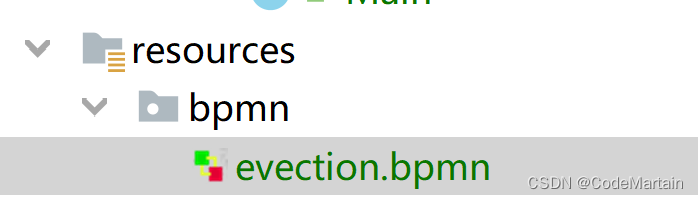
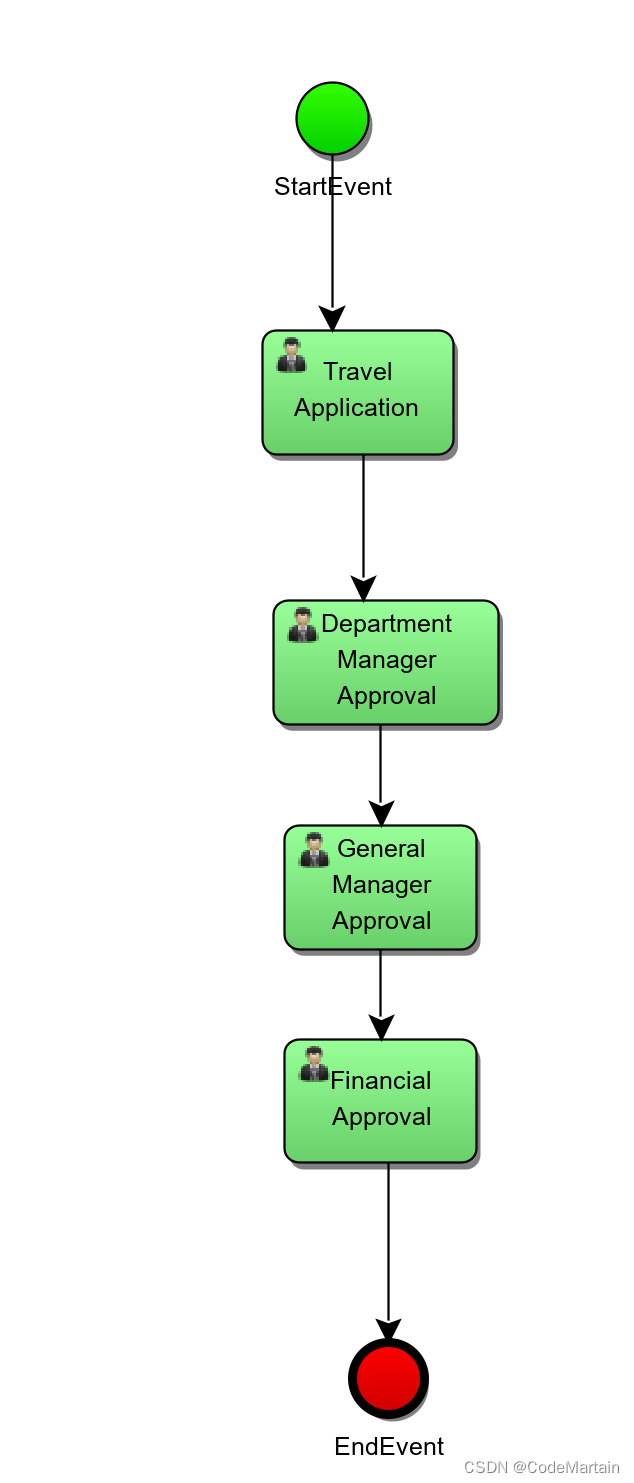
之后我们查看evection.bpmn文件
<?xml version="1.0" encoding="UTF-8" standalone="yes"?>
<definitions xmlns="http://www.omg.org/spec/BPMN/20100524/MODEL" xmlns:activiti="http://activiti.org/bpmn" xmlns:bpmndi="http://www.omg.org/spec/BPMN/20100524/DI" xmlns:omgdc="http://www.omg.org/spec/DD/20100524/DC" xmlns:omgdi="http://www.omg.org/spec/DD/20100524/DI" xmlns:tns="http://www.activiti.org/test" xmlns:xsd="http://www.w3.org/2001/XMLSchema" xmlns:xsi="http://www.w3.org/2001/XMLSchema-instance" expressionLanguage="http://www.w3.org/1999/XPath" id="m1696900343930" name="" targetNamespace="http://www.activiti.org/test" typeLanguage="http://www.w3.org/2001/XMLSchema">
  <process activiti:candidateStarterGroups="employee" activiti:candidateStarterUsers="Gavin" id="MyEvection" isClosed="false" isExecutable="true" name="Travel Application" processType="None">
    <startEvent id="_2" name="StartEvent"/>
    <userTask activiti:assignee="zhangsan" activiti:exclusive="true" id="_3" name="Travel Application"/>
    <userTask activiti:assignee="jerry" activiti:exclusive="true" id="_4" name="Department Manager Approval"/>
    <userTask activiti:assignee="tom" activiti:exclusive="true" id="_5" name="General Manager Approval"/>
    <userTask activiti:assignee="gavin" activiti:exclusive="true" id="_6" name="Financial Approval"/>
    <sequenceFlow id="_7" sourceRef="_2" targetRef="_3"/>
    <sequenceFlow id="_8" sourceRef="_3" targetRef="_4"/>
    <sequenceFlow id="_9" sourceRef="_4" targetRef="_5"/>
    <sequenceFlow id="_10" sourceRef="_5" targetRef="_6"/>
    <endEvent id="_11" name="EndEvent"/>
    <sequenceFlow id="_12" sourceRef="_6" targetRef="_11"/>
  </process>
  <bpmndi:BPMNDiagram documentation="background=#FFFFFF;count=1;horizontalcount=1;orientation=0;width=842.4;height=1195.2;imageableWidth=832.4;imageableHeight=1185.2;imageableX=5.0;imageableY=5.0" id="Diagram-_1" name="New Diagram">
    <bpmndi:BPMNPlane bpmnElement="MyEvection">
      <bpmndi:BPMNShape bpmnElement="_2" id="Shape-_2">
        <omgdc:Bounds height="32.0" width="32.0" x="165.0" y="25.0"/>
        <bpmndi:BPMNLabel>
          <omgdc:Bounds height="32.0" width="32.0" x="0.0" y="0.0"/>
        </bpmndi:BPMNLabel>
      </bpmndi:BPMNShape>
      <bpmndi:BPMNShape bpmnElement="_3" id="Shape-_3">
        <omgdc:Bounds height="55.0" width="85.0" x="150.0" y="135.0"/>
        <bpmndi:BPMNLabel>
          <omgdc:Bounds height="55.0" width="85.0" x="0.0" y="0.0"/>
        </bpmndi:BPMNLabel>
      </bpmndi:BPMNShape>
      <bpmndi:BPMNShape bpmnElement="_4" id="Shape-_4">
        <omgdc:Bounds height="55.0" width="100.0" x="155.0" y="255.0"/>
        <bpmndi:BPMNLabel>
          <omgdc:Bounds height="55.0" width="100.0" x="0.0" y="0.0"/>
        </bpmndi:BPMNLabel>
      </bpmndi:BPMNShape>
      <bpmndi:BPMNShape bpmnElement="_5" id="Shape-_5">
        <omgdc:Bounds height="55.0" width="85.0" x="160.0" y="355.0"/>
        <bpmndi:BPMNLabel>
          <omgdc:Bounds height="55.0" width="85.0" x="0.0" y="0.0"/>
        </bpmndi:BPMNLabel>
      </bpmndi:BPMNShape>
      <bpmndi:BPMNShape bpmnElement="_6" id="Shape-_6">
        <omgdc:Bounds height="55.0" width="85.0" x="160.0" y="450.0"/>
        <bpmndi:BPMNLabel>
          <omgdc:Bounds height="55.0" width="85.0" x="0.0" y="0.0"/>
        </bpmndi:BPMNLabel>
      </bpmndi:BPMNShape>
      <bpmndi:BPMNShape bpmnElement="_11" id="Shape-_11">
        <omgdc:Bounds height="32.0" width="32.0" x="190.0" y="585.0"/>
        <bpmndi:BPMNLabel>
          <omgdc:Bounds height="32.0" width="32.0" x="0.0" y="0.0"/>
        </bpmndi:BPMNLabel>
      </bpmndi:BPMNShape>
      <bpmndi:BPMNEdge bpmnElement="_12" id="BPMNEdge__12" sourceElement="_6" targetElement="_11">
        <omgdi:waypoint x="206.0" y="505.0"/>
        <omgdi:waypoint x="206.0" y="585.0"/>
        <bpmndi:BPMNLabel>
          <omgdc:Bounds height="0.0" width="0.0" x="0.0" y="0.0"/>
        </bpmndi:BPMNLabel>
      </bpmndi:BPMNEdge>
      <bpmndi:BPMNEdge bpmnElement="_7" id="BPMNEdge__7" sourceElement="_2" targetElement="_3">
        <omgdi:waypoint x="181.0" y="57.0"/>
        <omgdi:waypoint x="181.0" y="135.0"/>
        <bpmndi:BPMNLabel>
          <omgdc:Bounds height="0.0" width="0.0" x="0.0" y="0.0"/>
        </bpmndi:BPMNLabel>
      </bpmndi:BPMNEdge>
      <bpmndi:BPMNEdge bpmnElement="_8" id="BPMNEdge__8" sourceElement="_3" targetElement="_4">
        <omgdi:waypoint x="195.0" y="190.0"/>
        <omgdi:waypoint x="195.0" y="255.0"/>
        <bpmndi:BPMNLabel>
          <omgdc:Bounds height="0.0" width="0.0" x="0.0" y="0.0"/>
        </bpmndi:BPMNLabel>
      </bpmndi:BPMNEdge>
      <bpmndi:BPMNEdge bpmnElement="_9" id="BPMNEdge__9" sourceElement="_4" targetElement="_5">
        <omgdi:waypoint x="202.5" y="310.0"/>
        <omgdi:waypoint x="202.5" y="355.0"/>
        <bpmndi:BPMNLabel>
          <omgdc:Bounds height="0.0" width="0.0" x="0.0" y="0.0"/>
        </bpmndi:BPMNLabel>
      </bpmndi:BPMNEdge>
      <bpmndi:BPMNEdge bpmnElement="_10" id="BPMNEdge__10" sourceElement="_5" targetElement="_6">
        <omgdi:waypoint x="202.5" y="410.0"/>
        <omgdi:waypoint x="202.5" y="450.0"/>
        <bpmndi:BPMNLabel>
          <omgdc:Bounds height="0.0" width="0.0" x="0.0" y="0.0"/>
        </bpmndi:BPMNLabel>
      </bpmndi:BPMNEdge>
    </bpmndi:BPMNPlane>
  </bpmndi:BPMNDiagram>
</definitions>
我们可以看到,.bpmn文件其实是一个xml格式的文件,我们尝试改一下后缀名为.xml
由于使用的.xml文件后缀而不是原生的.bpmn文件,那怎么生成流程图呢?
右键该文件—>>

之后就会生成一个图:这个图就比较美观,可以用于给客户展示(内部使用的话没必要)

当然你也可以截图巴拉巴拉,反正有很多方法,不用太在意;
如果流程名使用中文,可能会出现乱码问题,别着急,
还是乱码的话,需要修改下面这两个文件:
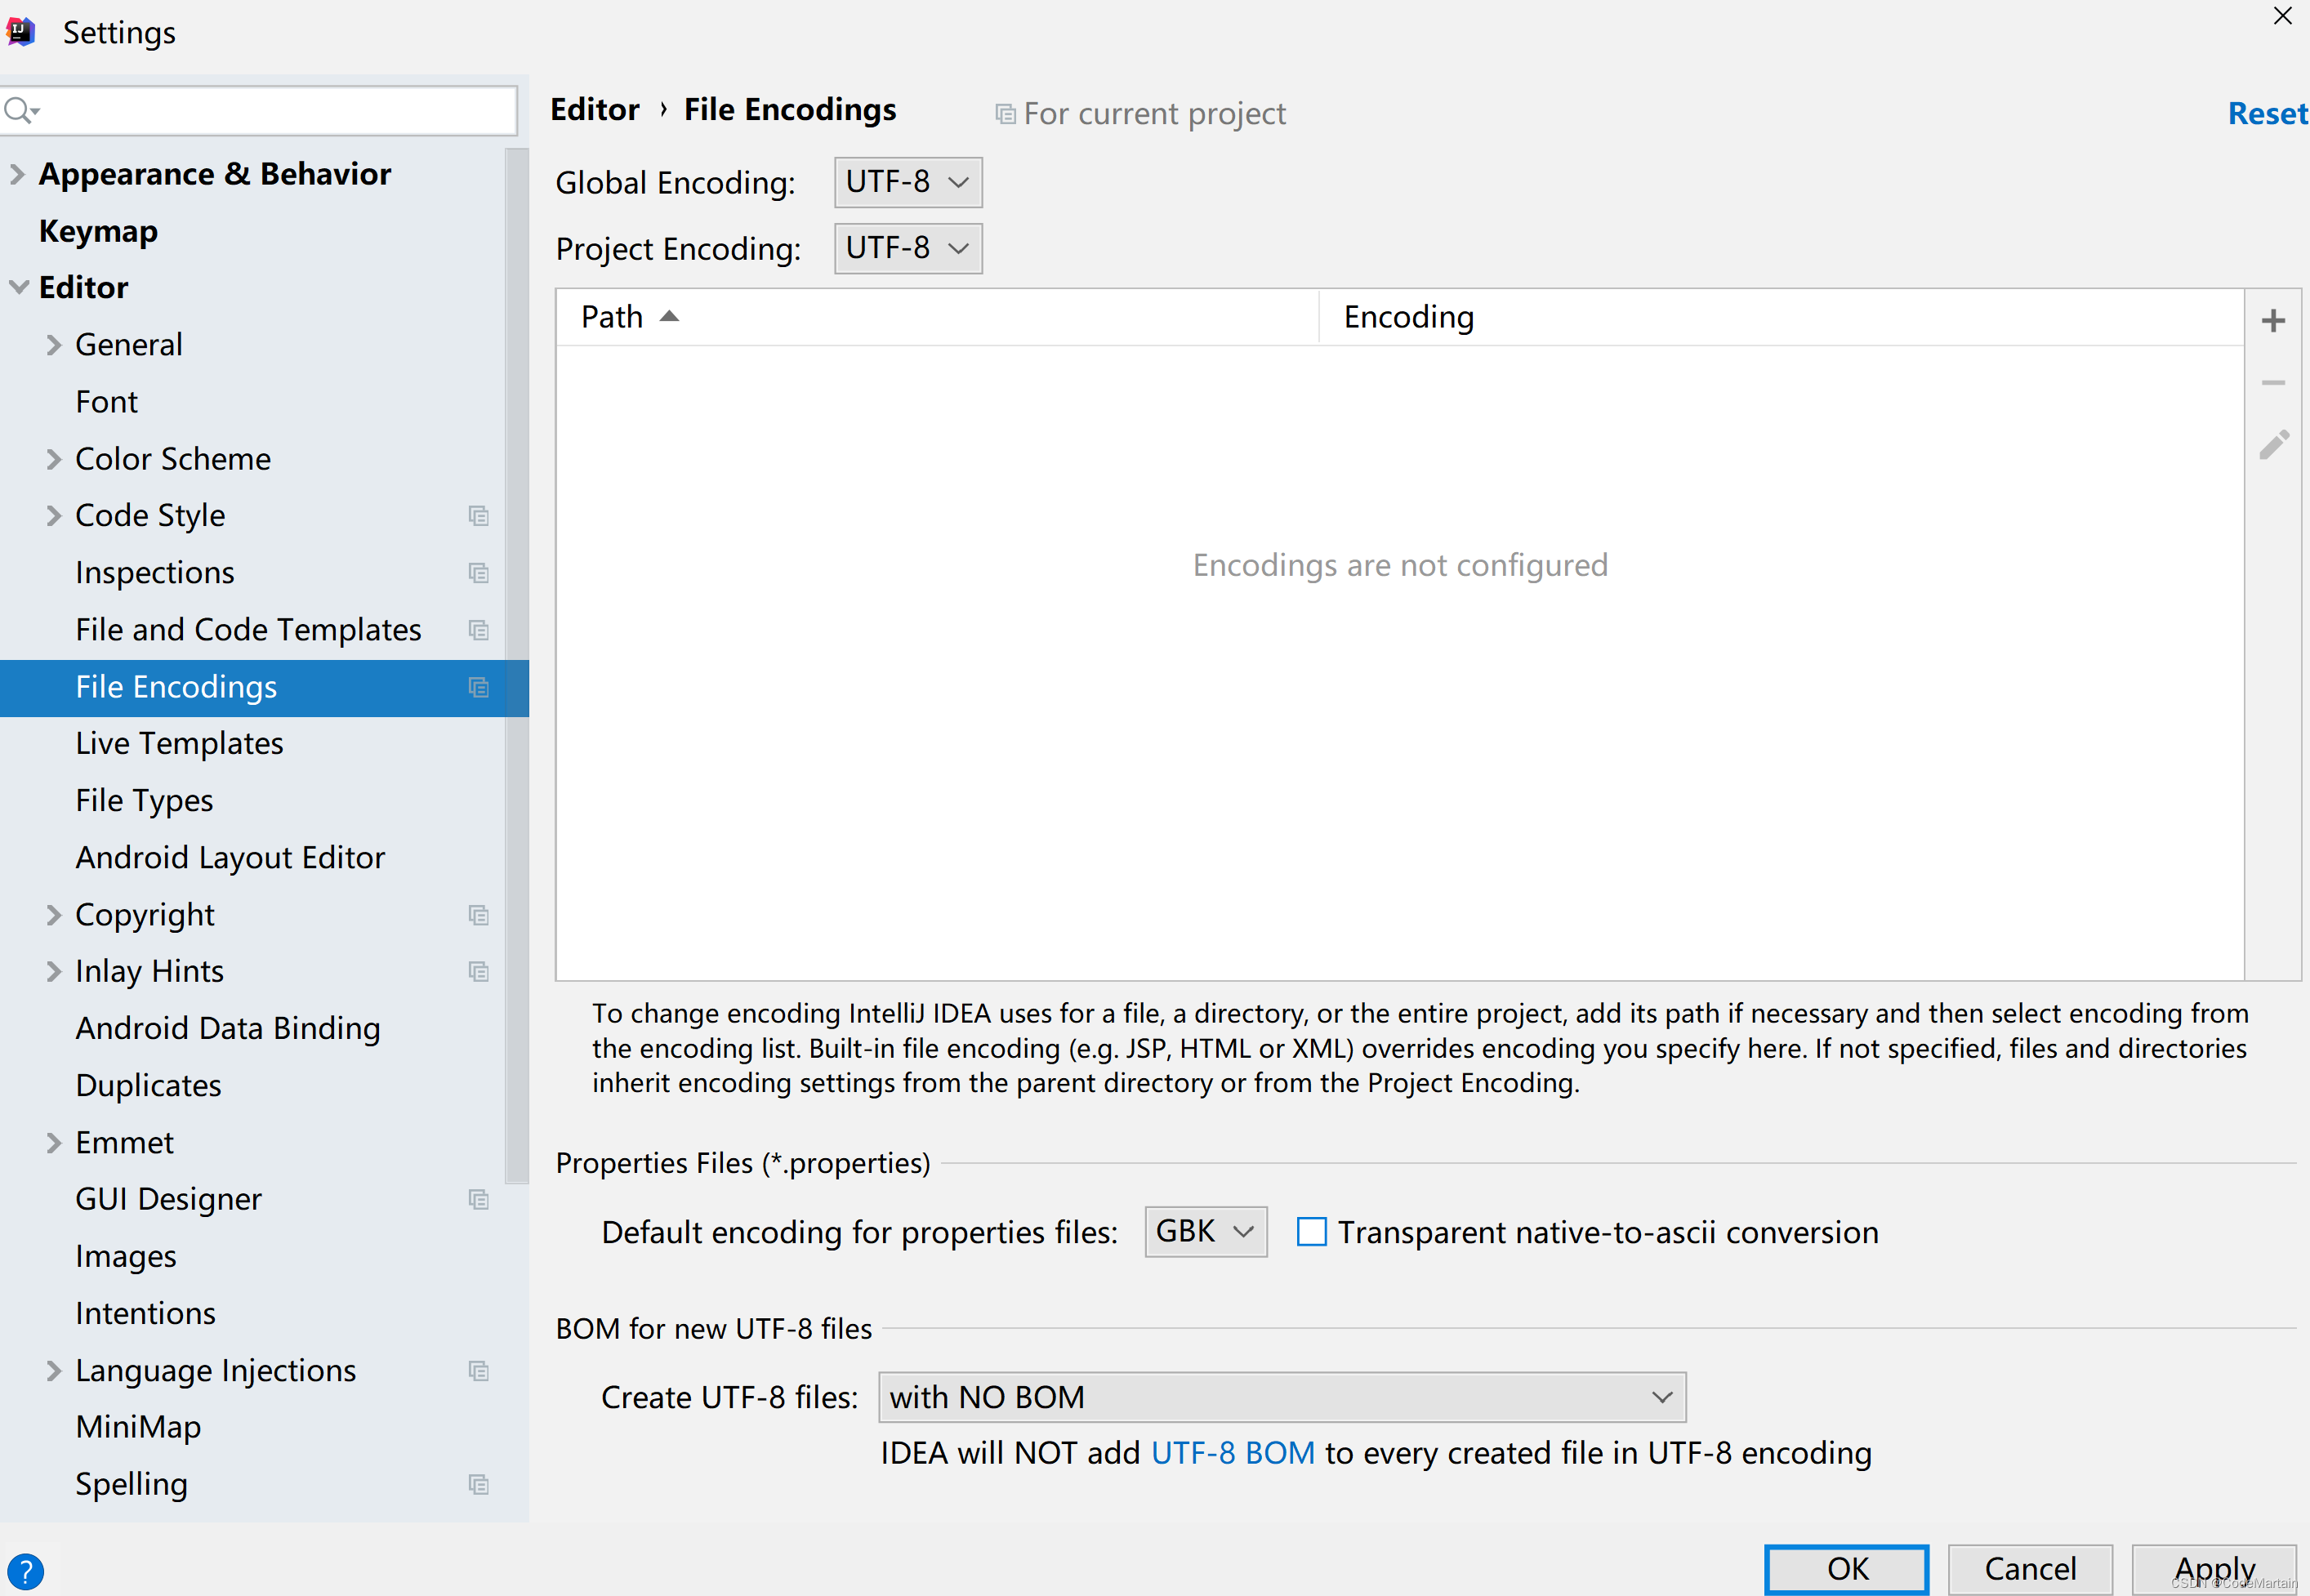
参考这篇文章—三步解决IDEA actiBPM插件之.bpmn文件中文乱码问题
中文版流程
2,部署流程
把流程定义文件,加载到数据库中
   @Test
    public void Test02() {
        //1,创建processEngine
        ProcessEngine processEngine = ProcessEngines.getDefaultProcessEngine();
        //2,获取部署的服务 RepositoryService
        RepositoryService repositoryService = processEngine.getRepositoryService();
        //3,使用RepositoryService实例进行流程的部署,定义一个流程名然后部署到数据库中
        DeploymentBuilder deployment = repositoryService.createDeployment();
        //4,将部署信息装入数据库表中
        Deployment deploy = deployment.name("出差申请流程").disableSchemaValidation().addClasspathResource("bpmn/evection.bpmn").addClasspathResource("bpmn/evection.png").deploy();

        System.out.println("流程部署id"+ deploy.getId());
        System.out.println("流程部署名称"+ deploy.getName());
        System.out.println("流程部署目录"+ deploy.getCategory());
        System.out.println("流程部署"+ deploy.getTenantId());
        System.out.println("流程部署"+ deploy.getKey());
        System.out.println("流程部署时间"+ deploy.getDeploymentTime());

    }
部署完毕后,我们可以看到re的表中有了数据
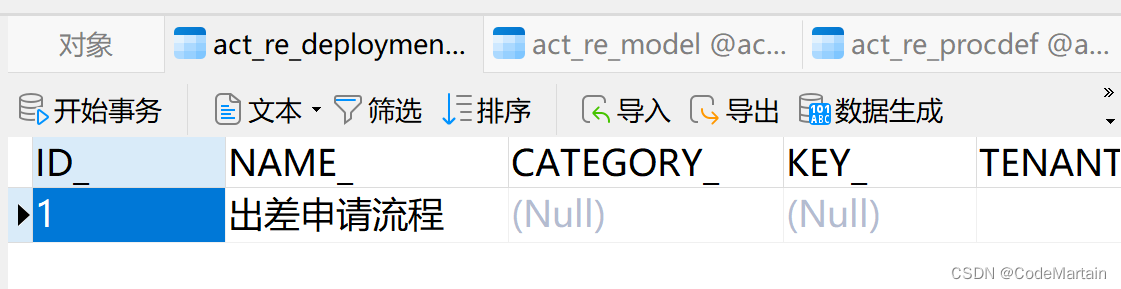
部署时操作的表有:
- ACT_RE_DEPLOYMENT
存放部署的流程信息(名称,部署时间等)
DeploymentEntity[id=1, name=出差申请流程]
2023-10-10 11:45:14,089 2510  [           main] DEBUG entEntityImpl.insertDeployment  - ==>  Preparing: insert into ACT_RE_DEPLOYMENT(ID_, NAME_, CATEGORY_, KEY_, TENANT_ID_, DEPLOY_TIME_, ENGINE_VERSION_) values(?, ?, ?, ?, ?, ?, ?)
2023-10-10 11:45:14,100 2521  [           main] DEBUG entEntityImpl.insertDeployment  - ==> Parameters: 1(String), 出差申请流程(String), null, null, (String), 2023-10-10 11:45:14.01(Timestamp), null
2023-10-10 11:45:14,102 2523  [           main] DEBUG entEntityImpl.insertDeployment  - <==    Updates: 1

- ACT_GE_BYTEARRAY
存放部署文件信息
Preparing: INSERT INTO ACT_GE_BYTEARRAY(ID_, REV_, NAME_, BYTES_, DEPLOYMENT_ID_, GENERATED_) VALUES (?, 1, ?, ?, ?, ?) , (?, 1, ?, ?, ?, ?)
2023-10-10 11:45:14,121 2542  [           main] DEBUG eEntityImpl.bulkInsertResource  - ==> Parameters: 2(String), bpmn/evection.png(String), java.io.ByteArrayInputStream@7a11c4c7(ByteArrayInputStream), 1(String), false(Boolean), 3(String), bpmn/evection.bpmn(String), java.io.ByteArrayInputStream@4cc547a(ByteArrayInputStream), 1(String), false(Boolean)
2023-10-10 11:45:14,132 2553  [           main] DEBUG eEntityImpl.bulkInsertResource  - <==    Updates: 2

ACT_RE_PROCDEF
流程定义表

ACT_GE_PROPERTY

3,启动流程
启动流程需要使用runtimeService,
 @Test
    public void Test03() {
        //流程引擎
        ProcessEngine processEngine = ProcessEngines.getDefaultProcessEngine();
        //获得运行时服务
        RuntimeService runtimeService = processEngine.getRuntimeService();
        //通过key来开启一个实例
        ProcessInstance myEvection = runtimeService.startProcessInstanceByKey("MyEvection");
        System.out.println(myEvection.getProcessDefinitionId());
        System.out.println(myEvection.getId());
        System.out.println(myEvection.getActivityId());
    }
启动时根据act_re_procdef表中的key来启动一个实例;

创建流程实例时用到/操作的表
主要是下面的几张表

记录了流程历史表

记录了当下正在走的流程
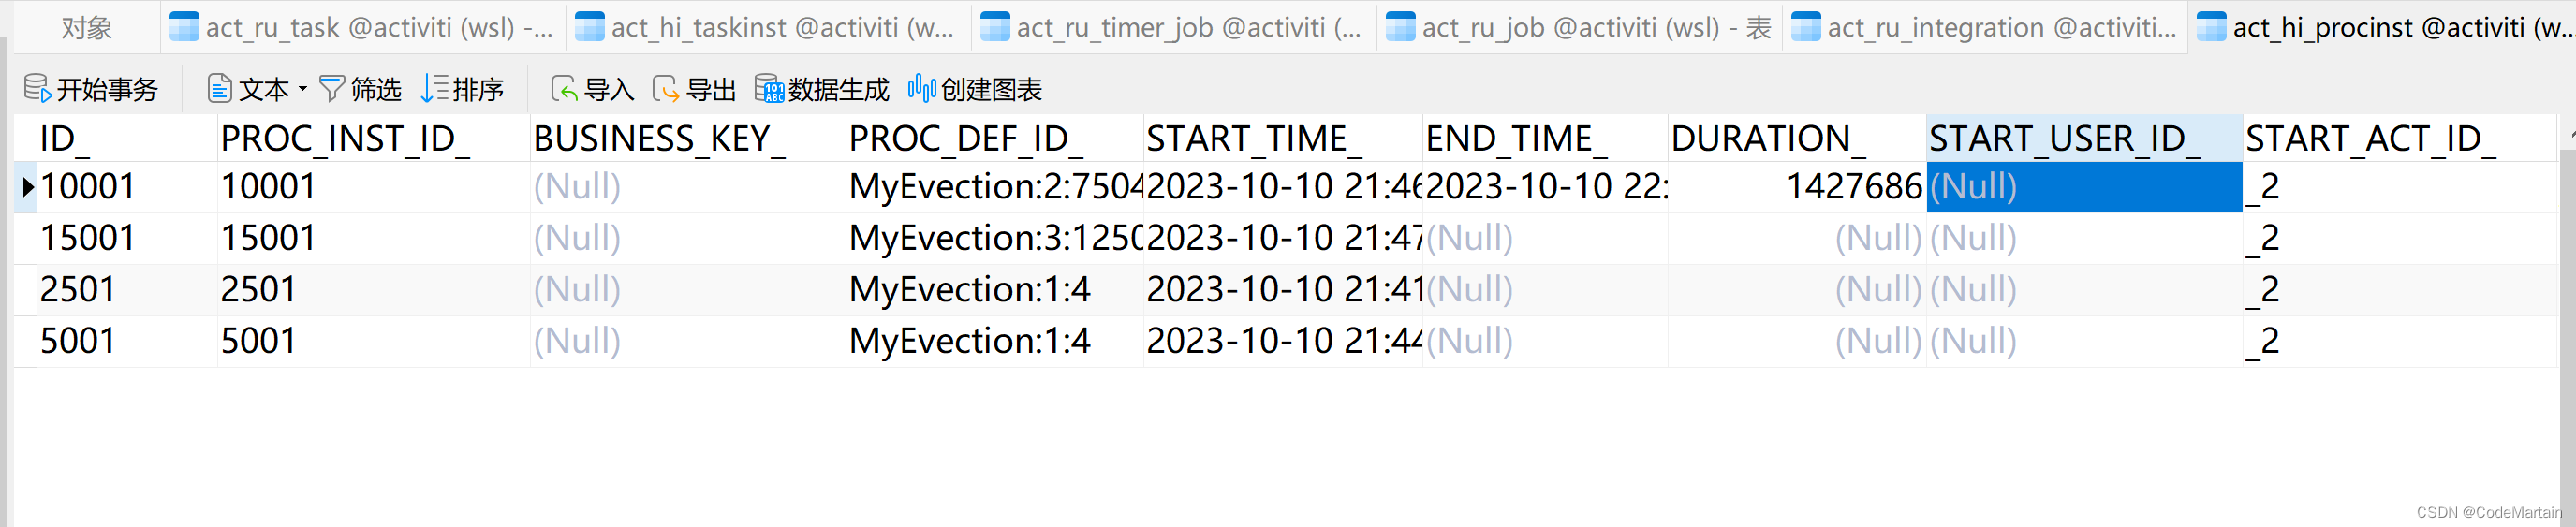
记录了操作的流程用时(开始时间和结束时间)
任务完成得整个流程代码如下
package gavin.test;

import org.activiti.engine.*;
import org.activiti.engine.repository.Deployment;
import org.activiti.engine.repository.DeploymentBuilder;
import org.activiti.engine.runtime.ProcessInstance;
import org.activiti.engine.task.Task;
import org.junit.Test;

import java.util.List;

public class ActTest {


    //创建数据表
    @Test
    public void Test01() {
        ProcessEngine engine = ProcessEngines.getDefaultProcessEngine();
        System.out.println(engine);
    }

    /**
     * 部署流程
     * 1,创建processEngine
     * 2,获取部署的服务 RepositoryService
     * 3,使用RepositoryService实例进行流程的部署,定义一个流程名然后部署到数据库中
     * 4,将部署信息(.bpmn文件和.png文件)入数据库表中输出部署信息
     */
    @Test
    public void Test02() {
        //1,创建processEngine
        ProcessEngine processEngine = ProcessEngines.getDefaultProcessEngine();
        //2,获取部署的服务 RepositoryService
        RepositoryService repositoryService = processEngine.getRepositoryService();
        //3,使用RepositoryService实例进行流程的部署,定义一个流程名然后部署到数据库中
        DeploymentBuilder deployment = repositoryService.createDeployment();
        //4,将部署信息装入数据库表中
        Deployment deploy = deployment.name("出差申请流程").disableSchemaValidation().addClasspathResource("bpmn/evection.bpmn").addClasspathResource("bpmn/evection.png").deploy();

        System.out.println("流程部署id" + deploy.getId());
        System.out.println("流程部署名称" + deploy.getName());
        System.out.println("流程部署目录" + deploy.getCategory());
        System.out.println("流程部署" + deploy.getTenantId());
        System.out.println("流程部署" + deploy.getKey());
        System.out.println("流程部署时间" + deploy.getDeploymentTime());

    }

    /**
     * hi_actinst 流程实例执行历史
     * hi_identitylink 流程参与用户历史
     * hi_procinst 流程实例历史信息
     * hi_taskinst 流程任务历史
     * ru_execution 流程执行信息
     * ru_identitylink 路程参与用户信息
     * ru_task 流程任务
     */
    @Test
    public void Test03() {
        //流程引擎
        ProcessEngine processEngine = ProcessEngines.getDefaultProcessEngine();
        //获得运行时服务
        RuntimeService runtimeService = processEngine.getRuntimeService();
        //通过key来开启一个实例
        ProcessInstance myEvection = runtimeService.startProcessInstanceByKey("MyEvection");
        System.out.println(myEvection.getProcessDefinitionId());
        System.out.println(myEvection.getId());
        System.out.println(myEvection.getActivityId());
    }

    /**
     * 查询个人执行的任务
     */
    @Test
    public void Test04() {
        ProcessEngine engine = ProcessEngines.getDefaultProcessEngine();
        TaskService taskService = engine.getTaskService();
        List<Task> list = taskService.createTaskQuery().processDefinitionKey("MyEvection").taskAssignee("zhangsan").list();

        for (Task task :
                list) {
            System.out.println(task.getProcessInstanceId());
            System.out.println(task.getId());
            System.out.println(task.getAssignee());
            System.out.println(task.getName());
        }
    }

    /**
     * 完成任务id
     */
    @Test
    public void Test05() {
        ProcessEngine defaultProcessEngine = ProcessEngines.getDefaultProcessEngine();
        TaskService taskService = defaultProcessEngine.getTaskService();
        taskService.complete("10005");
    }


    /**
     * 查询个人执行的任务
     */
    @Test
    public void Test06() {
        ProcessEngine engine = ProcessEngines.getDefaultProcessEngine();
        TaskService taskService = engine.getTaskService();
        List<Task> list = taskService.createTaskQuery().processDefinitionKey("MyEvection").taskAssignee("jerry").list();

        for (Task task :
                list) {
            System.out.println(task.getProcessInstanceId());
            System.out.println(task.getId());
            System.out.println(task.getAssignee());
            System.out.println(task.getName());
        }
    }
    /**
     * 完成任务id
     */
    @Test
    public void Test07() {
        ProcessEngine defaultProcessEngine = ProcessEngines.getDefaultProcessEngine();
        TaskService taskService = defaultProcessEngine.getTaskService();
        taskService.complete("17502");
    }
    /**
     * 查询个人执行的任务
     */
    @Test
    public void Test08() {
        ProcessEngine engine = ProcessEngines.getDefaultProcessEngine();
        TaskService taskService = engine.getTaskService();
        List<Task> list = taskService.createTaskQuery().processDefinitionKey("MyEvection").taskAssignee("tom").list();

        for (Task task :
                list) {
            System.out.println(task.getProcessInstanceId());
            System.out.println(task.getId());
            System.out.println(task.getAssignee());
            System.out.println(task.getName());
        }
    }
    /**
     * 完成任务id
     */
    @Test
    public void Test09() {
        ProcessEngine defaultProcessEngine = ProcessEngines.getDefaultProcessEngine();
        TaskService taskService = defaultProcessEngine.getTaskService();
        taskService.complete("20002");
    }
        /**
     * 完成任务id
     */
    @Test
    public void Test10() {
        ProcessEngine defaultProcessEngine = ProcessEngines.getDefaultProcessEngine();
        TaskService taskService = defaultProcessEngine.getTaskService();
        taskService.complete("22502");
    }

}
小结:
1,获得processengine—以生成数据表
2,部署对应的工作流
通过processengine获得部署服务(部署文件 *.bpmn 与流程图 )repositoryService
3,开启流程实例
获得runtimeservice后获得运行时
4,处理工作流程
获得taskservice完成流程实例,以进行下一步流程
打包部署
  @Test
    public void deployProcessZip() {
        ProcessEngine defaultProcessEngine = ProcessEngines.getDefaultProcessEngine();
        RepositoryService repositoryService = defaultProcessEngine.getRepositoryService();
        //获得流---读取资源
        InputStream inputStream = this.getClass().getClassLoader().getResourceAsStream("bpmn/evection.zip");
        //流传入构造方法中
        ZipInputStream zipInputStream = new ZipInputStream(inputStream);
        Deployment deploy = repositoryService.createDeployment().disableSchemaValidation().addZipInputStream(zipInputStream).deploy();
        System.out.println(deploy.getId());
        System.out.println(deploy.getName());
    }


 6844
6844


 被折叠的 条评论
为什么被折叠?
被折叠的 条评论
为什么被折叠?
 到【灌水乐园】发言


