


React博客项目系列1 编写markdown文章,代码高亮,显示文章与目录
文章复制代码
要实现的功能:
- 鼠标悬浮在博文里的代码块,右上角出现复制按钮
- 点击复制按钮,复制代码块里的代码
下载依赖
yarn add copy-to-clipboard
功能实现
// 封装组件
import { CopyOutlined, LoadingOutlined } from '@ant-design/icons'
import React, { useEffect, useState } from 'react'
import './index.scss'
import copy from 'copy-to-clipboard'
import { Button } from 'antd'
export default function CodeCopyBtn ({ children }) {
  // 控制按钮显示
  const [copyOk, setCopyOk] = useState(false)
  const handleClick = async () => {
    const text = children[0].props.children[0] // 获取文本
    if (window.isSecureContext) {// 在安全域下
      await navigator.clipboard.writeText(text) // 使用浏览器原生剪贴板
    } else {
      copy(text) // 使用copy-to-clipboard
    }
    setCopyOk(true)
  }
  // 复制成功后将按钮变回"复制代码"供下次使用
  useEffect(() => {
    if (copyOk) {
      setTimeout(() => {
        setCopyOk(false)
      }, 1000)
    }
  }, [copyOk])
  return (
    <div className='code-copy-btn'>
      {copyOk ? (
        <Button className='copy-btn'>
          <LoadingOutlined />
          复制成功
        </Button>
      ) : (
        <Button className='copy-btn' onClick={handleClick}>
          <CopyOutlined />
          复制代码
        </Button>
      )}
    </div>
  )
}
.code-copy-btn {
  position: absolute;
  right: 10px;
  top: 10px;
  display: none;

  .copy-btn {
    padding: 5px;
    line-height: 1;
    border-radius: 5px;
    color: #fff;
    background-color: #d9534f;
    border-color: #d43f3a;
  }

  .ant-btn-default:not(:disabled):hover {
    color: #000 !important;
    border-color: #000 !important;
  }

  .ant-btn {
    height: auto;
  }


  pre.blog-pre {
    position: relative !important;
  }
  // 鼠标hover代码块控制按钮出现
  pre.blog-pre:hover & {
    display: block;
  }
  // 兼容移动端的触摸事件
  pre.blog-pre.active & {
    display: block;
  }
}
// 组件使用
import './index.scss'
import ReactMarkdown from 'react-markdown'
import { useState, useEffect } from 'react'
import CodeCopyBtn from '@/components/CodeCopyBtn'
const ArticleDetail = () => {
  const [articleMsg, setArticleMsg] = useState({})
  let ref = ''
  const Pre = (preProps) => {
    return (
      <pre
        className='blog-pre'
        // 兼容移动端的触摸事件
        onTouchStart={({ currentTarget }) => {
          if (ref) ref.className = 'blog-pre'
          currentTarget.className = 'blog-pre active'
          ref = currentTarget
        }}
      >
        <CodeCopyBtn>{preProps.children}</CodeCopyBtn>
        {preProps.children}
      </pre>
    )
  }
  return (
          <div className='article-body'>
            <ReactMarkdown
              className='markdown-body'
              remarkPlugins={[remarkGfm, { singleTilde: false }]}
              rehypePlugins={[rehypeRaw]}
              components={{
                pre: Pre, // 修改pre标签
                code ({ node, inline, className, children, ...props }) {
                  const match = /language-(\w+)/.exec(className || '')
                  return !inline && match ? (
                    <SyntaxHighlighter
                      children={String(children).replace(/\n$/, '')}
                      style={coldarkDark}
                      language={match[1]}
                      PreTag="div"
                      showLineNumbers={true}
                      // showInlineLineNumbers={true}
                      {...props}
                    />
                  ) : (
                    <code className={className} {...props} children={children} />
                  )
                }
              }}
            >{articleMsg.body}</ReactMarkdown>
          </div>
  )
}
export default ArticleDetail
拿到文本:preProps.children[0].props.children[0]

效果:

评论添加表情
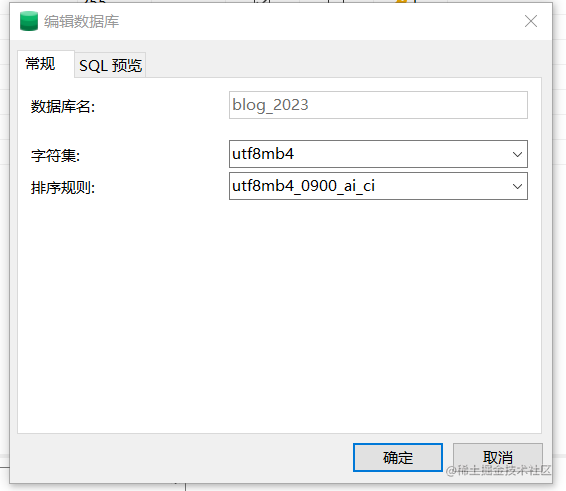
数据库编码问题
MySQL 的 utf8 编码只支持3字节的数据,而 emoji 数据是4个字节的字符,所以如果后端用的是 MySql 的话字符集记得要用utf8mb4。
表情功能实现
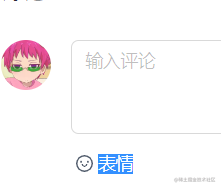
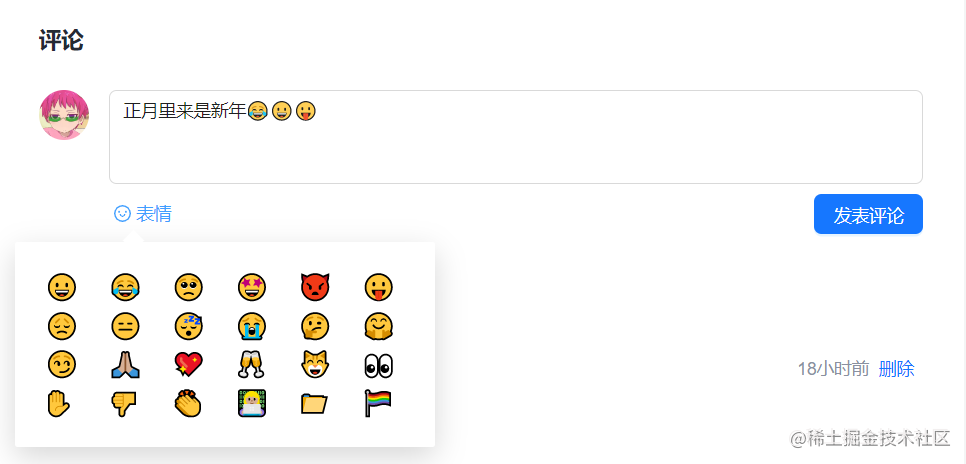
要实现的功能:
- 点击或悬浮在"表情"上,字体变蓝
- 点击"表情"出现表情框
- 点击emoji将emoji追加到评论后面
- 再次点击"表情"表情框关闭
// 封装组件
import './index.scss'
import { useState } from "react"
import { SmileOutlined } from '@ant-design/icons'
import { Col, Row } from 'antd'
// inputValue是当前输入的评论内容,setInputValue是设置评论内容
const Emoji = ({ inputValue, setInputValue }) => {
const [showEmoji, setShowEmoji] = useState(false)
// emoji自行在https://www.emojiall.com/zh-hans/all-emojis中选择
const emojiList = [
{ id: 1, emoji: '😀' },
{ id: 2, emoji: '😂' },
{ id: 3, emoji: '🥺' },
{ id: 4, emoji: '🤩' },
{ id: 5, emoji: '👿' },
{ id: 6, emoji: '😛' },
{ id: 7, emoji: '😞' },
{ id: 8, emoji: '😑' },
{ id: 9, emoji: '😴' },
{ id: 10, emoji: '😭' },
{ id: 11, emoji: '🤔' },
{ id: 12, emoji: '🤗' },
{ id: 13, emoji: '😏' },
{ id: 14, emoji: '🙏🏼' },
{ id: 15, emoji: '💖' },
{ id: 16, emoji: '🥂' },
{ id: 17, emoji: '😸' },
{ id: 18, emoji: '👀' },
{ id: 19, emoji: '✋' },
{ id: 20, emoji: '👎' },
{ id: 21, emoji: '👏' },
{ id: 22, emoji: '👩🏼💻' },
{ id: 23, emoji: '📁' },
{ id: 24, emoji: '🏳️🌈' },
]
// 表情追加到评论内容后
const handleOk = (emoji) => {
setInputValue(inputValue.concat(emoji))
}
return (
<div className='emoji'>
// 点击一次出现表情框,再点一次表情框关闭
<div className={showEmoji ? "active smile" : "smile"} onClick={() => setShowEmoji(!showEmoji)}>
<SmileOutlined />
<span>表情</span>
</div>
// 表情框部分
{showEmoji && <div className="emoji-box" >
<Row gutter={[16, 8]}>
{emojiList.map((item) => (
<Col span={4} key={item.id} onClick={() => handleOk(item.emoji)}>
<span>{item.emoji}</span>
</Col>
))}
</Row>
</div >}
</div>
)
}
export default Emoji
$blue: #409eff;
.emoji {
  position: relative;
  .smile {
    font-size: 14px;
    color: #4e5969;
    span {
      margin-left: 4px;
    }
    &:hover { // 悬浮字体变蓝
      cursor: pointer;
      color: $blue;
    }
  }
  .active { // 点击字体变蓝
    color: $blue;
  }
  .emoji-box {
    position: absolute;
    top: 100%;
    left: -75px;
    z-index: 6666;
    width: 336px;
    padding: 24px;
    color: #909090;
    background-color: #fff;
    border-radius: 2px;
    box-shadow: 0 8px 24px rgba(0, 0, 0, 0.16);
    margin-top: 14px;

    &::before {
      content: '';
      position: absolute;
      margin-left: -0.5rem;
      top: -0.6rem;
      right: 70%;
      width: 1rem;
      height: 1rem;
      background-color: #fff;
      border-right: none;
      border-bottom: none;
      transform: rotate(45deg);
    }
    span {
      font-size: 20px;
      cursor: pointer;
    }
  }
}
细节
因为"表情"那部分就是span,所以有时候点快了会出现蓝底:
解决方法是设置user-select: none;约束用户不能选择文本。
效果:


 344
344


 被折叠的 条评论
为什么被折叠?
被折叠的 条评论
为什么被折叠?
 到【灌水乐园】发言


