


 本文详细介绍了如何使用Python搭建一个针对CSDN登录的WEB自动化测试框架,包含配置文件设置、工具类封装、对象库层定义、操作层优化和数据驱动测试。通过实例演示,实现登录过程的自动化并生成Allure报告。
重新梳理了一下框架,顺带稍改良了一下。
本次以CSDN的登录为例,搭一个WEB自动化框架
基本框架
1、创建配置文件
-
配置文件必须创建在项目根目录
-
创建的配置文件名称,三选一: pytest.ini、tox.ini、setup.cfg
-
只能创建一个配置文件,不能创建多个
-
配置文件中不允许有注释信息
[pytest]
addopts = -s -v
testpaths = ./script
python_files = test_*.py
python_classes = Test*
python_functions = test_*
[pytest]
# 添加命令行参数
addopts = -s -v # -s可以显示出用例当中的打印信息,-v会显示出用例执行过程中的详细信息
# 文件路径
testpaths = ./script
# 文件名称
python_files = test_*.py
# 类名称
python_classes = Test*
# 方法名称
python_functions = test_*# 注意:ini文件在实际应用中不能存在注释
2、创建一个工具类,用于封装驱动等方法
import logging
from selenium import webdriver
from common.log_cfg import init_log_config
from selenium.webdriver.support.wait import WebDriverWait
from selenium.webdriver.support import expected_conditions as ECinit_log_config()
class GetDriver:
driver = None# 浏览器驱动
@classmethod
def get_driver(cls, url=""):
if cls.driver is None:
# 打开chrome浏览器
cls.driver = webdriver.Chrome()
logging.info("创建新的浏览器驱动...")
# 最大化窗口
cls.driver.maximize_window()
# 打开指定地址
cls.driver.get(url)
logging.info("进入地址:{}".format(url))
else:
logging.warning("浏览器驱动已存在,不再创建新的驱动")# 关闭浏览器
@classmethod
def quit_driver(cls):
if cls.driver is not None:
logging.info("关闭浏览器驱动...")
cls.driver.quit()
cls.driver = None
logging.info("驱动关闭成功")
else:
logging.warning("未检测到驱动对象")# 元素显式等待
@classmethod
def locate_element(cls, element):
return WebDriverWait(cls.driver, 10).until(EC.presence_of_element_located(element))
3、定义对象库层,封装元素信息
from utils import GetDriver
# 定义对象库层
class LoginPage:def __init__(self):
# 首页-登录/注册
self.login_or_register = 'xpath', '//*[text()="登录/注册"]'
# 使用密码登录
self.login_user_pwd = 'xpath', '//*[text()="密码登录"]'
# 用户名输入框
self.username_inputbox = 'xpath', '//*[@autocomplete="username"]'
# 密码输入框
self.pwd_inputbox = 'xpath', '//*[@placeholder="密码"]'
# 登录按钮
self.login_btn = 'xpath', '//*[@class="base-button"]'
# 登录失败提示
self.login_err = 'css selector', '.login-form-error'
# 首页-用户头像
self.head_portrait = 'xpath', '//*[@id="csdn-toolbar"]/div[2]/div/div[3]/div/div[1]'
# 首页-用户头像-用户昵称
self.nickname = 'xpath', '//*[@id="floor-user-profile_485"]/div/div[1]/div[2]/div[2]/div/div[1]'def get_element(self, element):
GetDriver.locate_element(element)
4、定义操作层
这个改良了一下,把操作封装成关键字。原本一个个的操作步骤封装太冗长,还要业务层再次调用,太麻烦了
# 定义操作层
class LoginHandle(LoginPage):# 点击
def click_on(self, element):
self.get_element(element).click()# 输入文本
def input_text(self, element, text):
self.get_element(element).send_keys(text)# 鼠标悬停
def hover(self, element):
action = ActionChains(GetDriver.driver)
action.move_to_element(element)
action.perform()# 获取文本信息
def get_text(self, element):
return self.get_element(element).text
5、定义业务层
登录成功和失败写在一个流程里了
# 定义业务层
class LoginProcess(LoginHandle):
def __init__(self):
super(LoginProcess, self).__init__()
GetDriver.get_driver("https://www.csdn.net/")def login(self, username, pwd):
logging.info("开始执行登录流程...")
logging.info("首页")
try:
self.click_on(self.login_or_register)
logging.info("点击登录/注册")
logging.info("进入登录页面")
self.click_on(self.login_user_pwd)
logging.info("点击密码登录")
self.input_text(self.username_inputbox, username)
logging.info("输入用户名:{}".format(username))
self.input_text(self.pwd_inputbox, pwd)
logging.info("输入密码:{}".format(pwd))
"""
用户名或密码为空时,登录按钮disabled
用户名密码正确时,正常登录,获取用户昵称
用户名或密码错误时,返回"用户名或密码错误"
"""
if self.get_element(self.login_btn).is_enabled():
self.click_on(self.login_btn)
logging.info("登录")
if self.get_element(self.head_portrait).is_displayed():
self.click_on(self.head_portrait)
logging.info("点击头像,进入到个人页面")
logging.info("获取用户昵称为:{}".format(self.get_text(self.nickname)))
return self.get_text(self.nickname)
else:
return self.get_element(self.login_err).text
else:
logging.info("用户名或密码为空,登录按钮不可用")
return "登录按钮不可用"
except Exception as e:
GetDriver.driver.get_screenshot_as_file(config.ScreenshotFile)
logging.error("登录流程出现错误,错误信息如下:")
logging.error(e)
logging.info("截图保存:{}".format(config.ScreenshotFile))
6、创建测试用例
from page.page_login import LoginProcess
from utils import GetDriver
class TestLogin:def setup_class(self):
GetDriver.get_driver("https://www.csdn.net/")def teardown_class(self):
GetDriver.quit_driver()def test_01_login(self):
result = LoginProcess().login("123","123")
assert "错误" in result
能跑。下面再加入数据驱动
数据驱动
1、新建一个excel文档存放测试数据
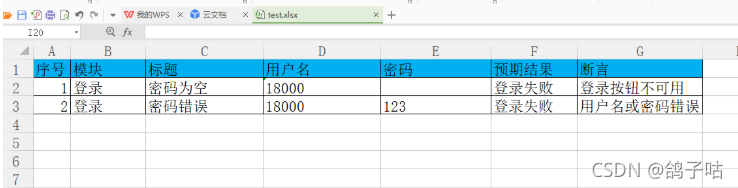
2、获取excel中的数据
原本用的xlrd 发现数值参数取出来后是float型的ヽ(`Д´)ノ 试了好久没成,就改用openpyxl了`Д´|
这里只提取了标题,用户名,密码,预期结果,断言信息
import config
import openpyxl
def get_data():
excel = openpyxl.load_workbook(config.DataFile)
sheet = excel["登录"]
test_data = []
for i in range(2, sheet.max_row + 1):
# 提取标题-预期结果
case_title = "{}--{}".format(sheet.cell(i, 3).value, sheet.cell(i, 6).value)
# 提取测试数据
username = sheet.cell(i, 4).value
pwd = sheet.cell(i, 5).value
# 提取断言值
expect = sheet.cell(i, 7).value
test_data.append([case_title, username, pwd, expect])
# print(test_data)
return test_data
打印看一下

没毛病( • ̀ω•́ )✧
3、加到用例里面
import logging
import pytest
from common.get_data import get_data
from page.page_login import LoginProcess
from utils import GetDriver
class TestLogin:def setup_class(self):
GetDriver.get_driver("https://www.csdn.net/")def teardown_class(self):
GetDriver.quit_driver()@pytest.mark.parametrize("case_title,username,pwd,expect", get_data())
def test_01_login(self, case_title, username, pwd, expect):
logging.info("开始执行用例:{}".format(case_title))
result = LoginProcess().login(username, pwd)
assert expect in result
跑一下看看

!!!∑(゚Д゚ノ)ノ
看一下截图
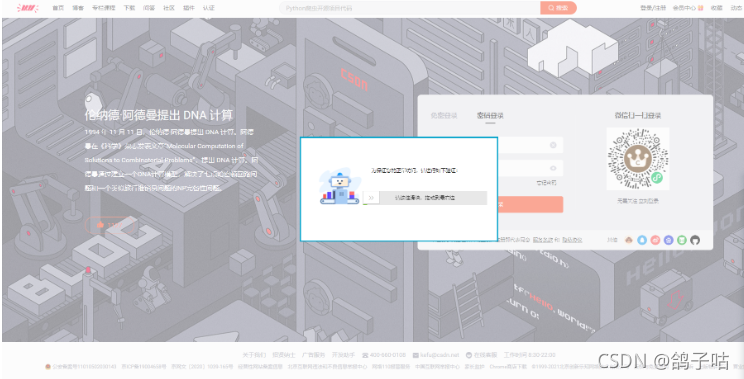
尝试太多次出验证了。。不管他了
生成allure报告
1、在配置文件中加上 --alluredir report
[pytest]
addopts = -s -v --alluredir report
testpaths = ./script
python_files = test_*.py
python_classes = Test*
python_functions = test_*
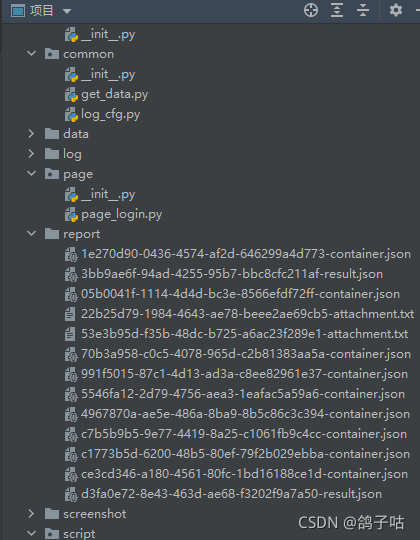
再次运行,运行完后会生成一堆json和txt文件
2、把文件转成html报告
在控制台中使用命令 allure generate report -o report/html --clean

然后就得到html报告了

打开看一下

就这点东西,可搞了我一天呐。。。╮(╯﹏╰)╭
最后再加一段代码,一步到位,生成文件后自动转成html报告
import os
import pytestif __name__ == '__main__':
pytest.main()os.system("allure generate report -o report/html --clean")
在这里运行跑完就可以直接生成报告了


 1426
1426

 被折叠的 条评论
为什么被折叠?
被折叠的 条评论
为什么被折叠?
 到【灌水乐园】发言


