


学习目标
- 在Centos中安装redis
- 配置Redis主从
- 配置Redis哨兵集群
- 使用RedisTemplate连接Redis哨兵集群
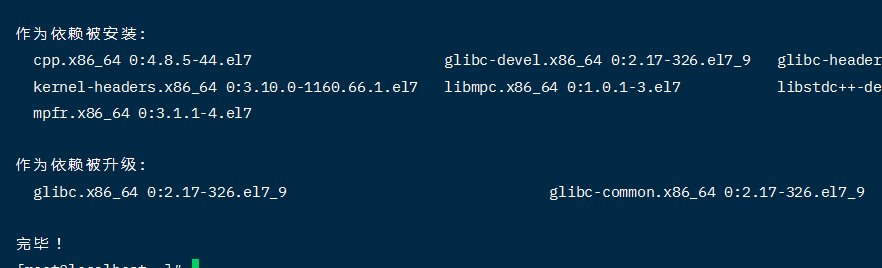
1. 安装redis依赖
安装redis之前,先安装redis依赖
yum -y install gcc gcc-c++ make tcl

结果:
编译安装需要gcc5.3以上,可以用gcc -v 命令查看当前版本号
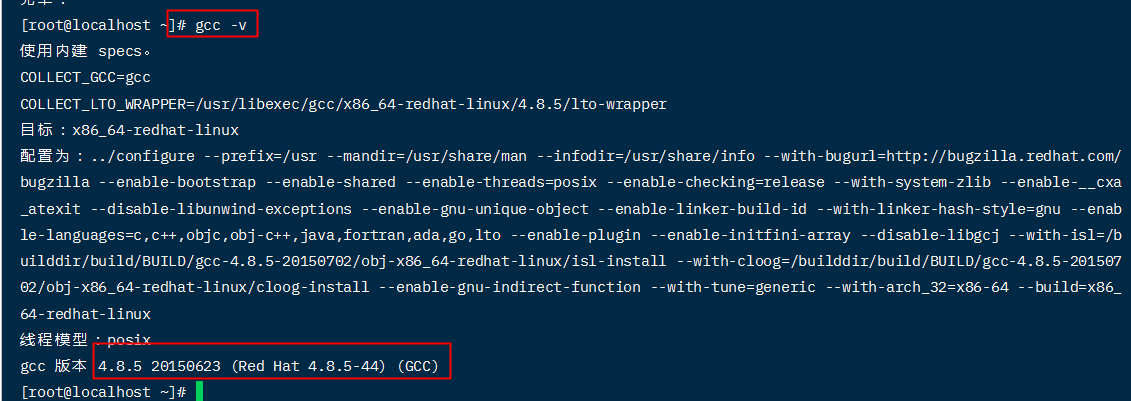
使用下面的命令升级到gcc9.1
yum -y install centos-release-scl
yum -y install devtoolset-9-gcc devtoolset-9-gcc-c++ devtoolset-9-binutils
scl enable devtoolset-9 bash
#scl命令启用只是临时的,新开的会话默认还是原gcc版本。
#如果要长期使用gcc 9.1的话执行下面的命令即可:
echo -e “\nsource /opt/rh/devtoolset-9/enable” >>/etc/profile
2. 安装Redis
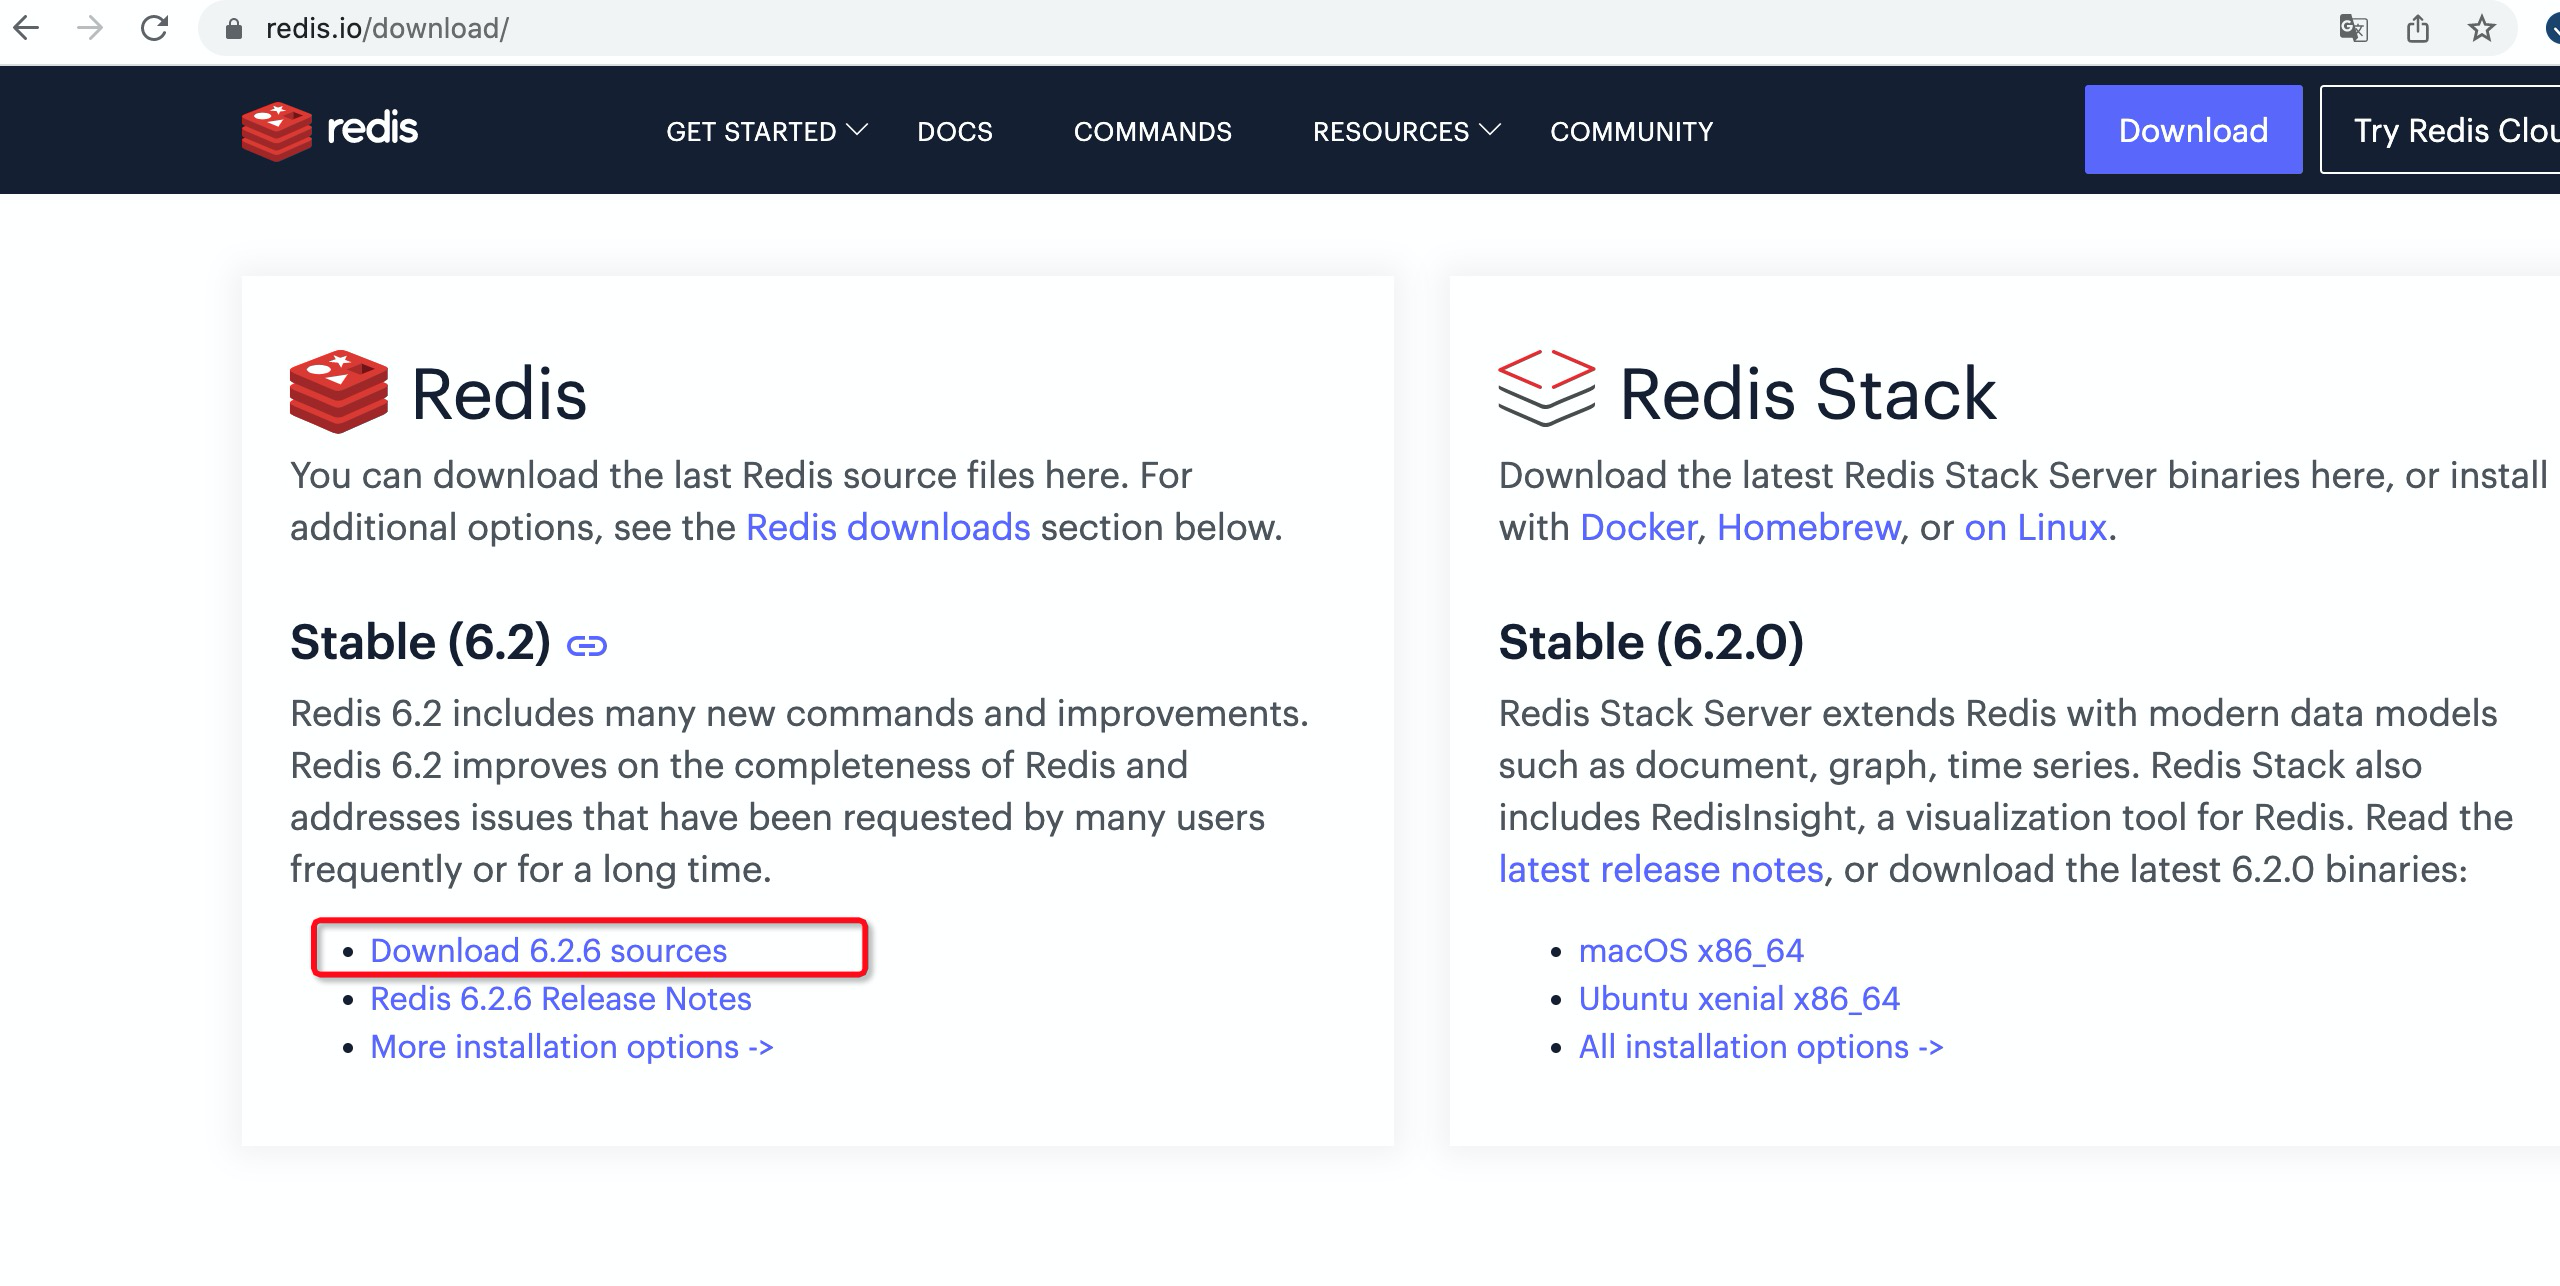
下载安装包 redis-6.2.6.tar.gz
官网地址:http://redis.io/download
所有版本:https://download.redis.io/releases/
下载地址:https://download.redis.io/releases/redis-6.2.6.tar.gz
创建文件夹
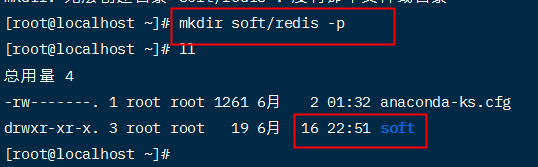
上传redsi的压缩文件到 /root/soft/redis,并解压:**tar -zvxf redis-6.2.6.tar.gz **
为了方便重新命名一下:mv redis-6.2.6 redis
切换到 redis 文件夹,执行:make
结果
然后执行:make test,这个时间比较长

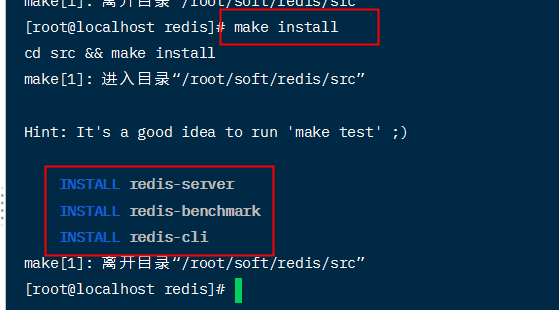
执行安装命令:make install
执行:redis-server,启动redis
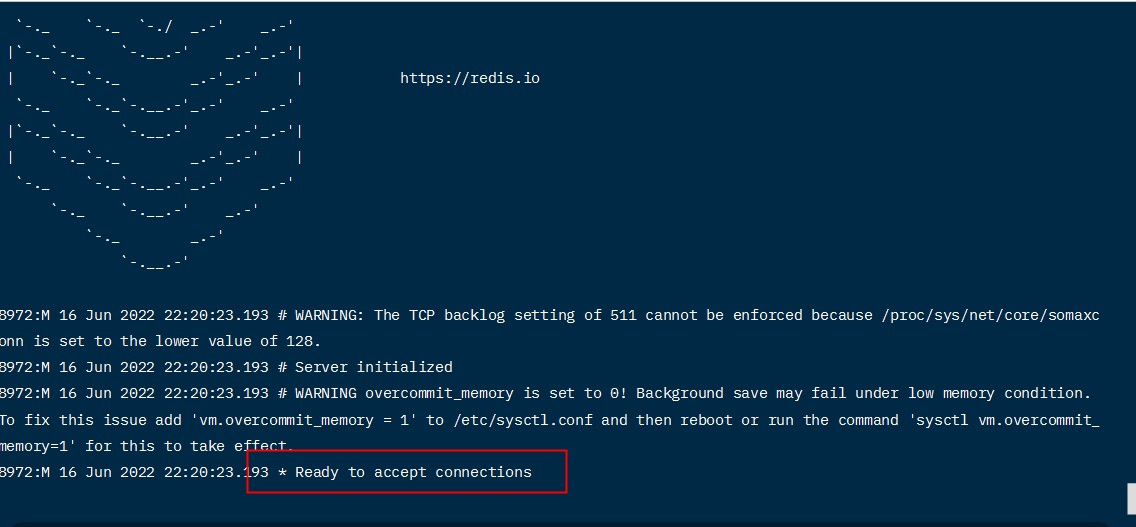
但是这样子发现redis并不是后台运行,如果要后台运行还要进行一些配置
这时候终止redis:ctrl + c
3. 简单配置
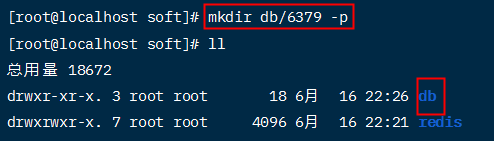
切换到 /root/soft/redis 目录,创建 db/6379 目录(存放redis持久化文件)
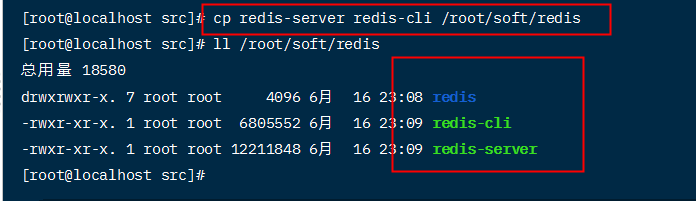
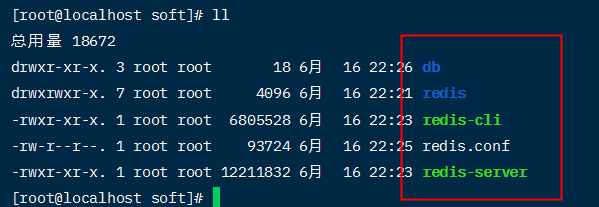
进入 src 文件夹,复制redis-server、redis-cli文件到 /root/soft/redis 目录(方便以后操作)
进入 /root/soft/redis/redis 文件夹,复制 redis.conf 文件到 /root/soft/redis 目录
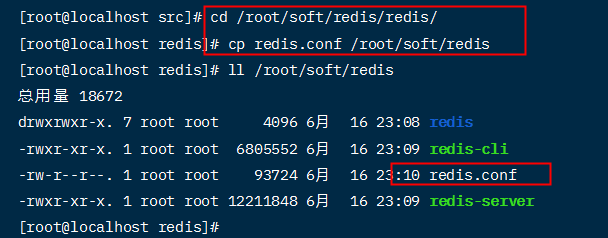
最终结果:
编辑redis.conf文件
- daemonize yes (让redis后台运行)
- dir /root/soft/redis/db/6379 (存放redis的持久化文件)
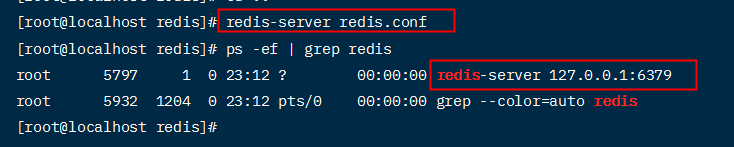
切换到 /root/soft/redis 目录,执行:redis-server redis.conf
尝试用 redis-cli 连接

退出 redis-cli,使用 exit 命令
但这时候关闭redis,就只能:kill -9 进程号
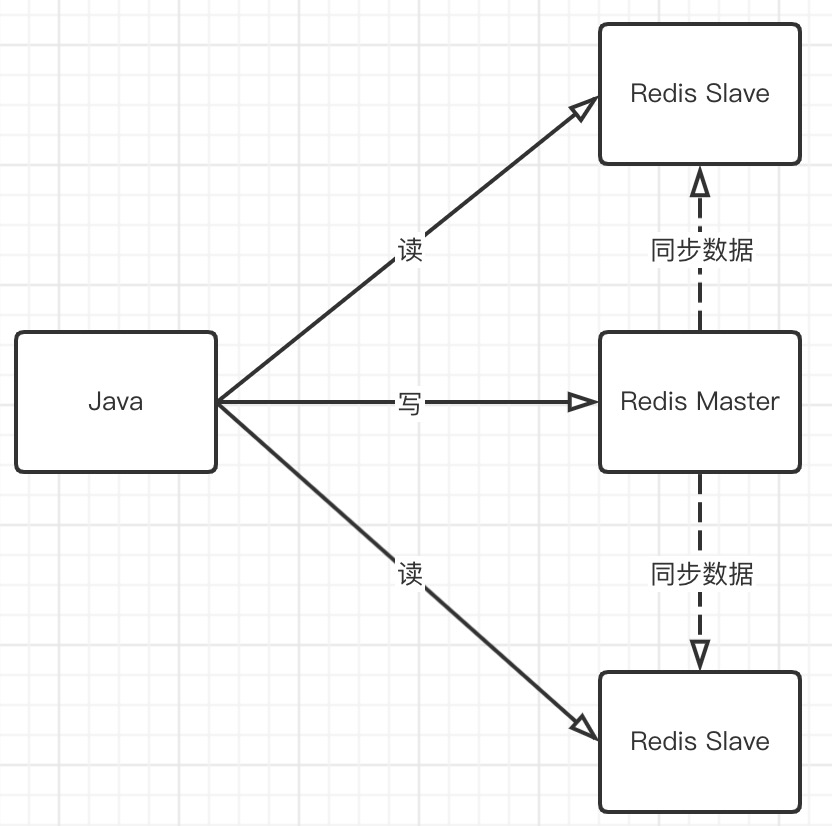
4. Redis 主从
单节点的redis,并发能力是有上限的,要进一步提高,就需要搭建集群,读写分离
1. 准备
创建3个文件夹:7001、7002、7003
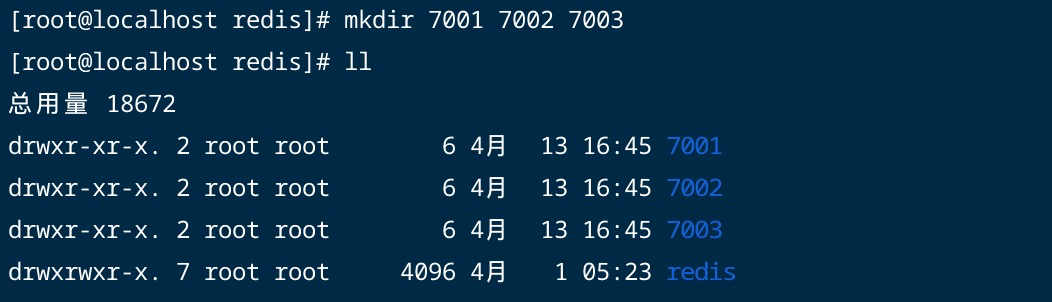
复制 redis.conf 文件到 7001、7002、7003 文件夹,执行下面的命令
echo 7001 7002 7003 | xargs -t -n 1 cp redis.conf

在 7001、7002、7003 下,分别建立 db 和 logs 目录
修改配置文件,以 7001 为示例(注意:并不是用下面的配置去整个替换redis.conf中的内容)
# 把192.168.56.103暴露出去,这样就可以通过这个ip连接redis
bind 192.168.56.103 127.0.0.1 -::1
# 端口
port 7001
# 进程文件
pidfile /var/run/redis_7001.pid
# 日志文件,需要提前建好logs文件夹
logfile /root/soft/redis/7001/logs/redis.log
# 持久化文件目录,需要提前建好db文件夹
dir /root/soft/redis/7001/db

# aof暂时关掉
appendonly no
# rdb也暂时恢复到默认配置

# 虚拟机有多个ip,为了避免混乱,方便主从通信,绑定一个ip
replica-announce-ip 192.168.56.103
7002 、7003 类似
2. 主从
让 7002、7003 作为 7001 的从节点
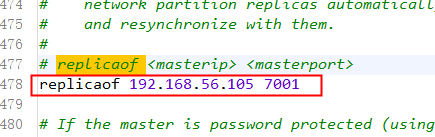
修改 7002 、7003 的配置文件
replicaof 192.168.56.103 7001
# 注意,redis 5.0之前的版本叫 slaveof
(注意:下面截图不用在意ip地址)
切换到 /root/soft/redis 目录,分别启动
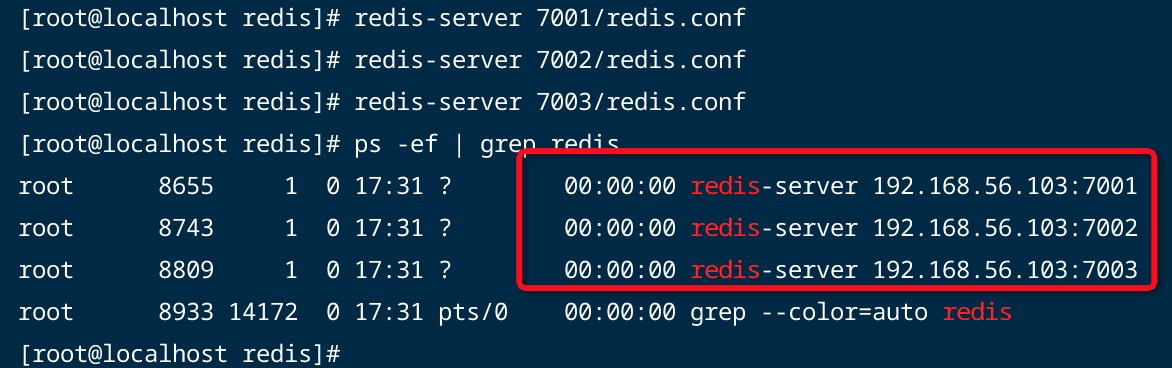
可以看到启动成功3个 redis 实例
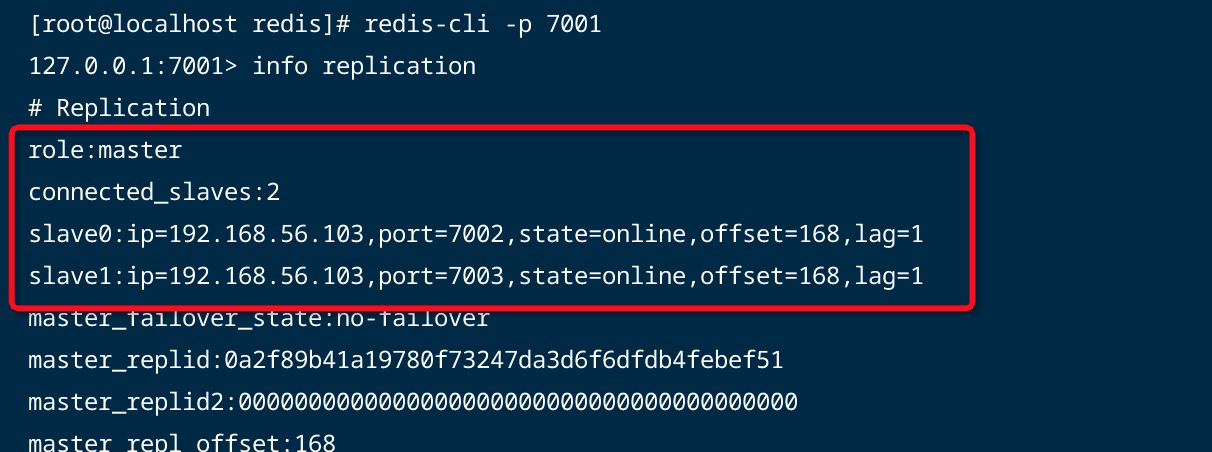
查看集群状态
测试数据同步
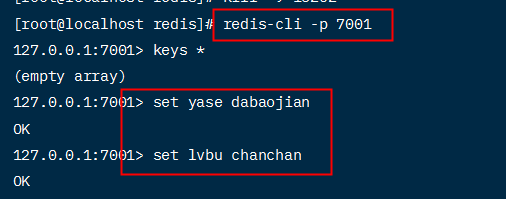
在 7001 实例 设置一个key
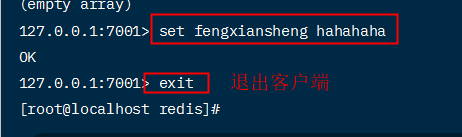
在 7002 实例可以获取到这个key
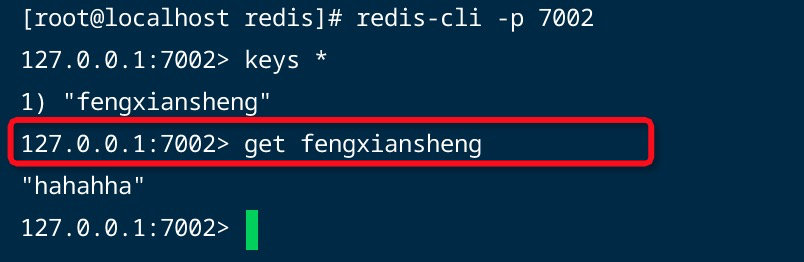
而且,默认情况下,从节点不能写

对应的 配置

3. 数据同步机制
1. 第一次同步,全量同步
在 /root/soft/redis 目录下,创建 7004,内容同7002、7003
启动 7001后,启动7004

查看 7001 日志
15726:M 16 Jun 2022 23:58:54.577 * Ready to accept connections
                                  # 下面是启动7004后,7001的日志
                                  # 7004请求数据同步
15726:M 16 Jun 2022 23:59:25.227 * Replica 192.168.56.105:7004 asks for synchronization
                                  # 7004是第一次连接,所以请求全量同步
15726:M 16 Jun 2022 23:59:25.228 * Full resync requested by replica 192.168.56.105:7004
                                  # 创建:复制积压缓冲区,Mater只要有slave就会创建这个
15726:M 16 Jun 2022 23:59:25.228 * Replication backlog created, my new replication IDs are '70fd50d3011b7796ca452cac022f20d406e1e8a0' and '0000000000000000000000000000000000000000'
                                  # 执行 bgsave 生成 rdb
15726:M 16 Jun 2022 23:59:25.228 * Starting BGSAVE for SYNC with target: disk
                                  # 启动一个后台线程生成rdb
15726:M 16 Jun 2022 23:59:25.229 * Background saving started by pid 16207
16207:C 16 Jun 2022 23:59:25.242 * DB saved on disk
16207:C 16 Jun 2022 23:59:25.243 * RDB: 4 MB of memory used by copy-on-write
15726:M 16 Jun 2022 23:59:25.315 * Background saving terminated with success
15726:M 16 Jun 2022 23:59:25.315 * Synchronization with replica 192.168.56.105:7004 succeeded
查看 7004 日志
16202:S 16 Jun 2022 23:59:25.226 * Ready to accept connections
                                  # 连接主节点
16202:S 16 Jun 2022 23:59:25.227 * Connecting to MASTER 192.168.56.105:7001
                                  # 开始数据同步
16202:S 16 Jun 2022 23:59:25.227 * MASTER <-> REPLICA sync started
16202:S 16 Jun 2022 23:59:25.227 * Non blocking connect for SYNC fired the event.
                                  # Mater已回复连接信息,可以进行数据同步
16202:S 16 Jun 2022 23:59:25.227 * Master replied to PING, replication can continue...
                                  # 不能进行增量同步
16202:S 16 Jun 2022 23:59:25.227 * Partial resynchronization not possible (no cached master)
                                  # 全量同步
16202:S 16 Jun 2022 23:59:25.229 * Full resync from master: 70fd50d3011b7796ca452cac022f20d406e1e8a0:0
16202:S 16 Jun 2022 23:59:25.316 * MASTER <-> REPLICA sync: receiving 175 bytes from master to disk
16202:S 16 Jun 2022 23:59:25.316 * MASTER <-> REPLICA sync: Flushing old data
16202:S 16 Jun 2022 23:59:25.316 * MASTER <-> REPLICA sync: Loading DB in memory
16202:S 16 Jun 2022 23:59:25.321 * Loading RDB produced by version 6.2.6
16202:S 16 Jun 2022 23:59:25.321 * RDB age 0 seconds
16202:S 16 Jun 2022 23:59:25.321 * RDB memory usage when created 1.83 Mb
16202:S 16 Jun 2022 23:59:25.321 # Done loading RDB, keys loaded: 0, keys expired: 0.
16202:S 16 Jun 2022 23:59:25.322 * MASTER <-> REPLICA sync: Finished with success
流程:
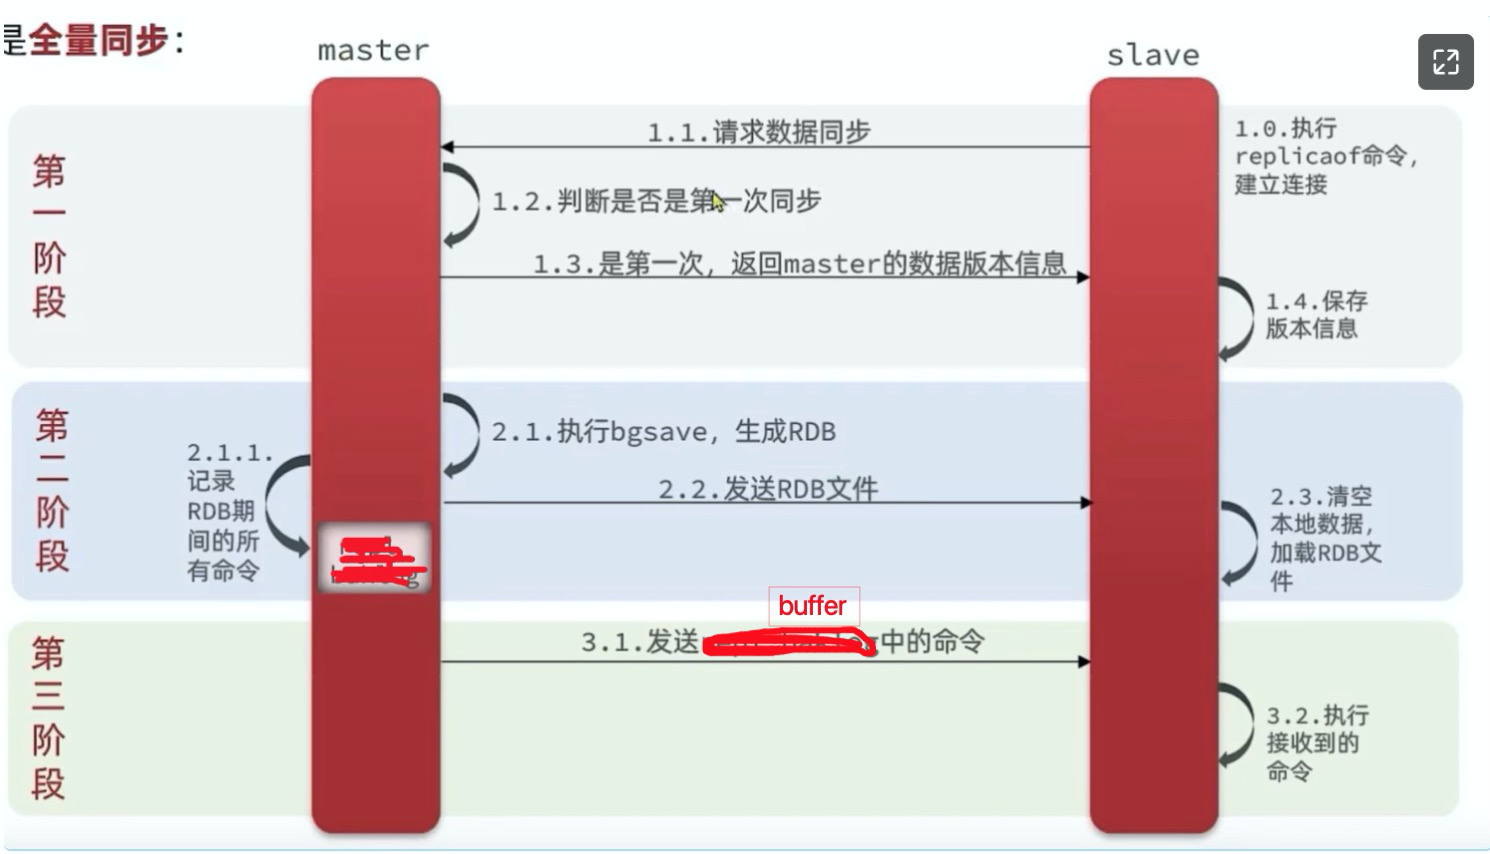
第一阶段
- slave 启动时,与 master 建立连接,并请求数据同步
- slav建立连接时候会发送 runId 和 offset
- offset:数据偏移量,第一次连接是-1,表示全量同步
- runId :master的唯一标示,redis 在启动的时候,都会为自己生成一个ID,第一次salve传“?”
- slav建立连接时候会发送 runId 和 offset
- master 会判断这个 slave 是不是第一次连接
- 是:会把offset 和 runId 发给 slave ,slave会保存这个信息
第二阶段
- 然后 master 生成一个rdb,发送给 slave,slave拿到后清空本地数据,加载rdb文件
- master 生成rdb的时候,正常接收客户端请求,会把命令记录到 replication_buffer 中(也叫复制缓冲区)
第三阶段
- master 发送 replication_buffer 中的命令 , slave接到后执行,全量同步完毕
2. 增量同步
一般情况下,当 slave 故障,重启后,会做增量同步
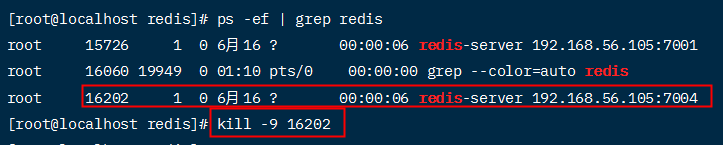
关闭 7004
使用 redis-cli 连接 7001,设置几个key
再次启动 7004 ,然后查看日志
7001
                                 # 关闭7004时,有这句输出
15726:M 17 Jun 2022 01:10:45.448 # Connection with replica 192.168.56.105:7004 lost.
                                 # 执行set命令时,生成了rdb文件
15726:M 17 Jun 2022 01:13:07.166 * 1 changes in 3600 seconds. Saving...
15726:M 17 Jun 2022 01:13:07.168 * Background saving started by pid 18474
18474:C 17 Jun 2022 01:13:07.272 * DB saved on disk
18474:C 17 Jun 2022 01:13:07.274 * RDB: 6 MB of memory used by copy-on-write
15726:M 17 Jun 2022 01:13:07.371 * Background saving terminated with success
                                 # 7004 请求数据同步
15726:M 17 Jun 2022 01:18:27.830 * Replica 192.168.56.105:7004 asks for synchronization
                                 # 接受同步请求,发送数据
15726:M 17 Jun 2022 01:18:27.830 * Partial resynchronization request from 192.168.56.105:7004 accepted. Sending 5950 bytes of backlog starting from offset 1.
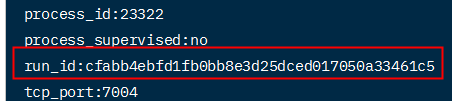
7004
23322:S 17 Jun 2022 01:18:27.830 * Ready to accept connections
23322:S 17 Jun 2022 01:18:27.830 * Connecting to MASTER 192.168.56.105:7001
23322:S 17 Jun 2022 01:18:27.830 * MASTER <-> REPLICA sync started
23322:S 17 Jun 2022 01:18:27.830 * Non blocking connect for SYNC fired the event.
23322:S 17 Jun 2022 01:18:27.830 * Master replied to PING, replication can continue...
                                 # 请求增量同步
23322:S 17 Jun 2022 01:18:27.830 * Trying a partial resynchronization (request 70fd50d3011b7796ca452cac022f20d406e1e8a0:1).
23322:S 17 Jun 2022 01:18:27.830 * Successful partial resynchronization with master.
23322:S 17 Jun 2022 01:18:27.830 * MASTER <-> REPLICA sync: Master accepted a Partial Resynchronization.
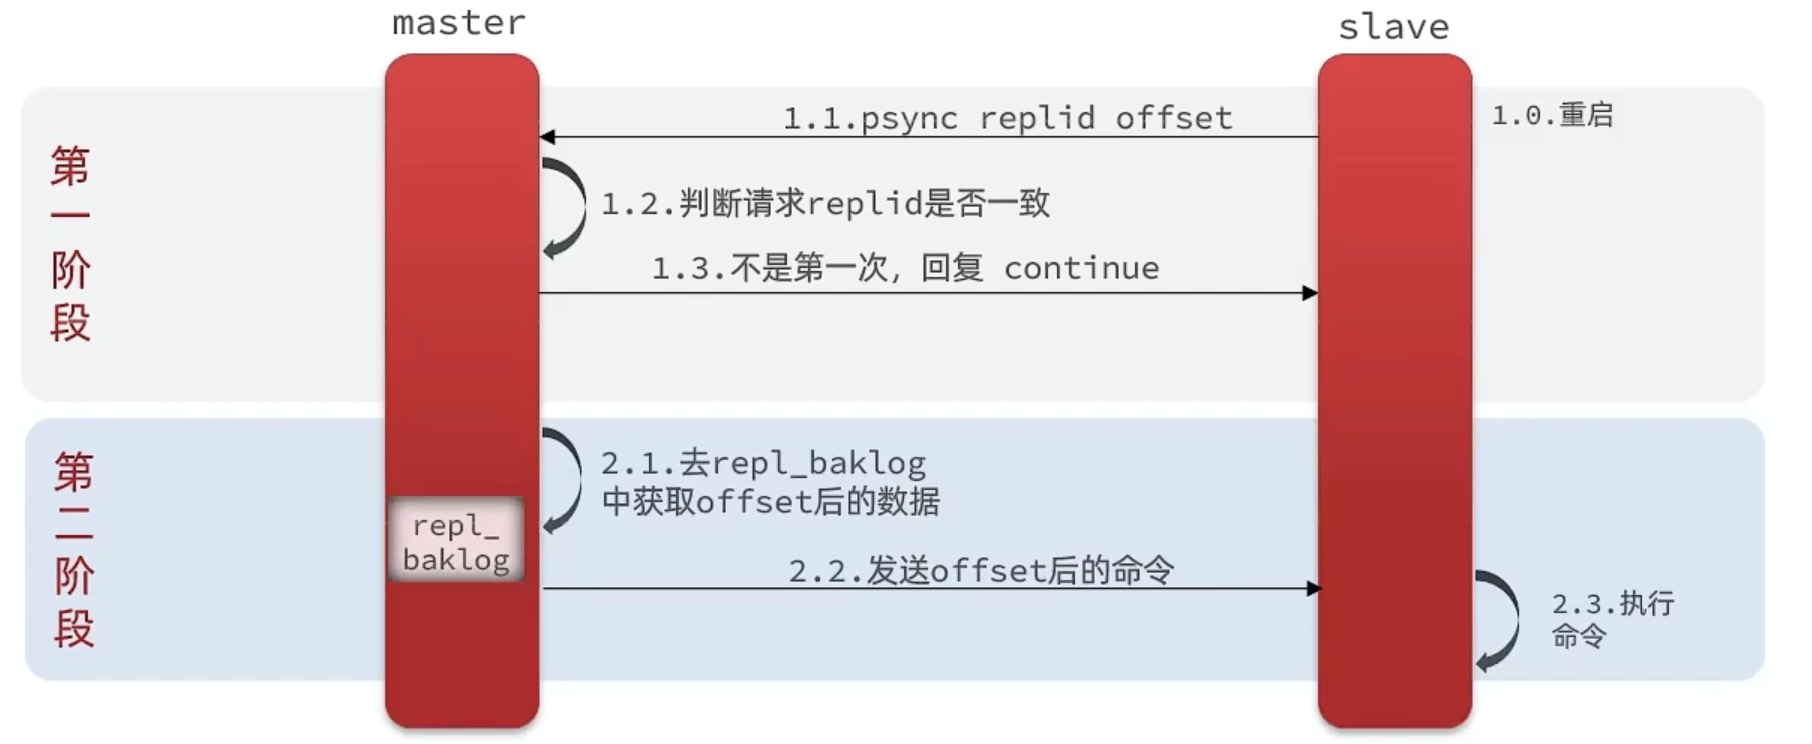
主从正常同步的时候,master会把命令写到 replication_buffer(复制缓冲区) 中,
同时也会写在 replication_backlog_buffer 中(也叫:复制积压缓冲区,默认1M大小)
当 slave 断开,又重新连接的时候,master 会根据 offset ,从 repl_backlog 中获取增量数据给 slave
但是repl_backlog的大小有上限,写满后,新来的数据会覆盖最早的数据,如果 slave 断开时间太久,导致一部分数据还没有同步就被覆盖了,就只能最全量同步
5. Redis 哨兵
当主从集群下Master当宕机,Redis 的哨兵机制(Sentinel)会从Slave节点中选举一个新的Master
主要功能如下
(1)集群监控,负责监控redis master和slave是否正常工作
(2)故障转移,如果master node挂掉了,自动故障转移,从Slave节点中选举一个新的Master
(3)消息通知,如果某个redis实例有故障,那么哨兵负责发送消息作为报警通知给管理员
如果故障转移发生了,通知client客户端新的master地址

总结:Redis哨兵用来监控主从集群,当Master宕机时,从Slave中选举新的Master
1. 集群监控
哨兵是基于心跳机制监控集群状态,每秒向集群中的实例发送ping命令
- 如果某个哨兵节点发现某实例没在规定时间(down-after-milliseconds 配置)响应,
则该实例:主观宕机(sdown) - 如果指定数量(quorum)的哨兵都认为这个实例宕机,则该实例:客观宕机(odown),quorum最好超过一半数量
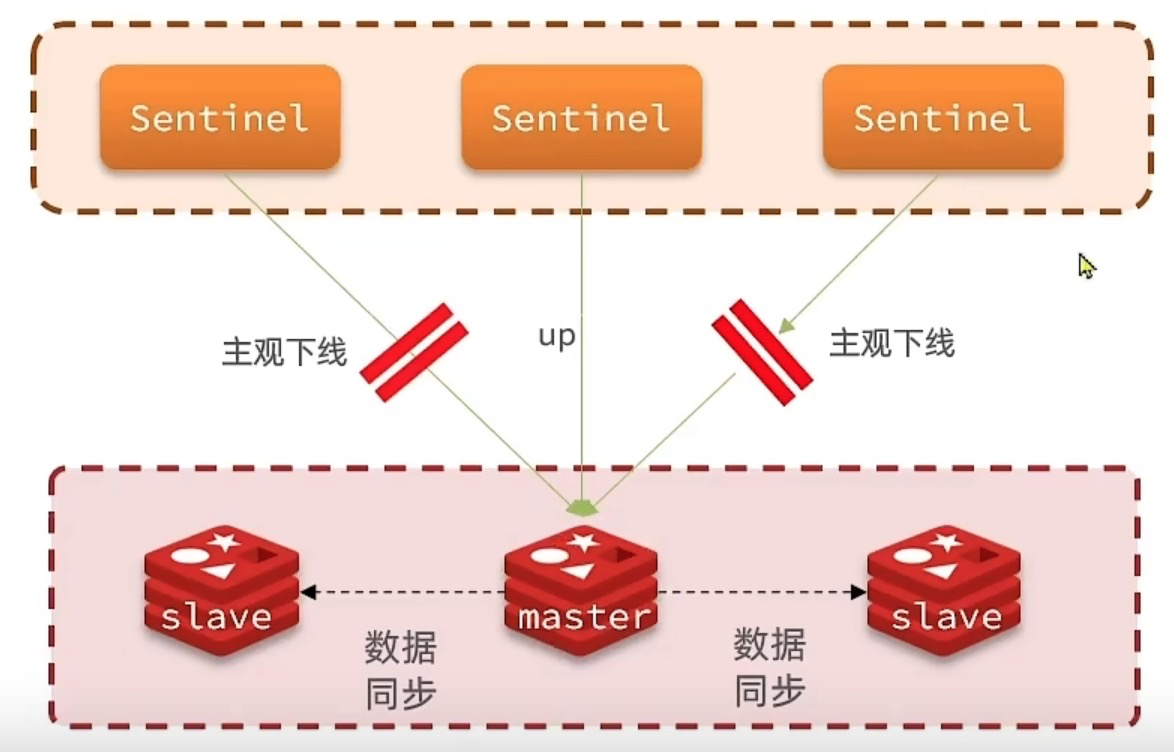
上图中,一同有3个哨兵,其中2个都认为master宕机了,且quorum=2,那么这个master就是客观宕机,需要进行故障转移
2. 故障转移
一旦认为Master客观宕机,哨兵会在slave中选出一个最为新的Master,选举算法
- 判断跟Master断开连接的时长,超过了down-after-milliseconds的10倍,排除这个slave
- 判断salve的优先级,replica-priority属性(老版本是slave-priority)越低,优先级就越高
- 如果replica-priority相同,那么看replication offset,offset越大,优先级就越高
- offset越大:数据越完整
- 如果上面两个条件都相同,那么选择一个 run id 比较小的
- runid是启动redis时生成的,通过 info server 命令可以查看runid
- 
- 
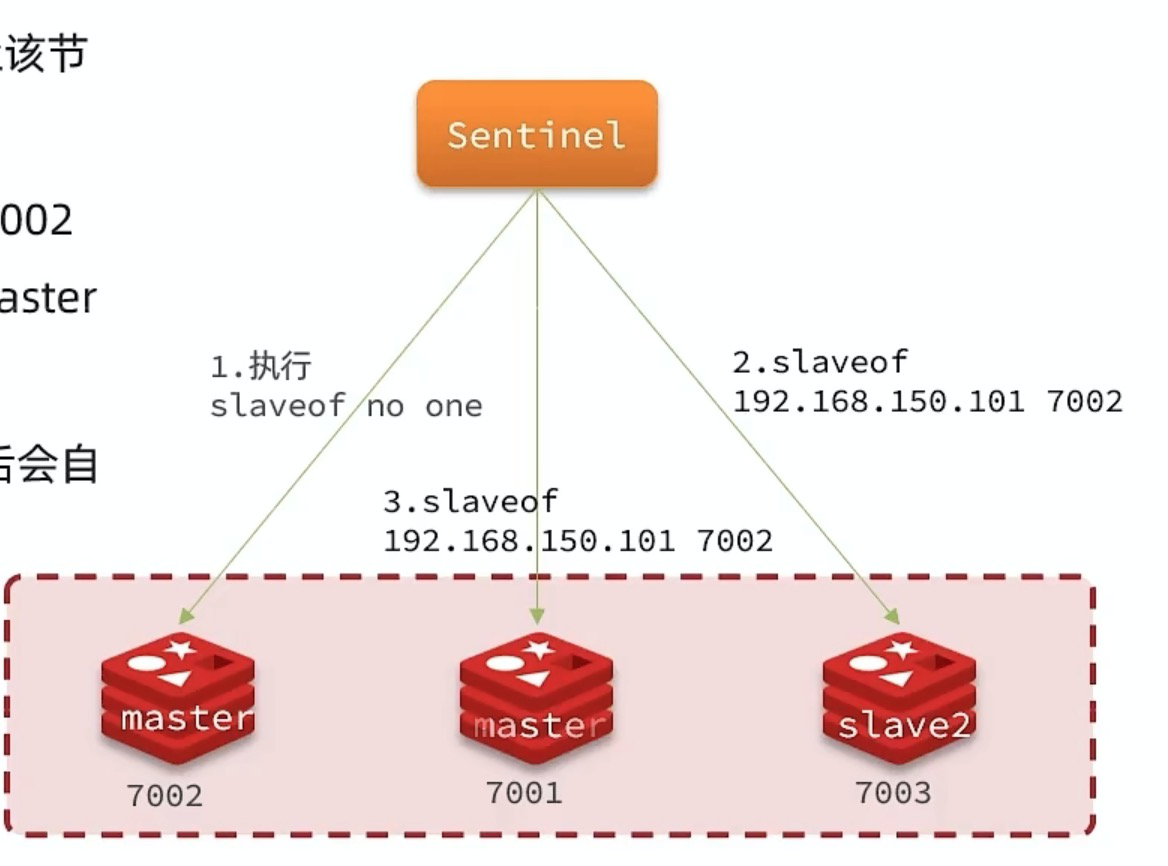
一旦确定Master节点后,会选择一个哨兵节点,进行故障转移
- 给备选的slave发送 **slave no none **命令,让该节点成为Master
- 给其他slave节点发送 REPLICAOF(老版本是:slaveof) 命令,让这些slave成为新Master的从节点
- 给故障的节点标记为slave,当节点恢复后,会自动成为从节点
3. 搭建哨兵集群
1. 配置
在 /root/soft/redis 目录下创建 3 个 文件夹

在 s1 中 创建 sentinel.conf 文件,并添加下面内容
# 哨兵 监听端口,每个哨兵监听一个
port 27001
# 哨兵之间通信使用的ip地址
sentinel announce-ip 192.168.56.103
# 监控集群,格式:sentinel monitor <master name(可自定义)> <master ip> <master port> <quorum>
sentinel monitor mymaster 192.168.56.103 7001 2
# 主观判断指定时间内,节点是否宕机,单位:毫秒
sentinel down-after-milliseconds mymaster 5000
# 故障转移的超时时间,单位:毫秒,如果超时,再选一个slave进行切换
sentinel failover-timeout mymaster 60000
# 工作目录
dir "/root/soft/redis/s1"
# 密码配置,我没有设置密码
#sentinel auth-pass mymaster <password>


# 新的master切换之后,同时有多少个slave被切换到去连接新master,重新做同步
# sentinel parallel-syncs mymaster 1
# 假设1个master,4个slave,然后master宕机了,4个slave中有1个切换成了master,剩下3个slave就要挂到新的master上面去
# 这个时候,如果parallel-syncs是1,那么3个slave,一个一个,排序挂接到新的master上面去
# 如果parallel-syncs是3,那么一次性就会把所有slave挂接到新的master上去
s2、s3类似
启动哨兵:** redis-sentinel s1/sentinel.conf**,启动前要保证redis实例已经启动
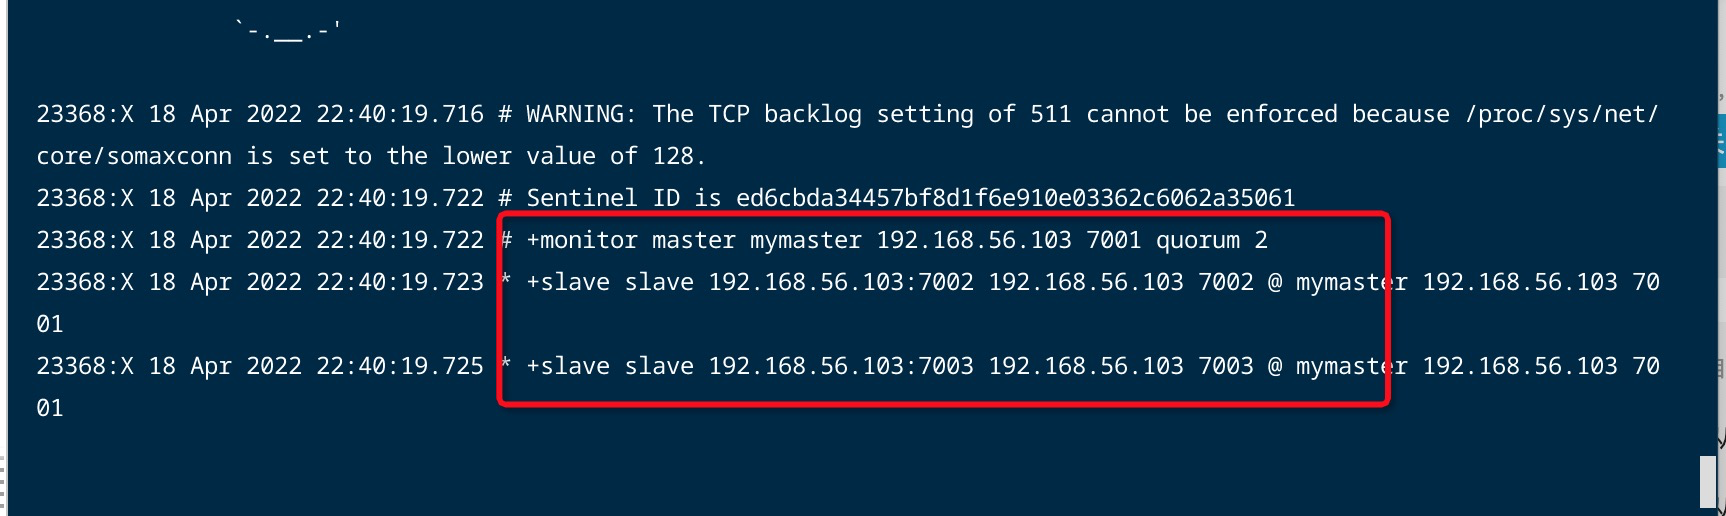
哨兵启动后,会互相通信
s1

s2
s3

2. 测试
关闭 7001 主节点,从 3 个哨兵日志中,找到如下日志,我的是在s2中找到的
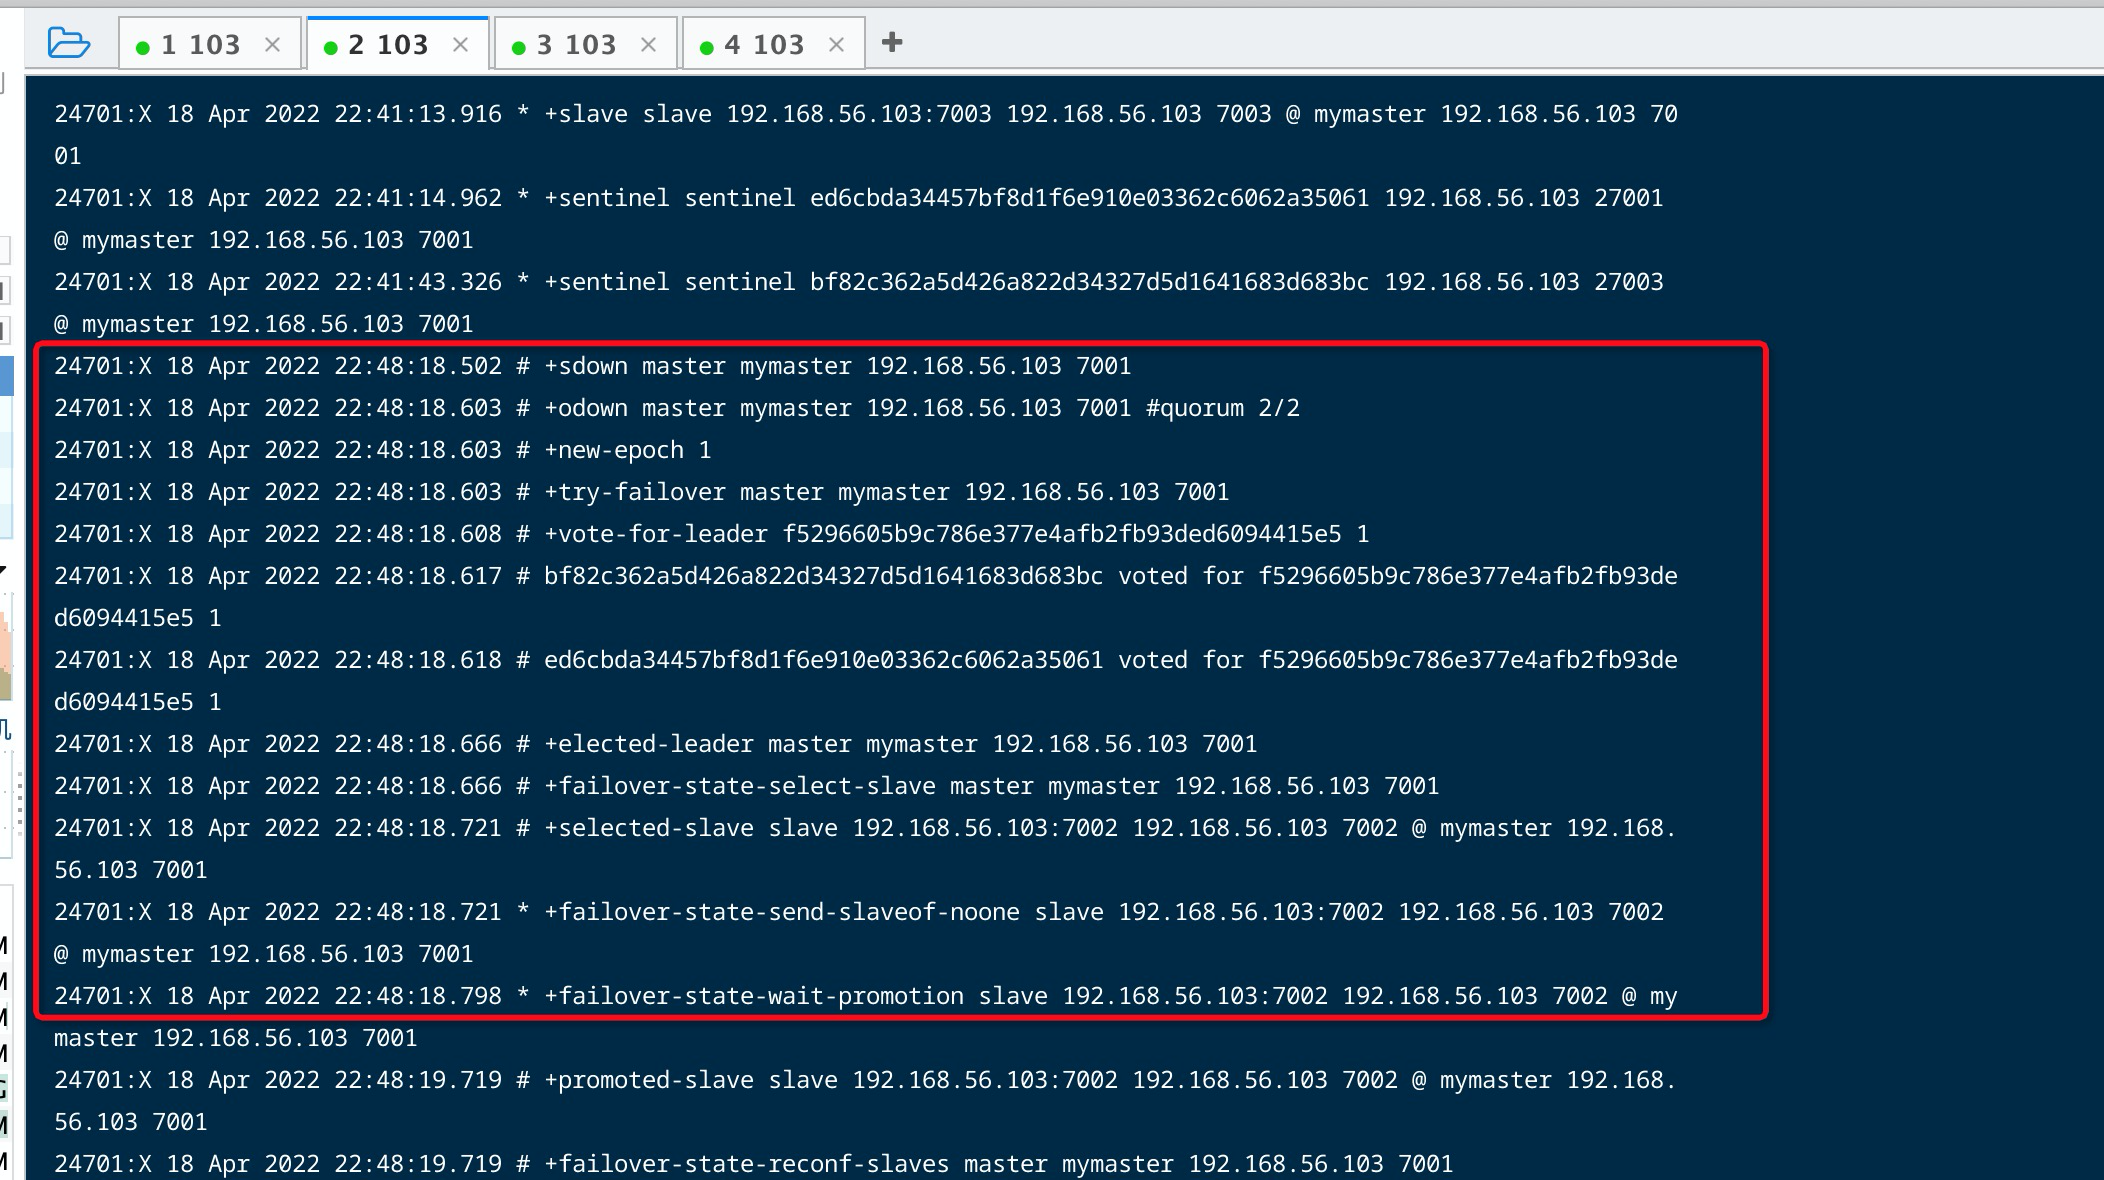
解释:
主观认为 7001 宕机
24701:X 18 Apr 2022 22:48:18.502 # +sdown master mymaster 192.168.56.103 7001
客观认为 7001 宕机, 因为 quorum 2/2
24701:X 18 Apr 2022 22:48:18.603 # +odown master mymaster 192.168.56.103 7001 #quorum 2/2
开始投票选出一个哨兵做故障转移,最终结果投票给 f5296605b9c786e377e4afb2fb93ded6094415e5
24701:X 18 Apr 2022 22:48:18.603 # +new-epoch 1
24701:X 18 Apr 2022 22:48:18.603 # +try-failover master mymaster 192.168.56.103 7001
投票选出一个哨兵做故障转移
24701:X 18 Apr 2022 22:48:18.608 # +vote-for-leader f5296605b9c786e377e4afb2fb93ded6094415e5 1
24701:X 18 Apr 2022 22:48:18.617 # bf82c362a5d426a822d34327d5d1641683d683bc voted for f5296605b9c786e377e4afb2fb93ded6094415e5 1
24701:X 18 Apr 2022 22:48:18.618 # ed6cbda34457bf8d1f6e910e03362c6062a35061 voted for f5296605b9c786e377e4afb2fb93ded6094415e5 1
24701:X 18 Apr 2022 22:48:18.666 # +selected-leader master mymaster 192.168.56.103 7001
24701:X 18 Apr 2022 22:48:18.666 # +failover-state-select-slave master mymaster 192.168.56.103 7001
从集群中选择一个作为新的master,最终选择了 7002
24701:X 18 Apr 2022 22:48:18.721 # +selected-slave slave 192.168.56.103:7002 192.168.56.103 7002 @ mymaster 192.168.56.103 7001
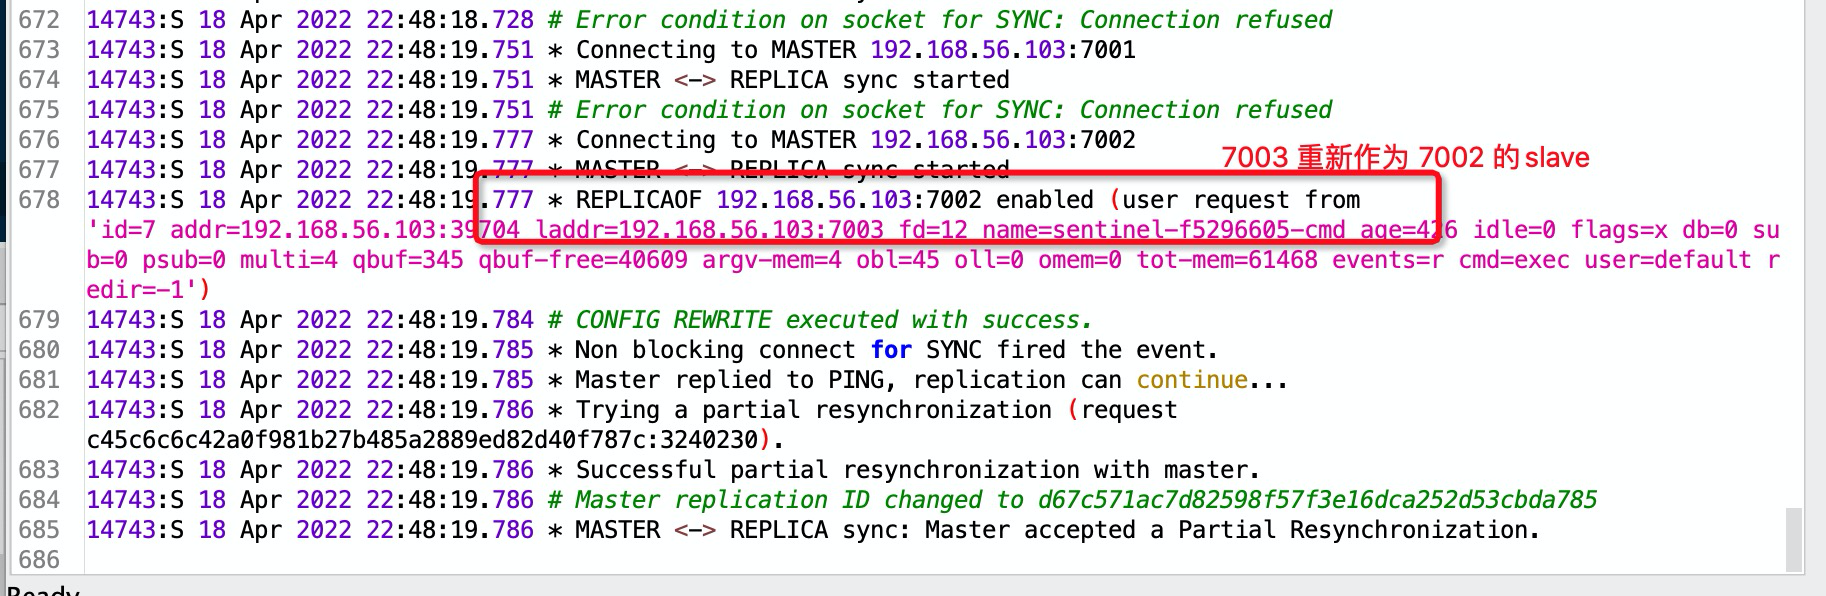
给 7002 发送了noone命令,让它成为主节点,查看下方图1
24701:X 18 Apr 2022 22:48:18.721 * +failover-state-send-slaveof-noone slave 192.168.56.103:7002 192.168.56.103 7002 @ mymaster 192.168.56.103 7001
等待其他的sentinel确认
24701:X 18 Apr 2022 22:48:18.798 * +failover-state-wait-promotion slave 192.168.56.103:7002 192.168.56.103 7002 @ mymaster 192.168.56.103 7001
确认完成
24701:X 18 Apr 2022 22:48:19.719 # +promoted-slave slave 192.168.56.103:7002 192.168.56.103 7002 @ mymaster 192.168.56.103 7001
重新配置7001,让其成为slave
24701:X 18 Apr 2022 22:48:19.719 # +failover-state-reconf-slaves master mymaster 192.168.56.103 7001
通知7003 ,新的master是7002,查看下方图2
24701:X 18 Apr 2022 22:48:19.777 * +slave-reconf-sent slave 192.168.56.103:7003 192.168.56.103 7003 @ mymaster 192.168.56.103 7001
24701:X 18 Apr 2022 22:48:20.724 * +slave-reconf-inprog slave 192.168.56.103:7003 192.168.56.103 7003 @ mymaster 192.168.56.103 7001
24701:X 18 Apr 2022 22:48:20.724 * +slave-reconf-done slave 192.168.56.103:7003 192.168.56.103 7003 @ mymaster 192.168.56.103 7001
24701:X 18 Apr 2022 22:48:20.796 # -odown master mymaster 192.168.56.103 7001
24701:X 18 Apr 2022 22:48:20.796 # +failover-end master mymaster 192.168.56.103 7001
监控新的master
24701:X 18 Apr 2022 22:48:20.796 # +switch-master mymaster 192.168.56.103 7001 192.168.56.103 7002
7003 和 7001 是 7002 的slave
24701:X 18 Apr 2022 22:48:20.796 * +slave slave 192.168.56.103:7003 192.168.56.103 7003 @ mymaster 192.168.56.103 7002
24701:X 18 Apr 2022 22:48:20.796 * +slave slave 192.168.56.103:7001 192.168.56.103 7001 @ mymaster 192.168.56.103 7002
24701:X 18 Apr 2022 22:48:25.853 # +sdown slave 192.168.56.103:7001 192.168.56.103 7001 @ mymaster 192.168.56.103 7002
图1:
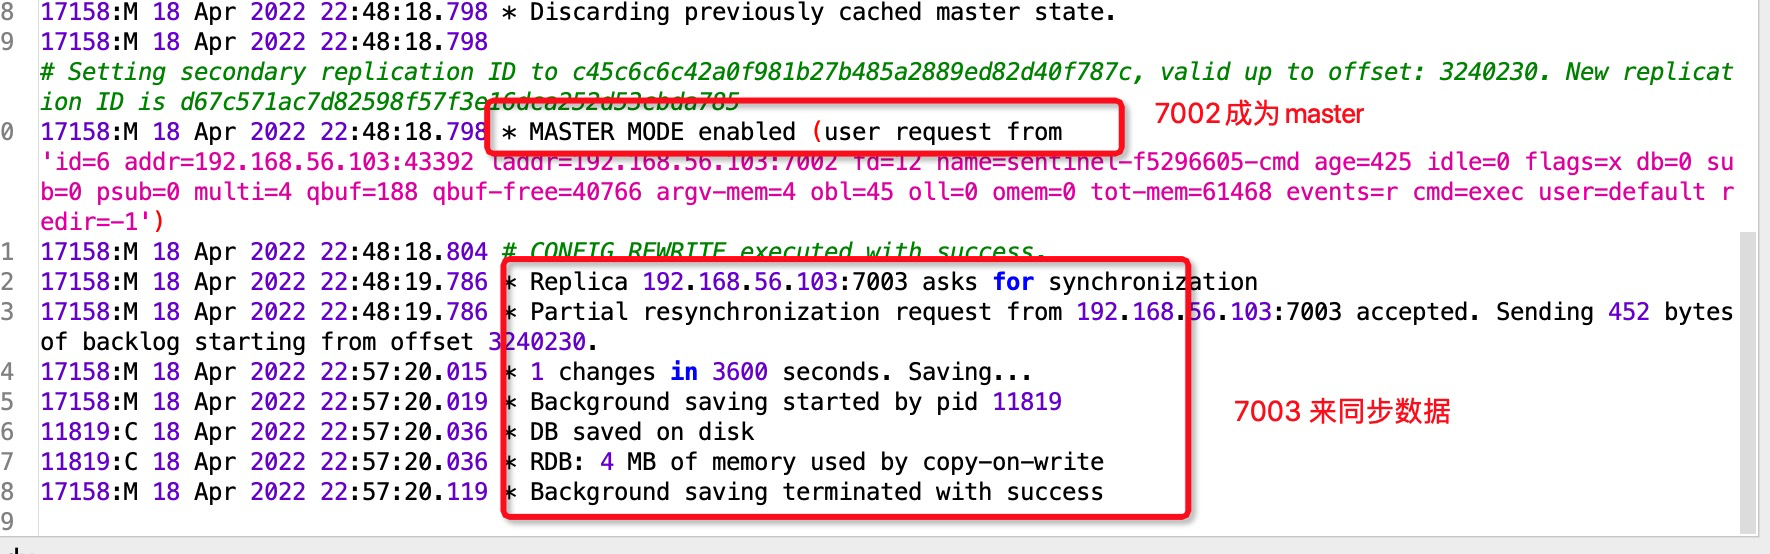
图2:
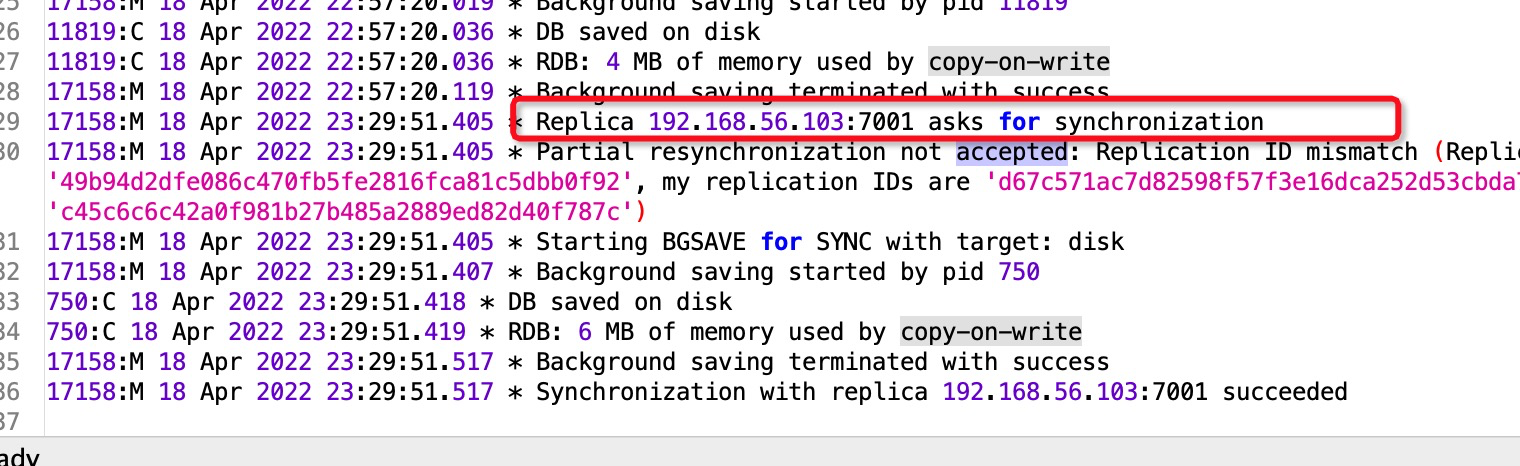
这时候再次重启 7001 ,然后查看7002日志,发现7001请求同步数据
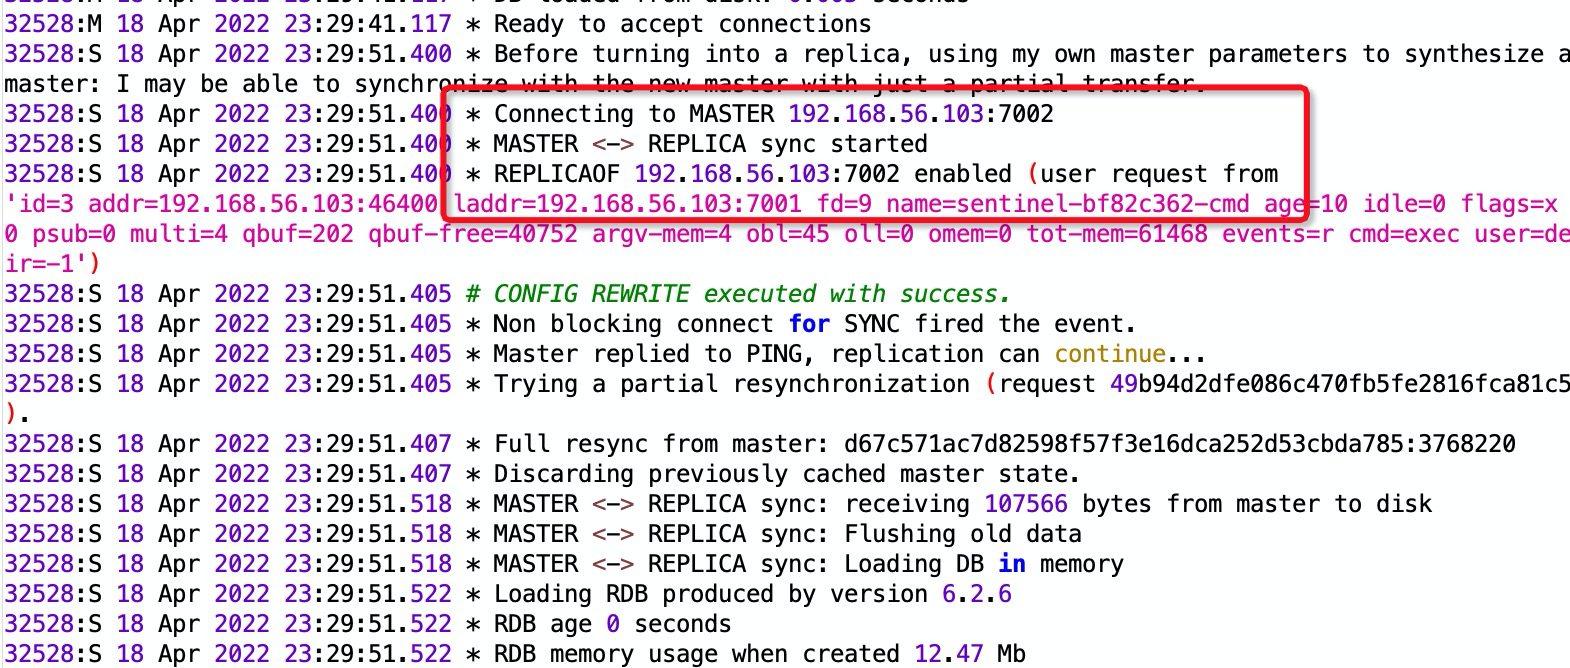
查看7001日志,作为一个slave,连接7002
4. redisTemplate
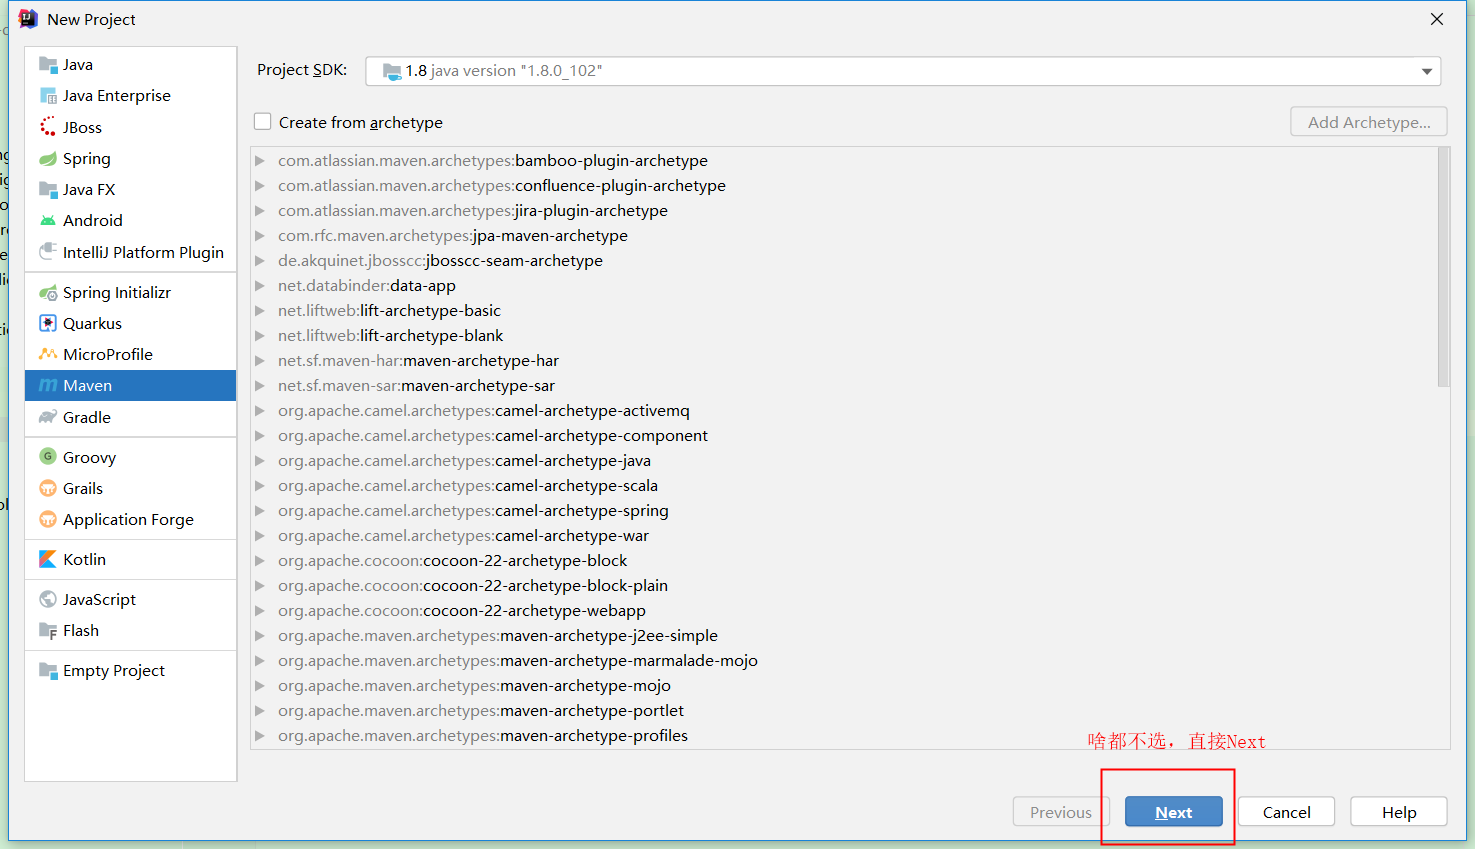
1. 创建一个普通的maven项目
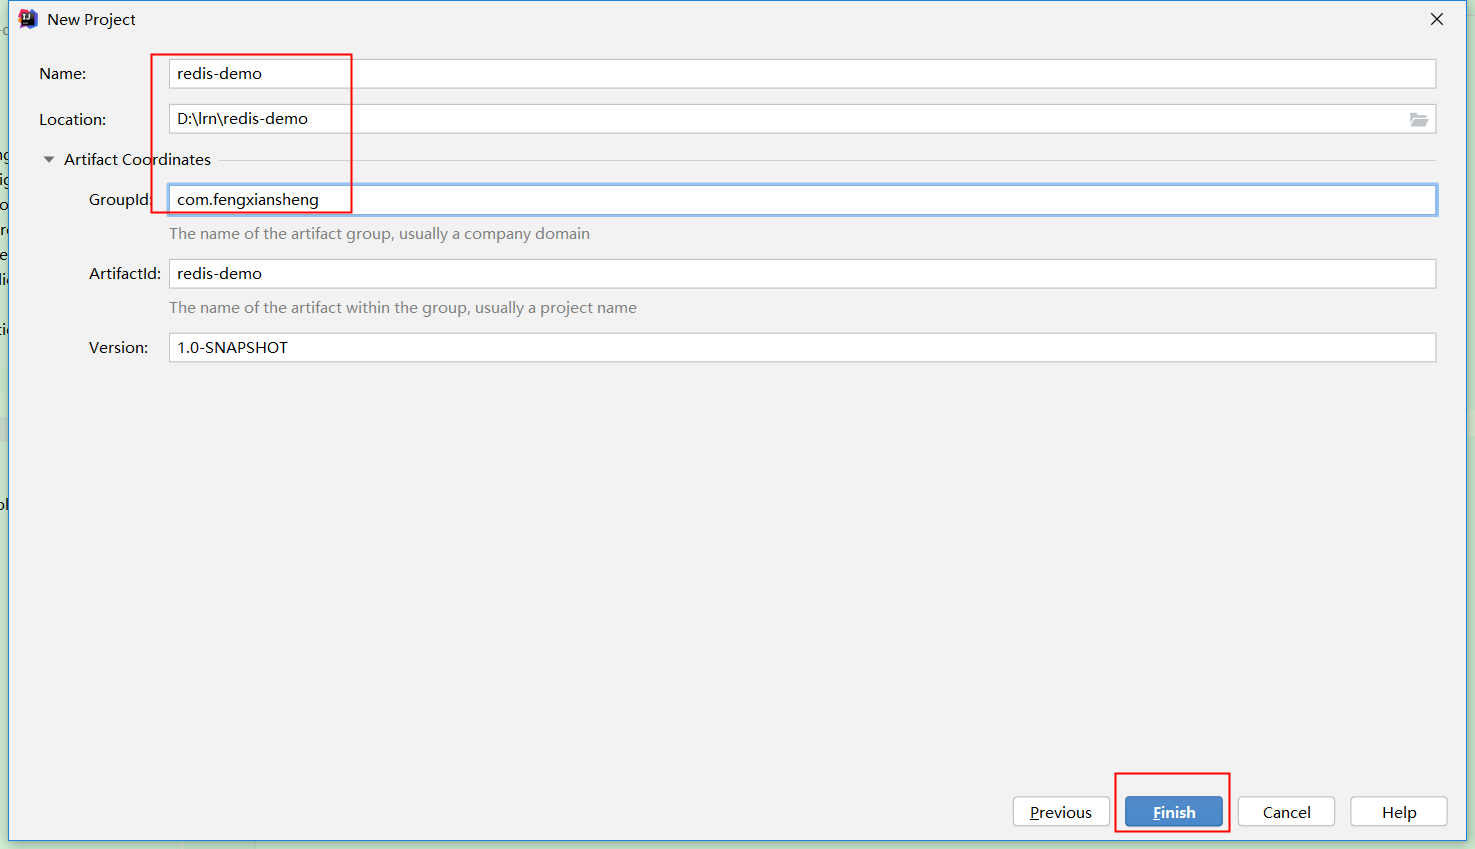
2. pom.xml
<parent>
  <groupId>org.springframework.boot</groupId>
  <artifactId>spring-boot-starter-parent</artifactId>
  <version>2.3.12.RELEASE</version>
</parent>

<dependencies>
  <dependency>
    <groupId>org.apache.commons</groupId>
    <artifactId>commons-pool2</artifactId>
    <version>2.6.2</version>
  </dependency>
  <!-- spring data redis 测试 -->
  <dependency>
    <groupId>org.springframework.boot</groupId>
    <artifactId>spring-boot-starter-data-redis</artifactId>
  </dependency>

  <!-- spring boot 测试 -->
  <dependency>
    <groupId>org.springframework.boot</groupId>
    <artifactId>spring-boot-starter-web</artifactId>
  </dependency>
</dependencies>
3. 启动类
@SpringBootApplication
public class Application {

    public static void main(String[] args) {
        SpringApplication.run(Application.class,args);
    }
}
4. properties
# master 名称
spring.redis.sentinel.master=mymaster
# 哨兵地址
spring.redis.sentinel.nodes[0]=192.168.56.105:27001
spring.redis.sentinel.nodes[1]=192.168.56.105:27002
spring.redis.sentinel.nodes[2]=192.168.56.105:27003
5. 配置类
@Configuration
public class RedisConfig {

    /**
    * 配置读写分离
    * @return
    */
    @Bean
    public LettuceClientConfigurationBuilderCustomizer configurationBuilderCustomizer(){
        return clientConfigurationBuilder -> clientConfigurationBuilder.readFrom(ReadFrom.REPLICA_PREFERRED);
    }
}
代码中的 ReadFrom._REPLICA_PREFERRED _是redis的读取策略,有下面几种
- MASTER 从master读取
- MASTER_PREFERRED 优先 master 读取,master不可用,读 slave
- REPLICA 从 slave 读取
- REPLICA_PREFERRED 优先从 slave 读取,slave不可用,读master
6. Controller
@RestController
public class RedisController {

    @Autowired
    private StringRedisTemplate stringRedisTemplate;

    @GetMapping("/set")
    public String set(@RequestParam String key , @RequestParam String value){
        stringRedisTemplate.opsForValue().set(key, value);
        return "success";
    }

    @GetMapping("/get")
    public String get(@RequestParam String key){
        return stringRedisTemplate.opsForValue().get(key);
    }
}
正常访问,没问题,如果停掉Redis Master 节点,再次访问,也是正常的
5. 两种数据丢失
- 异步复制导致的数据丢失
- 因为master -> slave的复制是异步的,所以可能有部分数据还没复制到slave,master就宕机了,此时这些部分数据就丢失了
- 脑裂导致的数据丢失
- 脑裂,也就是说,某个master所在机器突然脱离了正常的网络,跟其他slave机器不能连接,但是实际上master还运行着
- 此时哨兵可能就会认为master宕机了,然后开启选举,将其他slave切换成了master
- 这个时候,集群里就会有两个master,也就是所谓的脑裂
- 虽然某个slave被切换成了master,但是可能client还没来得及切换到新的master,还继续写向旧master的数据可能也丢失了
优化,redis.conf中有两个配置:
- min-replicas-to-write 1
- 写数据时,如果跟 master 正常同步的 slave 数量小于1,则 master 拒绝写入
- 配置0,则关闭此功能
- min-slaves-max-lag 10
- 主从库间进行数据复制时,从库给主库发送 ACK 消息的最大延迟,单位:秒
- 如果大于10秒,则 master 拒绝写入
这两个配置可以有效避免数据的丢失


 2938
2938

 被折叠的 条评论
为什么被折叠?
被折叠的 条评论
为什么被折叠?
 到【灌水乐园】发言


