


最近在做一个项目的技术栈升级,从Vue2升级至Vue3,Vue2中有一个通用的全局 Dialog 方法,是通过 Vue.extend 来实现的,具体请看下方的Vue2代码:
一、main.js 中定义通用方法
Vue.prototype.$dialog = {
    open(component, args) {
        return new Promise((resolve, reject) => {
            let Dialog = Vue.extend(component);
            var $vm = new Dialog({
                el: document.createElement("div"),
                router,
                store,
                eventBus: new Vue(),
            });
            var node = document.body.appendChild($vm.$el);

            $vm.open(args).then(
                result => {
                    if (resolve) {
                        resolve(result);
                    }
                    node.remove();
                    $vm.$destroy();
                },
                (arg) => {
                    if (reject) {
                        reject(arg)
                    }
                    node.remove();
                    $vm.$destroy();
                }
            );
        });
    }
};
二、定义通用 DialogLayout.vue
<template>
  <el-dialog :title="title" :visible.sync="visible" :center="center" :modal="true" :width="width"
    class="n-dialog-layout" :class="$slots.footer ? 'has-footer' : ''" :modal-append-to-body="true"
    :append-to-body="true" :lock-scroll="true" :show-close="showClose" :close-on-click-modal="false"
    :before-close="beforeClose" @opened="$emit('opened')" @close="handleClose" :fullscreen="fullscreen">
    <slot name="title" slot="title"></slot>
    <slot></slot>
    <slot name="footer" slot="footer"></slot>
  </el-dialog>
</template>
<script>
export default {
  name: "n-dialog-layout",
  props: {
    title: {},
    fullscreen: {
      default: false,
      type: Boolean,
    },
    width: {
      default: "50%",
      type: String,
    },
    showClose: {
      default: true,
      type: Boolean,
    },
    center: {
      default: false,
      type: Boolean,
    },
    beforeClose: {
      default: (done) => {
        done();
      },
      type: Function,
    },
  },
  data() {
    return {
      promise: null,
      resolve: null,
      reject: null,
      visible: false,
      confirmClose: false,
      result: {},
    };
  },
  methods: {
    open() {
      this.confirmClose = false;
      this.promise = new Promise((resolve, reject) => {
        this.resolve = resolve;
        this.reject = reject;
        this.visible = true;
      });
      return this.promise;
    },
    close(result) {
      this.confirmClose = true;
      this.result = result;
      this.visible = false;
    },
    cancel(arg) {
      this.confirmClose = false;
      this.result = arg;
      this.visible = false;
    },
    handleClose() {
      if (this.confirmClose) {
        this.resolve(this.result);
      } else {
        this.reject(this.result);
      }
    },
  },
};
</script>
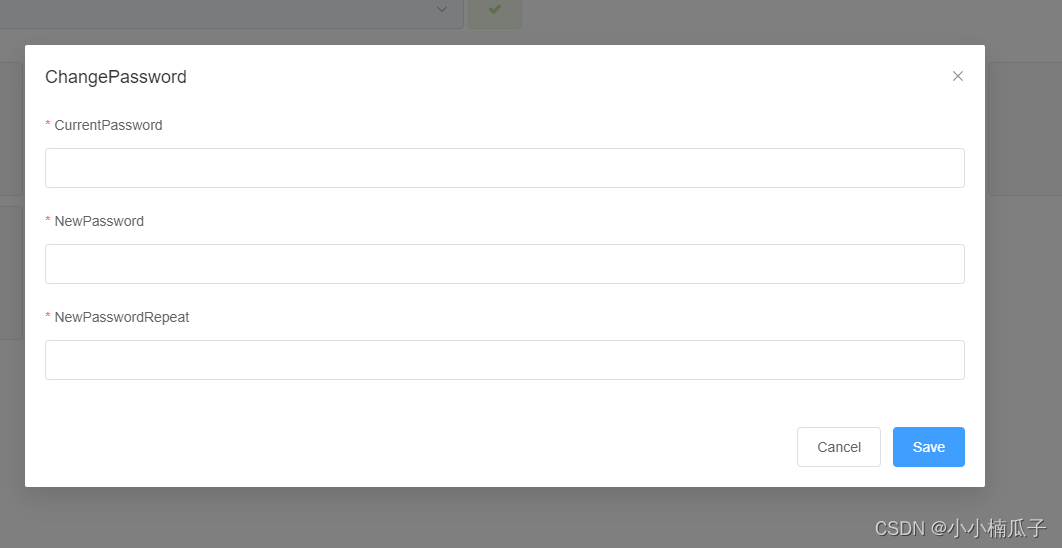
三、 定义需要通过 Dialog 打开的具体页面
<template>
  <n-dialog-layout :title='l("ChangePassword")' ref="dialog">
    <div class="info" v-loading="loading">
      <el-form ref="passwordForm" status-icon size="large" :model="item" label-width="100px" label-position="top"
        class="m-b" :rules="rules">
        <el-form-item :label="l('CurrentPassword')" prop="currentPassword">
          <el-input type="password" v-model="item.currentPassword"></el-input>
        </el-form-item>
        <el-form-item :label="l('NewPassword')" prop="password">
          <el-input type="password" v-model="item.password"></el-input>
        </el-form-item>
        <el-form-item :label="l('NewPasswordRepeat')" prop="confirmPassword">
          <el-input type="password" v-model="item.confirmPassword"></el-input>
        </el-form-item>
      </el-form>
    </div>
    <template slot="footer">
      <span class="dialog-footer">
        <el-button @click="cancel()" size="large">{{ l('Cancel') }}</el-button>
        <el-button type="primary" @click="ok()" size="large">{{ l('Save') }}</el-button>
      </span>
    </template>
  </n-dialog-layout>
</template>
四、具体使用
import ChangePasswordDialog from './dialog/changePassword';
this.$dialog.open(ChangePasswordDialog).then(res => {
	this.save();
})
五、如何用 Vue3 的语法来重写 main.js 中的 $dialog 方法?
app.config.globalProperties代替 Vue.prototype;- 用什么来
代替Vue.extend 呢?这里使用的 createApp; - createApp
代替Vue.extend 以后遇到的问题,例如:无法使用 ElementPlus 的UI控件、无法解析全局注册的组件
createdApp 代替 Vue.extend 实现创建一个“子类”,实现同样的效果,先看代码
问题1:无法使用 ElementPlus 的UI控件、无法解析全局注册的组件
回答: 使用 createApp 创建出来的应用实例,use ElementPlus,register 里面是我放的全局通用方法和组件
问题2:为什么Dialog.mount 的节点是写死的?而不是 动态 document.createElement ?
回答:实践过程中发现 document.createElement 通过 proxy.$dialog.open(ChangePasswordDialog) 打开正常,但是加上 .then() 就会出现关闭两次才可以正常关闭的情况
app.config.globalProperties.$dialog = {
  open(component, args) {
    return new Promise((resolve, reject) => {
      const Dialog = createApp(component);
      Dialog.use(ElementPlus);
      Dialog.use(register);
      const $vm = Dialog.mount("#Dialog");
      const node = document.body.appendChild($vm.$el);
      $vm.open(args).then(
        (result) => {
          if (resolve) {
            resolve(result);
          }
          node.remove();
        },
        (arg) => {
          if (reject) {
            reject(arg);
          }
          node.remove();
        }
      );
    });
  },
};
具体效果如下
比较灵活,可插拔的通用Dialog


 1190
1190


 被折叠的 条评论
为什么被折叠?
被折叠的 条评论
为什么被折叠?
 到【灌水乐园】发言


