


日志分析系统
日志分析系统
Centos01:服务器
Centos02:服务器
Centos05:客户端
一.配置elk
1.elastic search(elk光盘,centos01,02)
安装
[root@centos ~]# rpm -ivh /mnt/elasticsearch-5.5.0.rpm

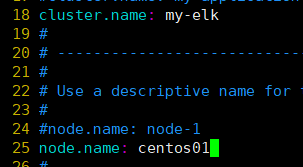
修改配置文件
[root@centos ~]# cp /etc/elasticsearch/elasticsearch.yml /etc/elasticsearch/elasticsearch.yml.bak
[root@centos ~]# vim /etc/elasticsearch/elasticsearch.yml


启动服务设置开机自动启动
[root@centos ~]# systemctl daemon-reload
[root@centos ~]# systemctl start elasticsearch.service
[root@centos ~]# systemctl enable elasticsearch.service

监听端口
[root@centos ~]# netstat -anptu | grep 9200

02配置文件:
[root@centos ~]# scp root@192.168.100.10:/etc/elasticsearch/elasticsearch.yml /etc/elasticsearch/

[root@centos ~]# vim /etc/elasticsearch/elasticsearch.yml


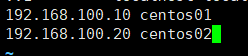
修改hosts文件
[root@centos ~]# vim /etc/hosts

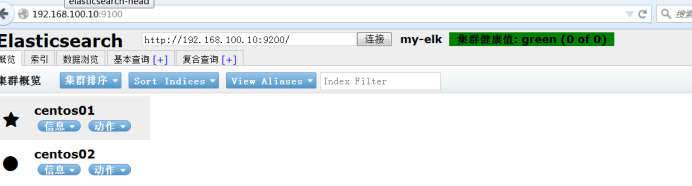
2.elastic sear-head(centos01,02)
安装依赖node
[root@centos ~]# tar zxvf /mnt/node-v8.2.1.tar.gz -C /usr/src/

[root@centos ~]# mv /usr/src/node-v8.2.1/ /usr/local/node
[root@centos ~]# cd /usr/local/node/
[root@centos node]# ./configure && make && make install

[root@centos ~]# tar jxvf /mnt/phantomjs-2.1.1-linux-x86_64.tar.bz2 -C /usr/src/

安装phantomjs
[root@centos ~]# cd /usr/src/phantomjs-2.1.1-linux-x86_64/
[root@centos phantomjs-2.1.1-linux-x86_64]# cd bin/
[root@centos bin]# cp phantomjs /usr/local/bin/
[root@centos bin]# chmod +x /usr/local/bin/phantomjs

移动Elasticsearch-head
[root@centos ~]# tar zxvf /mnt/elasticsearch-head.tar.gz -C /usr/src/

[root@centos ~]# mv /usr/src/elasticsearch-head/ /usr/local/

[root@centos ~]# cd /usr/local/elasticsearch-head/
[root@centos elasticsearch-head]# npm install

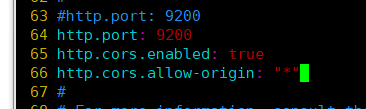
修改elasticsearch跨域访问
[root@centos ~]# vim /etc/elasticsearch/elasticsearch.yml

[root@centos ~]# /etc/init.d/elasticsearch restart

监听端口
[root@centos ~]# netstat -anptu | grep 9200

修改elasticsearch-head配置文件监听9200
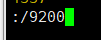
[root@centos ~]# vim /usr/local/elasticsearch-head/_site/app.js

搜索9200

修改elasticsearch-head配置文件监听9100端口
[root@centos ~]# vim /usr/local/elasticsearch-head/Gruntfile.js

搜索9100

启动服务
[root@centos ~]# cd /usr/local/elasticsearch-head/
[root@centos elasticsearch-head]# npm run start&

监听9100端口
[root@centos ~]# netstat -anptu | grep 9100

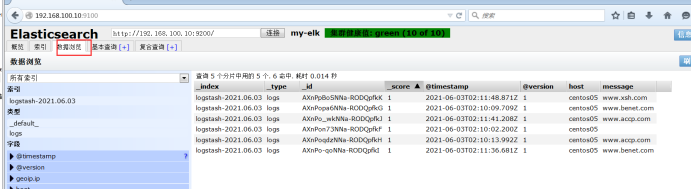
验证:火狐浏览器

3.安装配置logstash(centos05,系统盘)
安装http
[root@centos05 ~]# yum -y install httpd

[root@centos05 ~]# echo “www.benet.com” > /var/www/html/index.html
[root@centos05 ~]# systemctl start httpd
[root@centos05 ~]# systemctl enable httpd

安装logstash
02拷贝文件
[root@centos ~]# scp /mnt/logstash-5.5.1.rpm root@192.168.100.50:/root/

[root@centos05 ~]# rpm -ivh logstash-5.5.1.rpm

优化命令
[root@centos05 ~]# ln -s /usr/share/logstash/bin/logstash /usr/local/bin/

启动服务设置开机自动启动
[root@centos05 ~]# systemctl start logstash
[root@centos05 ~]# systemctl enable logstash

插入测试数据
[root@centos05 ~]# logstash -e ‘input { stdin{}} output { stdout{}}’

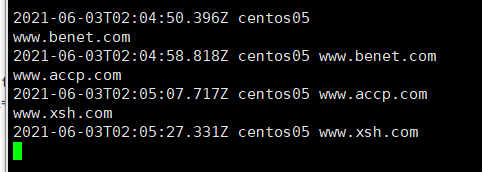
[root@centos05 ~]# logstash -e ‘input { stdin{}} output { stdout{ codec=>rubydebug}}’


[root@centos05 ~]# logstash -e ‘input { stdin{}} output { elasticsearch{hosts => [“192.168.100.10:9200”]}}’

验证:
4.采集apache成功日志(centos05)
设置允许日志读取
[root@centos05 ~]# chmod o+r /var/log/httpd/access_log

创建采集日志文件
[root@centos05 ~]# touch /etc/logstash/conf.d/apache.conf
[root@centos05 ~]# chmod +x /etc/logstash/conf.d/apache.conf

查看日志所在位置
[root@centos05 ~]# ls -ld /var/log/httpd/access_log

input {
file {
path => “/var/log/httpd/access_log”
type => “access”
start_position => “beginning”
}
}
output {
    if[type] == "access" {
            elasticsearch {
                    hosts => ["192.168.100.10:9200"]
                    index => "access-%{+YYYY.MM.dd}"
            }
    }
}

检查日志采集文件是否有问题
[root@centos05 ~]# logstash -f /etc/logstash/conf.d/apache.conf

注:系统日志文件位置
[root@centos05 ~]# ls -ld /var/log/httpd/access_log

重新启动logstash
[root@centos05 ~]# systemctl restart logstash.service

验证:


5.安装配置kibana(centos01)
安装
[root@centos ~]# rpm -ivh /mnt/kibana-5.5.1-x86_64.rpm

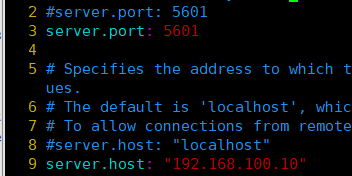
修改主配置文件
[root@centos ~]# vim /etc/kibana/kibana.yml


启动服务
[root@centos ~]# systemctl start kibana
[root@centos ~]# systemctl enable kibana

验证:


 191
191


 被折叠的 条评论
为什么被折叠?
被折叠的 条评论
为什么被折叠?
 到【灌水乐园】发言


