


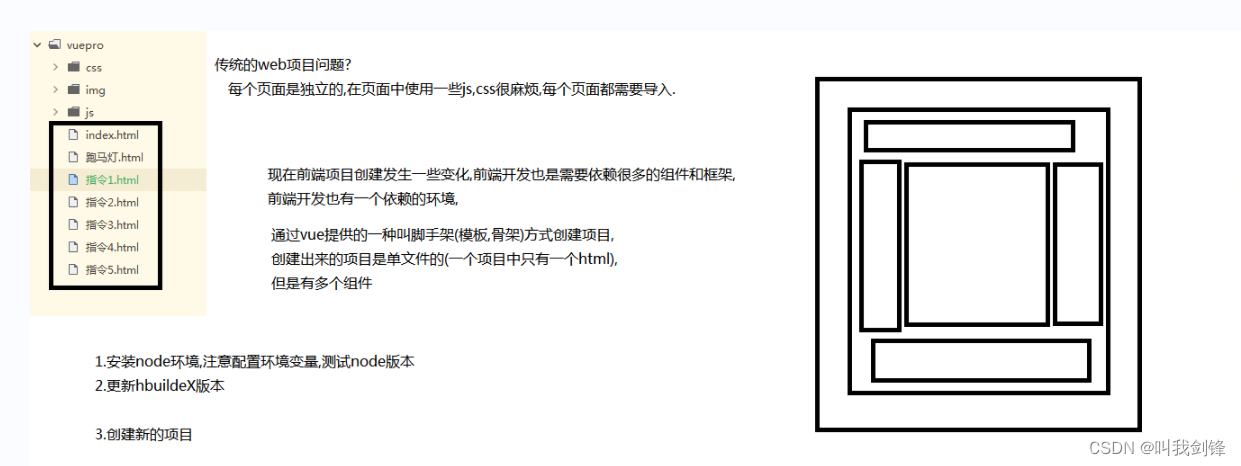
传统的web项目问题:
每个页面是独立的,在页面中使用一些js,css很麻烦,每个页面都需要导入。
vue-cli 官方提供的一个脚手架,用于快速生成一个 vue 的项目模板;预先定义好的目录结构及基础代码,就好比咱们在创建 Maven 项目时可以选择创建一个骨架项目,这个骨架项目就是脚手架,我们的开发更加的快速;
主要的功能
- 统一的目录结构
- 本地调试
- 热部署
- 单元测试
- 集成打包上线
需要的环境
- Node.js
简单的说 Node.js 就是运行在服务端的 JavaScript。Node.js 是一个基于 Chrome JavaScript 运行时建立的一个平台。Node.js 是一个事件驱动 I/O 服务端 JavaScript 环境,基于 Google 的 V8 引擎,V8 引擎执行 Javascript 的速度非常快,性能非常好。
- npm
npm 是 Node.js 的包管理工具,用来安装各种 Node.js 的扩展。npm 是JavaScript 的包管理工具,也是世界上最大的软件注册表。有超过 60 万个JavaScript 代码包可供下载,每周下载约 30 亿次。npm 让 JavaScript 开发人员可以轻松地使用其他开发人员共享的代码。
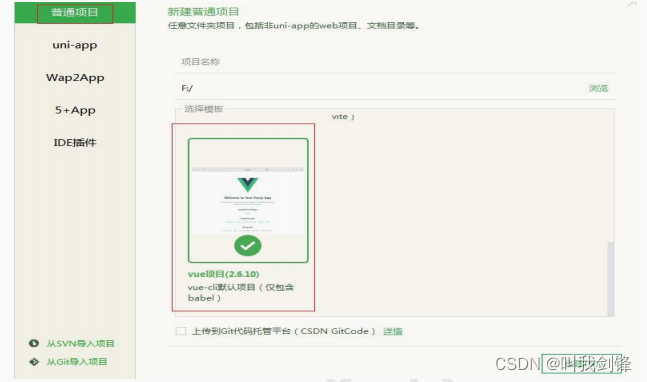
使用HBuilderX快速搭建一个Vue-cli项目
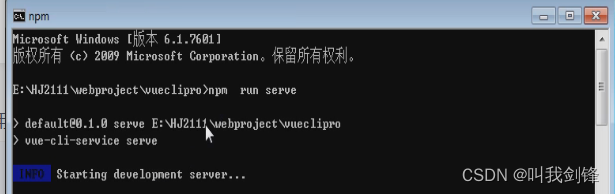
创建成功后,在命令窗口启动项目
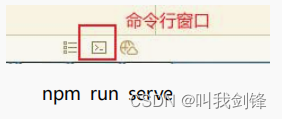
具体命令需要看配置文件中如何定义
启动成功后,会出现访问项目地址:
http://127.0.0.1:8080/
在命令行中 ctrl+c 停止服务
终端运行

选中cmd
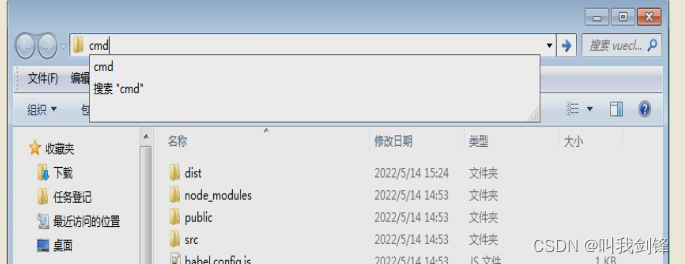
输入命令
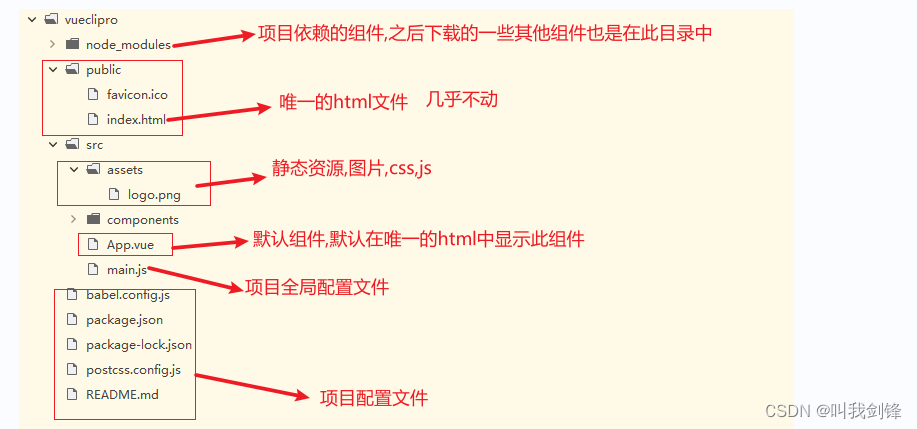
项目结构:
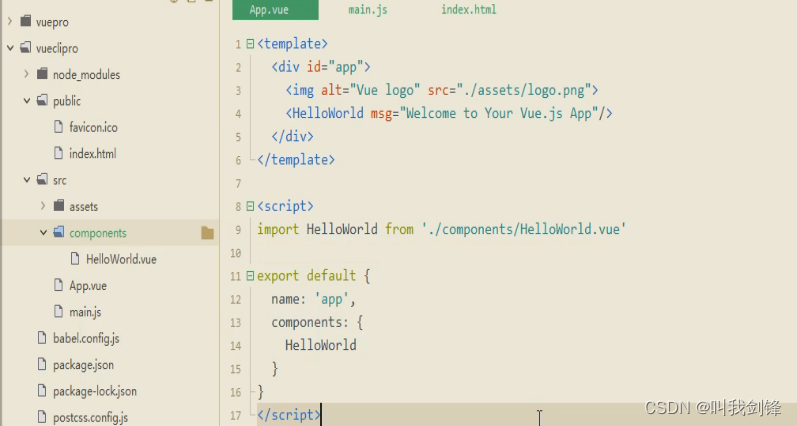
导入组件
组件创建
<!-- 表示一个模板组件 -->
<template>
	<!-- 组件必须有一个根标签 -->
	<div>
		<input type="button" @click="login()">
	</div>
</template>

<script>
	/* 导出组件,别的地方可以导入 */
	export default {
		data() {
			return{
				message:"hello";
			}
		},
		methods:{
			login();
		}
	}
</script>

<style>
</style>
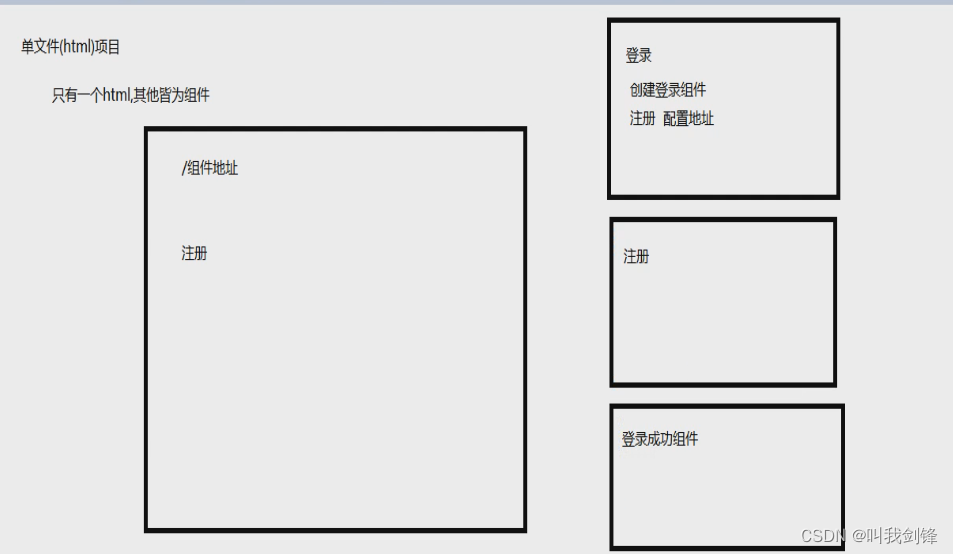
组件路由
vue router 是 Vue.js 官方的路由管理器。它和 Vue.js 的核心深度集成。
安装
vue-router 是一个插件包,所以我们还是需要用 npm 来进行安装的。
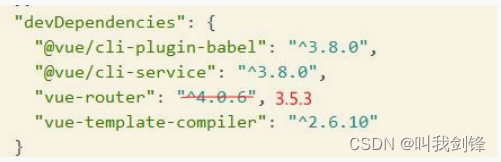
注意 Vue2.6 只能集成 vue router3.x 版本
需要修改版本号 在 package.json
打开命令行工具,输入项目目录,输入下列命令:
npm install vue-router --save-dev
搭建步骤
1、创建router目录
创建 index.js 文件,在其中配置路由
//导入vue
import Vue from 'vue';
/* 导入路由 */
import router from 'vue-router';
/* 导入其他组件 */
import login from '../views/login';
import content from '../components/content';
//配置组件
Vue.use(router)
/* 定义组件路由 */
var rout = new router({
routes: [{
path: '/index',
name: 'index',
component: index
},
{
path: '/content',
component: content
}
]
});
//导出路由对象
export default rout;2、使用路由--导入组件
<template>
    <div>
        <router-link to="/index">首页</router-link>
        <router-link to="/content">内容</router-link>
    </div>
</template>
3.在 main.js 中配置路由
import Vue from 'vue';//相当于导入vue.js
import App from './App.vue'//导入App组件, ./表示当前目录  ../上一级

Vue.config.productionTip = false

//导入路由功能
import router from './router/index.js'
Vue.use(router);

//导入ElementUI
import ElementUI from 'element-ui';
import 'element-ui/lib/theme-chalk/index.css';
Vue.use(ElementUI);

//导入网络请求库
import axios from 'axios';
axios.defaults.withCredentials=true;
//定义后端地址
axios.defaults.baseURL="http://127.0.0.1:8080/webBack/";
//将axios绑定到vue对象
Vue.prototype.$http=axios;

//添加响应拦截器
axios.interceptors.response.use((resp) =>{
		if(resp.data==201){
			router.replace("/login");
		}
		if(resp.data==500){
			ElementUI.Message({message: '系统忙',type: 'warning'});
		}
    return resp;
},(error)=>{
	ElementUI.Message({message: "请求地址有误",type: "error"});
	return Promise.reject(error);
});

new Vue({
  render: h => h(App),
  router,
}).$mount('#app');   //创建一个Vue对象,并将App组件注册进去,把#app标签与Vue对象绑定
4.
路由导航守卫--index.js
为路由对象,添加 beforeBach 导航守卫
to-将要访问的页面地址 ,from- 从哪个页面访问的 ,next- 放行函数
//路由导航守卫  一旦发生路由  就会执行此函数
rout.beforeEach((to,from,next)=>{
	//如果用户访问的登录页,直接放行
    if(to.path=='/login'){
		return next();
    }else{
         var account = window.sessionStorage.getItem("account");
		 if(account==null){ //表名没有登录
			 return next("/login");
		}else{
			next();
			}
		}
})
5.
路由嵌套
{
    path: '/main',
    component: Main, //路由嵌套 在 main 下面的嵌套子路由
    children:[
    {
        path:"/admin",
        component:Admin
    }
    ]
}
6.
路由传参
<router-link :to="{path:'/User',query:{num:id,name:'jim'}}">
用户
</router-link>
目标组件获取地址参数
this.$route.query.num
ElementUI
Element,一套为开发者、设计师和产品经理准备的基于 Vue 2.0 的桌面端组件库

安装 ElementUI
npm i element-ui -S在 main.js 中写入以下内容:
//导入ElementUI
import ElementUI from 'element-ui';
import 'element-ui/lib/theme-chalk/index.css';
Vue.use(ElementUI);
具体组件使用参考 API 文档
网络请求
axios 是一个 HTTP 的网络请求库.
安装 npm install axios在 main.js 中配置 axios
导入 axios
import axios from 'axios';
设置访问后台服务器地址
axios.defaults.baseURL="http://127.0.0.1:9999/api/";
将 axios 挂载到 vue 全局对象中,使用 this 可以直接访问
Vue.prototype.$http=axios;- 使用 get 或 post 方法即可发送对应的请求
- then 方法中的回调函数会在请求成功或失败时触发
- 通过回调函数的形参可以获取响应内容,或错误信息
基本语法
this.$http.get(地址?Key=value&key2=val1).then(function(response){ }
this.$http.post("login",{key:"value",key2:"val2"}).then(function(response){ }
axios 的常用 API
- get:查询数据
- post 添加数据
- put:修改数据
- delete:删除数据
axios 的响应结果
响应结果的主要属性
- data:实际响应回来的数据
- headers:响应头信息
- status:响应状态码
- statusText:响应状态信息
//axios 请求拦截
axios.interceptors.request.use(config =>{
//为请求头对象,添加 Token 验证的 token 字段
    config.headers.token = window.sessionStorage.getItem('token');
    return config;
})
// 添加响应拦截器
axios.interceptors.response.use((resp) =>{//正常响应拦截
    if(resp.data.code==500){
        ElementUI.Message({message:resp.data.message,type:"error"})
    }
return res;
},(error) =>{//请求失败时执行此函数,如 404
    if(error.response.data.code==404){
        ElementUI.Message({message:"请求地址有误",type:"error"});
    }
    return Promise.reject(error);
});


 320
320


 被折叠的 条评论
为什么被折叠?
被折叠的 条评论
为什么被折叠?
 到【灌水乐园】发言


