


1.第一步引入element ui
npm install element-ui
2.在使用image-viewer组件中引入
import ElImageViewer from "element-ui/packages/image/src/image-viewer";


components: {
    ElImageViewer
  },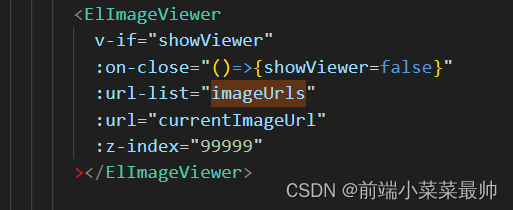
 <ElImageViewer
          v-if="showViewer"
          :on-close="()=>{showViewer=false}"
          :url-list="imageUrls"
          :url="currentImageUrl"
          :z-index="99999"
        ></ElImageViewer>
3.接下来就是重点了:
需要先处理一下富文本传递过来的数据
 repairRichText(html) {
      // console.log(html);
      // 去掉<img>中style /width / height属性
      let newContent = html.replace(/<img[^>]*>/gi, match => {
        match = match
          .replace(/style="[^"]+"/gi, "")
          .replace(/style='[^']+'/gi, "");
        match = match
          .replace(/width="[^"]+"/gi, "")
          .replace(/width='[^']+'/gi, "");
        match = match
          .replace(/height="[^"]+"/gi, "")
          .replace(/height='[^']+'/gi, "");
        return match;
      });
      // 修改所有style里的width属性为max-width:100%
      newContent = newContent.replace(/style="[^"]+"/gi, match => {
        match = match
          .replace(/width:[^;]+;/gi, "max-width:100%;")
          .replace(/width:[^;]+;/gi, "max-width:100%;");
        return match;
      });
      // 去掉所有<br/>标签
      newContent = newContent.replace(/<br[^>]*\/>/gi, "");
      // img标签添加style属性:max-width:100%;height:auto
      // 实现预览效果在此处添加class类名为"content-img",后面会通过dom来查找图片
      newContent = newContent.replace(
        /\<img/gi,
        '<img  class="content-img" style="max-width:100%;height:auto;display:block;margin-top:0;margin-bottom:0;"'
      );
      // return
      return newContent;
    }
定义参数,接收后端接口返回的富文本的数据 ,并用正则把图片提取出来,赋值给另一个数组集合,如下图:

其中this.intorduction是用来接收富文本数据.this.imageUrls是用来存储图片的,随后定义一个函数onShow(),把提取出来的图片集合传递给onShow函数
this.onShow(this.imageUrls);
onShow(data) {
      this.$nextTick(() => {
        const imgHtml = document.getElementsByClassName("content-img");
        console.log(imgHtml);
        for (let i = 0; i < imgHtml.length; i += 1) {
          imgHtml[i].onclick = () => {
            console.log(i);
            // console.log();
            //解决点击预览时不是当前图片问题
            // [...data]
            const tempImgList = [...data]; // 所有图片地址
            console.log(tempImgList);
            if (i === 0) {
              this.imageUrls = tempImgList;
            } else {
              // 调整图片顺序,把当前图片放在第一位
              // splice
              const start = tempImgList.splice(i);
              // splice
              const remain = tempImgList.splice(0, i);
              this.imageUrls = start.concat(remain);
              console.log(this.imageUrls);
            }
            this.onPreview();
          };
        }
      });
    },
    onPreview() {
      this.showViewer = true;
    },
到此,就可以实现使用element-ui组件实现富文本图片的预览效果了。


 725
725


 被折叠的 条评论
为什么被折叠?
被折叠的 条评论
为什么被折叠?
 到【灌水乐园】发言


