


Day 2
ImageView
插入图片
<ImageView
android:layout_width="wrap_content"
android:layout_height="wrap_content"
android:src="@drawable/a"
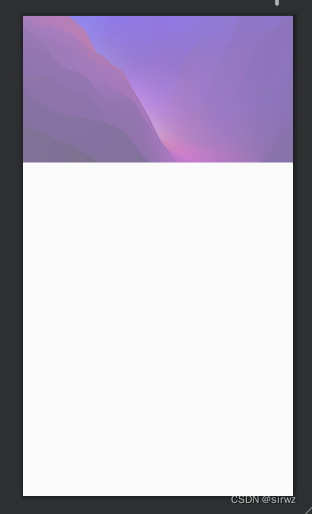
android:alpha="0.55"
android:scaleType="fitStart"/>
android:alpha="0.55" //表示透明度范围 0~1
android:scaleType="fitStart" //表面图片的对应位置 默认居中
示意图:
点击事件
一个按钮显示多个背景图 在不同的操作下显示不同的背景图
页面代码:
<?xml version="1.0" encoding="utf-8"?>
<LinearLayout xmlns:android="http://schemas.android.com/apk/res/android"
    android:layout_width="match_parent"
    android:layout_height="match_parent"
    android:orientation="vertical"
    android:padding="15dp"
    android:gravity="center">
    <LinearLayout
        android:layout_width="match_parent"
        android:layout_height="wrap_content"
        android:orientation="horizontal">
        <TextView
            android:id="@+id/textView4"
            android:layout_width="70dp"
            android:layout_height="wrap_content"
            android:gravity="center"
            android:text="手机号:"/>

        <EditText
            android:id="@+id/et_phonenum"
            android:layout_width="match_parent"
            android:layout_height="wrap_content"
            android:ems="10"
            android:gravity="center"
            android:hint="请输入手机号"
            android:inputType="number"/>
    </LinearLayout>
    <LinearLayout
        android:layout_marginTop="10dp"
        android:layout_width="match_parent"
        android:layout_height="wrap_content"
        android:orientation="horizontal">
        <TextView
            android:id="@+id/textView5"
            android:layout_width="70dp"
            android:layout_height="wrap_content"
            android:gravity="center"
            android:text="密码:"/>

        <EditText
            android:id="@+id/et_pwd"
            android:layout_width="match_parent"
            android:layout_height="wrap_content"
            android:ems="10"
            android:gravity="center"
            android:hint="请输入密码"
            android:inputType="number"/>
    </LinearLayout>
    <LinearLayout
        android:layout_marginTop="10dp"
        android:layout_width="match_parent"
        android:layout_height="wrap_content"
        android:orientation="horizontal">
        <TextView
            android:id="@+id/textView6"
            android:layout_width="70dp"
            android:layout_height="wrap_content"
            android:gravity="center"
            android:text="重置密码:"/>

        <EditText
            android:id="@+id/et_rewd"
            android:layout_width="match_parent"
            android:layout_height="wrap_content"
            android:ems="10"
            android:gravity="center"
            android:hint="请再次输入密码"
            android:inputType="textPassword"/>
    </LinearLayout>
    <LinearLayout
        android:layout_marginTop="20dp"
        android:layout_width="match_parent"
        android:layout_height="wrap_content">
        <TextView
            android:id="@+id/a7"
            android:layout_width="70dp"
            android:layout_height="wrap_content"
            android:gravity="center"
            android:text="性别"/>
        <RadioGroup
            android:id="@+id/rg_sex"
            android:layout_width="wrap_content"
            android:layout_height="wrap_content"
            android:orientation="horizontal">
            <RadioButton
                android:id="@+id/rb_man"
                android:layout_width="wrap_content"
                android:layout_height="wrap_content"
                android:checked="true"
                android:text="男"/>
            <RadioButton
                android:id="@+id/rd_woman"
                android:layout_width="wrap_content"
                android:layout_height="wrap_content"
                android:checked="true"
                android:text="女"
                android:layout_marginLeft="30dp"/>
        </RadioGroup>
    </LinearLayout>
    <CheckBox
        android:id="@+id/cd_adrult"
        android:layout_marginTop="150dp"
        android:layout_width="match_parent"
        android:layout_height="wrap_content"
        android:text="已满18岁"/>
    <CheckBox
        android:id="@+id/cd_agree"
        android:layout_width="match_parent"
        android:layout_height="wrap_content"
        android:text="我同意相关条款"/>

    <Button
        android:id="@+id/tb_zhuce"
        android:layout_width="match_parent"
        android:layout_height="wrap_content"
        android:layout_marginTop="30dp"
        android:text="注册" />

</LinearLayout>
效果图

单选按钮
单选框 RadioButton
单选框的独立存在: 主要用在同意协议等
单选框一般情况下都是多个出现:比如性别,必须跟RadioGroup结合使用
内容两个或两个以上 实际却只能选一个按钮的方法
 <RadioGroup
        ......>
            <RadioButton
            ......
            ....../>
            <RadioButton
            ........
             ......./>
             ...
        </RadioGroup>
// 单选框的点击事件是设置在RadioGroup上

onCheckedChangeListener()
复选框 CheckBox
复选框的独立使用:主要用于 同意协议
复选框的多个使用:多选
复选框的点击事件:
可用于一下条款的按钮 可以点击也可以取消
<CheckBox> <CheckBox/>
// 复选框的点击事件是设置在checkbox上

onCheckedChangeListener()
StateListDrawable
<?xml version="1.0" encoding="utf-8"?>
<selector xmlns:android="http://schemas.android.com/apk/res/android">
    //true 设置触发时的颜色
    <item android:drawable="@color/black" android:state_pressed="true"></item>
    //false 没有触发操作的颜色
    <item android:drawable="@color/white" android:state_pressed="false"></item>
</selector>
    <Button
        android:layout_width="wrap_content"
        android:layout_height="wrap_content"
        android:text="登录"
        android:background="@drawable/sirwzbj"
        />
用户提示
使用内部类进行处理
    //使用内部类进行处理

    @Override
    protected void onCreate(Bundle savedInstanceState) {
        super.onCreate(savedInstanceState);
        setContentView(R.layout.activity_main2);
        //1.获取页面上的控件
        //如何获取页面上的按钮 findViewById()
        //R.id.tb_zhuce 表示页面上的案件id
        Button tb_zhuce=findViewById(R.id.tb_zhuce);

        //2.给页面上的控件 设置监听
        //3.处理监听,一旦发现有人点击按钮 进行操作
        tb_zhuce.setOnClickListener(tb_zhuces);


    }
    //用内部类来 进行操作
    private View.OnClickListener tb_zhuces =new View.OnClickListener() {
        @Override
        public void onClick(View view) {
            //后台提示
            Log.i("tb_zhuce点击事件","新用户注册成功");
            //前台提示
            //Toast.makeText(参数1,参数2,参数3)
            //1:上下文 2:要给用户提示内容(要是字符串格式(如过是数字:123+""))
            Toast.makeText(MainActivity2.this, "功能尚未完成", Toast.LENGTH_SHORT).show();
        }
    };
   @Override
    protected void onCreate(Bundle savedInstanceState) {
        super.onCreate(savedInstanceState);
        setContentView(R.layout.activity_main2);
        //1.获取页面上的控件
        //如何获取页面上的按钮 findViewById()
        //R.id.tb_zhuce 表示页面上的案件id
        Button tb_zhuce=findViewById(R.id.tb_zhuce);
        //2.给页面上的控件 设置监听
        //3.处理监听,一旦发现有人点击按钮 进行操作
        tb_zhuce.setOnClickListener(new View.OnClickListener() {
            @Override
            public void onClick(View view) {
                Log.i("tb_zhuce点击事件","新用户注册成功");
                Toast.makeText(MainActivity2.this, "功能尚未完成", Toast.LENGTH_LONG).show();
            }
        });
    }
   @Override
    protected void onCreate(Bundle savedInstanceState) implements View.OnClickListener{
        super.onCreate(savedInstanceState);
        setContentView(R.layout.activity_main2);
        //1.获取页面上的控件
        Button tb_zhuce=findViewById(R.id.tb_zhuce);
        Button tb_zhuce1=findViewById(R.id.tb_zhuce1);
        Button tb_zhuce2=findViewById(R.id.tb_zhuce2);
        //2.给页面上的控件 设置监听
        //3.处理监听,一旦发现有人点击按钮 进行操作
        tb_zhuce.setOnClickListener(new View.OnClickListener(this);
        tb_zhuce.setOnClickListener(new View.OnClickListener(this);
        tb_zhuce.setOnClickListener(new View.OnClickListener(this);
        }


    /**
     * 用接口 View.OnClickListener及实现方法的方式来
     * 来处理多个按钮的操作
     * @param view
     */


    @Override
    public void onClick(View view) {
        if (view.getId()==R.id.tb_zhuce){
            Toast.makeText(MainActivity2.this, "按钮被点击", Toast.LENGTH_LONG).show();
        }else if ((view.getId()==R.id.tb_zhuce1){
            Toast.makeText(MainActivity2.this, "按钮1被点击", Toast.LENGTH_LONG).show();
        }else if ((view.getId()==R.id.tb_zhuce2){
            Toast.makeText(MainActivity2.this, "按钮2被点击", Toast.L
            ENGTH_LONG).show();
        }
点击的效果图如下:

ScrollView 滚动视图控件
<LinearLayout xmlns:android="http://schemas.android.com/apk/res/android"
    xmlns:app="http://schemas.android.com/apk/res-auto"
    xmlns:tools="http://schemas.android.com/tools"
    android:layout_width="match_parent"
    android:layout_height="match_parent"
    tools:context=".MainActivity5"
    android:orientation="vertical">
    <LinearLayout
        android:layout_width="match_parent"
        android:layout_height="wrap_content">
        <Button
            android:id="@+id/btn_top"
            android:layout_width="wrap_content"
            android:layout_height="wrap_content"
            android:layout_weight="1"
            android:text="回到顶部"/>
        <Button
            android:id="@+id/btn_bottom"
            android:layout_width="wrap_content"
            android:layout_height="wrap_content"
            android:layout_weight="1"
            android:text="跳转底部"/>
    </LinearLayout>
    <ScrollView
        android:id="@+id/sv"
        android:layout_width="match_parent"
        android:layout_height="wrap_content">
        <LinearLayout
            android:layout_width="match_parent"
            android:layout_height="wrap_content"
            android:orientation="vertical">
            <TextView
                android:layout_width="match_parent"
                android:layout_height="wrap_content"
                android:text="顶部" />

                .....

            <TextView
                android:layout_width="match_parent"
                android:layout_height="wrap_content"
                android:text="底部" />
        </LinearLayout>
    </ScrollView>
</LinearLayout>
效果图

public class MainActivity5 extends AppCompatActivity implements View.OnClickListener{
    //1.声明容量
    private ScrollView scrollView;
    private View btn_top;
    private View btn_bottom;

    @Override
    protected void onCreate(Bundle savedInstanceState) {
        super.onCreate(savedInstanceState);
        //2.根据ID获取页面上的控件,并把控件赋值给容器
        setContentView(R.layout.activity_main5);
         btn_top = findViewById(R.id.btn_top);
         btn_bottom = findViewById(R.id.btn_bottom);
        scrollView =findViewById(R.id.sv);
         //3.设置监听
        btn_top.setOnClickListener(this);
        btn_bottom.setOnClickListener(this);
    }
    @Override
    public void onClick(View view) {
        if (view.getId()==R.id.btn_top){
            //返回顶部
            scrollView.fullScroll(ScrollView.FOCUS_UP);
        }else if (view.getId()==R.id.btn_bottom){
            //跳转底部
            scrollView.fullScroll(ScrollView.FOCUS_DOWN);
        }
    }
}
** 使用时的注意点?**
- 不用再ScrollView内部使用自带滚动条的控件或布局
- ScrollView直接子View只能有一个
- ScrollView只支持竖直滑动 如果想要横向滑动 HorizontalScrollView


 307
307


 被折叠的 条评论
为什么被折叠?
被折叠的 条评论
为什么被折叠?
 到【灌水乐园】发言


