


七,为集合类型属性赋值
①为
List
集合类型属性赋值
在
Clazz
类中添加以下代码
private List<Student> students;
public List<Student> getStudents() {
return students;
}
public void setStudents(List<Student> students) {
this.students = students;
}
配置
bean
:
<bean id="clazzTwo" class="com.atguigu.spring.bean.Clazz">
<property name="clazzId" value="4444"></property>
<property name="clazzName" value="Javaee0222"></property>
<property name="students">
<list>
<ref bean="studentOne"></ref>
<ref bean="studentTwo"></ref>
<ref bean="studentThree"></ref>
</list>
</property>
</bean>
若为
Set
集合类型属性赋值,只需要将其中的
list
标签改为
set
标签即可
②为
Map
集合类型属性赋值
创建教师类
Teacher
:
public class Teacher {
private Integer teacherId;
private String teacherName;
public Integer getTeacherId() {
return teacherId;
}
public void setTeacherId(Integer teacherId) {
this.teacherId = teacherId;
}
public String getTeacherName() {
return teacherName;
}
public void setTeacherName(String teacherName) {
this.teacherName = teacherName;
}
public Teacher(Integer teacherId, String teacherName) {
this.teacherId = teacherId;
this.teacherName = teacherName;
}
public Teacher() {
}
@Override
public String toString() {
return "Teacher{" +
"teacherId=" + teacherId +
", teacherName='" + teacherName + '\'' +
'}';
}
}
在
Student
类中添加以下代码:
private Map<String, Teacher> teacherMap;
public Map<String, Teacher> getTeacherMap() {
return teacherMap;
}
public void setTeacherMap(Map<String, Teacher> teacherMap) {
this.teacherMap = teacherMap;
}
配置
bean
:
<bean id="teacherOne" class="com.atguigu.spring.bean.Teacher">
<property name="teacherId" value="10010"></property>
<property name="teacherName" value="大宝"></property>
</bean>
<bean id="teacherTwo" class="com.atguigu.spring.bean.Teacher">
<property name="teacherId" value="10086"></property>
<property name="teacherName" value="二宝"></property>
</bean>
<bean id="studentFour" class="com.atguigu.spring.bean.Student">
<property name="id" value="1004"></property>
<property name="name" value="赵六"></property>
<property name="age" value="26"></property>
<property name="sex" value="女"></property>
<!-- ref属性:引用IOC容器中某个bean的id,将所对应的bean为属性赋值 -->
<property name="clazz" ref="clazzOne"></property>
<property name="hobbies">
<array>
<value>抽烟</value>
<value>喝酒</value>
<value>烫头</value>
</array>
</property>
<property name="teacherMap">
<map>
<entry>
<key>
<value>10010</value>
</key>
<ref bean="teacherOne"></ref>
</entry>
<entry>
<key>
<value>10086</value>
</key>
<ref bean="teacherTwo"></ref>
</entry>
</map>
</property>
</bean>
③引用集合类型的
bean
<!--list集合类型的bean-->
<util:list id="students">
<ref bean="studentOne"></ref>
<ref bean="studentTwo"></ref>
<ref bean="studentThree"></ref>
</util:list>
<!--map集合类型的bean-->
<util:map id="teacherMap">
<entry>
<key>
<value>10010</value>
</key>
<ref bean="teacherOne"></ref>
</entry>
<entry>
<key>
<value>10086</value>
</key>
<ref bean="teacherTwo"></ref>
</entry>
</util:map>
<bean id="clazzTwo" class="com.atguigu.spring.bean.Clazz">
<property name="clazzId" value="4444"></property>
<property name="clazzName" value="Javaee0222"></property>
<property name="students" ref="students"></property>
</bean>
<bean id="studentFour" class="com.atguigu.spring.bean.Student">
<property name="id" value="1004"></property>
<property name="name" value="赵六"></property>
<property name="age" value="26"></property>
<property name="sex" value="女"></property>
<!-- ref属性:引用IOC容器中某个bean的id,将所对应的bean为属性赋值 -->
<property name="clazz" ref="clazzOne"></property>
<property name="hobbies">
<array>
<value>抽烟</value>
<value>喝酒</value>
<value>烫头</value>
</array>
</property>
<property name="teacherMap" ref="teacherMap"></property>
</bean>
八,引入外部属性文件
①加入依赖
<dependency>
<groupId>mysql</groupId>
<artifactId>mysql-connector-java</artifactId>
<version>8.0.16</version>
</dependency>
<!-- 数据源 -->
<dependency>
<groupId>com.alibaba</groupId>
<artifactId>druid</artifactId>
<version>1.0.31</version>
</dependency>
②创建外部属性文件
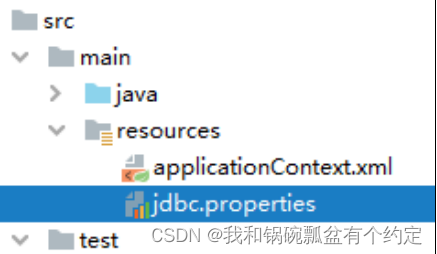
jdbc.user=root
jdbc.password=atguigu
jdbc.url=jdbc:mysql://localhost:3306/ssm?serverTimezone=UTC
jdbc.driver=com.mysql.cj.jdbc.Driver
③引入属性文件
<!-- 引入外部属性文件 -->
<context:property-placeholder location="classpath:jdbc.properties"/>
④配置
bean
<bean id="druidDataSource" class="com.alibaba.druid.pool.DruidDataSource">
<property name="url" value="${jdbc.url}"/>
<property name="driverClassName" value="${jdbc.driver}"/>
<property name="username" value="${jdbc.user}"/>
<property name="password" value="${jdbc.password}"/>
</bean>
⑤测试
@Test
public void testDataSource() throws SQLException {
ApplicationContext ac = new ClassPathXmlApplicationContext("springdatasource.xml");
DataSource dataSource = ac.getBean(DataSource.class);
Connection connection = dataSource.getConnection();
System.out.println(connection);
}


 3009
3009


 被折叠的 条评论
为什么被折叠?
被折叠的 条评论
为什么被折叠?
 到【灌水乐园】发言


