


 文章介绍了Vue中组件间通信的方法,包括通过props传递数据和函数,自定义事件的两种实现方式,使用消息订阅与发布的概念,以及如何利用全局事件总线实现任意组件间的通信。最后,文章讨论了Vuex作为状态管理模式在大型应用中的重要性,包括简单的store设置、模块化和命名空间的概念。
一、props属性
1概述
父组件可以通过组件标签的形式将数据或者函数传递给子组件,子组件可以通过props去读取父组件传递过来的数据
2使用
<HelloWorld title="这是一个标题"/>
props:["title"]<span>{{ title }}</span>3 props三种写法
1.简单接收
props:["title"] 2.限制接收(类型错误,能渲染,但是控制台会报错)
props:{
    title:string
}
3.必须与默认(default与required二选一)
props:{
    title:{
        type:string,
        default:"我是一个标题呀",
        reuqired:true
     }
}
4传递函数
父组件
<HelloWorld title="这是一个标题" :function="getMes"/>
getMes(name) {
  console.log(name);
}
子组件
<button @click="sendName">我是一个按钮</button>
sendName() {
return this.function(this.mes)
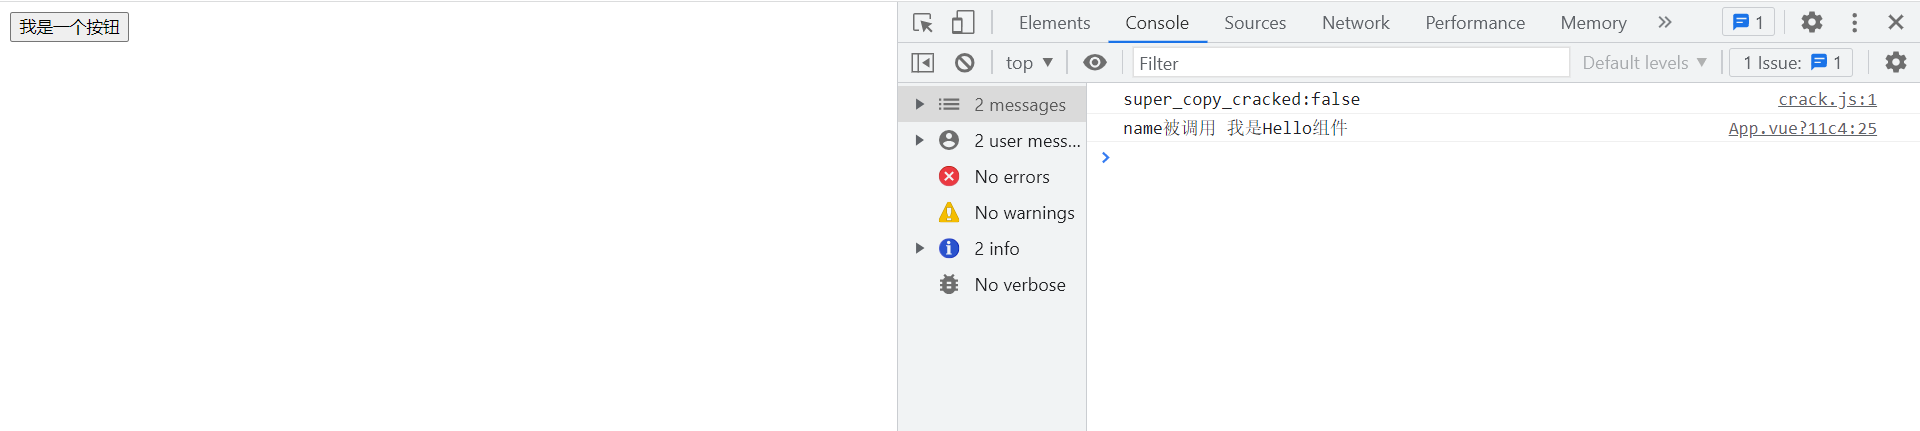
}二、自定义事件(适用于子组件与父组件传递)
第一种
自定义事件实现作用于组件
父组件
<HelloWorld title="这是一个标题" @finyou ="send" /> //绑定一个自定义事件
send(name) {
  console.log('name被调用',name);
}
子组件
<button @click="getClick">我是一个按钮</button>
getClick() {
  this.$emit('finyou',this.mes)  //this.$emit('事件名','传递参数')  //触发事件
}
效果图
第二种(ref)
父组件
<HelloWorld title="这是一个标题" ref="hello"/>
mounted() {
this.$refs.hello.$on('demo',this.getMes)
}
子组件
<div class="hello">
    <button @click="getClick">点击触发自定义事件</button>
    <button @click="sendName">点击解绑自定义事件</button>
</div>
methods: {
    getClick() {
     this.$emit('demo',this.mes)
    },
    sendName() {
      this.$off('demo') // 解绑一个事件
      this.$off() //全部进行解绑
    }
  }
三、消息的订阅与发布
概述
联想生活中的报纸的订阅,消息的订阅与发布就是组件的订阅消息,当有组件发布消息后,就可获取数据
原生的难与解决 安装pubsub-js
npm i pubsub-js使用:
消息的订阅
import pubsub from 'pubsub-js'

pubsub.subscribe("hello",function(eventName,data){
        console.log(”有人发布hello的消息“)
})
消息的发布
import pubsub from 'pubsub-js'

pubsub.publish("hello",666)
四、全局事件总线(实现任意组件的通话)
根据VueComponent.prototype.__ proto__ = Vue.prototype的原理来进行全局引用
import Vue from 'vue'
import App from './App.vue'

Vue.config.productionTip = false

new Vue({
  render: h => h(App),
  beforeCreate() {
    Vue.prototype.$bus = this  //安装全局事件总线
  },
}).$mount('#app')
传递数据
this.$bus.$emit('hello',this.name)接收数据
this.$bus.$on('hello',(data)=>{
    console.log('接收到了数据',data)
)
接收的函数要用箭头函数,this指向VueComponent,如果是普通函数则指向Vue函数
最好在beforeDestroy钩子中,用$off去解绑当前组件所用到的事件。
beforeDestroy() {
this.$bus.$off('hello')
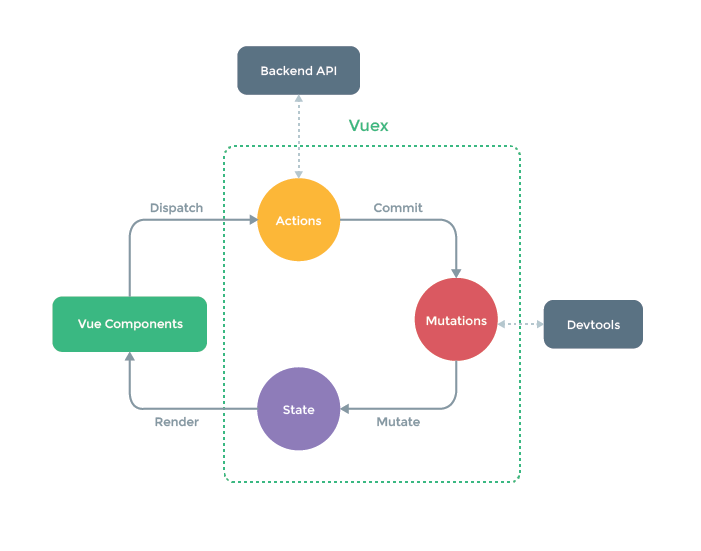
}五、vuex
Vuex 是一个专为 Vue.js 应用程序开发的状态管理模式,也可以理解为是一个仓库,供其他组件来取值
如果您不打算开发大型单页应用,使用 Vuex 可能是繁琐冗余的。确实是如此——如果您的应用够简单,您最好不要使用 Vuex。
简单的store
import Vue from 'vue'
import Vuex from 'vuex'

Vue.use(Vuex)

export default new Vuex.Store({
    state: {
        count: 0
    },
    actions: {
        Increment(a) {
            this.commit('increment', a)
        }
    },
    mutations: {
        increment(state) {
            state.count++
        }
    }
})
new Vue({
render: h => h(App),
store
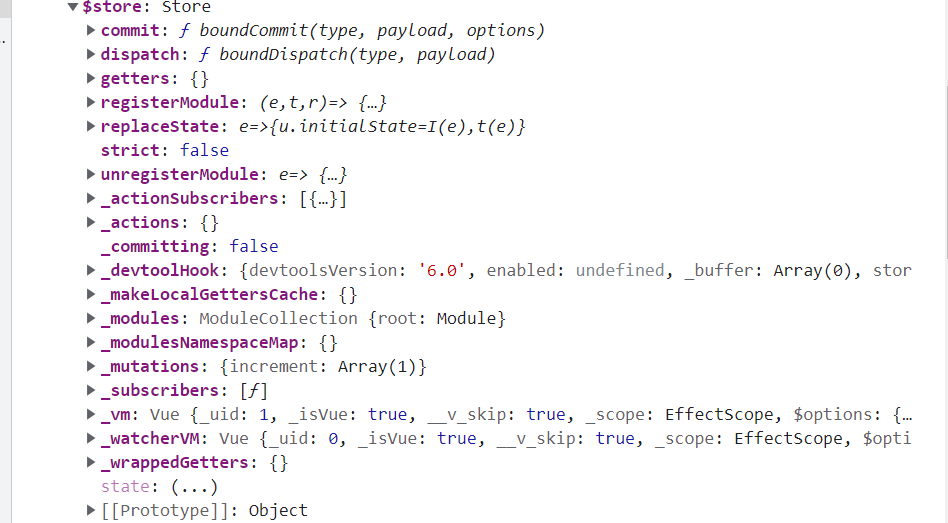
}).$mount('#app')
这样每个组件上vc都有一个$store
实现点击按钮进行自增
<button @click="getClick">点击触发自定义事件{{$store.state.count }}</button>
getClick() {
this.$store.dispatch('Increment')
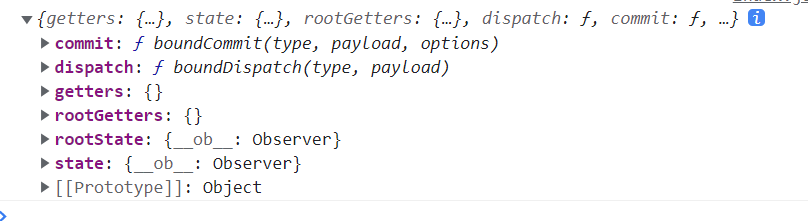
}其中action中的函数参数返回值是一个getters
actions: {
    Increment(a) {
    a.commit('increment')
    console.log(a);
    }
},
模块化
当你的项目很大,存在许多的模块,将所有的业务写在一起就有点拥挤,可读性差,你可以将他们按模块进行划分,执行不同的业务功能
模块A
const moduleA = {
  state: () => ({ ... }),
  mutations: { ... },
  actions: { ... },
  getters: { ... }
}
模块B
const moduleB = {
  state: () => ({ ... }),
  mutations: { ... },
  actions: { ... },
  getters: { ... }
}
export default new Vuex.Store({
  modules: {
    a: moduleA,
    b: moduleB
  }
})
命名空间
默认情况下,模块内部的 action、mutation 和 getter 是注册在全局命名空间的——这样使得多个模块能够对同一 mutation 或 action 作出响应。
如果希望你的模块具有更高的封装度和复用性,你可以通过添加 namespaced: true 的方式使其成为带命名空间的模块。当模块被注册后,它的所有 getter、action 及 mutation 都会自动根据模块注册的路径调整命名。例如:
const store = new Vuex.Store({
  modules: {
    account: {
      namespaced: true, //命名空间的开启

      // 模块内容(module assets)
      state: () => ({ ... }), // 模块内的状态已经是嵌套的了,使用 `namespaced` 属性不会对其产生影响
      getters: {
        isAdmin () { ... } // -> getters['account/isAdmin']
      },
      actions: {
        login () { ... } // -> dispatch('account/login')
      },
      mutations: {
        login () { ... } // -> commit('account/login')
      },
}
})


 411
411

 被折叠的 条评论
为什么被折叠?
被折叠的 条评论
为什么被折叠?
 到【灌水乐园】发言


