


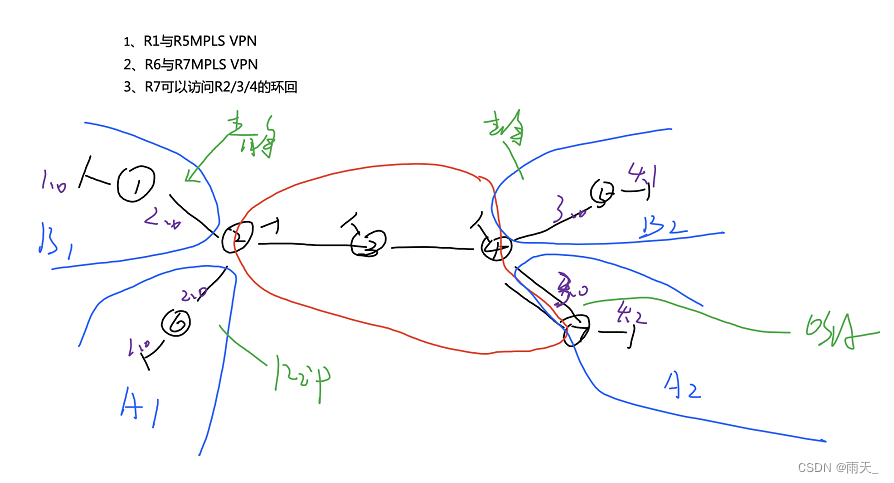

1.配置公有IP地址和环回
[r2]int lo0
[r2-LoopBack0]ip add 2.2.2.2 24
[r2-LoopBack0]int g0/0/1
[r2-GigabitEthernet0/0/1]ip add 23.1.1.1 24
[r3]int lo0
[r3-LoopBack0]ip add 3.3.3.3 24
[r3]int g0/0/0
[r3-GigabitEthernet0/0/0]ip add 23.1.1.2 24
[r3]int g0/0/1
[r3-GigabitEthernet0/0/1]ip add 34.1.1.1 24
[r4]int lo0
[r4-LoopBack0]ip add 4.4.4.4 24
[r4]int g0/0/0
[r4-GigabitEthernet0/0/0]ip add 34.1.1.2 24
[r4]int g4/0/0
[r4-GigabitEthernet4/0/0]ip add 47.1.1.1 24
[r7]int g0/0/1
[r7-GigabitEthernet0/0/1]ip add 47.1.1.2 24
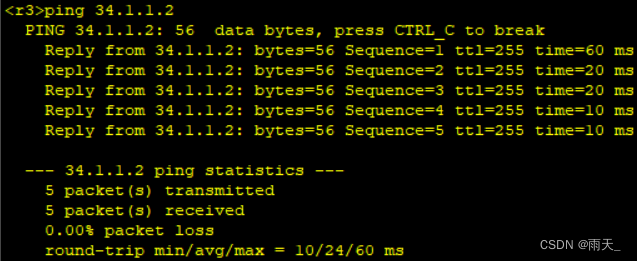
(测试)

2.对公网进行OSPF宣告
[r2]ospf 1 router-id 2.2.2.2
[r2-ospf-1]area 0
[r2-ospf-1-area-0.0.0.0]network 23.1.1.1 0.0.0.0
[r2-ospf-1-area-0.0.0.0]network 2.2.2.2 0.0.0.0
[r3]ospf 1 router-id 3.3.3.3
[r3-ospf-1]area 0
[r3-ospf-1-area-0.0.0.0]network 3.3.3.3 0.0.0.0
[r3-ospf-1-area-0.0.0.0]network 23.1.1.2 0.0.0.0
[r3-ospf-1-area-0.0.0.0]network 34.1.1.1 0.0.0.0
[r4]ospf 1 router-id 4.4.4.4
[r4-ospf-1]area 0
[r4-ospf-1-area-0.0.0.0]net
[r4-ospf-1-area-0.0.0.0]network 34.1.1.2 0.0.0.0
[r4-ospf-1-area-0.0.0.0]network 4.4.4.4 0.0.0.0
[r4-ospf-1-area-0.0.0.0]network 47.1.1.1 0.0.0.0
(沉默R4和R7的接口并且加上认证)
[r4-ospf-1]silent-interface GigabitEthernet 4/0/0
[r4]int g4/0/0
[r4-GigabitEthernet4/0/0]ospf authentication-mode md5 1 cipher 123456
(查看)
(为R7配置缺省路由)
[r7]ip route-static 0.0.0.0 0 47.1.1.1
(测试)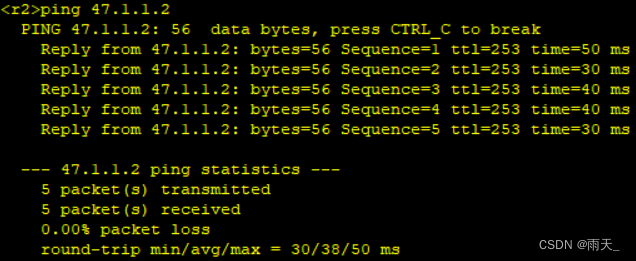

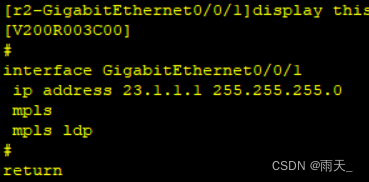
3.在公网开启MPLS协议
[r2]mpls lsr-id 2.2.2.2
[r2]mpls
Info: Mpls starting, please wait... OK!
[r2-mpls]mpls ldp
[r2-mpls-ldp]q
[r2]int g0/0/1
[r2-GigabitEthernet0/0/1]mpls
[r2-GigabitEthernet0/0/1]mpls ldp
[r3]mpls lsr-id 3.3.3.3
[r3]mpls
Info: Mpls starting, please wait... OK!
[r3-mpls]mpls ldp
[r3-mpls-ldp]q
[r3]int g0/0/0
[r3-GigabitEthernet0/0/0]mpls
[r3-GigabitEthernet0/0/0]mpls ldp
[r3]int g0/0/1
[r3-GigabitEthernet0/0/1]mpls
[r3-GigabitEthernet0/0/1]mpls ldp
[r4]mpls lsr-id 4.4.4.4
[r4]mpls
Info: Mpls starting, please wait... OK!
[r4-mpls]mpls ldp
[r4-mpls-ldp]q
[r4]int g0/0/0
[r4-GigabitEthernet0/0/0]mpls
[r4-GigabitEthernet0/0/0]mpls ldp
(查看)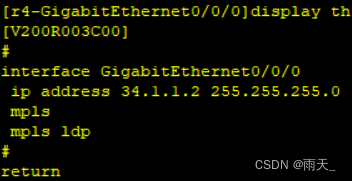
4.创建VPN空间
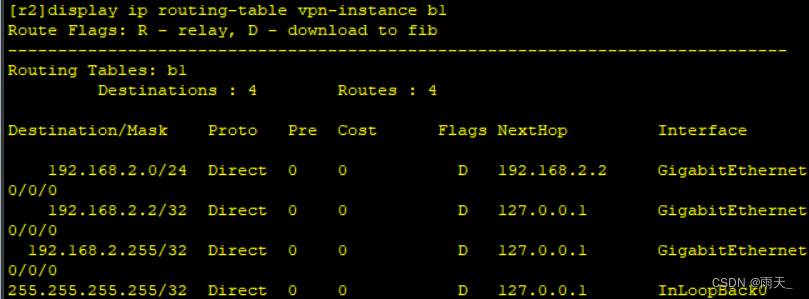
[r2]ip vpn-instance b1
[r2-vpn-instance-b1]route-distinguisher 1:1
[r2-vpn-instance-b1-af-ipv4]vpn-target 1:1
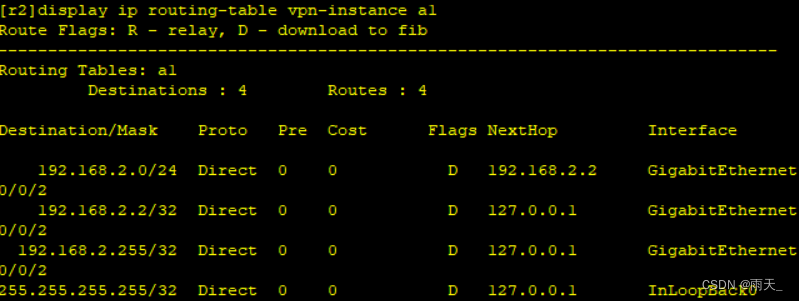
[r2]ip vpn-instance a1
[r2-vpn-instance-a1]route-distinguisher 2:2
[r2-vpn-instance-a1-af-ipv4]vpn-target 2:2
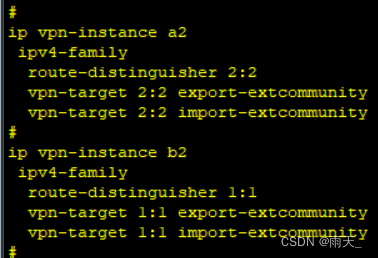
[r4]ip vpn-instance b2
[r4-vpn-instance-b2]route-distinguisher 1:1
[r4-vpn-instance-b2-af-ipv4]vpn-target 1:1
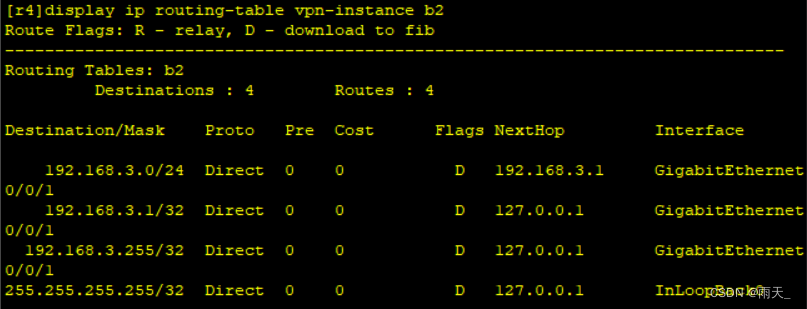
[r4]ip vpn-instance a2
[r4-vpn-instance-a2]route-distinguisher 2:2
[r4-vpn-instance-a2-af-ipv4]vpn-target 2:2
(查看)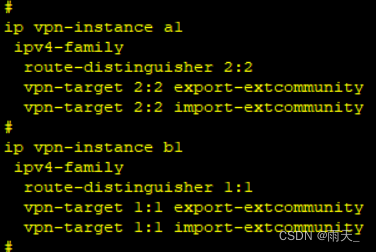
(在VPN空间中放入接口)
[r2]int g0/0/0
[r2-GigabitEthernet0/0/0]ip binding vpn-instance b1
[r2-GigabitEthernet0/0/0]ip add 192.168.2.2 24
[r2]int g0/0/2
[r2-GigabitEthernet0/0/2]ip binding vpn-instance a1
[r2-GigabitEthernet0/0/2]ip add 192.168.2.2 24
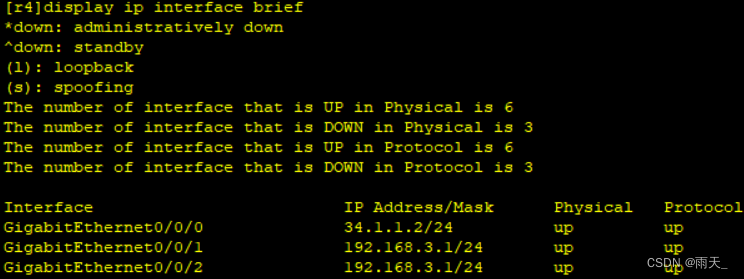
[r4]int g0/0/1
[r4-GigabitEthernet0/0/1]ip binding vpn-instance b2
[r4-GigabitEthernet0/0/1]ip add 192.168.3.1 24
[r4]int g0/0/2
[r4-GigabitEthernet0/0/2]ip binding vpn-instance a2
[r4-GigabitEthernet0/0/2]ip add 192.168.3.1 24
(查看)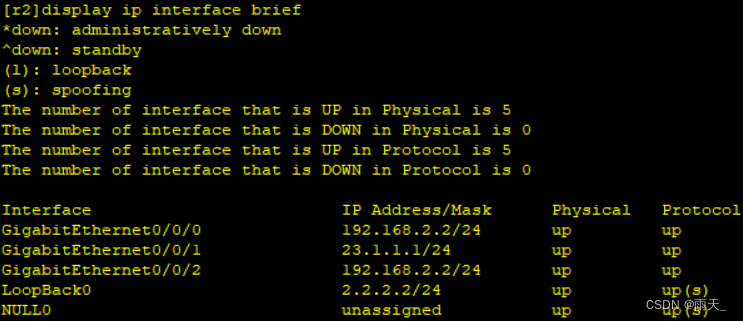
5.创建BGP邻居
[r2]bgp 1
[r2-bgp]router-id 2.2.2.2
[r2-bgp]peer 4.4.4.4 as-number 1
[r2-bgp]peer 4.4.4.4 connect-interface LoopBack 0
(创建传递VPN路由的关系)
[r2-bgp]ipv4-family vpnv4
[r2-bgp-af-vpnv4]peer 4.4.4.4 enable
[r4]bgp 1
[r4-bgp]router-id 4.4.4.4
[r4-bgp]peer 2.2.2.2 as-number 1
[r4-bgp]peer 2.2.2.2 connect-interface LoopBack 0
(创建传递VPN路由的关系)
[r4-bgp]ipv4-family vpnv4
[r4-bgp-af-vpnv4]peer 2.2.2.2 enable
(查看)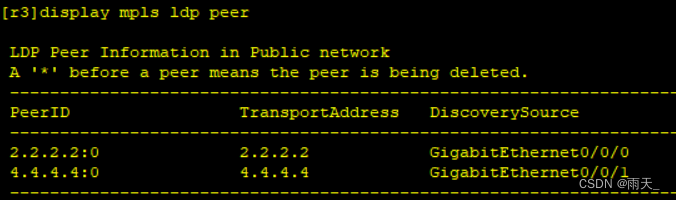
6.配置客户端,传递私网路由
[r6]int lo0
[r6-LoopBack0]ip add 192.168.1.1 24
[r6]int g0/0/0
[r6-GigabitEthernet0/0/0]ip add 192.168.2.1 24
[r7]int lo0
[r7-LoopBack0]ip add 192.168.4.2 24
[r7]int g0/0/0
[r7-GigabitEthernet0/0/0]ip add 192.168.3.2 24
(测试)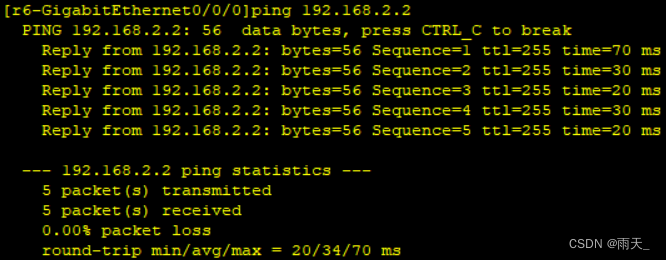
7.开启RIP和OSPF协议
[r6]rip 1
[r6-rip-1]ver 2
[r6-rip-1]network 192.168.1.0
[r6-rip-1]network 192.168.2.0
(绑定VPN空间)
[r2]rip 1 vpn-instance a1
[r2-rip-1]ver 2
[r2-rip-1]network 192.168.2.0
(查看路由表)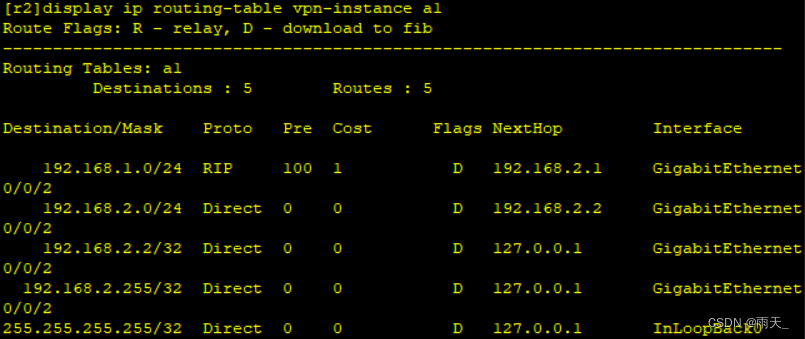
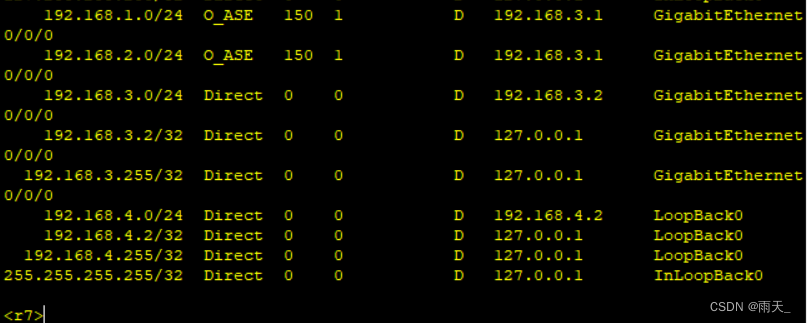
[r7]ospf 1 router-id 7.7.7.7
[r7-ospf-1]area 0
[r7-ospf-1-area-0.0.0.0]network 192.168.4.2 0.0.0.0
[r7-ospf-1-area-0.0.0.0]network 192.168.3.2 0.0.0.0
(查看路由表)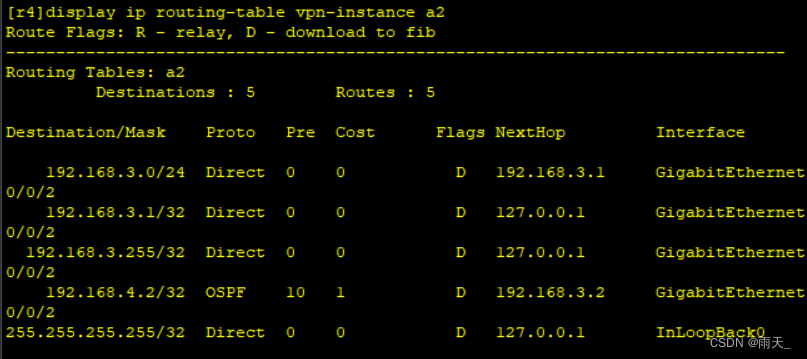
8.进行重发布
[r2]rip 1 vpn-instance a1
[r2-rip-1]import-route bgp
[r2]bgp 1
[r2-bgp]ipv4-family vpn-instance a1
[r2-bgp-a1]import-route rip 1
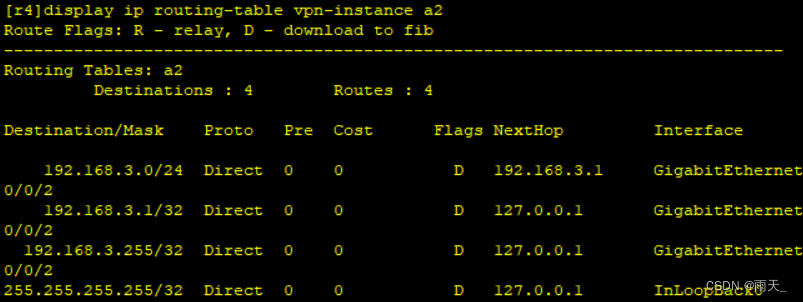
[r4]ospf 2 vpn-instance a2
[r4-ospf-2]import-route bgp
[r4]bgp 1
[r4-bgp]ipv4-family vpn-instance a2
[r4-bgp-a2]import-route ospf 2
(查看)


(测试)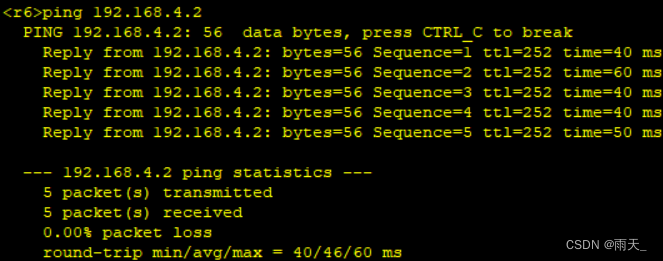
9.配置静态路由和B1、B2的IP地址和环回
[r1]int lo0
[r1-LoopBack0]ip add 192.168.1.1 24
[r1]int g0/0/0
[r1-GigabitEthernet0/0/0]ip add 192.168.2.1 24
[r1]ip route-static 192.168.3.0 24 192.168.2.2
[r1]ip route-static 192.168.4.0 24 192.168.2.2
[r2]ip route-static vpn-instance b1 192.168.1.0 24 192.168.2.1
[r5]int lo0
[r5-LoopBack0]ip add 192.168.4.1 24
[r5]int g0/0/0
[r5-GigabitEthernet0/0/0]ip add 192.168.3.2 24
[r5]ip route-static 192.168.1.0 24 192.168.3.1
[r5]ip route-static 192.168.2.0 24 192.168.3.1
(查看)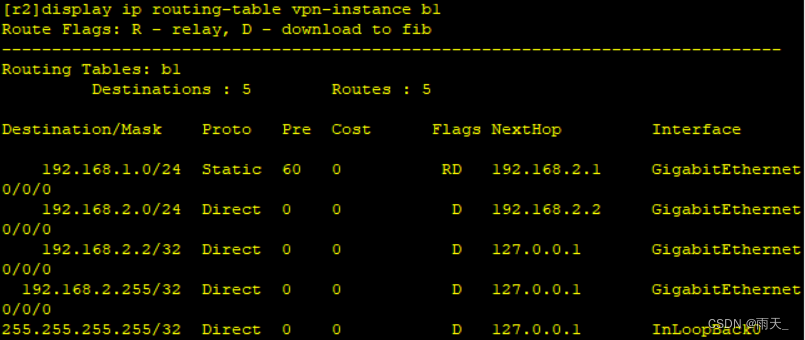
(测试)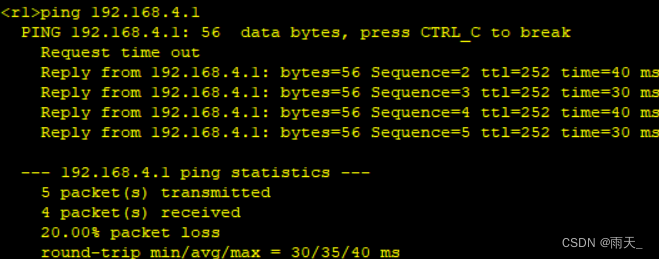
10.重发布静态路由
[r4]ip route-static vpn-instance b2 192.168.4.0 24 192.168.3.2
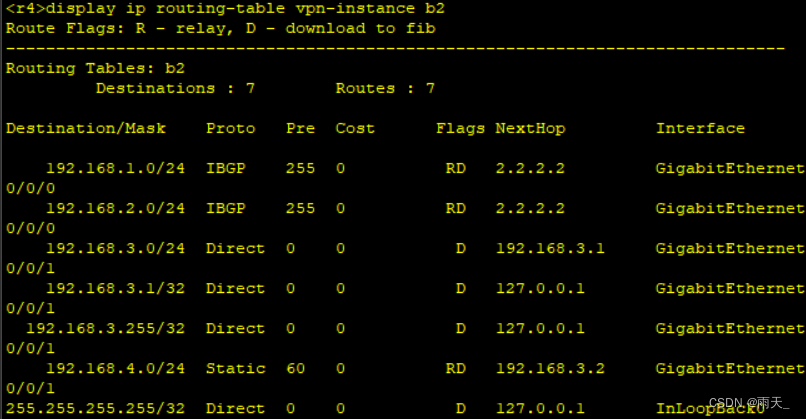
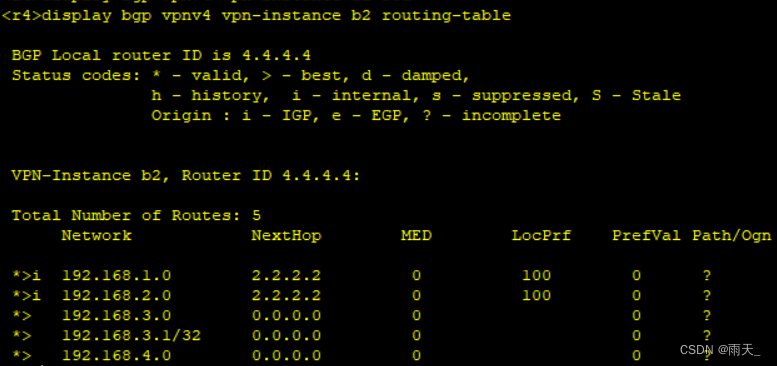
(查看)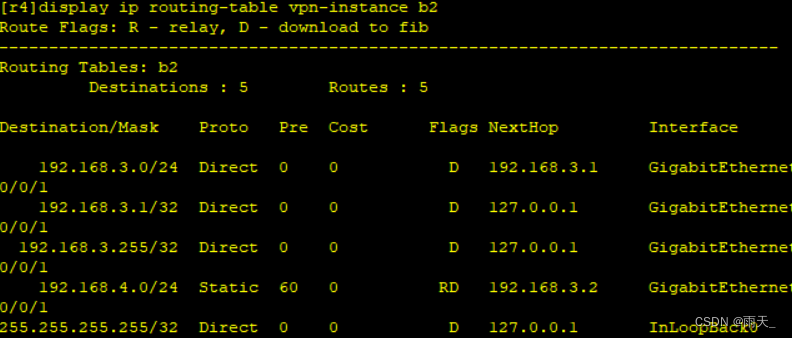
[r4]bgp 1
[r4-bgp]ipv4-family vpn-instance b2
[r4-bgp-b2]import-route direct
[r4-bgp-b2]import-route static
[r4]bgp 1
[r4-bgp]ipv4-family vpn-instance b2
[r4-bgp-b2]import-route direct
[r4-bgp-b2]import-route static
(查看)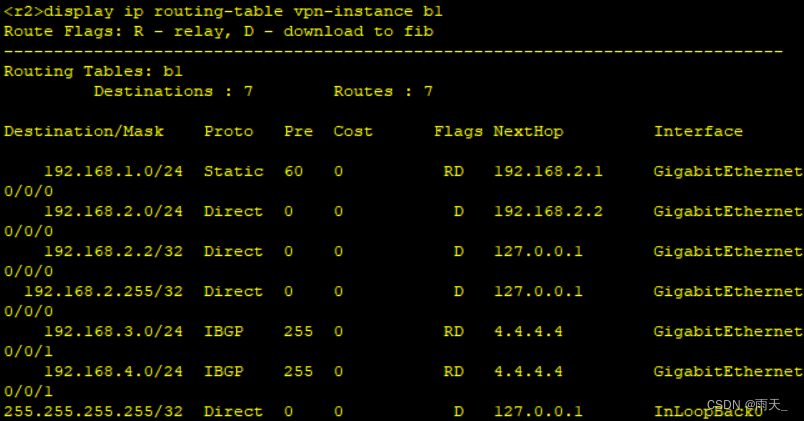
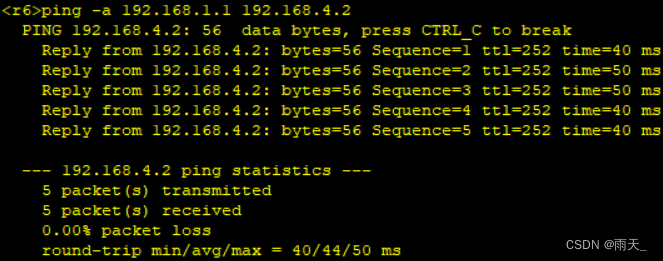
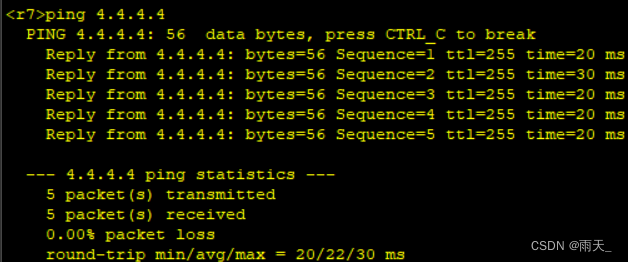
11.测试


 5243
5243


 被折叠的 条评论
为什么被折叠?
被折叠的 条评论
为什么被折叠?
 到【灌水乐园】发言


